Table of Contents >> Show >> Hide
- Why DIY Salt Scrubs Are So Popular
- What You Need Before You Start
- How to Make Your Own Salt Scrubs in 13 Steps
- Step 1: Choose a salt that is body-friendly
- Step 2: Decide where you plan to use it
- Step 3: Pick your carrier oil
- Step 4: Use a simple base ratio
- Step 5: Add scent carefully, not dramatically
- Step 6: Keep it clean while you mix
- Step 7: Customize with one extra, not ten
- Step 8: Test the texture on your hands first
- Step 9: Patch-test before full use
- Step 10: Use the scrub on damp, not dry, skin
- Step 11: Focus on rough areas and avoid irritated skin
- Step 12: Rinse well and moisturize afterward
- Step 13: Use it in moderation and store it smartly
- Best Ingredient Combinations to Try
- Common Mistakes to Avoid
- Who Should Be Extra Careful With Salt Scrubs?
- Experience Notes: What Making Your Own Salt Scrubs Actually Feels Like
- Conclusion
If your shower shelf is starting to look like a tiny spa gift shop with commitment issues, making your own salt scrub might be the smartest thing you do all week. A homemade salt scrub is simple, affordable, customizable, and surprisingly satisfying to mix together. It can help buff away rough, flaky skin on areas like elbows, knees, and heels while giving your routine that “I absolutely have my life together” energy, even if your laundry says otherwise.
The trick is doing it the right way. Salt scrubs are meant for the body, not delicate facial skin, and they work best when the salt is fine, the oil is balanced, and your technique is gentle. Too much enthusiasm can turn “glow” into “why is my shin offended?” So below, you’ll find a practical, skin-friendly guide to making your own salt scrubs in 13 clear steps, plus tips for choosing ingredients, avoiding common mistakes, and creating a scrub that feels luxurious instead of like you exfoliated with beach gravel.
Why DIY Salt Scrubs Are So Popular
Homemade salt scrubs have stayed popular for one very simple reason: they work well when used correctly. Salt acts as a physical exfoliant, meaning it helps lift away surface dead skin cells through gentle friction. Paired with a carrier oil, it can leave rough body skin feeling smoother and softer after rinsing. The best part is that a basic scrub only needs two core ingredients: salt and oil. Everything else is optional flair.
DIY also gives you more control. You can keep the formula fragrance-free, choose lighter or richer oils, skip irritating extras, and make a small batch instead of buying a huge tub that lives in your bathroom until the end of time. If your skin is on the dry side, you can use more oil. If you want a scrub mostly for elbows and feet, you can make it a little grittier. It is basically skincare with a choose-your-own-adventure plotline.
What You Need Before You Start
Before mixing, gather a few basics: fine sea salt or finely ground pink salt, a carrier oil such as coconut, olive, sweet almond, or jojoba oil, a clean bowl, a spoon, and a dry jar with a tight-fitting lid. You can also add a few drops of essential oil if your skin tolerates it, or stir in dried botanicals like lavender buds for texture and scent. Keep in mind that “pretty” and “skin-friendly” are not always the same thing, so resist the urge to dump half your kitchen into the bowl.
A good starter ratio is 1 cup fine salt to 1/3 to 1/2 cup oil. That usually creates a scoopable, damp-sand texture that spreads easily without becoming a puddle. If the scrub feels too dry, add a little more oil. If it feels too runny, add more salt one spoonful at a time.
How to Make Your Own Salt Scrubs in 13 Steps
-
Step 1: Choose a salt that is body-friendly
Start with a fine or medium-fine salt. Fine sea salt is the easiest choice for beginners because it exfoliates without feeling too aggressive. Himalayan pink salt can also work if the grains are small enough. Avoid extra-coarse salt for most body areas unless you are only targeting very rough spots like heels. Large crystals may look fancy in a jar, but your skin is not grading you on aesthetics.
-
Step 2: Decide where you plan to use it
This matters more than people think. A salt scrub for knees, elbows, and feet can be a little more robust. A scrub for arms, legs, and torso should be gentler. Salt scrubs are generally best reserved for the body, especially rough patches. If your skin is very dry, reactive, or sensitive, a sugar scrub may be a better fit.
-
Step 3: Pick your carrier oil
Carrier oil is what turns plain salt into an actual scrub instead of a bowl of exfoliating chaos. Coconut oil creates a rich, spa-like texture, though it can firm up in cooler rooms. Olive oil is easy to find and very moisturizing, but it has a stronger scent. Sweet almond and jojoba oils feel lighter and more elegant on the skin. Start with the oil you already know your skin likes.
-
Step 4: Use a simple base ratio
For a reliable beginner batch, combine 1 cup fine salt with 1/3 cup oil. Stir, then adjust. Want it richer? Add another tablespoon or two of oil. Want it more scrubby? Add a little more salt. The ideal texture resembles wet beach sand that holds together when scooped but still spreads across damp skin.
-
Step 5: Add scent carefully, not dramatically
If you enjoy fragrance, add a few drops of essential oil, not a heroic amount. Lavender, citrus, and peppermint are common choices, but fragrance can irritate some skin, especially if it is sensitive or freshly shaved. Start small and patch-test first. This is a body scrub, not a chemical experiment starring your forearm.
-
Step 6: Keep it clean while you mix
Use a clean bowl, a clean spoon, and a completely dry container. Water in the jar can shorten the life of a homemade scrub and make contamination more likely. If you are planning to keep the scrub in your shower, scoop it out with dry fingers or a small spoon instead of letting water drip into the container every day.
-
Step 7: Customize with one extra, not ten
You can add a teaspoon of vitamin E oil, a small amount of finely ground oatmeal, or a pinch of dried lavender buds for a more gift-worthy blend. But keep the recipe simple. The more ingredients you add, the harder it is to predict how the scrub will feel, smell, or store. Minimalism is not boring here. It is strategic.
-
Step 8: Test the texture on your hands first
Rub a small amount between wet hands. If it feels scratchy, add more oil or switch to a finer salt next time. If it feels too slick and barely exfoliates, add more salt. Your hands are the safe audition stage before your legs get cast in the full production.
-
Step 9: Patch-test before full use
Apply a small amount to a small area of skin and rinse. Wait to see how your skin responds, especially if your formula contains essential oils or botanicals. If you notice redness, stinging that lasts, or irritation, stop there and simplify the recipe. Skincare confidence is great. Skin drama is not.
-
Step 10: Use the scrub on damp, not dry, skin
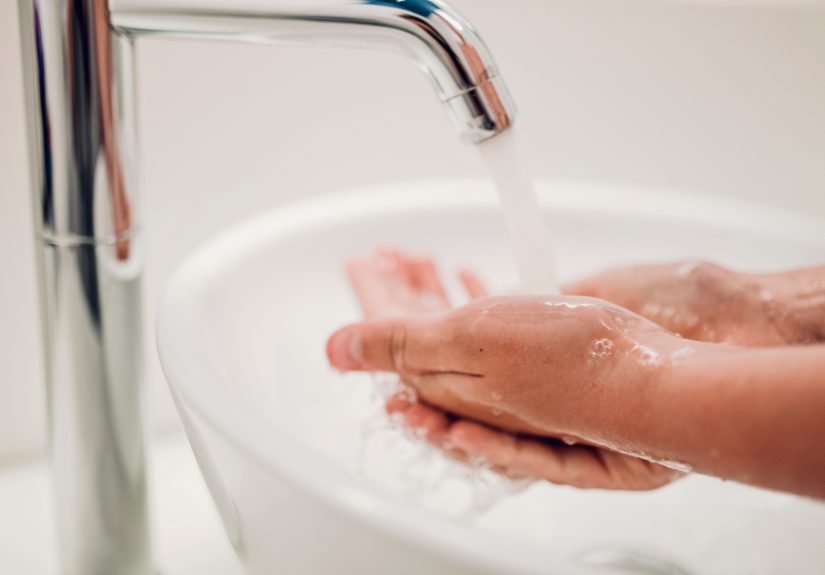
When you are ready to use it, step into the shower and let warm water soften the skin first. Then massage a small amount onto damp skin using light circular motions. Damp skin helps the scrub glide more evenly and keeps the process from feeling too harsh. Do not scrub like you are trying to erase your past.
-
Step 11: Focus on rough areas and avoid irritated skin
Salt scrubs shine on elbows, knees, heels, and other rough body areas. Skip skin that is freshly shaved, sunburned, broken, inflamed, or irritated. Also avoid using a salt scrub on your face, where the skin is more delicate and more easily irritated. A homemade salt scrub is supposed to polish the skin, not pick a fight with it.
-
Step 12: Rinse well and moisturize afterward
After scrubbing for about 30 seconds to a minute per area, rinse thoroughly with lukewarm water. Pat the skin dry instead of rubbing with a towel. Follow up with a moisturizer or body lotion to help seal in hydration. Exfoliation without moisturizer is like washing your car and skipping the shine. Technically done, emotionally incomplete.
-
Step 13: Use it in moderation and store it smartly
Most people only need a physical body scrub once or twice a week. More is not better, especially if your skin is dry or sensitive. Store the scrub in a sealed jar in a cool, dry place, and make smaller batches so it stays fresh. If the smell changes, the texture looks odd, or water has clearly gotten into the jar, toss it and make a new batch.
Best Ingredient Combinations to Try
Classic Sea Salt Scrub
Mix 1 cup fine sea salt with 1/3 to 1/2 cup jojoba or almond oil. This is the easiest all-purpose version and works well for most body skin that is not overly sensitive.
Coconut Oil Salt Scrub
Use 1 cup fine salt with 1/3 cup softened coconut oil. This creates a richer, thicker scrub that feels great on dry elbows, knees, and feet. If the mixture hardens, let it warm slightly before using.
Citrus Spa Scrub
Combine fine salt and oil, then add a few drops of citrus essential oil. Use caution with fragranced formulas, especially if your skin is reactive. Keep this kind of scrub for body use only and avoid irritated skin.
Lavender Wind-Down Scrub
Add a few drops of lavender essential oil and a pinch of dried lavender to a simple salt-and-oil base. It is a nice option for an evening shower and also makes a lovely handmade gift when packed in a labeled jar.
Common Mistakes to Avoid
The first mistake is choosing salt that is too coarse. Big crystals may feel dramatic, but they can also feel rough enough to make your skin file a formal complaint. The second mistake is overusing the scrub. If your skin feels tight, stingy, or extra sensitive afterward, that is your cue to reduce the frequency or switch to a gentler formula.
Another common mistake is using salt scrub on the face. Facial skin usually does better with gentler exfoliation. Freshly shaved skin, open cuts, eczema flares, and sunburn are also bad times for a salt scrub. And finally, do not ignore storage. A wet hand dipped into a jar again and again is not the glamorous part of DIY beauty, but it is how good products go bad faster than expected.
Who Should Be Extra Careful With Salt Scrubs?
If you have very sensitive skin, a damaged skin barrier, active rashes, eczema-prone skin, or a history of irritation from fragrance, go cautiously or skip salt scrubs entirely. In those cases, a gentler body exfoliant or a softer sugar-based scrub may be a better choice. Anyone with cuts, cracked skin, or recent shaving irritation should wait until the skin is calm before exfoliating. Salt and broken skin are not a dream team. They are more like two coworkers who absolutely should not be put on the same project.
Experience Notes: What Making Your Own Salt Scrubs Actually Feels Like
One of the most interesting things about making your own salt scrub is how quickly you realize that good skincare is often less about fancy branding and more about texture, balance, and consistency. The first time most people make a scrub, they either add too much oil and end up with a slippery body treatment that behaves like salad dressing, or they add too much salt and create something that feels like exfoliating with decorative gravel. That learning curve is normal. In fact, it is part of the charm.
There is also something oddly satisfying about seeing how a tiny formula tweak changes the whole experience. A scrub made with jojoba oil feels lighter and smoother, while coconut oil makes the mixture feel richer and more cushiony. Fine sea salt glides more gently, but a slightly larger grain on the heels feels more effective. After a couple of batches, you start understanding your own skin in a much more practical way. You stop asking, “What is the trendiest scrub?” and start asking, “What texture does my skin actually enjoy?” That is a much more useful question.
People who stick with DIY salt scrubs also tend to notice how much technique matters. When you use a scrub gently on damp skin and follow with moisturizer, the result can feel polished and comfortable. When you rush, scrub too hard, or use it too often, the result can shift from glowy to grumpy in a hurry. In that sense, homemade salt scrubs teach restraint. They are effective, but only when you do not behave like you are sanding a deck.
There is an emotional side to the experience, too. Mixing a small jar of scrub can feel calming in a way that is hard to explain until you do it. It turns ordinary ingredients into a little ritual. You pick a salt, choose an oil, maybe add a light scent, stir it together, and suddenly the whole thing feels intentional. It is not just about softer skin. It is about creating a routine that feels a little more personal and a lot less rushed.
Another pleasant surprise is how giftable homemade salt scrubs are. A simple jar with a label and a spoon can look charming without trying too hard. It feels thoughtful because it is thoughtful. You made something usable, customizable, and practical. And unlike some DIY gifts, it usually does not end up hidden in a drawer beside mystery candles and aggressive potpourri.
Over time, the biggest lesson is usually this: the best homemade salt scrub is not the most complicated one. It is the one you will actually use, that your skin tolerates well, and that fits into your routine without turning your bathroom into a slippery oil slick. Start simple. Adjust slowly. Keep it clean. Be gentle. That is the real spa wisdom, and fortunately, it costs a lot less than a fancy boutique tub with a poetic label and an unnecessary amount of gold foil.
Conclusion
Making your own salt scrub is refreshingly simple once you know the basics. Choose a fine salt, pair it with a nourishing carrier oil, keep the formula clean and simple, and use it gently on rough body areas no more than once or twice a week. Done right, a DIY salt scrub can leave skin feeling smoother, softer, and more polished without making your wallet cry. The secret is not using more ingredients. It is using better judgment, a lighter hand, and a jar that stays dry.


