Table of Contents >> Show >> Hide
- Why Stainless Steel Loses Its Shine (Even When You Swear You Clean It)
- The Fast Daily Routine (3 Minutes, No Drama)
- The Weekly Deep Clean (10–15 Minutes to a Seriously Shiny Sink)
- Fix the Usual Sink Offenders (Spots, Rust Marks, Scratches, and Smells)
- How to Polish for Maximum Shine (Without Turning It Into a Slip ’N Slide)
- What NOT to Do (A Love Letter to Your Sink’s Finish)
- A Simple Maintenance Schedule (So Your Sink Stays “Guest-Ready”)
- Experience-Based Add-On (): What People Learn After Trying “Everything”
- Conclusion: A Shiny Sink Is a System, Not a Miracle
Your stainless steel sink has a tough job description: part dishwasher sidekick, part colander, part coffee-ring museum,
andsomehowalso the unofficial stage for every “I’ll just set this here for a second” decision you regret later.
So when it starts looking dull, spotted, or mysteriously gray (as if it’s going through something), it’s not because stainless steel
is fragile. It’s because it’s popular.
The good news: you don’t need a cabinet full of fancy products or an elbow replacement to get that “new sink” gleam back.
With the right technique (and a strong commitment to drying, which is the unglamorous hero of this story), you can remove grime,
hard-water spots, and hazethen keep the shine with a simple routine. Let’s turn that sink from “meh” to “mirror-ish.”
Why Stainless Steel Loses Its Shine (Even When You Swear You Clean It)
1) Water spots are basically tiny mineral souvenirs
If you have hard water, minerals like calcium and magnesium stick around after the water evaporates. That leaves speckles, cloudy film,
and ring marksespecially around the drain and faucet where water loves to linger.
2) Grease + soap scum = the “invisible dulling layer”
Dish soap is great, but soap residue can build up when it mixes with oils and minerals. That thin film grabs onto light and refuses to reflect it nicely,
which is why your sink can look clean-ish but still not sparkle.
3) Scrubbing the wrong way can make scratches look louder
Most stainless sinks have a brushed finish with a visible “grain.” Scrubbing across that grain can create fine scratch patterns that catch the light
and make the surface look hazy. The fix is simple: clean with the grain whenever possible.
The Fast Daily Routine (3 Minutes, No Drama)
This is the routine that prevents 90% of the “Why does my sink look like that?” moments. Think of it as brushing your teeth… but for your sink.
(Less minty. More dishes.)
Step 1: Rinse away grit
Rinse the basin with warm water to remove crumbs and gritty bits. Tiny particles can act like sandpaper if you start scrubbing before rinsing.
Step 2: Wash with dish soap and a soft sponge
Add a drop or two of dish soap to a non-scratch sponge or soft cloth. Wipe the entire sink, including corners and the area around the drain.
If your sink has a clear grain, finish with long strokes in the direction of that grain.
Step 3: Rinse thoroughly
Soap left behind can create dull film. A full rinse is the difference between “clean” and “clean but mysteriously cloudy.”
Step 4: Dry it like you mean it
Use a microfiber cloth or clean towel to dry the sink completely. This single step is the best anti-water-spot trick on earthbecause it stops the spots
from forming in the first place.
The Weekly Deep Clean (10–15 Minutes to a Seriously Shiny Sink)
Once a week (or whenever your sink starts looking like a before-photo), do this deeper clean. It’s simple, cheap, and oddly satisfying.
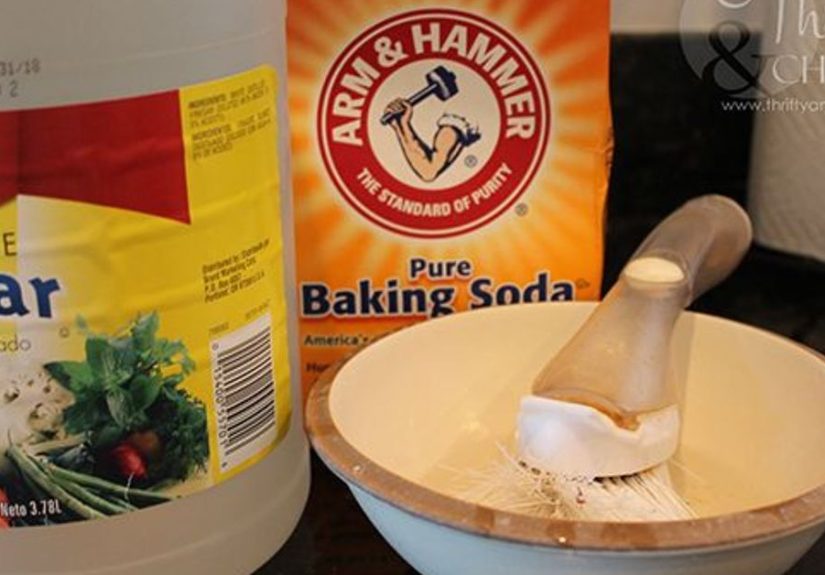
What you’ll need
- Baking soda
- Dish soap (optional but helpful)
- Non-scratch sponge or microfiber cloth
- An old toothbrush or small detail brush
- White vinegar (in a spray bottle if you have one)
- Clean towel for drying/buffing
Step 1: Sprinkle baking soda over a damp sink
Make sure the sink is damp (not flooded). Sprinkle baking soda across the basin. Baking soda is a gentle abrasive that can lift grime without
being harshperfect for stainless steel’s brushed finish.
Step 2: Add a little dish soap and scrub (with the grain)
A small squirt of dish soap adds grease-cutting power. Scrub gently, focusing on cloudy areas and around the drain. If you can see the grain,
scrub in that direction for the smoothest finish.
Step 3: Detail the corners and hardware zone
Use a toothbrush for tight seams, around the drain flange, and at the sink edges where gunk loves to hide. If you’re thinking,
“I didn’t know my sink had this many corners,” you’re not alone.
Step 4: Rinse, then use vinegar to tackle mineral haze
Rinse away the baking soda completely. Then lightly spray or wipe vinegar over the surface to help dissolve mineral deposits and remove lingering haze.
(Bonus: you’ll see any remaining baking soda react, which is basically the sink version of applause.)
Step 5: Final rinse + dry + buff
Rinse again thoroughly, then dry the sink completely. Finish by buffing with a clean, dry cloth using long strokes. At this point,
you should be able to admire your reflectionat least enough to notice you missed a spot near the drain. (It happens.)
Fix the Usual Sink Offenders (Spots, Rust Marks, Scratches, and Smells)
Hard-water spots and cloudy film
If drying daily isn’t happening (no judgment), you’ll likely see water spots. Here’s what works:
- Vinegar wipe-down: Dampen a cloth with vinegar and wipe the spots, then rinse and dry.
- Baking soda paste: For thicker mineral haze, make a paste (baking soda + a little water), rub gently, rinse, and dry.
- Prevent it: Keep a towel under the sink and do a quick dry after the last dish run. It’s boring, but it’s undefeated.
Rust-colored marks (the “why is my stainless steel… rusting?” panic)
Stainless steel is rust-resistant, not rust-proof. Many “rust” marks come from other metalslike leaving a cast-iron pan, steel can, or
a wet scrub pad sitting in the sink. The metal transfers or rust particles can stain the surface.
- Gentle approach: Start with baking soda paste and a soft sponge.
- For stubborn spots: Use a stainless-safe cleanser designed for rust/mineral stains (follow the label and rinse well).
- Prevention: Don’t store wet metal items in the sink, and avoid leaving steel scrubbers there between uses.
Scratches and scuffing
Tiny scratches are normal in stainless sinksthink of them as “patina with a kitchen degree.” But if the sink looks overly scuffed:
- Clean first: Scratches look worse when they’re filled with grime.
- Use a gentle paste: A baking soda paste rubbed lightly with the grain can make light scratches less noticeable by removing residue and blending the look.
- Don’t chase perfection: Stainless steel is meant to be used. Aim for clean and bright, not “museum glass.”
Sink smells and a funky drain
The sink basin can be spotless while the drain is plotting against you. If odors show up:
- Clean the drain area: Scrub around the drain opening and the underside of any stopper.
- Flush with hot water: A hot water rinse after cleaning helps move leftover residue along.
- Deodorize smartly: Mild kitchen-safe deodorizing steps can help, but avoid mixing cleaners. If you use a commercial drain cleaner, follow the product instructions carefully.
How to Polish for Maximum Shine (Without Turning It Into a Slip ’N Slide)
After cleaning and drying, you can boost shine by buffing the surface. Some people use a tiny amount of oil to enhance the look and reduce water spotting.
If you try this, use a very small amount on a cloth and buff wellyour goal is a satin sheen, not an oil slick.
Oil-polish tips (optional)
- Use just a drop or two on a clothseriously, start tiny.
- Buff until it no longer feels greasy to the touch.
- Avoid oil buildup near the drain where it can trap grime.
- If your sink sees a lot of raw-food prep, consider skipping oil and sticking to “clean + dry” for a low-residue finish.
What NOT to Do (A Love Letter to Your Sink’s Finish)
If you want a shinier sink, avoid the stuff that quietly wrecks stainless steel over time:
- Don’t use steel wool or wire brushes. They can scratch and leave behind metal bits that rust.
- Be cautious with chlorine bleach (chlorides). Chloride cleaners can contribute to corrosion if left on stainless steel. If you ever use a disinfectant that contains bleach, follow the label and rinse thoroughly afterward.
- Don’t let acidic foods camp out in the sink. Lemon juice, vinegar, tomato saucefine for quick cleaning or cooking, but don’t leave them sitting for long periods.
- Don’t mix cleaning products. Especially anything acidic with other chemicals. When in doubt: rinse, then switch products.
- Don’t skip the final rinse. Residue = haze.
A Simple Maintenance Schedule (So Your Sink Stays “Guest-Ready”)
- Daily: Soap + soft sponge, rinse, dry.
- Weekly: Baking soda scrub (with the grain), vinegar wipe, rinse, dry, buff.
- As needed: Spot-treat hard water marks, rust stains, and drain funk.
Experience-Based Add-On (): What People Learn After Trying “Everything”
If you’ve ever deep-cleaned your stainless sink right before guests arriveonly to spot a fresh water ring the moment you finishwelcome to the club.
The most common “experience lesson” people share is that shiny sinks are less about intense scrubbing and more about tiny habits.
Someone will spend 20 minutes chasing haze with product after product, then realize the real magic was simply drying the sink after the last dish.
It’s not glamorous. It’s not viral. It works anyway.
Another classic: the mysterious orange stain that sparks a dramatic “Is my sink rusting?!” moment. In real kitchens,
those marks often show up after a cast-iron skillet takes a nap in the basin or a wet steel scrub pad gets left behind.
The sink gets blamed, but it’s usually a transfer stain from another metal. The experience-based fix is surprisingly gentle:
clean first, then use a mild paste or a stainless-safe cleanser, andthis is keystop scrubbing like you’re sanding a deck.
People who go too hard tend to create new scratch patterns that make the area look more noticeable in overhead lighting.
Hard water homes have their own sink personality. Folks in mineral-heavy areas often report a “clean today, spotted tomorrow” cycle.
The winning strategy they end up with is a two-part routine: (1) a quick vinegar wipe for spots when they appear, and (2) a dedicated drying towel
that lives near the sink like it pays rent. Some even keep a microfiber cloth in the drawer beneath the sink so it’s impossible to ignore.
The sink doesn’t need more effort; it needs less time between water contact and towel contact.
Then there’s the “I used the wrong tool once and now I regret everything” story. Steel wool, rough scrub pads,
and powdered cleansers meant for tougher surfaces can leave a sink looking duller because they change how the brushed finish reflects light.
People who’ve been through that usually switch to non-scratch sponges and clean with the grain, and they’re amazed how quickly the sink looks better.
The takeaway: the tool matters as much as the cleaner.
Finally, there’s the polishing debate. Some households swear by a tiny bit of oil to boost shine and reduce spotting.
Others try oil once and immediately hate the way it feels during daily usebecause if you use too much, it can attract grime or feel slick.
The “learned from experience” compromise is simple: if you polish with oil, use the smallest amount possible and buff until it feels dry,
or skip oil entirely and rely on clean-and-dry for a brighter, lower-maintenance finish.
Conclusion: A Shiny Sink Is a System, Not a Miracle
The fastest path to a stainless steel sink that shines is a simple formula: gentle cleaning + thorough rinsing + complete drying.
Baking soda lifts grime without bullying the finish, vinegar helps cut mineral haze, and “with-the-grain” wiping keeps the brushed look looking intentional.
Do the quick daily reset, hit it with a weekly deep clean, and you’ll spend less time scrubbingand more time enjoying a sink that finally looks like it
belongs in a kitchen photo (even if the rest of the counter is telling a different story).


