Table of Contents >> Show >> Hide
- First, Figure Out What Kind of “Flood” You’re Dealing With
- Safety Before You Touch the Drain
- Tools and Materials That Actually Work
- How to Plug a Basement Floor Drain During Floods (Step-by-Step)
- Standpipe vs Plug: The Smarter “Containment” Trick
- Long-Term Fixes That Beat “Panicked Plugging” Every Time
- After the Storm: When and How to Remove the Plug
- Quick Example: A Realistic “Do This Tonight” Plan
- Common Mistakes (So You Don’t Learn Them the Hard Way)
- Real-World Experiences & Lessons Learned (Extra )
- SEO Tags
When floodwater shows up uninvited, it rarely knocks politely. Sometimes it barges in through a window well.
Sometimes it creeps under a door. And sometimesbecause basements love dramait burps up through the floor drain
like your house is auditioning for a low-budget disaster movie.
Plugging a basement floor drain can help during certain kinds of flooding, especially sewer backups.
But it’s not a magic cork you jam in and forget. Do it the right way, for the right reason, with the right gear,
and you can reduce damage (and the kind of smell that makes you question every life choice that led you to homeownership).
First, Figure Out What Kind of “Flood” You’re Dealing With
Before you plug anything, take 60 seconds to diagnose the source. This matters because plugging the drain during the
wrong type of flooding can make things worselike putting a Band-Aid on a broken pipe (literally).
Scenario A: Sewer Backup (Floor Drain Is the Culprit)
- Water rises from the floor drain (often brown/gray, may smell like sewage).
- Toilets may gurgle; other low drains may act weird.
- It often happens during heavy rain when municipal systems surcharge or a main line is blocked.
Plugging can be useful hereas a temporary stopgapbecause the backup is trying to enter through the lowest opening.
Scenario B: Groundwater/Surface Flooding (Water Finds Every Crack)
- Water seeps up through cracks, cove joints, or around the slab perimeter.
- Water may be relatively clear and doesn’t smell like sewage.
- It worsens with high groundwater or prolonged storms.
Plugging may not help muchand can sometimes increase pressure under the slab or remove a “relief path.”
In this case, the better targets are sump pumping, grading, downspouts, and waterproofing strategies.
Scenario C: The Mixed Bag (Because Basements Are Overachievers)
Sometimes you get both: stormwater seepage and a sewer surcharge. If you suspect sewage is involved,
treat all water as contaminated and prioritize safety.
Safety Before You Touch the Drain
Floodwaterespecially sewage backupcan carry bacteria and contaminants. Protect your body and your house at the same time.
- Electricity: Don’t step into standing water if outlets, appliances, or extension cords are nearby. If it’s safe, shut off power to the basement.
- PPE: Rubber boots, waterproof gloves, eye protection, and (ideally) an N95/respirator during cleanup.
- Ventilation: Open windows if possible (and safe) to reduce odors and airborne nastiness.
Tools and Materials That Actually Work
If you wait until your drain is actively spewing water to start shopping, your basement will win that race.
If flooding is a known risk in your area, keep one of these ready.
Best Options for Temporarily Plugging a Basement Floor Drain
-
Mechanical (expanding) test plug: A rubber plug that expands as you tighten a wing nut/bolt.
Great for quick installs and common pipe sizes. -
Inflatable test ball / inflatable pipe plug: Insert into the pipe and inflate to the specified pressure.
Often used by plumbers; can handle stronger backpressure when correctly sized and installed. -
Backflow-style floor drain insert (float/ball type): Allows normal drainage out, but helps block sewage from coming back in.
Helpful if you have HVAC condensate or a dehumidifier draining into the floor drain. -
Standpipe setup: Not a “plug,” but a smart alternative that contains backup by raising the overflow point above the floor.
Often recommended because it reduces the risk of pressurizing under-slab piping.
Helpful Extras
- Flathead screwdriver (to lift the drain cover)
- Measuring tape (or even a ruler) to estimate drain opening diameter
- Old towels / rags (because basements love consequences)
- Bucket and disinfectant supplies for cleanup
How to Plug a Basement Floor Drain During Floods (Step-by-Step)
These steps focus on plugging when water is backing up through the drain (typical sewer-backup scenario).
If you’re dealing with groundwater seepage, jump to the section on better long-term fixes.
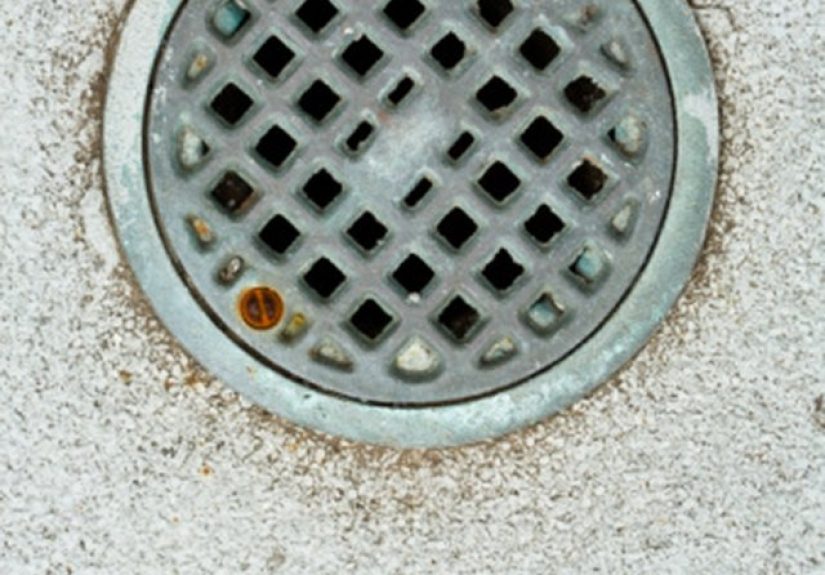
Step 1: Remove the Floor Drain Cover and Clear Debris
Use a screwdriver to lift the grate. Clear hair, sludge, and debris around the opening so your plug can seat properly.
A plug that isn’t seated is basically a motivational posternice idea, questionable results.
Step 2: Estimate the Pipe Size
Many basement floor drains connect to 2″, 3″, or 4″ piping, but older homes can be quirky.
Measure the inside diameter if you can. If not, measure the visible opening and choose the closest matching plug size.
A slightly undersized plug can pop loose under pressure; oversized plugs may not fit or may not seat correctly.
Step 3: Pick Your Plug Method
Option A: Mechanical Expanding Test Plug (Fast and Common)
- Insert the rubber test plug into the drain opening (or into the pipe throat if accessible).
- Make sure it sits evenlyno tilted, half-cocked plug energy.
- Tighten the wing nut/bolt until the rubber expands snugly.
- Test the seal by pouring a small amount of water around the plug area (if safe) and watching for seepage.
Pro tip: Don’t overtighten like you’re trying to crush a soda can. Tight enough to seal is the goal;
overtightening can damage the plug or crack brittle materials.
Option B: Inflatable Test Ball / Inflatable Pipe Plug (Stronger Backpressure Control)
- Insert the deflated test ball into the pipe (usually a bit deeper than the drain throat, per the product instructions).
- Inflate using the specified tool (hand pump or compressor) to the manufacturer’s recommended pressure.
- Confirm the hose/valve is secure and the ball isn’t slipping upward.
- Monitor periodically during the stormif pressure builds, conditions can change quickly.
Important: Follow the product’s inflation pressure limits. Overinflating can rupture the plug or the line.
Option C: Emergency Rubber Ball Method (Only If You’re Truly Stuck)
Some extension resources note that a flexible rubber ball slightly larger than the pipe can work in a pinch
but it must be braced in place. This is emergency-only and not as reliable as a real test plug.
Step 4: Understand the Big RiskBackpressure and Pipe Damage
Here’s the part people skip because it’s less fun than “Step 1: Save your basement.”
If the municipal sewer surcharges hard, a fully sealed drain can increase pressure in under-floor piping.
In severe events, that pressure may try to escape somewhere else (including cracking or rupturing weaker sections).
This is why many flood mitigation guides recommend using a standpipe or installing a proper backwater valve for long-term protection.
A practical rule: if you expect water depths to rise significantly, plugging may not be the safest strategy.
Consider containment, professional guidance, and long-term mitigation instead of relying on a plug alone.
Step 5: Don’t Forget Other Low Openings
If the sewer line is surcharging, the floor drain might be the first place water appearsbut not the only one.
Basement showers, toilets, laundry standpipes, and utility sinks can also back up.
Some emergency preparedness guidance recommends plugging or capping sewer openings below grade during flood events.
Standpipe vs Plug: The Smarter “Containment” Trick
If your issue is sewer surcharge, a standpipe can be a safer alternative to a hard plug.
Instead of sealing the system, it raises the overflow point so the backup rises inside a vertical pipe rather than across your floor.
The basement stays drier and your under-slab piping is less likely to be stressed by a dead-end seal.
How a Floor Drain Standpipe Works (Simple Version)
- You attach an adapter to the floor drain.
- You insert a vertical pipe (standpipe) that rises above the floorsometimes several feet.
- During surcharge, water rises in the standpipe instead of spreading across the basement.
When a Standpipe Makes Sense
- Your basement floods through the floor drain during big storms.
- You want a temporary setup that’s less likely to create a pressurized “sealed bottle” under your slab.
- You’re working toward long-term fixes but need a practical interim solution.
Long-Term Fixes That Beat “Panicked Plugging” Every Time
A drain plug is like an umbrella: helpful in the moment, not a permanent roof replacement.
If your basement drain backs up regularly, build a plan that doesn’t depend on sprinting to the basement at midnight.
1) Install a Backwater Valve (Best for Sewer Backup Risk)
A backwater valve is a one-way device installed in the building drain/sewer line to prevent sewage from flowing back into the home.
Plumbing codes describe and regulate these valves, including the need for access so they can be serviced and maintained.
Because installation often involves cutting into the main line, this is usually a licensed-plumber job.
- Pros: Strong protection against sewer backflow when properly installed and maintained.
- Cons: Needs maintenance; can block outflow if the valve is closed during a backup event (you may need to avoid using plumbing fixtures).
2) Consider an Overhead Sewer or Ejector System (High Protection, Bigger Project)
Some mitigation guides describe overhead sewer configurations or systems that route basement fixtures upward before tying into the main sewer.
This reduces the chance of sewage backing into basement-level drains, but it’s a more involved retrofit.
3) Manage Stormwater Like It’s Your Job (Because It Kind of Is)
- Extend downspouts away from the foundation.
- Fix negative grading so water doesn’t flow toward the house.
- Keep gutters clear so rain isn’t waterfalling next to your basement wall.
- Maintain sump pumps (and consider a battery backup).
After the Storm: When and How to Remove the Plug
Once the municipal system is no longer surcharging and the risk has passed, remove the plug carefully.
If sewage was involved, wear protective gear and disinfect the area.
- Confirm water levels are stable and no backup pressure is pushing against the plug.
- Loosen slowlydon’t “pop” it loose and create a surprise fountain.
- Replace the grate and run a small amount of clean water to reestablish the trap seal (helps block sewer gases).
- Clean and disinfect tools and nearby surfaces using safe, label-directed disinfecting methods.
Quick Example: A Realistic “Do This Tonight” Plan
Imagine a heavy thunderstorm, the street drains are struggling, and you notice your basement floor drain starting to bubble and rise.
Here’s a practical sequence:
- Put on boots and gloves, and keep kids/pets out of the basement.
- Shut off basement power if there’s any chance water will reach outlets or appliances.
- Remove the grate, wipe the opening clean, and install your correctly sized mechanical test plug.
- Stop using sinks/toilets/showers if you suspect the main sewer is surcharging (so you don’t add to the problem).
- When the storm passes, monitor for 30–60 minutes before removing the plug.
Common Mistakes (So You Don’t Learn Them the Hard Way)
- Using the wrong size plug: Too small slips; too big won’t seat.
- Assuming all water is “just rain”: Sewer backup needs different handling and cleanup.
- Overtightening or overinflating: This can damage plugs and potentially stress piping.
- Plugging without a plan for other fixtures: Backup can find another low opening.
- Ignoring long-term fixes: If it happened once, it can happen againusually at 2 a.m., on a holiday.
Real-World Experiences & Lessons Learned (Extra )
If you talk to enough homeowners in flood-prone neighborhoods, you’ll notice two truths: (1) basements are honest about gravity,
and (2) everyone becomes a “plumbing philosopher” after the first sewer backup.
One of the most common experiences people describe is the “false start”: they see water on the floor and assume it’s groundwater seepage,
only to discovertoo latethat it’s actually coming from the floor drain. The tell is usually the smell or the color, but in the moment, adrenaline makes
everyone a little optimistic. The lesson: when water appears during a heavy storm, take a quick look at the drain itself. If it’s bubbling or rising from
below, you’re likely dealing with sewer surcharge or a main-line issue, and a drain plug (or better, a standpipe) may help immediately.
Another widely reported lesson is that a plug can be both a hero and a troublemaker. Homeowners who successfully stopped a backup often say the same thing:
the plug workeduntil pressure built. Some people notice the plug “creeping” upward, or they hear odd gurgling in nearby fixtures.
That’s not your house being haunted; it’s hydraulics doing what hydraulics do. This is why experienced DIYers keep an eye on the setup during the storm
and avoid treating a plug as a set-it-and-go-to-bed solution. It’s also why many long-term mitigation guides emphasize backwater valves or overhead sewer
arrangements: they’re designed to handle backflow without turning your under-slab piping into a pressurized mystery box.
A surprisingly practical experience comes from people with dehumidifiers, HVAC condensate lines, or water softener drains tied into the floor drain.
If you hard-plug the drain, those lines can’t drain eitherso you may accidentally cause a secondary mess (overflow pans, pooled condensate, or a softener
discharge problem). In areas with chronic backup risk, homeowners often prefer a backflow-style floor drain insert (a float/ball type) or a
planned standpipe setup that can be deployed quickly while keeping some drainage function in mind. The key takeaway: know what drains into your floor drain
before you seal it.
Cleanup stories are also painfully consistent. People who assumed “it’s only a little water” and skipped protective gear usually regret it.
Floodwater and sewage backups can contaminate surfaces, stored items, and even the air (especially when drying begins and residues get disturbed).
The best experiences are the ones where homeowners treated the water like it was contaminated from the start: gloves, boots, ventilation, careful disposal,
and thorough cleaning/disinfecting of hard surfaces. A common tip is to keep a simple “flood kit” near the basement stairsgloves, contractor bags, a
flashlight, and the drain plug or standpipe componentsso you’re not rummaging through storage while water is actively auditioning for “Worst Timing Ever.”
Finally, many people learn that the most valuable “tool” is documentation. After a backup, homeowners who take photos, note the date/time, and record
where water entered have an easier time dealing with insurance, contractors, and (when applicable) municipal sewer departments. Those notes help determine
whether the real fix is a backwater valve, a sump upgrade, downspout changes, or repairs to the building sewer line. The best outcome isn’t merely plugging
the drain in the momentit’s using that moment as the final proof you need to upgrade your defenses before the next big storm tries again.
![18 Best Types of Charts and Graphs for Data Visualization [+ How to Choose]](https://corkopencoffee.org/wp-content/uploads/2026/05/18-best-types-of-charts-and-graphs-for-data-visualization-how-to-choose-qKM1PBYG-thumb.jpg)


