Table of Contents >> Show >> Hide
- What Is Faux Leather, and Why Does It Scrape?
- Supplies You Will Need
- How to Repair a Scrape on Faux Leather Shoes: 13 Steps
- 1. Inspect the Scrape Carefully
- 2. Remove Loose Dirt First
- 3. Clean the Shoe With Mild Soap
- 4. Use Rubbing Alcohol Only for Greasy Spots
- 5. Let the Shoe Dry Completely
- 6. Trim Loose Flaps or Ragged Edges
- 7. Smooth the Area With Fine-Grit Sandpaper
- 8. Apply Flexible Filler for Deeper Scrapes
- 9. Lightly Sand the Dried Filler
- 10. Match the Color Before Painting
- 11. Paint in Thin Layers
- 12. Seal the Repair
- 13. Protect the Entire Shoe
- How to Fix Light Scuffs Without Full Repair
- Common Mistakes to Avoid
- When Should You Visit a Cobbler?
- How to Prevent Future Scrapes on Faux Leather Shoes
- Best Products for Faux Leather Shoe Scrape Repair
- Experience Notes: What Actually Works in Real Life
- Conclusion
Faux leather shoes are the overachievers of the footwear world: stylish, budget-friendly, and usually brave enough to survive coffee runs, rainy sidewalks, and that one chair leg that always attacks your toe. But when a scrape appears, suddenly your shoes look like they have been through a tiny battlefield. The good news? Most surface scrapes on faux leather shoes can be improved at home with simple tools, patience, and a little color-matching confidence.
This guide explains how to repair a scrape on faux leather shoes in 13 practical steps. You will learn how to clean the area, smooth rough edges, fill deeper marks, restore color, seal the repair, and protect your shoes so they do not immediately rejoin the drama department. Faux leather is not the same as genuine leather, so the repair method needs to be gentle, flexible, and realistic. We are aiming for “wow, those look much better,” not “museum restoration performed by a wizard.”
What Is Faux Leather, and Why Does It Scrape?
Faux leather, also called synthetic leather, PU leather, vegan leather, or pleather, is usually made with a fabric backing coated in plastic-like material such as polyurethane or vinyl. That top coating gives the shoe its smooth leather-like look. Unfortunately, when the surface gets scraped, the color layer can lift, peel, or show a lighter base underneath.
Unlike real leather, faux leather does not absorb conditioner in the same way. You cannot simply polish it deeply and expect the material to heal itself. Instead, repairing faux leather shoes usually means cleaning, smoothing, filling if needed, applying matching color, and sealing the surface so the repair stays flexible.
Supplies You Will Need
Before you begin, gather your repair kit. A good setup prevents the classic DIY problem of holding a half-painted shoe while searching for a cotton swab like your life depends on it.
- Soft microfiber cloths
- Soft-bristle brush or old clean toothbrush
- Mild dish soap
- Warm water
- Cotton swabs
- Rubbing alcohol for spot cleaning, used lightly
- Fine-grit sandpaper, ideally 400 to 600 grit
- Small scissors or nail clippers
- Flexible vinyl or faux leather repair filler
- Acrylic leather paint or flexible shoe paint in a matching color
- Small detail paintbrush or sponge applicator
- Clear acrylic finisher, flexible sealant, or shoe-safe protective spray
- Paper towels or shoe trees to hold the shoe shape
How to Repair a Scrape on Faux Leather Shoes: 13 Steps
1. Inspect the Scrape Carefully
Start by looking closely at the scrape. Is it just a surface scuff? Is the color missing? Is the faux leather peeling? Is there a small flap hanging loose? The repair method depends on the damage. A shallow scrape may only need cleaning, color, and sealant. A deeper scrape with missing material may need filler first.
Run your fingertip gently over the area. If the surface feels smooth but looks dull or discolored, it is probably a light scuff. If you feel a groove, ridge, or torn edge, plan to smooth and fill it.
2. Remove Loose Dirt First
Use a soft-bristle brush or clean toothbrush to remove dust, dried mud, and grit from the shoe. Pay special attention to seams, soles, and the edge around the scrape. Dirt trapped under paint or filler can make the repair lumpy, weak, and about as elegant as frosting a cake with gravel in it.
3. Clean the Shoe With Mild Soap
Mix a few drops of mild dish soap with warm water. Dampen a microfiber cloth, wring it out well, and wipe the scraped area and the surrounding shoe surface. Do not soak faux leather. Too much water can weaken glue, affect the backing, or leave the material looking cloudy.
After cleaning, wipe again with a cloth dampened with plain water to remove soap residue. Then dry the area with a clean towel.
4. Use Rubbing Alcohol Only for Greasy Spots
If the scrape feels oily or has polish buildup, lightly dab the spot with rubbing alcohol on a cotton swab. Use a tiny amount and test first on a hidden area, such as the inside edge of the shoe. Faux leather finishes vary, and strong solvents can remove color or make the surface sticky. Think of alcohol as a detail tool, not a shower.
5. Let the Shoe Dry Completely
Wait until the shoe is fully dry before repairing. Paint and filler do not bond well to damp surfaces. Stuff the shoe with white paper towels or insert a shoe tree so the upper keeps its shape. Avoid a hair dryer on high heat, a clothes dryer, or direct sun. Heat can cause faux leather to crack, warp, or peel faster.
6. Trim Loose Flaps or Ragged Edges
If the scrape created tiny hanging pieces of faux leather, trim them carefully with small scissors or nail clippers. Do not pull them. Pulling can enlarge the damage and turn a repairable scrape into a sad little crater. Remove only pieces that are already detached or standing up.
7. Smooth the Area With Fine-Grit Sandpaper
Use 400 to 600 grit sandpaper to lightly smooth rough edges. Sand gently in small motions. The goal is not to grind the shoe into a science project. You only want to level raised edges so filler and paint can sit evenly. Wipe away dust with a clean cloth afterward.
8. Apply Flexible Filler for Deeper Scrapes
If the scrape has a groove, missing coating, or exposed fabric backing, apply a small amount of flexible vinyl or faux leather repair filler. Use a toothpick, mini spatula, or cotton swab to spread it thinly into the damaged area. Keep the filler level with the surrounding surface.
Several thin layers are better than one thick blob. Thick filler can crack when the shoe bends. Let each layer dry according to the product instructions. On shoes, flexibility matters because toe boxes and side panels move with every step.
9. Lightly Sand the Dried Filler
Once the filler is fully dry, lightly sand it with fine-grit sandpaper until it feels smooth. Wipe away dust. If the area still has a dip, add another thin layer of filler, dry, and sand again. This step is where patience earns its paycheck.
10. Match the Color Before Painting
Choose acrylic leather paint, flexible shoe paint, or color from a vinyl repair kit. For black faux leather shoes, matching is usually easy. Brown, tan, cream, burgundy, and white can be trickier because undertones matter. A warm brown and a cool brown may both be called “brown,” but one says “espresso” and the other says “sad cardboard.”
Test your color on a hidden part of the shoe. Let it dry before judging. Many paints dry slightly darker or duller than they look when wet.
11. Paint in Thin Layers
Use a small brush or sponge applicator to apply paint over the repaired scrape. Blend the paint slightly beyond the damaged area so the repair does not look like a sticker. Use thin coats and let each coat dry before adding another. Two or three light layers usually look smoother and last longer than one heavy coat.
If the faux leather has a pebbled texture, tap the final wet layer gently with a small sponge to mimic grain. For smooth shoes, use long, light strokes in the direction of the shoe’s surface.
12. Seal the Repair
After the color dries completely, apply a clear flexible finisher or shoe-safe protective sealant. This helps protect the painted area from moisture, rubbing, and future scuffs. Choose the finish based on your shoe: matte for dull surfaces, satin for soft shine, or gloss for shiny faux leather. Apply lightly and evenly.
Do not over-seal. A thick glossy patch on a matte shoe is basically a neon sign that says, “I was repaired here.” Let the sealant cure according to the product instructions before wearing the shoes.
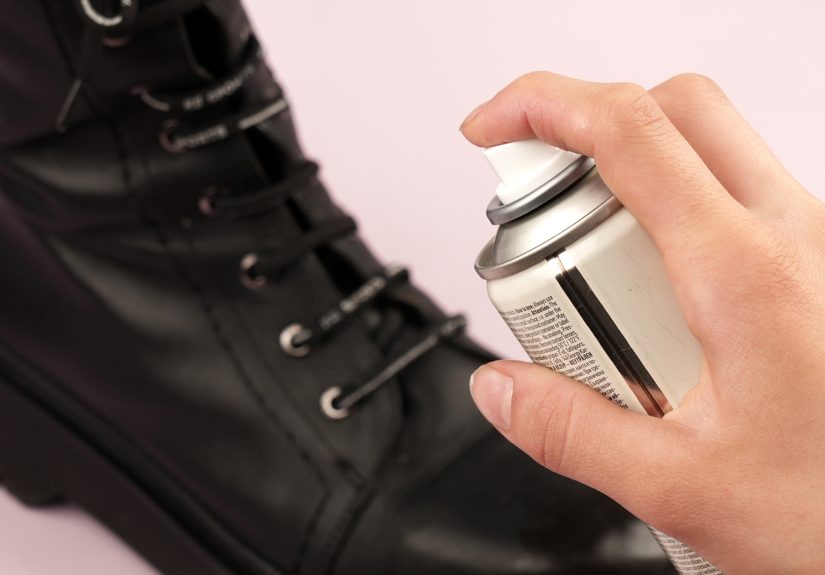
13. Protect the Entire Shoe
Once the repair has cured, wipe the rest of the shoe clean and apply a suitable shoe protector spray made for synthetic materials, faux leather, or multi-material footwear. This adds a protective layer against water spots and dirt. Spray in a ventilated area, keep the can at the recommended distance, and let the shoes dry fully.
How to Fix Light Scuffs Without Full Repair
Not every scrape needs filler and paint. If your faux leather shoes only have a pale scuff mark, try this quick method first. Clean the area with mild soap and water, dry it, then buff gently with a microfiber cloth. For black shoes, a tiny amount of matching shoe cream or flexible black shoe paint can cover a light mark. For white shoes, use a small amount of white shoe paint rather than household wall paint, which may crack.
A magic eraser can help on rubber soles and trim, but use caution on faux leather uppers. It is mildly abrasive and may dull the finish if you rub too hard.
Common Mistakes to Avoid
Using Too Much Water
Faux leather does not enjoy being soaked. Excess moisture can affect adhesives and backing materials. Always use a damp cloth, not a dripping one.
Skipping the Cleaning Step
Paint over dirt, and the repair may peel. Clean first, repair second, admire third.
Using Regular Craft Paint
Basic craft paint may dry stiff and crack where the shoe bends. Use flexible acrylic leather paint or a product designed for shoes, vinyl, or faux leather.
Applying Thick Coats
Thick filler and paint look obvious and are more likely to crack. Thin layers create a smoother, stronger repair.
Expecting Perfection on Peeling Faux Leather
If faux leather is peeling widely, a scrape repair may only be temporary. Once the coating starts breaking down across a large area, the material may continue to flake. You can improve the look, but long-term durability may be limited.
When Should You Visit a Cobbler?
Visit a shoe repair professional if the shoe is expensive, the scrape is large, the sole is separating, the heel is damaged, or the upper has a structural tear. A cobbler may be able to recolor, patch, or reinforce the area more neatly than a home repair. However, some cobblers are cautious with faux leather because it can be harder to restore than genuine leather. Ask first before assuming the shoe can be fully refinished.
How to Prevent Future Scrapes on Faux Leather Shoes
Prevention is easier than repair. Store faux leather shoes away from direct sunlight and heat. Keep them in dust bags or on a shoe rack where they are not rubbing against buckles, zippers, or other shoes. Clean dirt quickly after wearing, especially if the shoes were exposed to salt, mud, or rain.
Use a protector spray that is safe for synthetic materials. Reapply it periodically, especially during wet seasons. When driving, consider keeping a pair of “car shoes” if your dress shoes rub against pedals. Yes, that sounds dramatic, but so does discovering a fresh scrape five minutes before a meeting.
Best Products for Faux Leather Shoe Scrape Repair
You do not need a professional workshop to repair a scrape, but using the right type of product matters. Look for flexible vinyl repair filler, acrylic leather paint, synthetic-safe cleaner, and a clear flexible finisher. For small black scrapes, a black shoe touch-up cream may be enough. For colored shoes, a paint set with mixable shades gives you better control.
Avoid bleach, harsh solvents, acetone-heavy cleaning, and stiff glues unless the repair product specifically instructs you to use them. Faux leather coatings can react badly to aggressive chemicals, and the damage may become worse than the original scrape.
Experience Notes: What Actually Works in Real Life
Here is the honest experience section: faux leather shoe repair is not difficult, but it rewards calm hands. The biggest improvement usually comes from cleaning and color correction. Many people see a scrape and assume the shoe is ruined, but the mark is often just missing pigment on the top layer. Once the area is cleaned and recolored with thin coats, the shoe can look dramatically better.
The most important lesson is to stop touching the scrape before you make it worse. When faux leather gets a flap or raised edge, it is tempting to pick at it. Do not. That tiny flap is like a loose thread on a sweater with villain energy. If you pull it, the problem grows. Trim loose material instead, then fill only what needs filling.
Another useful experience: color matching takes longer than the actual painting. Black shoes are forgiving, but brown faux leather shoes can be surprisingly complicated. A scrape on a chestnut boot may need a mix of brown, yellow, red, and a microscopic amount of black. Always test the color and let it dry. Wet paint lies. Dry paint tells the truth.
For sneakers or casual shoes, a slightly imperfect repair is usually invisible from standing height. People rarely inspect your shoes from six inches away unless they are toddlers, dogs, or unusually intense fashion critics. Focus on making the scrape less noticeable and preventing it from spreading.
For dress shoes, blend wider than the scrape. If you paint only the exact damaged line, the repair may look like a thin stripe. Feather the paint gently into the surrounding area. A sponge can help soften the edges, especially on textured faux leather.
Drying time is another place where people get impatient. Paint may feel dry on the surface but remain soft underneath. If you wear the shoes too soon, the repaired area can crease, smudge, or collect lint. Let the repair cure overnight when possible. Your future self will appreciate this rare display of maturity.
In my experience, the best home repairs happen in three rounds: first clean and inspect, then fill and smooth, then color and seal. Trying to do everything in one rushed session often creates a thick patch. A scrape repair should be built like a good sandwich: neat layers, no chaos, and absolutely no giant blob in the middle.
One more practical tip: repair both shoes visually, even if only one is scraped. That does not mean painting both shoes completely. It means cleaning and lightly buffing the pair so one shoe does not look freshly restored while the other looks like it has been living under a bus seat. Matching overall shine helps the repaired shoe blend in.
Finally, know when to retire the shoes. If the faux leather is cracking everywhere, peeling in sheets, or flaking around every crease, a scrape repair may be a short-term cosmetic fix. That is not failure. That is material science politely asking you to go shoe shopping.
Conclusion
Repairing a scrape on faux leather shoes is absolutely possible when the damage is moderate and the surface is still stable. The winning formula is simple: clean gently, trim loose edges, smooth the scrape, fill deeper damage, match the color, paint in thin layers, and seal the repair. Faux leather may not behave like real leather, but with the right products and a little patience, your shoes can return to public life looking polished instead of punished.
Whether you are fixing black work shoes, white faux leather sneakers, brown ankle boots, or a favorite pair of vegan leather loafers, the method stays the same. Go slowly, test products first, and let everything dry properly. Your shoes carried you this far. The least you can do is give them a tiny spa day with better lighting.
Note: This article is written for general at-home shoe care. Always test cleaners, fillers, paints, and sealants on a hidden area first because faux leather finishes can vary by brand, coating, and shoe construction.


