Table of Contents >> Show >> Hide
- Concrete, Cement, Mortar: A 20-Second Reality Check
- What You’ll Need (and What You Can Skip)
- 5 Ways to Sculpt With Concrete (Pick Your Adventure)
- 1) Mold + Pour (Clean lines, repeatable results)
- 2) Hand-Build With Mortar (Like clay, but grittier)
- 3) Armature + “Ferrocement” Style (Strong, lightweight shells)
- 4) Carve While It’s “Green” (Satisfying, but timing matters)
- 5) GFRC (Glass Fiber Reinforced Concrete) (Thin, detailed, and surprisingly strong)
- Mixing for Sculpture: The Rules That Prevent Heartbreak
- Step-by-Step: Sculpting a Concrete Piece Over an Armature
- Hypertufa Sculpting (Rustic, Light, and Garden-Friendly)
- Color and Finishing: Make It Look Intentional (Even If You Panicked)
- Curing: The Unsexy Step That Makes Your Sculpture Survive
- Sealing: Penetrating vs Film-Forming (Choose the Right Armor)
- Troubleshooting: Common Problems (and How to Fix Them)
- Safety: Concrete Is Not a Spa Treatment
- Concrete Sculpture Project Ideas (Beginner to Bold)
- Experience-Based Tips: 10 Lessons Makers Learn the Fun Way (So You Don’t Have To)
- Conclusion
Concrete sculpting is basically the art of convincing a bag of dusty rocks to become something adorable, dramatic,
or at least not shaped like a sad potato. The good news: concrete is cheap, accessible, and surprisingly versatile.
The even better news: you don’t need a fancy studiojust a plan, some patience, and a willingness to accept that
your first piece might look like it crawled out of a modern art museum gift shop (affectionately).
This guide walks you through the main concrete sculpting methods (molds, armatures, carving, GFRC, hypertufa),
explains how to mix for strength and detail, and covers finishing, curing, sealing, and safetyso your masterpiece
survives weather, time, and the occasional confused squirrel.
Concrete, Cement, Mortar: A 20-Second Reality Check
People casually say “cement” when they mean “concrete,” and that’s how perfectly nice projects get mildly chaotic.
Here’s the quick breakdown:
- Cement: the powdered binder (usually Portland cement) that hardens when mixed with water.
- Concrete: cement + water + sand + gravel/aggregate (the classic “rocky” mix).
- Mortar: cement + water + sand (usually no big gravel). Great for sculpting detail.
For sculpture, you’ll often want mortar (or a sand mix / repair mix) because big gravel fights fine detail.
If you do use standard concrete, save it for chunky, bold forms where you don’t mind a little extra texture.
What You’ll Need (and What You Can Skip)
Materials
- Sculpting mix: mortar mix, sand mix, or a repair mix (easier than custom recipes at first).
- Water: clean, cool water. (Yes, it matters. No, it can’t be “mystery bucket water.”)
- Reinforcement (optional but helpful): fiberglass fibers, alkali-resistant glass fibers (GFRC), wire mesh, or lath.
- Bonding / fortifier (optional): acrylic fortifier or bonding additive for thin coats and better adhesion.
- Form/mold materials: silicone molds, plastic containers, foam, cardboard, or melamine board for box forms.
- Sealer: penetrating water repellent (silane/siloxane) or a film-forming acrylic, depending on the look you want.
Tools
- Mixing tub or bucket, margin trowel or sturdy spoon, and a drill with mixing paddle (optional but nice).
- Disposable gloves, dust mask/respirator, safety glasses.
- Wire cutters, pliers, and scissors for mesh or fabric reinforcement.
- Texture tools: brushes, sponges, stamps, combs, palette knives, even crumpled aluminum foil.
- Sandpaper or diamond pads (for finishing)plus dust control (very important).
5 Ways to Sculpt With Concrete (Pick Your Adventure)
1) Mold + Pour (Clean lines, repeatable results)
This is the best starting point if you like predictable shapes and fewer surprises. You pour a mix into a mold,
vibrate/tap to release air bubbles, let it set, and demold. Great for planters, stepping stones, bookends,
small statues, and geometric decor.
Pro tip: If you want crisp edges, use a mold material with smooth surfaces (silicone, plastic, melamine).
For a more organic feel, use fabric molds or hand-formed foam.
2) Hand-Build With Mortar (Like clay, but grittier)
You build forms by applying mortar in layersoften over a base shape (foam, crumpled paper covered in plastic,
or an armature). This is how many garden sculptures get made: birds, mushrooms, faces, faux stones, and whimsical creatures
that may or may not resemble your neighbor’s dog.
This method shines when you want texture and custom shapes. Thin layers can crack if rushed,
so you’ll work in coats and reinforce as needed.
3) Armature + “Ferrocement” Style (Strong, lightweight shells)
An armature is a skeletonusually wire, mesh, or rebarthat supports your sculpture. Then you apply a mortar mix
into/over the mesh. This is a classic approach for larger pieces because the structure comes from the armature,
not from making everything solid (and insanely heavy).
Think: a 2-foot garden heron that you can actually move without calling three friends and a chiropractor.
4) Carve While It’s “Green” (Satisfying, but timing matters)
“Green” concrete means it has set but hasn’t fully cured. In that window, you can carve lines, sharpen edges,
and shape details with hand tools more easily than once it’s fully hardened. The trick is timing:
too soon and it smears; too late and it laughs at your tools.
5) GFRC (Glass Fiber Reinforced Concrete) (Thin, detailed, and surprisingly strong)
GFRC uses alkali-resistant glass fibers and a cement-rich mix so you can make thinner sections with high strength.
It’s popular for countertops and furniture, but sculptors love it for detailed panels, shells, and pieces that need
strength without bulk. You can do “premix” (fibers mixed in) for smaller projects, or “spray-up” for production setups.
Mixing for Sculpture: The Rules That Prevent Heartbreak
Concrete work is mostly about water management. Too little water and the mix won’t pack or bond well; too much water
makes it weaker and more prone to cracking and surface defects. For sculpture, aim for a mix that holds shape when pressed,
especially for hand-building and hypertufa.
Start Simple (Use Bagged Mixes First)
If you’re new, use a mortar mix, sand mix, or a repair mix and follow the bag directions. Once you’re comfortable,
you can experiment with custom blends for finer detail or lighter weight.
Helpful Additives (Optional, Not Magic)
- Acrylic fortifier/bonding additive: Improves bonding and water resistance, especially useful for thin coats or patch-style sculpting.
- Fibers (polypropylene or AR glass fibers): Help resist shrinkage cracking and add toughness in thin sections.
- Plasticizer: Improves workability without dumping extra water into the mix.
Don’t treat additives like cheat codes. They help, but good curing and smart thickness matter more.
Step-by-Step: Sculpting a Concrete Piece Over an Armature
Let’s walk through a reliable method for making a small-to-medium garden sculpture (say, a simple bird, abstract form,
or a mini bust). This approach balances strength, detail, and sanity.
Step 1: Sketch the Shape (and plan thickness)
Draw the front and side view. Decide your “shell” thickness. For many small sculptures, a consistent shell is stronger
(and less crack-prone) than random thick-thin-thick areas. If you want thin details (ears, beaks, petals),
plan to reinforce them or sculpt them as separate pieces to attach later.
Step 2: Build the Armature
Use wire and mesh to create the form. Chicken wire, hardware cloth, or expanded metal lath can work.
Twist wire tightly, and avoid floppy sections (fresh mortar is heavier than it looks). If the piece needs to stand,
create a stable base and consider embedding a small internal support (like a rod) that won’t wobble.
Tip: Make the armature slightly smaller than the final sculpture so you have room for your mortar shell.
Step 3: Apply a “Scratch Coat”
Mix a small batch of mortar to a peanut-butter consistency. Press it into the mesh so it keys through and grabs.
This first coat doesn’t need to be pretty. Its job is to lock onto the armature and create a rough surface for later layers.
Step 4: Build Form in Layers (Don’t Rush the Thickness)
Add more mortar in coats. Let each layer firm up before adding the next, especially on vertical surfaces.
If you try to sculpt the entire thickness at once, gravity will do what gravity doesyour sculpture will slowly “melt”
into a new shape you did not approve.
If you need bulk, consider filling the inside with lightweight, removable forms (foam wrapped in plastic) so you aren’t making a solid concrete boulder.
Step 5: Sculpt Details and Texture
When the surface is firm but still workable, refine shapes with small tools. Add texture with:
- Stiff brush for “stone” grain
- Sponge dabbing for porous rock
- Comb or fork for striations
- Crumpled foil for random natural texture
- Stamping (leaves, lace, carved patterns) for decorative surfaces
Step 6: Cure Like You Mean It
Concrete doesn’t “dry” into strengthit gains strength as cement hydrates. That process needs moisture.
Cover the piece with plastic to retain humidity and keep it out of direct sun and wind. If possible, lightly mist
before re-covering (especially in dry climates). A slow, moist cure dramatically improves durability.
Step 7: Demold / Finish / Sand (With Dust Control)
Once the piece is hard enough to handle, refine edges and smooth areas if you want. Wet-sanding or using tools
with dust collection helps control fine dust. For many sculptures, leaving tool marks and texture looks better than
chasing a perfectly polished surface anyway.
Hypertufa Sculpting (Rustic, Light, and Garden-Friendly)
Hypertufa is a lightweight, porous concrete-like mix often made with Portland cement and lightweight aggregates like
perlite plus organic material like peat moss. It’s popular for planters, faux rocks, and natural-looking garden pieces.
The texture is charmingly “ancient ruin,” in a good way.
A common starting blend is roughly 1 part Portland cement to 1.5 parts peat moss and
1.5 parts perlite (by volume), adjusted with water until it holds shape when squeezed.
The water amount matters a lottoo wet and it slumps and weakens.
Because hypertufa is porous, it may weather beautifully outdoorsbut it can be less strong than dense concrete.
Keep delicate features thicker, and cure it carefully under plastic to reduce cracking.
Color and Finishing: Make It Look Intentional (Even If You Panicked)
Pigments and Integral Color
Powder pigments formulated for cement can tint the mix. Measure consistently if you’re making multiple parts.
Earth tones often look more natural than super-saturated colors, especially outdoors.
Surface Color: Stains, Washes, and Dry-Brushing
You can color the surface after curing using concrete stains or diluted masonry paints. For stone-like effects,
many artists use thin washes in layers: darker tones in crevices, lighter highlights on raised textures.
Dry-brushing (almost no paint on the brush) can make details pop without looking “painted.”
Inlays and Embedded Details
Press glass beads, stones, or metal accents into the surface when the mix is firm. If embedding metal, consider
corrosion riskrust can stain concrete. Stainless or non-rusting accents are safer for bright finishes.
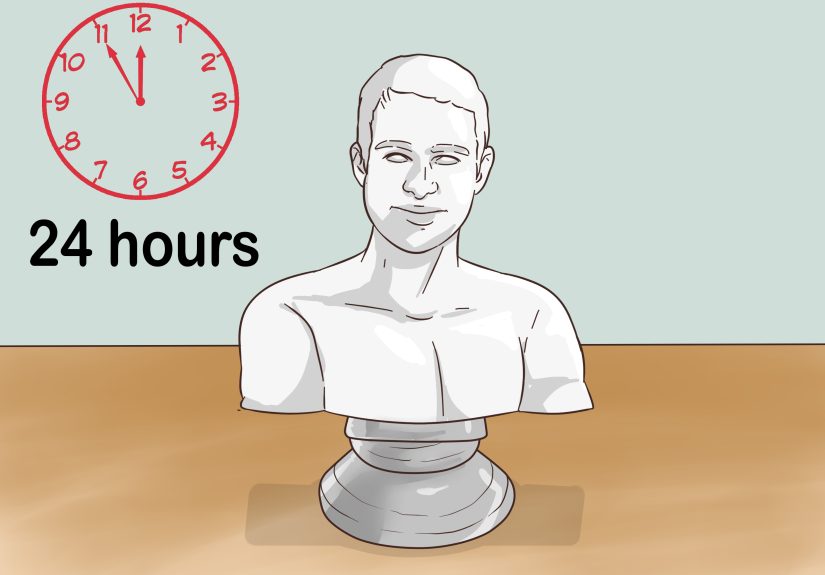
Curing: The Unsexy Step That Makes Your Sculpture Survive
If you do everything else right but cure poorly, your sculpture may crack, dust, or weaken. For many projects,
plan on a minimum of about a week of protected curing (longer is better), keeping the piece damp
or sealed under plastic so moisture doesn’t escape too fast.
- Protect from wind and sun: they pull moisture out fast and can cause shrinkage cracks.
- Avoid freezing during early cure: freezing can damage fresh concrete before it gains strength.
- Give it time: concrete continues gaining strength for weeks; many mixes are considered “full cure” around 28 days.
Some acrylic “cure & seal” products can help retain moisture on fresh concrete surfaces. They’re convenient for certain projects,
but always follow product instructions and test on a small area if appearance matters.
Sealing: Penetrating vs Film-Forming (Choose the Right Armor)
Sealers help resist water, stains, and weatheringespecially important for outdoor sculptures in wet or freeze-thaw climates.
There are two big categories:
Penetrating sealers (silane/siloxane)
These soak in and create water repellency within the pores without leaving a visible surface film. They’re popular outdoors
when you want a natural look and breathability.
Film-forming sealers (acrylics, urethanes)
These leave a coating on top that can deepen color (“wet look”) and add sheen. Great for decorative indoor pieces or outdoor
pieces where you want that finished, gallery look. The tradeoff: surface films can wear, scratch, or peel over time if moisture
pushes from below.
Rule of thumb: For outdoor garden sculptures that should look like stone, penetrating sealers are often the safest bet.
For indoor decor or glossy finishes, film-forming sealers can look fantastic.
Troubleshooting: Common Problems (and How to Fix Them)
Hairline cracks
Often caused by too much water, layers applied too thick too fast, or rapid drying. Improve curing (plastic cover),
use fibers for thin sections, and build in coats.
Delamination between layers
Usually a bonding issueprevious layer too dry/dusty or too smooth. Apply the next coat while the base is still “green,”
rough up the surface, and consider an acrylic fortifier for better adhesion.
Pitting and air bubbles
Tap/vibrate molds, press mortar into mesh thoroughly, and avoid overly stiff mixes that trap air. For mold work, a light “face coat”
brushed into details before filling can help.
Chalky surface (dusting)
Often from poor curing or over-watering. Better curing and a quality sealer can help, but prevention is easier than rescue.
Safety: Concrete Is Not a Spa Treatment
Two hazards deserve your full attention: dust and skin contact.
-
Silica dust: Mixing dry materials, sanding, grinding, or cutting concrete can release respirable crystalline silica.
Use a proper respirator, keep dust down (wet methods), and use ventilation or a HEPA vacuum when possible. -
Wet concrete/cement burns: Wet cement is highly alkaline and can irritate or burn skin with prolonged contact.
Wear gloves, long sleeves, and wash skin promptly if splashed. Don’t let wet mortar sit inside gloves or boots.
Also protect your eyes. Concrete splatter has impeccable aimespecially when you’re wearing your favorite shirt.
Concrete Sculpture Project Ideas (Beginner to Bold)
- Leaf impression stepping stones: great practice for texture and demolding.
- Hypertufa “stone” planters: forgiving shapes, satisfying results.
- Abstract tabletop forms: minimal design, maximum style.
- Small animal bust: armature + layered mortar practice.
- Concrete mushrooms: classic garden sculpture, easy to batch-make.
- Wall plaques: ideal for GFRC-style thin panels and detailed molds.
Experience-Based Tips: 10 Lessons Makers Learn the Fun Way (So You Don’t Have To)
The internet is full of perfect concrete sculptures that look like they were gently lifted from a design catalog by well-rested people.
Real life is different. Real life includes a wheelbarrow that tips at the exact wrong moment and a sculpture that looks great until it
develops a mysterious crack shaped like a lightning bolt. Here are the most common, experience-based lessons shared by DIYers and studio folks
who have made enough concrete art to earn a permanent dust outline on their shoes.
1) You will overwater the first batch. Almost everyone does. The mix feels too stiff, so you add waterthen it turns into slump city.
Next time, add water slowly and mix longer than you think you need. Concrete “loosens up” as you mix.
2) “Just one thick coat” is a trap. Thick applications crack more easily and slide around on vertical surfaces.
Layering feels slower, but it gives you control and strength. If your sculpture is slumping, it’s not “expressive”it’s telling you to pause.
3) Armatures fail in the most dramatic ways. A wire frame that feels sturdy in your hands can suddenly wobble once it’s wearing a heavy mortar jacket.
Makers learn to overbuild supports, anchor bases, and brace anything tall. If it’s skinny and upright, it needs extra help.
4) Texture is your best friend. Beginners often chase smoothness, then realize texture hides tiny flaws and looks more natural outdoors.
The happiest sculptures are frequently the ones with intentional tool marks, stone-like pores, or patterned surfaces.
5) Demolding is an emotional event. You’ll want to peek early. Don’t. Most heartbreak happens because someone “just checked” and snapped an edge.
If you must do something, do the safe thing: tap the mold, wait longer, and let time do its job.
6) Curing is where the pros quietly win. Makers who get consistent results treat curing like a real step, not an afterthought.
Covering with plastic, keeping pieces shaded, and avoiding rapid drying often makes the difference between “handmade charm” and “crumbly regret.”
7) Sealer changes the vibe. A penetrating sealer can keep the natural, stone-like look. A film-forming acrylic can deepen color and add shine,
which can be stunningor can make a rustic piece look oddly “wet.” Experienced makers always test sealers on a hidden spot first.
8) “Outdoor durable” depends on design, not just products. Thin, delicate projections break more easily, no matter what mix you use.
Makers learn to thicken vulnerable parts, add reinforcement, and design with weather in mind. The strongest sculpture is the one that doesn’t invite damage.
9) The best tools are sometimes household junk. A stiff dish brush makes great stone texture. Foil makes believable rock pores.
A plastic spoon can sculpt curves beautifully. Over time, people build a “texture drawer” filled with weird objects that suddenly feel priceless.
10) Your second sculpture will be wildly better than your first. Concrete teaches quickly because it gives instant feedback:
mix too wet, it slumps; cure too fast, it cracks; reinforce well, it survives. Makers who stick with it discover that concrete is less “mystical”
and more “repeatable science with a side of art.”
Conclusion
Concrete sculpting is part craft, part chemistry, and part learning how to slow down at the exact moment you want to speed up.
Choose the right method for your project (mold, armature, carving, GFRC, or hypertufa), mix with discipline (especially with water),
cure patiently, and seal strategically. Do those things, and your sculpture won’t just look goodit’ll last.
And if your first piece comes out a little wonky? Congratulations. You’ve made art the traditional way: with optimism, grit, and a mild amount of chaos.


