Table of Contents >> Show >> Hide
- Why the Setup Matters More Than the Decorations
- How to Set Up an Axolotl Tank in 13 Steps
- Step 1: Choose a low, wide tank instead of a tall one
- Step 2: Put the tank in the coolest room in the house
- Step 3: Skip the heater and plan for cooling instead
- Step 4: Rinse the tank and décor the safe way
- Step 5: Pick a safe floor for the tank
- Step 6: Add hides, shade, and simple enrichment
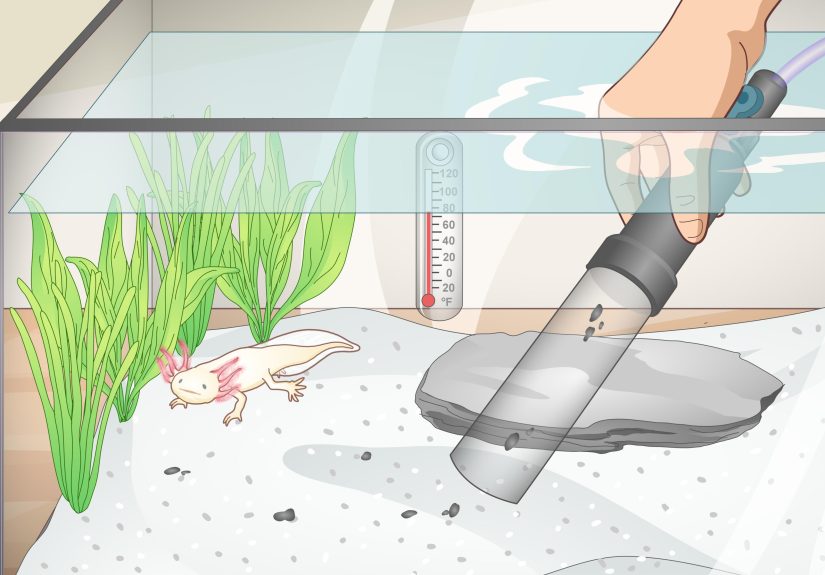
- Step 7: Install a low-flow filter
- Step 8: Fill the tank with dechlorinated water
- Step 9: Cycle the tank before adding your axolotl
- Step 10: Test the water like a tiny scientist
- Step 11: Add your axolotl gently and handle as little as possible
- Step 12: Feed the right foods and remove leftovers
- Step 13: Build a simple weekly maintenance routine
- Common Axolotl Tank Mistakes to Avoid
- What Setup Feels Like in Real Life: Experience and Lessons From the Tank Side
- Conclusion
- SEO Tags
Setting up an axolotl tank looks simple right up until you realize your adorable little water dragon is not, in fact, a decorative potato. Axolotls are fully aquatic salamanders with sensitive skin, frilly external gills, and a strong preference for cool, clean, low-flow water. In other words, they are charming, weird, and a little dramatic about their home conditions. Fair enough.
If you want your axolotl tank setup to work long-term, the goal is not to build the fanciest aquarium on the internet. The goal is to build a stable one. That means the right tank size, the right temperature, a cycled filter, safe flooring, gentle flow, and a maintenance routine you can actually stick to after the excitement of “new pet day” wears off.
This guide breaks the process into 13 practical steps, so you can go from empty glass box to a healthy axolotl habitat without making the classic mistakes: overheated water, gravel disasters, and the dreaded “I added my pet before the tank was cycled” plot twist. Let’s get your tank set up the smart way.
Why the Setup Matters More Than the Decorations
Axolotls stay aquatic for life, breathe through delicate gills, and can live for many years in human care when their environment is stable. That is why tank setup is not just a design choice. It is basic life support with better lighting. A beautiful tank that runs too warm, has strong current, or allows waste to build up is still a bad tank. A simple tank with cool water, safe décor, and reliable filtration is the better home every single time.
How to Set Up an Axolotl Tank in 13 Steps
Step 1: Choose a low, wide tank instead of a tall one
Axolotls use floor space more than vertical space, so think “wide apartment,” not “luxury penthouse.” A roomy aquarium gives them more usable bottom area, helps dilute waste, and makes water chemistry easier to manage. For most home keepers, bigger is easier. A 40-gallon breeder-style tank is a popular choice because it offers generous floor space and better stability than a cramped starter setup.
Could you keep an axolotl in something smaller? Some people try. Some people also assemble furniture without reading the instructions and then act shocked when they have “extra” screws. Give your axolotl more room from the start and your future self will thank you.
Step 2: Put the tank in the coolest room in the house
Before you add anything else, pick the location carefully. Keep the tank away from direct sun, warm windows, radiators, heating vents, and electronics that throw off extra heat. Axolotls do best in cool water, so the room itself should help you, not fight you.
This step sounds boring, but it prevents one of the biggest axolotl problems: chronic overheating. If the tank lives in a sunny room that turns into a toaster oven every afternoon, everything else becomes harder. Good placement is free and saves headaches later.
Step 3: Skip the heater and plan for cooling instead
Axolotls are not tropical fish. Their water should generally stay around 60 to 68 degrees Fahrenheit. When temperatures rise too high, stress, appetite loss, odd floating, and disease problems become more likely. In most homes, that means you do not need a heater. You need a cooling plan.
For mild temperature issues, fans blowing across the water surface can help. In hotter climates or during summer, a dedicated aquarium chiller may be the real answer. Frozen water bottles can work in an emergency, but they are not ideal as a daily strategy because sudden swings are not your friend. Stable cool water beats dramatic rescue missions with ice bottles every time.
Step 4: Rinse the tank and décor the safe way
Before setup, rinse the empty tank, hides, and décor with clean water only. Do not use soap, household cleaners, scented sprays, or “just a little disinfectant.” Axolotls have sensitive skin, and chemical residue is exactly the kind of invisible surprise you do not want in their habitat.
If something needs more scrubbing, use hot water and elbow grease. Yes, elbow grease is still legal and remains surprisingly effective.
Step 5: Pick a safe floor for the tank
Axolotls are enthusiastic gulp-feeders. If there is loose material on the tank floor that can fit into their mouths, there is a real chance they will swallow it. That is why gravel, pebbles, and other small substrate are bad ideas. They can cause impaction, which is exactly as fun as it sounds.
The simplest beginner option is a bare-bottom tank, slate, or tile. If you really want a natural-looking floor, make sure anything in the tank is too large to be swallowed. The point is not to win an aquascaping contest. The point is to avoid turning dinner into a trip to the exotic vet.
Step 6: Add hides, shade, and simple enrichment
Axolotls appreciate secure hiding spots and low-stress surroundings. Add caves, smooth shelters, sturdy décor, and plants that can handle cool water and lower light. Good hides help your axolotl feel safe, reduce stress, and make the tank feel less like a bright, open stage.
Keep decorations smooth and stable. Avoid sharp edges, tiny decorative pieces, or clutter that traps waste. Axolotl tank décor should be practical first, pretty second. Happily, practical can still look great.
Step 7: Install a low-flow filter
Filtration matters because axolotls are messy. They eat protein-rich food, produce waste quickly, and can foul water faster than many beginners expect. A good filter helps remove solids and supports beneficial bacteria that break down waste. The catch is that axolotls do not like strong current.
That means the filter should provide biological filtration without blasting the tank like a tiny underwater leaf blower. Sponge filters, baffled hang-on-back filters, and other low-flow options are common choices. If the current is strong enough to whip the gills around, it is too much. Gentle flow wins.
Step 8: Fill the tank with dechlorinated water
Tap water is often fine to use, but it must be treated properly first. Chlorine, chloramine, and related water additives can be harmful to axolotls. Use a water conditioner that makes tap water safe, and follow the label directions carefully. A thermometer is also essential, because guessing the water temperature with your hand is a terrific way to be confidently wrong.
When you do water changes later, new water should be treated before it goes into the tank. Consistency matters. Safe water is not a one-time event. It is a routine.
Step 9: Cycle the tank before adding your axolotl
This is the step new keepers most want to skip, and the one they regret skipping most. A cycled tank contains beneficial bacteria that convert ammonia from waste into nitrite and then into nitrate. Without that biological process, toxic waste builds up fast.
In plain English: your filter is not “ready” just because it is running. A brand-new aquarium needs time to develop the bacteria that make it safe. Cycling usually takes weeks, not days. Do not add the axolotl until testing shows the tank is actually cycled. Patience here protects your pet later.
Step 10: Test the water like a tiny scientist
Axolotl care works better when you stop guessing. Use a reliable aquarium test kit and monitor ammonia, nitrite, nitrate, pH, and temperature. The goal is simple: no ammonia spike, no nitrite spike, manageable nitrate, and stable conditions overall.
New keepers sometimes obsess over chasing a perfect number with constant adjustments. Resist that urge. Stability is usually more important than endless fiddling. A steady, clean tank beats a chemistry experiment gone rogue.
Step 11: Add your axolotl gently and handle as little as possible
Once the tank is ready, acclimate your axolotl calmly and avoid turning the move into a splashy action film. Axolotls are best treated as display pets, not hands-on pets. Their skin is delicate, and unnecessary handling can stress them or damage the protective coating on their bodies.
If you ever need to move one for cleaning or a health check, use a soft fine-meshed net or another gentle method recommended by your exotic vet. Look more, grab less. Your axolotl will not be offended. Probably.
Step 12: Feed the right foods and remove leftovers
A good tank setup includes a feeding plan, because food and water quality are tied together. Earthworms, nightcrawlers, blackworms, bloodworms, and quality axolotl or sinking carnivore pellets are common foods. Juveniles usually eat more often, while adults are typically fed every two to three days.
Keep portions sensible and remove uneaten food so it does not rot in the tank. Leftovers are not “bonus snacks for later.” They are a water quality problem in the making.
Step 13: Build a simple weekly maintenance routine
The best axolotl tank setup is the one you can maintain consistently. Plan on partial water changes, waste removal, and regular testing. Keep the filter working, but do not clean beneficial bacteria into oblivion with harsh scrubbing under untreated tap water. Rinse filter media according to manufacturer guidance and use tank water when appropriate to avoid wrecking the biofilter.
Also, watch your axolotl. Curled gills, odd floating, loss of appetite, skin changes, and unusual behavior can all signal trouble. The tank will tell you how it is doing if you pay attention.
Common Axolotl Tank Mistakes to Avoid
- Using gravel or small stones because they “look natural”
- Adding the axolotl before the tank is cycled
- Letting water temperatures creep too high in summer
- Installing a filter with a harsh, constant current
- Overdecorating the tank until waste gets trapped everywhere
- Overfeeding and leaving food to decay in the water
- Handling the axolotl more than necessary
- Ignoring routine testing because the water “looks fine”
The phrase “looks fine” has launched many aquarium disasters. Clear water can still have dangerous chemistry. Test kits exist for a reason.
What Setup Feels Like in Real Life: Experience and Lessons From the Tank Side
Here is the part many beginner guides skip: the first few weeks of setting up an axolotl tank are mostly a lesson in patience. Day one feels exciting because the tank is empty, the supplies are new, and you are convinced this will be the cleanest, calmest aquarium in history. Day seven feels different. You are staring at a thermometer like it owes you money, googling whether the filter flow is “too strong,” and wondering why cycling an aquarium apparently takes the same emotional energy as waiting for exam results.
One of the most common real-world experiences is learning that bigger tanks are often easier, not harder. A wider tank gives you more room for hides, more stable water, and less stress when something small changes. People often start out hoping to save space, then realize the smaller tank is less forgiving. With axolotls, “just enough” has a way of becoming “not quite enough” once summer hits or feeding gets messy.
Another classic experience is discovering how much temperature management matters. Many keepers do everything right except the room itself. The tank is perfect in spring, then July shows up like an uninvited villain. Suddenly you are closing blinds, aiming a fan across the water, and checking the thermometer three times before breakfast. This is why axolotl owners talk about cooling so much. It is not obsession. It is survival with a side of panic prevention.
There is also a learning curve with water flow. What looks “gentle” to a human can still feel like a nonstop treadmill to an axolotl. A beginner may install a powerful filter because more filtration sounds better, then notice the gills curling forward, the animal avoiding open areas, or the whole tank turning into a constant wind tunnel. Once the outflow is baffled or switched to a gentler system, the tank suddenly looks calmer, and the axolotl does too.
Feeding brings its own little revelations. Many new keepers assume an axolotl will eat like a fish and then simply drift off into the underwater sunset. In reality, feeding is tied directly to cleanliness. A piece of leftover worm hidden behind décor can become tomorrow’s water quality problem. Most experienced keepers end up simplifying the tank a bit, using easier-to-clean layouts, and getting very fast at spot-cleaning after meals.
The emotional side is real too. At first, people want the tank to be impressive. Later, they want it to be stable. That shift is actually a good sign. The smartest axolotl setups are usually the ones designed around the animal, not around social media aesthetics. A cave, a cool tank, low flow, safe footing, and clean water may not look flashy, but to an axolotl, that is luxury real estate.
And finally, nearly every axolotl keeper learns the same big lesson: success is usually not about doing one heroic thing. It is about doing small boring things consistently. Testing the water. Changing part of it every week. Watching the temperature. Removing leftovers. Not panicking and dumping random products into the tank. Axolotl care becomes much easier when routine replaces improvisation.
So yes, setting up an axolotl tank can feel a little intimidating at first. But once the system is stable, it becomes deeply satisfying. You stop micromanaging every bubble, your axolotl settles in, and the tank starts to run the way it should: cool, calm, clean, and quietly weird in the best possible way.
Conclusion
If you want to know how to set up an axolotl tank the right way, the formula is wonderfully straightforward: start with a wide tank, keep the water cool, use low flow filtration, avoid unsafe substrate, cycle the aquarium before adding the axolotl, and stay consistent with testing and maintenance. That is the foundation.
Everything else is extra. Fancy backgrounds, stylish caves, and lush plants can come later. Your axolotl does not care whether the tank looks trendy. It cares whether the water is safe, the current is gentle, and the floor is not secretly edible. Build the habitat around those priorities, and you will have a setup that is easier to manage and much better for your salamander.
Note: This article is informational and focuses on captive-bred pet axolotls. Always check local wildlife rules and contact an exotic veterinarian if you notice illness, injury, or sudden behavior changes.


