Table of Contents >> Show >> Hide
- Why a Frameless Shower Door Leaks in the First Place
- 1. The Bottom Sweep Is Worn, Cracked, or Missing
- 2. The Side Seal or Jamb Seal Is Not Doing Its Job
- 3. The Door Is Misaligned
- 4. Old or Failed Caulk Around Fixed Panels and Wall Connections
- 5. The Threshold or Curb Is Too Flat, Too Narrow, or Poorly Designed
- 6. The Showerhead Is Aimed Straight at the Door
- How to Find the Leak Before Buying Anything
- How to Stop a Frameless Shower Door From Leaking: Step by Step
- Step 1: Clean the Door, Seals, and Threshold
- Step 2: Replace the Bottom Seal or Sweep
- Step 3: Replace Side Seals if Water Escapes Near the Vertical Edge
- Step 4: Re-Caulk the Correct Areas
- Step 5: Check the Hinges and Door Alignment
- Step 6: Add a Drip Rail or Threshold Dam for Splash Control
- Step 7: Change Water Direction and Daily Habits
- Mistakes to Avoid
- When a DIY Fix Is Not Enough
- Maintenance Tips to Prevent Future Leaks
- Real-World Experiences With Leaky Frameless Shower Doors
- Final Thoughts
A frameless shower door is supposed to make your bathroom look sleek, modern, and a little fancy. What it is not supposed to do is act like a water cannon aimed directly at your bath mat. If you keep finding puddles outside the shower, don’t panic. A leaking frameless shower door is usually fixable, and in many cases, the problem comes down to seals, alignment, caulk, or water direction rather than some dramatic bathroom betrayal.
The trick is to stop guessing and start diagnosing. Throwing random caulk at the problem is a classic homeowner move, but it usually works about as well as putting a Band-Aid on a canoe. To actually stop a frameless shower door from leaking, you need to identify where the water is escaping and why it is getting out in the first place.
In this guide, you’ll learn the most common causes of a leaking frameless shower door, how to test the leak, what parts may need replacing, and when it’s time to call a professional. By the end, your shower should keep water where it belongs: inside the shower, not wandering across the bathroom floor like it pays rent.
Why a Frameless Shower Door Leaks in the First Place
Frameless shower doors are designed to resist leaks, but they are not giant fish tanks with zero gaps. They rely on carefully placed seals, sweeps, hinges, and threshold design to guide water back into the shower. When one of those pieces stops doing its job, the floor outside becomes the unlucky backup plan.
1. The Bottom Sweep Is Worn, Cracked, or Missing
The bottom sweep is one of the most common leak points. This clear strip snaps onto the bottom edge of the glass and helps block water from slipping underneath the door. Over time, it can harden, split, discolor, warp, or loosen. Once that happens, water starts sneaking out under the door like it has discovered a secret tunnel.
If the leak appears at the bottom edge, especially near the center or latch side of the door, the sweep is your first suspect. In many bathrooms, replacing this small part solves the issue fast.
2. The Side Seal or Jamb Seal Is Not Doing Its Job
If water is escaping near the vertical edge of the door, the issue may be a side sweep, jamb seal, or strike seal. These pieces help close the gap where the glass meets a wall, another glass panel, or the strike side of the opening. When they are worn or slightly out of place, water can spray through the gap and land outside the enclosure.
This is especially common on hinged frameless shower doors, where side gaps are small but important. A tiny gap in the wrong place can make a surprising mess.
3. The Door Is Misaligned
Sometimes the seals are fine, but the door itself is not closing the way it should. Hinges can loosen. Hardware can shift. A door can sag just enough to create an uneven gap at the bottom or strike side. That uneven gap becomes a water escape route.
If one corner of the door looks tighter than the other, if the door rubs slightly, or if it doesn’t line up cleanly when closed, alignment may be the real problem. In other words, the seal may be innocent and the hinges may be the actual troublemakers.
4. Old or Failed Caulk Around Fixed Panels and Wall Connections
Frameless doors usually are not caulked along the swinging edge, but fixed panels, wall jambs, and certain threshold connections often rely on silicone to keep water contained. If the old caulk is peeling, cracked, moldy, or missing sections, water can slip through those joints and show up outside the shower.
This is one reason a leak may seem like it is coming from the door when the real problem is a nearby glass-to-wall or metal-to-tile connection.
5. The Threshold or Curb Is Too Flat, Too Narrow, or Poorly Designed
Some showers leak because the door opening doesn’t guide water inward very well. If the curb is too flat, the threshold is too narrow, or there is no effective water barrier, splash can travel under the door even if the seal is decent. In those cases, a threshold dam or drip rail can make a major difference.
This is where many DIY fixes stall out. You replace the sweep, clean the glass, whisper motivational speeches to the hinges, and the leak still returns. That usually means the water management at the curb is the bigger issue.
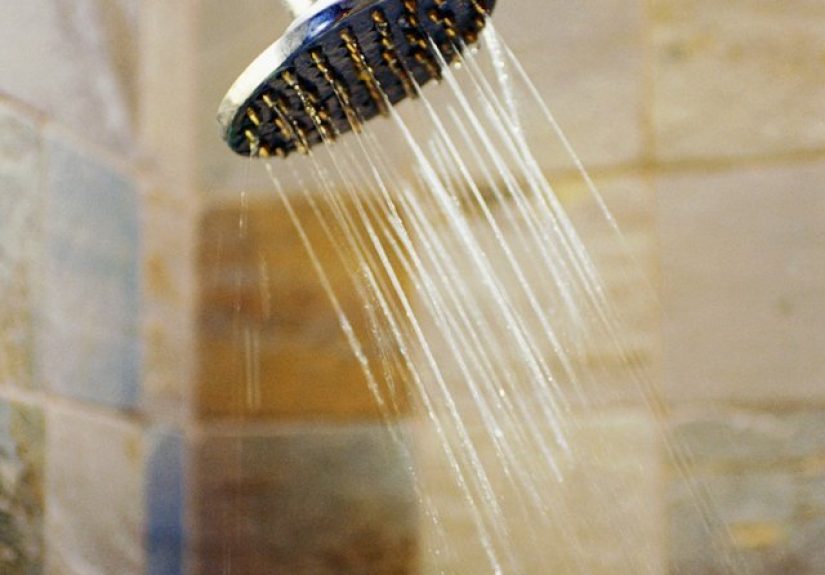
6. The Showerhead Is Aimed Straight at the Door
This one is less glamorous, but very real. If the showerhead sends strong spray directly at the door seam, hinges, or lower corner, you are basically stress-testing your enclosure every morning. Even a properly installed frameless door can struggle when blasted in its weakest spots day after day.
Sometimes the fix is not a new part. Sometimes the fix is simply changing the showerhead angle so the water hits tile instead of the door gap like a determined sniper.
How to Find the Leak Before Buying Anything
Before you replace parts, do a quick leak test. This takes only a few minutes and can save you time, money, and one unnecessary trip to the hardware store.
- Dry the shower completely. Wipe down the threshold, seals, glass edges, and floor outside the enclosure.
- Place paper towels outside the door. Put them near the bottom edge, hinge side, and latch side so you can see exactly where water appears first.
- Run a short test. Use the showerhead to spray one zone at a time for 20 to 30 seconds. Start low, then move higher.
- Watch where the first drip shows up. If the paper towel gets wet under the door, suspect the bottom sweep. If it gets wet near the side, suspect side seals, alignment, or caulk.
- Inspect visually. Look for gaps, warped vinyl, loose hardware, or caulk that looks tired enough to request early retirement.
How to Stop a Frameless Shower Door From Leaking: Step by Step
Step 1: Clean the Door, Seals, and Threshold
Soap scum, mineral buildup, and grime can keep seals from seating properly. Start by cleaning the bottom edge of the glass, side edges, threshold, and any existing seals. Use a non-abrasive cleaner and dry everything thoroughly. This helps you see the true condition of the parts and gives new seals or caulk a better chance to perform.
Step 2: Replace the Bottom Seal or Sweep
If the leak is coming from under the door, replace the bottom sweep first. Measure the width of the door and confirm the glass thickness before buying a replacement. Frameless shower door seals come in different profiles, including basic bottom sweeps and options with built-in drip rails.
To replace it, pull off the old sweep, clean the glass edge, trim the new piece if needed, and press it firmly into place. The fit should be snug, straight, and fully seated. If the new sweep sits crooked, it won’t perform well. This is one of those tiny details that matters a lot.
Step 3: Replace Side Seals if Water Escapes Near the Vertical Edge
If the leak is on the hinge side or latch side, inspect the vertical vinyl. A worn jamb seal, side sweep, or strike seal can let water pass through even when the door looks closed. Replace any brittle, torn, or flattened seal. If your door has two glass panels meeting at an edge, you may need a glass-to-glass seal or magnetic seal instead.
The key is matching the seal style to the location of the leak. Bottom leaks call for bottom sweeps. Side leaks call for side seals. The bathroom does not care about your optimism. It wants the correct part.
Step 4: Re-Caulk the Correct Areas
If the problem is failed silicone, remove the old caulk completely before applying new caulk. Do not smear fresh silicone over dirty, moldy, peeling material and hope for a miracle. That is not repair. That is arts and crafts.
Use a quality mildew-resistant bathroom silicone. Re-caulk fixed glass panel connections, wall profiles, and threshold joints where the manufacturer design calls for it. Smooth the bead neatly, keep it consistent, and let it cure fully before using the shower. Rushing the cure time is a great way to do the same repair twice.
Step 5: Check the Hinges and Door Alignment
Tighten loose hardware carefully and inspect whether the door closes evenly. If the gap at the bottom or strike side is uneven, the hinges may need adjustment. Some frameless shower doors are designed to slightly over-close so the seal meets the strike edge tightly. If the door is not landing where it should, even a brand-new seal may still leak.
This is also the moment to check whether the door is level enough to create even contact along the seals. If the door drifts, sags, or binds, hardware adjustment may be necessary. For heavy glass doors, use care. Tempered glass is durable in normal use but does not appreciate rough handling or overconfidence.
Step 6: Add a Drip Rail or Threshold Dam for Splash Control
If water keeps escaping at the bottom even after a new sweep, add a threshold dam or switch to a bottom seal with a drip rail. A drip rail helps redirect water back into the shower instead of letting it crawl along the underside of the door. A threshold dam creates a small physical barrier on the curb, which is especially helpful when the shower design allows splash to travel outward.
This is often the fix for showers with a flat curb or for households where the showerhead produces strong spray. It is not the flashiest upgrade, but neither is mopping your floor every day.
Step 7: Change Water Direction and Daily Habits
Adjust the showerhead so it points toward tiled walls rather than door seams, hinges, or the lower corner of the opening. If you use a handheld sprayer, avoid spraying directly at the gaps unless your goal is apparently to conduct leak research.
After each shower, squeegee or wipe the glass and bottom edge. This reduces hard water buildup, helps seals last longer, and gives you a chance to notice small issues before they become bigger ones.
Mistakes to Avoid
- Buying the wrong seal profile. Not every bottom strip fits every glass thickness or door style.
- Ignoring alignment. A crooked door can defeat a brand-new seal.
- Using the shower before silicone cures. Patience is cheaper than redoing the job.
- Caulking everything in sight. Frameless doors need targeted sealing, not random silicone decoration.
- Assuming the door is always the problem. Sometimes the leak comes from the fixed panel, threshold, tile joint, or shower pan area.
When a DIY Fix Is Not Enough
Call a professional if the door is badly misaligned, the glass feels loose, the threshold design is flawed, the shower pan seems to slope outward, or leaks continue after replacing seals and re-caulking. Persistent leaking can also point to installation problems, out-of-plumb walls, or a curb that does not provide enough room for proper water control.
This is also the smart move if you see damage around the floor, baseboard, or walls outside the shower. At that point, you are no longer just fixing a shower door leak. You are preventing long-term water damage, which is a much less fun project and a much more expensive one.
Maintenance Tips to Prevent Future Leaks
- Wipe the glass and hardware after each use.
- Check seals every few months for stiffness, tears, or shrinkage.
- Inspect caulk lines for cracks, peeling, or discoloration.
- Tighten loose hardware before the door shifts too far out of alignment.
- Keep mineral buildup from collecting on the bottom edge and threshold.
- Replace worn seals early instead of waiting for a miniature indoor flood.
Real-World Experiences With Leaky Frameless Shower Doors
Homeowners usually discover this problem in the least glamorous way possible: stepping into a cold puddle in socks. One common experience goes like this. The shower looks beautiful, the glass sparkles, and everything seems perfect until a small line of water appears outside the door after every shower. At first, it seems minor, so people throw down an extra bath mat and pretend the problem is “basically handled.” A week later, the mat is soaked, the grout outside the shower is suspiciously damp, and the bathroom has become a tiny water park nobody asked for.
Another very typical story involves replacing the wrong part first. Someone notices water near the bottom of the door and immediately blames the caulk. They remove old silicone, apply a fresh bead, wait for it to dry, and then proudly turn the shower back on. The puddle returns like an old enemy who knows your schedule. The real problem, it turns out, is a stiff and cracked bottom sweep that no longer touches the threshold properly. Ten minutes and one new seal later, the leak is gone. The moral of the story is simple: leaks love misdirection.
There are also cases where the door hardware looks fine, but the door has shifted just enough to break the seal at one corner. People often describe seeing water only on the latch side, only during longer showers, or only when the handheld sprayer is used. That pattern matters. It usually points to alignment or spray direction rather than a total seal failure. Once the hinges are adjusted and the showerhead angle is changed, the issue often disappears without any dramatic remodel.
Then there is the threshold problem, which is the sneakiest one of all. Some homeowners replace the sweep, replace the side seal, recaulk the glass, and still get water on the floor. In those situations, the curb may be too flat, too narrow, or just not controlling splash very well. Adding a threshold dam or a drip rail often feels almost unfairly simple after all that frustration. But simple is good. Simple means dry floors.
Perhaps the most helpful lesson from real-world experience is this: a frameless shower door leak is usually not a mystery forever. Once you slow down, test the leak properly, and match the fix to the location, the problem becomes much easier to solve. The bathroom may still be dramatic, but at least it can stop being wet about it.
Final Thoughts
If you want to stop a frameless shower door from leaking, start with diagnosis, not guesswork. Most leaks come from a worn bottom sweep, a failed side seal, loose alignment, old silicone, or poor water control at the threshold. Fix the actual cause, and the puddles usually disappear. Ignore the cause, and your bath mat will continue serving as a very underappreciated lifeguard.
The good news is that many frameless shower door leaks can be fixed without replacing the whole enclosure. A new seal, careful re-caulking, a hinge adjustment, or a threshold upgrade is often enough to turn your shower back into what it was meant to be: clean, stylish, and blissfully contained.