Table of Contents >> Show >> Hide
- Why Tame a Dog in Minecraft PE?
- What You Need Before You Start
- How to Tame a Dog in Minecraft PE: 10 Steps
- Step 1: Collect Bones from Skeletons
- Step 2: Find a Wolf in the Right Biome
- Step 3: Approach the Wolf Carefully
- Step 4: Put the Bones in Your Hand
- Step 5: Feed the Wolf Bones Until It Is Tamed
- Step 6: Watch for Hearts and the Collar
- Step 7: Make Your Dog Sit or Stand
- Step 8: Heal Your Dog with Meat
- Step 9: Protect It with Smart Gear and Safe Travel
- Step 10: Build a Pack by Taming or Breeding More Dogs
- Best Tips for Success in Minecraft PE
- Common Mistakes to Avoid
- Why This Method Works So Well in PE
- Player Experience: What Taming a Dog in Minecraft PE Really Feels Like
- Final Thoughts
If your Minecraft PE house feels a little too quiet, a loyal dog might be the missing ingredient. Sure, a chest room is nice. A diamond pickaxe is lovely. But a furry blocky bodyguard that follows you into caves, stares at skeletons like they owe rent, and looks adorable sitting by your bed? That is elite survival energy.
In Minecraft PE, which now falls under Bedrock Edition on mobile, you do not technically tame a “dog” in the wild. You tame a wolf, and once it becomes your pet, it behaves like the game’s version of a dog. The good news is that the process is simple. The bad news is that wolves do not accept belly rubs as payment. They want bones. Several bones. Possibly enough bones to make you question your skeleton-fighting career choices.
This guide walks you through 10 clear steps to tame a dog in Minecraft PE, plus tips on healing, protecting, breeding, and traveling with your new best friend. Whether you are playing in Survival mode for the first time or building an army of canine chaos, this guide will help you do it right.
Why Tame a Dog in Minecraft PE?
A tamed dog in Minecraft PE is not just decoration with a tail. It can follow you on adventures, help fight hostile mobs, and make your base feel more alive. Dogs are especially useful against skeletons, and they can also join combat when you attack a mob. In plain English: they are cute, helpful, and slightly dramatic. A perfect combination.
They are also great for players who want more personality in their world. A wolf sitting outside your cabin, beside your campfire, or near your farm instantly makes your build feel less like a storage warehouse and more like an actual home.
What You Need Before You Start
- Bones the main item used to tame a wolf
- A little patience one bone may work, but several is safer
- A nearby wolf biome wolves do not wander everywhere
- Optional supplies meat for healing, dye for the collar, and wolf armor for extra protection later
The smartest move is to collect a decent stack of bones first. Nothing is more awkward than finally finding a wolf, offering one sad bone, failing, and then standing there like a disappointed magician who forgot the trick.
How to Tame a Dog in Minecraft PE: 10 Steps
Step 1: Collect Bones from Skeletons
Before you can tame a dog in Minecraft PE, you need bones. The most reliable way to get them is by defeating skeletons. You can find skeletons at night, in dark caves, near mob spawners, or around dungeons. If you already have a mob farm, congratulations your future dog is basically sponsored.
Bring a sword, shield, or bow and clear out a few skeletons before you start looking for wolves. Aim to carry multiple bones, not just one. Taming is not guaranteed on the first try, so showing up with a single bone is like bringing one potato chip to a barbecue.
Step 2: Find a Wolf in the Right Biome
Once you have bones, it is time to find a wolf. Wolves spawn in certain Overworld biomes, and modern Bedrock versions include several wolf variants in different regions. Depending on your world, you may find wolves in areas like taiga, forest, grove, snowy taiga, old growth taiga, wooded badlands, sparse jungle, or savanna plateau.
Do not panic if the wolf looks different from the classic one you remember. Minecraft now includes multiple wolf appearances. The taming process is still the same. Fancy fur, same bone-based business deal.
Step 3: Approach the Wolf Carefully
Walk up to the wolf calmly. Do not hit it. Do not test your sword. Do not “accidentally” tap the attack button. Wild wolves are neutral, but they become hostile if attacked, and nearby wolves may join the argument. That turns your sweet pet hunt into an immediate regret simulator.
If you see a group, pick one wolf and focus on that one. Make sure the area is reasonably safe so you are not being shot by a skeleton while trying to make a new friend. That is terrible timing and worse branding.
Step 4: Put the Bones in Your Hand
On Minecraft PE, move the bones to your hotbar and select them. This is important because the wolf only cares about the item currently in your active slot. If you are holding dirt, your wolf taming plan becomes a landscaping project.
Once the bone is selected, walk close enough to interact with the wolf. On mobile, you will use the on-screen interaction control or tap the wolf while the bone is active.
Step 5: Feed the Wolf Bones Until It Is Tamed
Now the magic happens. Tap the wolf with the bone and keep feeding it until taming succeeds. If it does not work immediately, do not worry. You may see failed taming particles first. Just keep using bones until the wolf accepts your offer of skeletal friendship.
This step is where patience matters. Some wolves tame quickly. Others act like they are negotiating a celebrity contract. Keep going.
Step 6: Watch for Hearts and the Collar
You will know the wolf is tamed when hearts appear above it and a collar appears around its neck. Congratulations your wolf is now your dog. You have officially adopted a combat-ready fluff cube.
The collar is your visual proof that the taming worked. In many cases, the dog will also begin following your commands, sitting or standing depending on your interaction. If you do not see hearts or the collar yet, keep feeding bones.
Step 7: Make Your Dog Sit or Stand
After taming, you can interact with your dog to make it sit or stand. This is one of the most useful control features in Minecraft PE. A sitting dog stays put. A standing dog follows you.
Use sit mode when you want your dog safe at home, near your bed, inside your base, or next to your farm. Use stand mode when you want it to follow you on adventures. This matters more than many players realize. If your dog is standing while you sprint into danger, it may follow you straight into lava, a ravine, or the world’s least successful cave expedition.
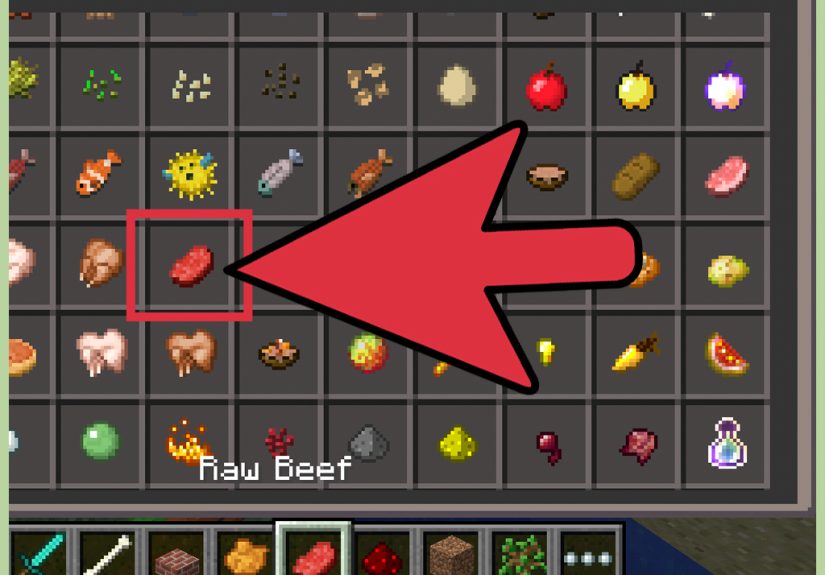
Step 8: Heal Your Dog with Meat
Your dog can take damage, especially in combat. To heal it, feed it meat. This is one of the simplest but most important parts of pet care in Minecraft PE. If your dog has been fighting mobs, top off its health before the next battle.
A handy visual clue is the tail. A healthier dog usually holds its tail higher, while a hurt dog’s tail droops lower. If your loyal companion looks less “ready for adventure” and more “I need a snack and a nap,” feed it.
Step 9: Protect It with Smart Gear and Safe Travel
If you are playing a recent Bedrock version, wolf armor is one of the best upgrades you can give your pet. You can craft it from armadillo scutes and equip it to an adult tamed wolf. This makes your dog much better suited for combat and exploration.
Even with armor, use common sense. Avoid leading your dog into lava lakes, exploding creeper crowds, or cliffs that look like they were designed by chaos itself. Dogs are brave. They are not always wise.
Also remember that a standing dog can teleport to you if it gets too far behind, which is useful for travel. Still, teleporting does not mean invincible. Keep routes safe and avoid risky jumps.
Step 10: Build a Pack by Taming or Breeding More Dogs
One dog is charming. Two dogs are better. A full pack? That is a moving security team with opinions.
You can tame multiple wolves if you have enough bones. You can also breed healthy tamed wolves using meat. This is a great way to build a dog family around your base or create a larger battle pack for nighttime runs. If you enjoy decorating and organizing, you can dye collars to tell your dogs apart more easily.
At this point, you are no longer just surviving. You are running a pixelated canine operation.
Best Tips for Success in Minecraft PE
Bring More Bones Than You Think You Need
This is the number one rule. Players often fail not because the method is hard, but because they underestimate how many bones a wolf may need. Extra bones save time, frustration, and dramatic speeches in the middle of the forest.
Keep Your First Dog at Home Sometimes
New players often get excited and immediately drag their first dog into caves, ravines, and mob fights. That is understandable. It is also how many first dogs meet a tragic lava-based ending. Let your first one guard the base while you learn the rhythm of pet management.
Use Collar Colors for Organization
If you tame several dogs, dyeing collars makes management much easier. Give one color to adventure dogs, another to home-base dogs, and another to breeding pairs. Suddenly you are not just surviving you are running a very organized dog department.
Do Not Leave Them Standing Everywhere
If a dog is not actively traveling with you, make it sit. Sitting dogs are easier to protect and less likely to wander into trouble. A sitting dog by the fireplace is cozy. A standing dog near a cliff is a future sad story.
Common Mistakes to Avoid
- Trying to tame a wolf without enough bones
- Accidentally attacking the wolf or its pack
- Forgetting to heal your dog after combat
- Taking an unarmored dog into dangerous battles
- Leaving your dog standing when it should be sitting safely at home
Why This Method Works So Well in PE
Minecraft PE is perfect for quick taming sessions because the process is direct and mobile-friendly. Once you have bones and find a wolf, the entire taming sequence takes only a few moments. It is one of the most rewarding early-to-mid game activities because it gives you both utility and personality at the same time.
Unlike some survival upgrades that feel purely mechanical, taming a dog changes the mood of your world. It adds companionship. It adds defense. It adds that lovely little moment when you come home after mining and your dog is still sitting there like, “You brought back cobblestone again? Amazing. Visionary. Bold.”
Player Experience: What Taming a Dog in Minecraft PE Really Feels Like
The first time you tame a dog in Minecraft PE, it usually feels less like following a tutorial and more like stumbling into one of the most unexpectedly wholesome moments in the game. You start with a practical goal. You want help against skeletons. You want a companion in the woods. You want to stop feeling like your survival world is just a series of dark tunnels, half-finished farms, and panic-built dirt towers. Then you feed a wolf a few bones, the hearts pop up, and suddenly this blocky animal is yours. Not in a weird villain way. In a “we are now a team” way.
That shift changes how you play. You move differently when a dog is following you. You become more careful near lava. You look twice before charging into a group of mobs. You stop making reckless jumps into ravines like an overconfident action hero and start acting more like a responsible expedition leader. It is funny, because Minecraft does not force that emotional connection. The game just gives the dog a collar, some loyal behavior, and a tendency to stay near you. Your brain does the rest.
There is also a strange level of pride involved. You will probably build a little dog area near your house. Maybe it starts as a fenced corner. Maybe it becomes a full doghouse with lanterns, carpet, trapdoors, and an absurd level of architectural effort for a creature that would probably be just as happy sitting on bare planks. But that is the point. Taming a dog in Minecraft PE often pushes players to add more life to their world. One pet becomes one kennel. One kennel becomes a better yard. A better yard becomes a nicer base. Suddenly your whole survival world levels up because you wanted your digital dog to have a respectable place to nap.
Adventure feels different too. Traveling with a dog creates a kind of soft chaos that many players end up loving. Sometimes the dog teleports to you at the perfect moment and saves you from a skeleton. Sometimes it launches itself into a fight you barely noticed and turns a routine path through the forest into a cinematic woodland ambush. Sometimes it does something incredibly brave. Sometimes it stares at a wall with the energy of a philosopher who has seen too much. Both experiences are valid.
For mobile players, the experience is even more personal because Minecraft PE tends to be played in shorter sessions. You hop in for ten minutes, harvest some wheat, sort a chest, and then your dog is there, still sitting where you left it, still making the world feel familiar. That small consistency matters. In a game full of creepers, caves, storms, and accidental disasters, a loyal dog becomes a tiny anchor point. It is one of the reasons taming a wolf remains one of the most beloved things players can do in Minecraft on mobile.
And yes, there is heartbreak too. Every longtime player eventually learns the lesson that dogs are loyal enough to follow you into situations they absolutely should not. That is why experienced players get so serious about sitting commands, healing food, and wolf armor. Once you have had a brave little dog leap toward a creeper at exactly the wrong moment, you never forget it. Minecraft PE may be made of blocks, but it is very good at turning simple mechanics into real attachment.
That is the magic of the whole thing. Taming a dog in Minecraft PE is mechanically easy, but emotionally bigger than it has any right to be. It starts as a survival upgrade and ends as one of the reasons your world feels like your world.
Final Thoughts
If you want a loyal companion, extra combat support, and a lot more charm in your world, learning how to tame a dog in Minecraft PE is absolutely worth it. The process is simple: gather bones, find a wolf, feed it until hearts and a collar appear, and then take care of your new pet like the blocky legend it is.
From there, you can heal it, armor it, breed more dogs, and build the kind of base that feels alive instead of merely functional. In other words, you are not just taming a mob. You are upgrading your entire Minecraft experience, one wagging square tail at a time.
![18 Best Types of Charts and Graphs for Data Visualization [+ How to Choose]](https://corkopencoffee.org/wp-content/uploads/2026/05/18-best-types-of-charts-and-graphs-for-data-visualization-how-to-choose-qKM1PBYG-thumb.jpg)


