Table of Contents >> Show >> Hide
- First: What This DIY Isand What It Is Not
- Safety Rules Before You Start
- Tools and Materials You’ll Need
- Step-by-Step: How to Turn a Fire Extinguisher Into a Decorative Fireplace DIY
- Step 1: Confirm the Extinguisher Is Safe to Use
- Step 2: Clean the Metal Surface
- Step 3: Decide on the Fireplace Style
- Option A: The No-Cut Mantel Display
- Option B: The Vertical Lantern Look
- Option C: The Faux Firebox Insert
- Step 4: Prime and Paint
- Step 5: Build the Decorative Flame Base
- Step 6: Attach or Style the Extinguisher Shell
- Step 7: Add Finishing Details
- Design Ideas for Different Home Styles
- Common Mistakes to Avoid
- Where to Display Your Decorative Fire Extinguisher Fireplace
- Budget Breakdown
- Real-Life Experience: What This DIY Teaches You
- Conclusion
Some DIY projects begin with a Pinterest board. Others begin with a strange object in the garage and the dangerous sentence, “I bet I can make something cool out of that.” If you have an old fire extinguisher and a love for industrial-style home decor, you may be wondering how to turn a fire extinguisher into a decorative fireplace DIY without accidentally creating a scene that requires an actual fire extinguisher.
Good news: yes, a retired extinguisher shell can become a quirky, conversation-starting decorative fireplace accent. Better news: this project should be purely decorative, flameless, and safe. We are not making a working heater, burner, torch, bioethanol insert, or secret villain device. We are transforming an empty, professionally safe-to-handle extinguisher body into a faux fireplace display using LED lights, metal paint, faux logs, glass pebbles, and a little design courage.
This guide walks you through planning, materials, safety checks, styling ideas, and real-world tips so your finished piece looks cozy, clever, and intentionalnot like you lost a fight with a hardware aisle.
First: What This DIY Isand What It Is Not
A decorative fire extinguisher fireplace is a small upcycled decor project that uses an empty extinguisher shell as the base or visual centerpiece for a faux flame display. Depending on the look you want, it can become a tabletop mini fireplace, a mantel accent, a faux hearth insert, or an industrial-style lantern.
This project is safe when it is:
- Made from an empty, depressurized extinguisher shell
- Used only with battery-operated LED candles or low-heat LED flame lights
- Kept away from real flames, heat sources, and combustible materials
- Built as decor, not as emergency equipment
This project is not safe if it involves:
- Cutting, drilling, or grinding a pressurized cylinder
- Burning fuel, alcohol, gel, wood, paper, or wax inside the extinguisher
- Using it as a real fireplace, heater, torch, or fire pit
- Keeping the extinguisher where someone might mistake it for working safety equipment
That last point matters. A decorative extinguisher should never replace a real, accessible fire extinguisher. In fact, keep a working extinguisher nearby in your home, especially if you enjoy DIY projects that involve power tools, paint, wiring, or the occasional “oops.”
Safety Rules Before You Start
Before the fun partpaint, lights, and dramatic “after” photoscomes the responsible part. Fire extinguishers are pressurized containers. Even an old one can be dangerous if it still has pressure or chemical residue inside. Treat it with respect, not like an empty soda can wearing a red outfit.
Use Only an Empty, Depressurized Shell
Check the pressure gauge. If the needle is in the green, the extinguisher may still be charged. If it is in the red or yellow, that does not automatically mean it is safe to cut, open, or alter. The safest approach is to have the extinguisher inspected, emptied, and depressurized by a certified fire equipment service company or your local hazardous waste program.
If the extinguisher is corroded, dented, swollen, leaking, or missing parts, do not use it for a craft project. Recycle or dispose of it according to local rules instead. No home decor item is worth a trip to urgent care.
Do Not Cut Into a Pressurized Extinguisher
This deserves its own spotlight. Do not saw, drill, puncture, grind, or heat a fire extinguisher until you are certain it is empty, depressurized, and safe to modify. If you are not experienced with metalwork, skip cutting altogether and design the fireplace effect around the exterior shell.
The easiest and safest version of this DIY does not require cutting the cylinder. Instead, you mount or style the extinguisher shell horizontally or vertically and add flameless lighting around it, under it, or in a separate attached display tray.
Use Flameless Light Only
Real candles are charming until they meet curtains, pets, children, or a distracted adult who thought, “I’ll only be gone for a second.” For this project, use LED flame bulbs, battery tea lights, LED strip lights, or flickering flameless candles. Choose products listed for indoor use, inspect cords if using plug-in lights, and avoid covering LEDs with materials that trap heat.
Tools and Materials You’ll Need
The exact supply list depends on your design, but this beginner-friendly version creates a decorative mini fireplace display using the extinguisher as a sculptural frame and a faux flame tray as the “firebox.”
Basic Materials
- One empty, depressurized fire extinguisher shell
- Metal primer
- Spray paint or brush-on enamel suitable for metal
- Fine-grit sandpaper or sanding sponge
- Degreasing cleaner or mild soap and water
- Painter’s tape
- Small wood board, metal tray, or heat-safe decorative base
- Battery-operated LED candles, LED flame lights, or faux ember lights
- Faux logs, lava rocks, glass pebbles, or ceramic stones
- Felt pads for the bottom
- Optional: metal brackets, strong craft adhesive, screws, decorative handles, stencils, or vinyl lettering
Helpful Tools
- Work gloves
- Safety glasses
- Drop cloth
- Screwdriver
- Soft cloth or tack cloth
- Paint mask or respirator for spray painting
If you plan to remove labels, handles, hoses, or brackets, work slowly. Some vintage extinguishers may have collectible value, and some parts can be sharp or brittle. Also, old paint may contain substances you do not want to sand aggressively. When in doubt, clean lightly, prime properly, and leave mystery coatings alone.
Step-by-Step: How to Turn a Fire Extinguisher Into a Decorative Fireplace DIY
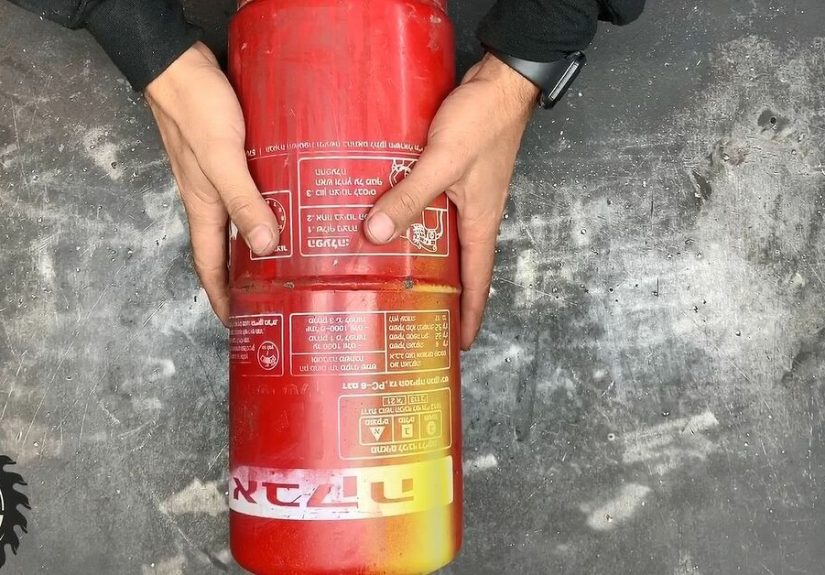
Step 1: Confirm the Extinguisher Is Safe to Use
Start with the boring-but-vital checkpoint. Confirm the extinguisher is empty and depressurized. Ideally, have a fire equipment professional remove the valve and make the shell safe for craft use. If your local regulations require the extinguisher to go through a household hazardous waste facility, follow that process first.
Once the shell is safe, decide whether you want to preserve the classic red look or give it a total makeover. Red creates a playful industrial vibe. Matte black feels modern. Antique brass gives speakeasy energy. Cream or sage green can make it surprisingly cottage-friendly, like your extinguisher went to design school and learned manners.
Step 2: Clean the Metal Surface
Paint sticks best to clean metal. Wipe the extinguisher with a degreasing cleaner or mild soap and water, then dry it completely. Remove dust, loose rust, flaking paint, grease, and grime. If the surface is glossy, lightly scuff it with fine-grit sandpaper so primer can grip.
Do not oversand old unknown coatings. If the finish is questionable, use a bonding primer designed for metal and follow the product label. Good prep is not glamorous, but it is the difference between a chic fireplace accent and paint that peels like a sunburn.
Step 3: Decide on the Fireplace Style
There are several ways to design the piece. Choose the one that fits your tools, confidence level, and room style.
Option A: The No-Cut Mantel Display
Place the extinguisher shell horizontally on a decorative base, secure it with brackets or a custom cradle, and arrange LED candles, faux logs, and glass pebbles in front of it. This gives the illusion of a miniature industrial fireplace without altering the cylinder.
Option B: The Vertical Lantern Look
Keep the extinguisher upright and style it like a lantern beside a faux flame tray. Add LED lights around the base, attach a decorative metal handle, and paint the shell in a finish that matches your room. This works well on a covered porch, entry console, or fireplace mantel.
Option C: The Faux Firebox Insert
Build a small rectangular base or shadow-box style frame, then mount the extinguisher shell as a decorative “chimney” or side feature. Place LED flame lights inside the box with faux logs. This is more of a mini fireplace sculpture and looks great in industrial, rustic, or eclectic interiors.
Step 4: Prime and Paint
Move to a well-ventilated area and protect the ground with a drop cloth. Tape off any parts you want to preserve, such as the original badge, gauge, or handle. Apply a metal primer in thin, even coats. Let it dry according to the product instructions.
Then apply your topcoat. Several light coats are better than one heavy coat. Heavy spray paint tends to drip, and drip marks on a cylinder are very visible. Rotate the extinguisher as you paint so the finish stays even. Let the paint cure fully before handling or attaching decor.
Step 5: Build the Decorative Flame Base
Choose a sturdy tray, wood plank, or metal base. If you use wood, keep the project flameless and low-heat. Paint or stain the base, then arrange faux logs, lava rocks, river stones, or glass pebbles. Tuck battery-operated LED lights among the materials so the glow looks natural.
For a fireplace effect, use warm white or amber flickering LEDs. For a modern look, try a hidden LED strip under frosted glass pebbles. Avoid cheap lights that become hot, have damaged battery compartments, or use frayed cords. Cozy should not smell like melting plastic.
Step 6: Attach or Style the Extinguisher Shell
Now position the extinguisher shell. For a horizontal display, use small brackets, a cradle, or adhesive bumpers to prevent rolling. For a vertical design, add felt pads or a weighted base so it cannot tip. If children or pets live in the home, secure the piece more firmly or display it out of reach.
Make sure the extinguisher is clearly decorative. You can remove the hose, add a label that says “Faux Flame,” paint it a non-emergency color, or place it where no one would search for safety equipment during an emergency.
Step 7: Add Finishing Details
This is where the project develops personality. Add brass numbers, stencil “Firehouse No. 7,” apply a matte black finish, or keep the original patina for vintage charm. A small plaque can make the piece feel intentional, especially if the extinguisher came from an old workshop, family garage, or historic building.
You can also add seasonal styling. In fall, surround the base with mini pumpkins and dried leaves. In winter, add pinecones, faux snow, and warm LEDs. In spring, swap in moss and pale stones. In summer, go minimal with clear glass pebbles and a soft amber glow.
Design Ideas for Different Home Styles
Industrial Loft
Use matte black or gunmetal paint, leave some hardware exposed, and pair the extinguisher with concrete-look tiles, black metal brackets, and amber LED flame bulbs. This style looks intentional, urban, and just dramatic enough to make guests ask questions.
Vintage Firehouse
Keep the red paint, polish the metal accents, and add old-style lettering. Use faux logs and warm flickering candles. This version works beautifully in a den, game room, bar area, or garage lounge.
Modern Minimalist
Paint the shell satin white, charcoal, or soft beige. Use a simple rectangular base, clear glass stones, and hidden LED strip lighting. The result feels less “rescued from a workshop” and more “expensive boutique object with a mysterious past.”
Rustic Cabin
Pair the extinguisher with reclaimed wood, faux birch logs, and warm LED candles. A distressed finish can work well here, but distress with restraint. There is a fine line between charmingly aged and “fell off a truck in 1986.”
Common Mistakes to Avoid
Using a Real Flame
Do not put a real candle, fuel cup, alcohol burner, or gel flame inside or near the extinguisher shell. The project is decorative. Flameless lighting gives the glow without the risk.
Skipping Metal Prep
If you paint over grease, dust, or loose rust, the finish will fail. Clean, scuff, prime, and paint patiently. The best DIY results usually come from doing the “invisible” steps well.
Making It Look Like Working Safety Gear
A decorative extinguisher should not be confused with a functional one. Paint it, label it, or display it in a way that clearly separates it from emergency equipment. Also, keep a real extinguisher in the kitchen, garage, or workshop according to your home safety needs.
Overdecorating the Base
Too many rocks, logs, lights, ribbons, signs, and tiny woodland creatures can make the project look cluttered. Choose one main visual idea: industrial, vintage, rustic, modern, or seasonal. Then edit ruthlessly. Your decorative fireplace does not need to become a craft store parade float.
Where to Display Your Decorative Fire Extinguisher Fireplace
This piece works best where people can see it up close. Try it on a mantel, bookshelf, entry table, covered patio console, workshop shelf, man cave bar, or media cabinet. Avoid placing it near heat, real fireplaces, stoves, radiators, or direct sunlight that can damage paint and batteries.
If you display it in a rental property, Airbnb, office, or public-facing space, be extra careful. Guests may assume it is functional safety equipment. In those settings, it is better to choose a clearly altered design and keep real, code-compliant extinguishers properly mounted and visible.
Budget Breakdown
If you already have a safe empty extinguisher shell, this DIY can be affordable. Expect to spend around $20 to $75 depending on the finish and lighting. Metal primer and paint may cost $10 to $25. LED candles or faux flame lights range from $8 to $30. A base, stones, faux logs, and hardware can add another $10 to $30.
The biggest cost should be safety. If you need professional help to empty, inspect, or prepare the extinguisher shell, consider that part of the project budget. Saving money is great; gambling with a pressurized metal cylinder is not the kind of couponing anyone recommends.
Real-Life Experience: What This DIY Teaches You
The first thing you learn while turning a fire extinguisher into a decorative fireplace DIY is that objects carry stories. A fire extinguisher is not just a red cylinder. It may have sat in a garage for years, hung in a workshop, lived behind a kitchen door, or guarded a building long after everyone forgot it was there. Repurposing it gives it a second life, but that second life should begin with respect for what it was designed to do.
From experience, the no-cut version is the smartest approach for most homeowners. It is safer, faster, and easier to style. You can achieve the fireplace illusion with a glowing base, faux logs, and clever positioning without opening the cylinder. The extinguisher becomes the character piece, while the LED flame tray does the cozy visual work. This also means you can finish the project in a weekend instead of spending three days wondering whether you should have taken up knitting instead.
Another lesson is that paint changes everything. A red extinguisher reads as bold and nostalgic. Black makes it sleek. Brass or copper spray paint can make it feel vintage and expensive. White or cream softens the whole object and helps it blend into modern interiors. If your room already has metal accents, match the finish to those details. A little coordination makes the piece look designed rather than randomly rescued.
Lighting is the soul of the project. Cheap cool-white LEDs can make the display look like a convenience store refrigerator. Warm amber flickering lights create the fireplace mood. Layering also helps: place one brighter LED source behind faux logs and a few smaller tea lights lower in the stones. The effect feels deeper and more realistic, especially at night.
One practical tip: hide the battery packs before you take photos or place the piece on display. Nothing ruins the magic faster than a visible plastic battery box dangling out the back like the project’s tail. Use adhesive cable clips, a small wood channel, or a removable panel to keep everything tidy while still allowing access for battery changes.
Finally, this DIY is a reminder that upcycling works best when creativity and safety shake hands. The goal is not to prove you can turn anything into anything. The goal is to create something attractive, useful, and safe enough to enjoy every day. When finished thoughtfully, a decorative fire extinguisher fireplace becomes more than a quirky object. It becomes a small glowing joke with good manners: a former fire-fighter now pretending to be the fire.
Conclusion
Learning how to turn a fire extinguisher into a decorative fireplace DIY is all about balance. You want the charm of upcycled decor, the warmth of a fireplace look, and the satisfaction of making something unusual with your own hands. But safety has to lead the project from start to finish. Use only an empty, depressurized shell, avoid real flames, rely on LED lighting, and make sure the finished piece is never confused with working emergency equipment.
With smart prep, the right paint, a sturdy base, and warm flameless lights, an old extinguisher can become a stylish industrial accent, a vintage firehouse-inspired display, or a playful mini fireplace that adds personality to your home. It is proof that good DIY does not always mean buying new materials. Sometimes the best decor starts with an object that has already had one very serious careerand is finally ready to relax.


