Table of Contents >> Show >> Hide
- Why Drill Safety Matters for Beginners
- Know Your Drill Before You Pull the Trigger
- Wear the Right Protective Gear
- Inspect the Drill Before Every Use
- Choose the Right Drill Bit for the Job
- Secure the Material Before Drilling
- Check What Is Behind the Surface
- Use the Correct Speed and Pressure
- Keep Both Hands in Control
- Drilling Pilot Holes Makes Work Safer and Cleaner
- Battery and Cord Safety
- Common Beginner Mistakes to Avoid
- How to Drill Safely: A Beginner Step-by-Step Example
- Cleaning and Storing Your Drill
- When Beginners Should Ask for Help
- Extra Experience: Practical Drill Safety Lessons Beginners Learn Fast
- Conclusion
A drill is one of the most useful tools a beginner can own. It can hang shelves, assemble furniture, install curtain rods, repair loose hinges, and make you feel like the official mayor of “I can fix that.” But because a drill spins fast, creates dust, grabs material, and can surprise you with torque, it deserves respect before it deserves confidence.
The good news? Learning how to use a drill safely is not complicated. Most accidents happen when people skip the boring steps: wearing eye protection, checking the bit, clamping the workpiece, reading the manual, or looking behind a wall before drilling. In other words, safety is not about being scared of the tool. It is about creating habits so the tool does exactly what you want without drama, flying chips, or a sudden “why is there water coming out of my wall?” moment.
This beginner-friendly guide explains drill safety tips, personal protective equipment, setup steps, common mistakes, and real-world habits that make drilling safer, cleaner, and more accurate.
Why Drill Safety Matters for Beginners
Power drills look simple: hold the handle, pull the trigger, make a hole. But a drill combines rotation, pressure, electricity or battery power, sharp bits, dust, and sometimes hidden hazards behind the surface. That means even a small project can go sideways if you rush.
Beginners often make the same mistake: they focus only on the hole. Experienced DIYers focus on the entire situation. What material am I drilling? Is the bit sharp? Is the workpiece clamped? Are my eyes protected? Is there wiring behind this wall? Is my sleeve about to become best friends with the chuck? That wider view is what keeps a simple task simple.
Know Your Drill Before You Pull the Trigger
Before using a drill, learn the basic parts. The chuck holds the bit. The trigger controls speed. The forward/reverse switch changes rotation direction. The clutch helps control torque when driving screws. Some drills include a hammer mode for masonry, while others have speed settings for delicate or heavy work.
Beginners should start by reading the owner’s manual. Yes, the manual may not win a Pulitzer Prize, but it tells you the tool’s limits, correct battery use, recommended accessories, and safety warnings. Every drill model is a little different, especially when it comes to torque, chuck style, and speed controls.
Wear the Right Protective Gear
Eye Protection Is Non-Negotiable
Safety glasses or goggles should be worn every time you drill. Drill bits can snap, wood can splinter, metal shavings can fly, and masonry dust can drift into your eyes. Regular eyeglasses are not the same as safety glasses because they are not designed to protect from side impact or debris.
Use Hearing Protection When Needed
A cordless drill in soft wood may not be very loud, but drilling into masonry, metal, or using hammer mode can create enough noise to bother your ears. If the tool is loud enough that you need to raise your voice to talk to someone nearby, use earplugs or earmuffs.
Protect Your Lungs From Dust
Drilling drywall, concrete, brick, tile, or treated material can create fine dust. A dust mask or respirator helps reduce what you breathe in. Work in a ventilated area when possible, and clean up dust with a vacuum rather than blowing it around like confetti at a very unhealthy parade.
Dress Like the Drill Is Not Your Fashion Consultant
Avoid loose sleeves, dangling hoodie strings, necklaces, bracelets, and loose hair near the spinning chuck. Anything that hangs can get caught. Wear snug clothing, tie back long hair, and remove jewelry before starting.
Inspect the Drill Before Every Use
A quick inspection can prevent a painful surprise. Look for cracks in the housing, a damaged chuck, strange battery swelling, frayed cords, loose parts, or unusual smells. If the drill has a cord, make sure the cord is not cut, crushed, or missing grounding protection where required.
Check the trigger and forward/reverse selector before placing the bit on the work. For cordless drills, remove or lock the battery when carrying the tool, changing bits, or storing it. A drill that starts accidentally can scare you at best and injure you at worst.
Choose the Right Drill Bit for the Job
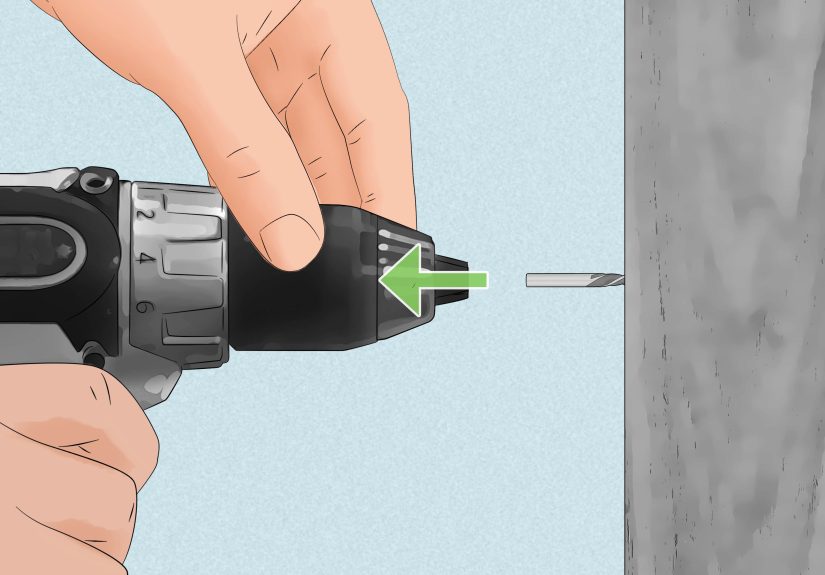
Drill safety starts with the right bit. Wood bits are designed for wood. Masonry bits are designed for brick, concrete, and stone. Metal bits are designed to cut metal without dulling immediately. A mismatched bit can wander, overheat, jam, break, or make a hole that looks like it was designed by a raccoon with a deadline.
Make sure the bit fits securely in the chuck and is centered. A crooked bit wobbles, increases friction, and makes the drill harder to control. Tighten the chuck firmly by hand or with the correct chuck key if your drill uses one. Never try to adjust the chuck while the drill is connected to power or while your finger is near the trigger.
Secure the Material Before Drilling
One of the best beginner drill safety tips is simple: do not hold small pieces of material in your hand while drilling. Clamp the workpiece to a stable surface or secure it in a vise. If the bit catches, the material can spin suddenly, which can hurt your hand and ruin the project.
When drilling through wood, place a scrap board underneath to support the back side. This reduces tear-out and helps protect your workbench. For round objects, use a vise or blocks to prevent rolling. Stable material gives you better control and cleaner results.
Check What Is Behind the Surface
Before drilling into a wall, stop and investigate. Walls can hide electrical wires, plumbing pipes, gas lines, ductwork, and studs. Use a stud finder with wire-detection features when appropriate, and avoid drilling directly above, below, or beside outlets and switches unless you understand the wall layout.
If you are unsure what is behind the wall, do not guess. A small hole in the wrong place can become an expensive repair. For plumbing, electrical, or structural work, ask a qualified adult, contractor, or electrician. Confidence is wonderful; drilling into a live wire is not.
Use the Correct Speed and Pressure
Beginners often press too hard. A drill is not a medieval battering ram. Let the bit cut. Start slowly so the bit does not skate across the surface, then increase speed once it begins to bite. Use steady, moderate pressure and keep the drill aligned with the hole.
For metal, slower speeds are often better, and the bit may need lubrication to reduce heat. For wood, a sharp bit and steady pressure usually work well. For masonry, use the correct masonry bit and hammer mode only if the drill is designed for it. If the drill stalls, stop immediately, release the trigger, and find out why the bit is stuck.
Keep Both Hands in Control
Hold the drill firmly. If the drill has an auxiliary handle, use it for tasks that require extra force, such as masonry drilling or large holes. Keep your feet planted and avoid leaning too far. Overreaching reduces balance and makes it harder to react if the bit catches.
Keep your finger off the trigger until the bit is positioned and you are ready to start. This small habit prevents accidental starts. It also makes you look like someone who knows what they are doing, which is a pleasant side effect.
Drilling Pilot Holes Makes Work Safer and Cleaner
A pilot hole is a smaller hole drilled before driving a screw or drilling a larger hole. It helps prevent wood from splitting, keeps screws straight, and reduces the force needed. For beginners, pilot holes are like training wheels that professional woodworkers still use because they are smart, not because they are shy.
To drill a pilot hole, mark the spot, choose a smaller bit, hold the drill perpendicular to the surface, start slowly, and drill only as deep as needed. A piece of painter’s tape on the bit can act as a simple depth guide.
Battery and Cord Safety
For cordless drills, use the battery and charger recommended by the manufacturer. Do not use cracked, leaking, swollen, or overheated batteries. Store batteries away from extreme heat and keep them away from loose metal objects that could contact the terminals.
For corded drills, keep the cord away from the bit and the cutting area. Use outdoor-rated extension cords for outdoor work and avoid wet conditions unless the tool and setup are specifically rated for that environment. Never carry a drill by its cord, and never yank the cord from the outlet.
Common Beginner Mistakes to Avoid
Using Dull Bits
Dull bits create heat, require more pressure, and increase the chance of slipping. Replace or sharpen bits when they stop cutting cleanly.
Forcing the Drill
If you need to push with all your strength, something is wrong. Check the bit type, speed setting, material, battery charge, and drill mode.
Skipping Clamps
Holding material by hand is risky, especially with small pieces. Clamp first, drill second, celebrate third.
Ignoring Heat
Bits can become hot after drilling. Do not touch the bit immediately after use. Give it time to cool, especially after drilling metal or masonry.
Changing Bits With Power Connected
Disconnect the cord or remove the battery before changing bits, adjusting accessories, cleaning the chuck, or inspecting a jam.
How to Drill Safely: A Beginner Step-by-Step Example
Imagine you want to install a small wall shelf. First, read the shelf instructions and check the weight rating. Next, use a stud finder to locate studs and avoid hidden wires. Mark your drilling points with a pencil. Put on safety glasses. Select the correct bit for the wall anchors or screws. Insert the bit fully into the chuck and tighten it.
Hold the drill straight, start slowly, and drill to the recommended depth. If using wall anchors, insert them according to the package directions. Then switch to a driver bit, set the clutch lower at first, and drive the screws without over-tightening. The goal is secure, not “I have permanently fused this shelf to planet Earth.”
Cleaning and Storing Your Drill
After drilling, remove dust from the tool body and vents with a dry cloth or vacuum. Do not soak the drill or spray cleaners into the motor vents. Remove the bit, store accessories in a case, and keep the drill in a dry place. Store batteries according to the manufacturer’s instructions.
Good storage is part of safety. Loose bits rolling around in a drawer become dull, damaged, and easy to grab the wrong way. A small bit case saves time and protects your fingers.
When Beginners Should Ask for Help
Ask for help when drilling into walls with unknown wiring, drilling near plumbing, working overhead, using large hole saws, drilling masonry for the first time, or using a hammer drill. Younger beginners should work with a knowledgeable adult. There is no shame in asking. The best DIYers are not fearless; they are careful enough to keep learning.
Extra Experience: Practical Drill Safety Lessons Beginners Learn Fast
One of the most useful real-world lessons about drill safety is that preparation feels slow only until something goes wrong. The beginner who spends five minutes finding safety glasses, clamping the board, and checking the bit usually finishes faster than the person who rushes, slips, splits the wood, loses the screw, drops the bit, and then has to explain why the “quick project” now needs a repair project.
Another helpful experience is learning how much control comes from starting slow. Many beginners squeeze the trigger fully because the drill sounds more powerful that way. But full speed at the wrong moment can make a bit wander across tile, metal, or finished wood. A slow start gives the bit time to settle into the mark. Once the bit has a small groove, the drill becomes easier to guide. This is especially important when drilling smooth surfaces.
Beginners also learn that sharp bits are safer than cheap, abused, mystery bits from the bottom of a toolbox. A sharp bit cuts with less pressure. Less pressure means better balance, less heat, and less chance of the drill suddenly lurching forward when the bit breaks through. If a bit squeals, smokes, burns wood, or refuses to cut, stop and check it. The solution is rarely “push harder and hope.”
Clamping is another habit that separates safe drilling from risky drilling. A board may feel stable when you hold it, but when the bit catches, the drill can spin the material faster than your hand can react. A clamp does not get offended, tired, or surprised. It simply holds the work so your hands can stay away from the danger zone.
Wall drilling teaches the biggest lesson: the surface is not the whole story. A clean white wall can hide wires, pipes, studs, insulation, and previous repairs. Before drilling, look for clues. Outlets, switches, sinks, bathrooms, and kitchens all suggest possible wiring or plumbing paths. Use detection tools and common sense, and when the project feels uncertain, get help before making a hole.
Finally, beginners should remember that a drill is most dangerous when the user becomes casual. The hundredth hole still deserves eye protection. The quick screw still deserves a stable stance. The “tiny adjustment” still deserves a removed battery. Safe drilling is not one heroic moment; it is a collection of small habits repeated until they become automatic.
Conclusion
Learning how to use a drill safely is mostly about slowing down before you speed up. Wear eye protection, secure loose clothing and hair, inspect the tool, choose the right bit, clamp your material, check behind walls, and disconnect power before changing accessories. These habits protect your eyes, hands, ears, lungs, project, and wallet.
A drill should make DIY projects easier, not scarier. Start with small practice projects, use light pressure, keep both hands in control, and let the tool do the work. With the right protection tips and a little patience, beginners can drill cleaner holes, drive straighter screws, and build confidence without turning the garage into a blooper reel.


