Table of Contents >> Show >> Hide
- What Is a Screw Extractor, Exactly?
- When You Should Use a Screw Extractor
- Tools and Supplies You’ll Want Nearby
- How to Use a Screw Extractor in 5 Simple Steps
- Common Mistakes That Make Extraction Harder
- Best Situations for Different Extractor Types
- Examples of Real-World Screw Extractor Jobs
- Experience-Based Advice From Common DIY Situations
- Final Thoughts
A stripped or broken screw has a special talent for turning a 10-minute repair into a full-blown emotional event. One minute you are fixing a cabinet hinge, bike part, or door latch. The next minute you are staring at a mangled fastener like it personally insulted your family. That is exactly where a screw extractor earns its keep.
If you have never used one before, do not worry. A screw extractor is not some mysterious pro-only gadget locked behind a secret handshake at the hardware store. It is a practical tool designed to remove damaged, stuck, or broken screws by biting into the metal and backing the fastener out. Used correctly, it can save the material around the screw, reduce frustration, and keep your project moving.
In this expert tool guide, you will learn what a screw extractor does, when to use it, how to choose the right type, and how to remove a stubborn fastener in five simple steps. You will also get troubleshooting tips, common mistakes to avoid, and real-world advice that makes the process much easier for first-time DIYers and seasoned fixers alike.
What Is a Screw Extractor, Exactly?
A screw extractor is a removal tool made to grip a screw after the head is stripped, rounded, broken, or otherwise too damaged for a normal screwdriver bit to grab. Most extractors work by drilling or reaming a small hole into the damaged fastener and then turning an extractor with reverse threads counterclockwise. As it bites into the screw, it creates enough grip to back the screw out.
There are a few common styles:
- Spiral screw extractors: A popular choice for general DIY repairs. They bite aggressively and work well on many common screws and bolts.
- Straight-flute extractors: Often preferred for harder metals because they grip without expanding the fastener as much.
- Double-ended extractor bits: These combine a drilling end and an extractor end in one bit, making them convenient for drill and driver users.
Translation: one tool family, several personalities. Pick the right one, and the job feels smart. Pick the wrong one, and you may spend quality time saying words your toolbox should never hear.
When You Should Use a Screw Extractor
A screw extractor is usually the best option when:
- The screw head is stripped and a regular bit keeps slipping.
- The screw is broken off near or below the surface.
- Pliers cannot grab enough of the screw to twist it out.
- You want to avoid chewing up the surrounding wood, metal, or plastic.
Before you jump straight to an extractor, check whether the screw head is still exposed. If it is sticking up even slightly, locking pliers may be faster. If a rubber band, hand screwdriver, or different bit size still has a fighting chance, try that first. A screw extractor is usually the move when the easy tricks have already failed or when the fastener is too damaged for ordinary methods.
Tools and Supplies You’ll Want Nearby
Using a screw extractor goes more smoothly when you stop halfway through exactly zero times. Gather your gear first:
- Screw extractor set
- Variable-speed drill with reverse
- Drill bits, if your extractor kit does not include them
- Center punch
- Hammer
- Safety glasses
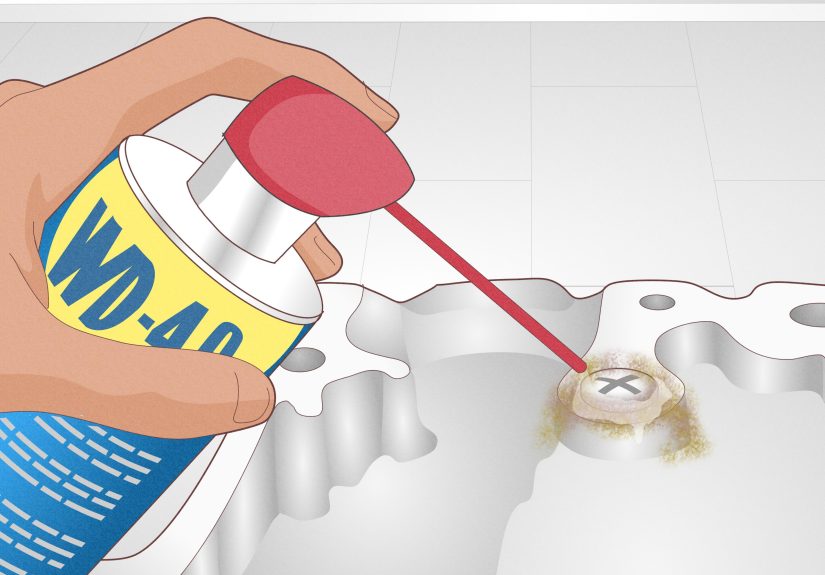
- Penetrating oil for rusted screws
- Cutting oil for drilling into metal, if needed
- Locking pliers for cleanup or backup
If you are working with rusty metal fasteners, penetrating oil can help loosen the threads before extraction. If you are drilling into metal, a little cutting oil helps reduce heat and makes the bit’s job easier. Think of those two liquids as the peacekeepers of the operation.
How to Use a Screw Extractor in 5 Simple Steps
Step 1: Choose the Right Extractor Size
Start by matching the extractor to the size of the damaged screw. Most kits include a size chart, and this part matters more than many people realize. An extractor that is too small may not grip. One that is too large may remove too much metal from the screw head or split surrounding material.
If you are using a double-ended screw extractor, identify which end drills and which end extracts. The drill end creates the starter hole. The extractor end bites and removes. It sounds obvious, but the number of people who confidently use the wrong end first suggests otherwise.
Step 2: Prep the Screw Before Drilling
Put on safety glasses before you do anything else. Drilling into a damaged screw can throw tiny metal fragments, and your eyeballs deserve better working conditions.
Next, use a center punch and hammer to make a small dent in the center of the stripped or broken screw. This gives the drill bit a place to start and helps prevent wandering. If the screw is rusted, add a drop or two of penetrating oil around the threads and let it sit for a few minutes. If you are drilling into metal, a small amount of cutting oil on the screw head can also help.
This prep step is easy to rush, but it is the difference between a clean extraction and a sloppy one. A centered pilot hole gives the extractor a much better chance of biting evenly.
Step 3: Drill a Pilot Hole Slowly and Straight
Install the recommended drill bit and set the drill to a low speed. Hold the drill perpendicular to the screw and drill slowly into the punched center mark. You do not need to tunnel to the Earth’s core here. In most cases, a shallow, centered hole is enough for the extractor to grab.
The goal is control, not drama. Let the bit cut without forcing it. If you push too hard, the bit can walk, overheat, or worsen the damage. If the screw is small, use especially light pressure. Tiny fasteners do not respond well to big-tool energy.
Step 4: Insert the Extractor and Turn Counterclockwise
Now switch to the extractor end. Insert it into the pilot hole and begin turning it counterclockwise. Depending on the extractor style, you may use a drill in reverse or turn it by hand with a tap wrench or small adjustable wrench.
Go slowly. As the extractor bites into the screw, you should feel resistance build. That is good. It means the extractor is engaging. Keep turning counterclockwise with steady pressure. Once the damaged screw breaks free, continue backing it out until you can remove it completely.
If the screw does not budge right away, stop and reassess. Add more penetrating oil, confirm you drilled the correct hole size, and make sure you are keeping the tool straight. This is not the moment to become an action hero.
Step 5: Clean the Hole and Replace the Fastener
Once the screw is out, inspect the surrounding material and the threads. Remove metal filings, dust, and debris. If the hole is damaged, repair it before installing a new screw. In wood, that might mean using a wood filler, plug, or slightly larger screw. In metal, it may mean rethreading or choosing a replacement fastener that matches the application.
And yes, replace the old screw. A fastener that just survived emergency surgery is not usually a top candidate for reuse.
Common Mistakes That Make Extraction Harder
Even a good screw extractor can fail if the setup is sloppy. Here are the biggest mistakes to avoid:
- Skipping the center punch: This often causes the bit to wander off-center.
- Using too much drill speed: Slow speed gives you better control and reduces the risk of further damage.
- Choosing the wrong extractor size: A poor match means poor grip.
- Tilting the drill: A crooked pilot hole makes it harder for the extractor to bite properly.
- Forcing the extractor: Steady pressure beats brute force almost every time.
- Ignoring rust or corrosion: A little penetrant can make a stubborn screw much easier to remove.
Also, do not forget that not every damaged screw calls for the same tool. A spiral extractor may be ideal for one job, while a straight-flute version may be smarter for another. Tool choice is not just hardware-store decoration. It matters.
Best Situations for Different Extractor Types
Double-Ended Extractors
Great for general home repair jobs, furniture hardware, hinges, light-duty metal fasteners, and situations where you want a quick drill-and-extract workflow.
Spiral Extractors
Useful for many stripped screws and bolts where aggressive bite is helpful. These are often what people mean when they say “easy out.”
Straight-Flute Extractors
A smart option when dealing with harder metals or when you want to reduce the risk of expanding the fastener as you remove it.
Examples of Real-World Screw Extractor Jobs
Cabinet hinge repair: A stripped wood screw in a kitchen hinge is one of the most common cases. If the head is chewed up and the hinge plate is in the way, a small extractor bit can remove the screw with less damage than aggressive prying.
Deck hardware: Outdoor screws often rust, seize, or snap after years of weather exposure. Penetrating oil plus a properly sized extractor gives you a cleaner shot at removal than muscling the screw with a worn driver bit.
Automotive trim or brackets: Rusted fasteners love to test your patience. A centered pilot hole, slow drilling, and a little lubricant can save you from enlarging holes or damaging nearby parts.
Flat-pack furniture: Soft hardware strips easily, especially when the wrong bit size is used. Extractors can rescue a project that looked one bad twist away from becoming a pile of emotional plywood.
Experience-Based Advice From Common DIY Situations
One of the biggest lessons people learn with screw extractors is that success usually comes from patience, not power. In real garage, workshop, and around-the-house repairs, the fasteners that fight the hardest are often the ones someone already attacked with the wrong bit, too much speed, or a heroic amount of force. By the time the extractor comes out, the screw is not just stripped. It is offended.
A common experience happens with old door hinges. The screw head looks only mildly damaged, so you try a larger driver bit. Then a rubber band. Then pliers. Then a sigh so dramatic the neighbors could hear it. Once you finally switch to an extractor, the job often becomes easier the moment you slow down. That is the pattern: rushed attempts make the problem worse, while careful setup makes the extractor look smarter than it really is.
Another frequent scenario is outdoor hardware. Deck screws, gate screws, and shed fasteners love moisture, rust, and long-term stubbornness. DIYers often discover that penetrating oil is not a miracle potion, but it is a very helpful wingman. Letting it sit for a few minutes before drilling can make the difference between a screw that backs out cleanly and one that acts like it has signed a long-term lease in your lumber.
Furniture repairs bring a different kind of challenge. The fasteners are usually smaller, the materials are easier to damage, and there is less room for mistakes. In those jobs, a lighter touch matters more than raw torque. People often have the best results when they use a low drill speed, keep the bit perfectly centered, and stop the second something feels off. Tiny screws do not give you much room to freelance.
Then there is the classic workshop lesson: if enough of the screw head is exposed to grab with locking pliers, that may still be the fastest option. Many experienced DIYers learn that a screw extractor is not the first tool for every damaged fastener. It is the right tool when the head is too far gone, too recessed, or too broken for simpler methods. Knowing when not to use the extractor is almost as useful as knowing how.
People also tend to remember the first time they drilled off-center. It usually starts with confidence and ends with a hole that looks like it was created during an earthquake. That experience teaches a valuable habit: always use a center punch, especially on metal. It feels like a tiny step, but it creates a major upgrade in control.
And finally, the most relatable experience of all: getting the screw out and immediately wondering whether to reuse it. The answer is almost always no. A damaged fastener already gave you one headache. There is no prize for inviting it back for a sequel. Replace it with a fresh screw, use the correct bit size, drive it straight, and your future self will be deeply grateful.
Final Thoughts
Learning how to use a screw extractor is one of those small DIY skills that pays off again and again. The tool itself is simple, but the method matters: choose the right size, prep the screw properly, drill slowly, stay centered, and back the fastener out with steady counterclockwise pressure. That is the formula.
Whether you are fixing a cabinet hinge, saving a rusted deck bracket, or rescuing an over-tightened furniture screw, a good extractor can turn a stuck fastener from a project-stopping nuisance into a manageable repair. Use it with patience, match the tool to the job, and you will look far more like a pro than someone who just spent 20 minutes losing an argument to one very small piece of metal.


