Table of Contents >> Show >> Hide
- First, the Wall Switch Isn’t “Just a Switch”
- Before the 14 Steps: Safety and Code Reality (No Scare TacticsJust Facts)
- The 14 Steps (A Safety-First Checklist for Wiring or Replacing a Wall Switch)
- Step 1: Decide whether this is a DIY job or a “call-a-pro” job
- Step 2: Identify what type of switch you have (single-pole vs. multi-location)
- Step 3: Confirm the device rating matches the job
- Step 4: Check whether a neutral is presentand whether your plan depends on it
- Step 5: Understand wire color conventionsthen don’t trust them blindly
- Step 6: Know what safety protection your circuit may require (AFCI/GFCI)
- Step 7: Gather the right “verification” tools, not just the right screwdriver
- Step 8: De-energize the circuit at the service panelthen prevent accidental re-energizing
- Step 9: Verify the power is off (and verify your tester works)
- Step 10: Document what you found before changing anything
- Step 11: Inspect the box and wiring condition like a detective
- Step 12: Confirm grounding and bonding are present and continuous
- Step 13: Follow manufacturer instructions and local code for the device you chose
- Step 14: Re-check operation and safety after reassemblyand watch for symptoms
- Common “Stop Now” Moments (Your Future Self Will Thank You)
- Quick FAQ (Because Everyone Asks These)
- Real-World Experiences (Extra Notes From People Who’ve Been There)
- Conclusion
Wiring a wall switch sounds like the kind of “easy adulting” task that should come with a free sticker: I did a thing!
And sometimes it is simpleuntil it’s not. Electrical work can cause shock, fire, and damage fast, and the risks jump way up if you’re not trained,
you’re working in an older home, or you’re guessing what wires do based on color alone.
So here’s what this guide is: a smart, safety-first, code-aware walkthrough of the 14 steps professionals use to plan, verify,
and finish a wall switch job correctlywithout giving you “twist this wire to that screw” instructions that could put you in danger.
If you’re not licensed/trained (or you’re under 18), treat this as a learning guide and a checklist to use with a qualified adult or electrician.
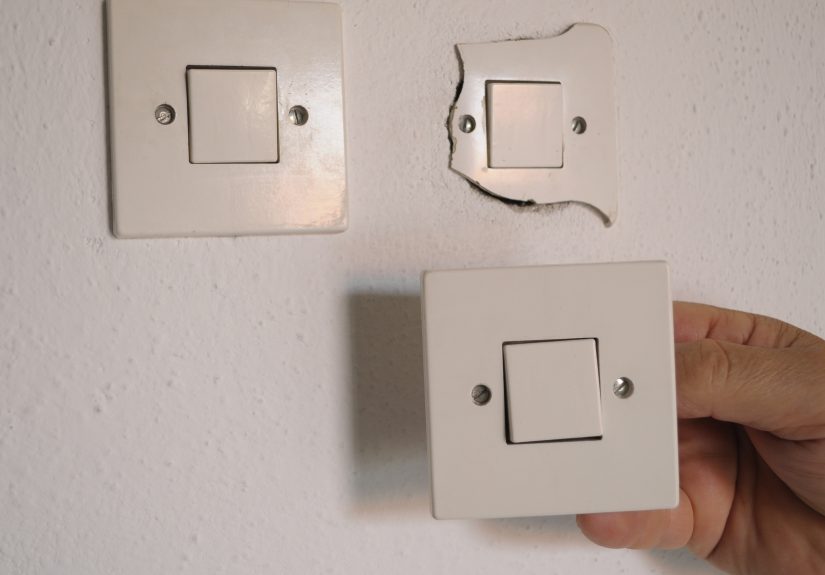
First, the Wall Switch Isn’t “Just a Switch”
A standard wall switch is usually controlling a lighting load by interrupting the hot conductorbasically opening and closing a circuit path.
That sounds simple, but the switch box can contain surprises: shared circuits, multi-location switching, older wiring methods, crowded boxes, or
smart devices that need a neutral connection even when the light is “off.”
Common switch types you’ll run into
- Single-pole: One switch controls one light from one location (the everyday classic).
- Three-way: Two switches control the same light from two locations (hallway/stairs vibes).
- Four-way: Three or more switches control the same light (because architects love cardio).
- Dimmer: Controls brightness; compatibility depends on bulb type and load.
- Smart switch: Adds Wi-Fi/automation; many require a neutral and proper grounding.
Before the 14 Steps: Safety and Code Reality (No Scare TacticsJust Facts)
Electrical safety is about removing uncertainty. The safest electricians aren’t fearlessthey’re methodical.
They shut off power, verify it’s actually off, and only proceed when conditions are controlled.
Also: the National Electrical Code (NEC) provides widely adopted standards, but local rules can be stricter.
Permits, inspection requirements, AFCI/GFCI protection rules, and device requirements vary by jurisdiction and home age.
The 14 Steps (A Safety-First Checklist for Wiring or Replacing a Wall Switch)
Think of these as the “professional workflow” stepsplanning, verification, identification, and quality checks.
If any step feels unclear, that’s your cue to pause and bring in a licensed electrician.
-
Step 1: Decide whether this is a DIY job or a “call-a-pro” job
Call a licensed electrician if you notice any of the following: aluminum branch wiring, brittle or cloth insulation,
a switch controlling multiple loads in confusing ways, repeated breaker trips, scorch marks, melted insulation, a loose box,
or a multi-location setup (3-way/4-way) you’re not confident you can identify correctly. -
Step 2: Identify what type of switch you have (single-pole vs. multi-location)
A quick clue: many three-way switches don’t have “ON/OFF” printed because either position can turn the light on depending on the other switch.
If you’re not sure, treat it as multi-location until proven otherwise. Guessing here is how simple becomes spicy. -
Step 3: Confirm the device rating matches the job
Switches and dimmers have ratings (amperage, voltage, and sometimes “motor” or “LED” compatibility). A dimmer rated for incandescent may not behave
well with certain LEDs. Smart switches may have special requirements (neutral, minimum load, grounding, companion devices for multi-location control). -
Step 4: Check whether a neutral is presentand whether your plan depends on it
Many traditional mechanical switches don’t use a neutral at the switch location. But many electronic devices (smart switches, occupancy sensors,
some dimmers) do. Newer code cycles increasingly emphasize having a neutral available in many switch locations because modern controls often need it. -
Step 5: Understand wire color conventionsthen don’t trust them blindly
In many U.S. homes, white/gray is often neutral, bare/green is ground, and black/red are often hot conductors. But past work, remodels,
and older methods can break the “rules.” Treat color as a cluenot a guarantee. -
Step 6: Know what safety protection your circuit may require (AFCI/GFCI)
Modern homes often require arc-fault (AFCI) and/or ground-fault (GFCI) protection depending on location and code adoption.
This matters because protection devices can trip if there’s a wiring faultor if something is misidentified during work. -
Step 7: Gather the right “verification” tools, not just the right screwdriver
Pros don’t proceed on hope. They use properly rated testers and follow a routine to confirm power status. If you don’t have the right test equipment
(and knowledge to use it correctly), this is a strong sign to stop and call a licensed electrician. -
Step 8: De-energize the circuit at the service panelthen prevent accidental re-energizing
Turning off the correct breaker is step one. Making sure someone can’t casually flip it back on while work is happening is step two.
In professional settings, this is handled with lockout/tagout practices. At home, communication and control of the panel matter. -
Step 9: Verify the power is off (and verify your tester works)
Verification isn’t a one-and-done moment. A standard best practice is to confirm your tester works on a known live source,
test your work area, and then confirm the tester still works. This reduces the risk of false readings. -
Step 10: Document what you found before changing anything
Before moving wires, take clear photos from multiple angles and label conductors logically. This is not busyworkit’s a rewind button.
Multi-location wiring and crowded boxes can become confusing quickly, and photos help prevent “How did this become extra parts?” moments. -
Step 11: Inspect the box and wiring condition like a detective
Look for warning signs: overheated insulation, brittle jacket, loose splices, crowded box fill, damaged device straps,
or a box that moves when touched. If anything looks overheated or physically compromised, stop and call a pro. -
Step 12: Confirm grounding and bonding are present and continuous
Grounding/bonding is not optionalit’s a key safety system. Metal boxes and metal plates often need proper bonding so that a fault
trips protection rather than energizing a surface you can touch. If grounding is unclear, that’s another “call-a-pro” checkpoint. -
Step 13: Follow manufacturer instructions and local code for the device you chose
Even two “light switches” can have different terminal layouts, back-wire vs. side-wire methods, torque requirements,
and compatibility notes. Smart devices may require companion switches or specific wiring configurations for multi-location control.
When instructions conflict with what you see in the wall, do not improviseescalate to a licensed electrician. -
Step 14: Re-check operation and safety after reassemblyand watch for symptoms
Once everything is reassembled, the job isn’t “done” until you observe normal operation: stable lighting, no unusual buzzing,
no heat at the faceplate, no breaker nuisance trips, and no flicker that wasn’t present before. If something feels off, turn it off
and get it assessed.
Common “Stop Now” Moments (Your Future Self Will Thank You)
- You can’t confidently identify the circuit. Mystery wiring is not a puzzle game.
- The switch box has no proper junction box or is loose/damaged.
- You see scorched marks, melted insulation, or a burnt smell.
- The breaker trips repeatedly or the switch feels warm/hot.
- You discover multi-location switching but don’t know how it’s configured.
- You expected a neutral but don’t see one and your device needs it.
Quick FAQ (Because Everyone Asks These)
Do I always have a neutral in the switch box?
Not alwaysespecially in older homes where the neutral might be at the ceiling fixture instead. Many modern controls prefer or require a neutral at the switch,
and newer code approaches increasingly account for that.
What do wire colors mean in U.S. homes?
Often: white/gray = neutral, bare/green = ground, black/red = hot. But mistakes and nonstandard work happen.
Testing and correct identification matter more than color assumptions.
Why do smart switches sometimes behave weird with LEDs?
Some electronic controls leak tiny amounts of current for standby power, and certain LEDs are sensitive enough to glow faintly (“ghosting”)
or flicker. Neutral-based designs and compatible bulbs can help.
What’s the difference between AFCI and GFCI?
GFCI helps protect people from shock caused by ground faults (especially near water).
AFCI helps reduce fire risk by detecting dangerous arcing conditions. Some devices combine both protections.
Real-World Experiences (Extra Notes From People Who’ve Been There)
The first time someone opens a switch box, they often expect a neat little scene: one black wire, one white wire, one ground wire, and a switch that politely
explains itself. In real houses, wiring can look more like a group chat where half the messages are missing. Here are some common “experience lessons” that
come up again and againshared in plain language so you can recognize patterns without taking risks.
The “But the White Wire Was Hot?!” Moment
Homeowners are often taught “white means neutral,” so seeing a white conductor used as part of a switched loop can cause instant confusion.
The takeaway isn’t “memorize weird exceptions.” The takeaway is: color is not proof. Past code practices and remodels sometimes repurpose
conductors in ways that don’t match modern expectations. If your plan depends on a neutral in the box (like many smart switches), that mismatch can be the
difference between a smooth upgrade and a full stop. In this situation, the safest move is to bring in an electrician who can identify conductors correctly
and ensure the wiring method is appropriate for modern devices.
The “Shallow Box” Surprise
Another classic: you buy a smart switch or a bulky dimmer and discover your existing box is about as roomy as a jeans pocket.
Modern devices can be deeper, and older boxes can be smaller or crowded with splices. People try to “make it fit” by cramming everything back in,
but that’s when insulation gets nicked, connections loosen, and the cover plate sits crooked (which is basically your wall’s way of waving a red flag).
The grown-up lesson here: space and box fill matter. If the box is crowded, the correct fix is not brute forceit’s evaluation and a proper
code-compliant solution.
The “It Worked… Until It Didn’t” Flicker Story
Lots of switch replacements happen because lights flicker, buzz, or feel unreliable. Sometimes the switch is the problem. Other times, the switch is the
messenger getting blamed for the message. Loose connections in a box, an aging fixture, a failing LED driver, or an incompatible dimmer can cause the same
symptoms. A practical approach is to treat flicker like a diagnosis task: note when it happens (only on dim? only with certain bulbs? only when another
appliance runs?), and don’t assume a new switch will magically fix a deeper wiring issue.
The AFCI “Why Is It Tripping?” Episode
People upgrading devices in newer homes sometimes meet their first AFCI trip and immediately assume the breaker is “too sensitive.”
In reality, AFCIs can reveal problems: loose terminations, damaged insulation, or wiring conditions that create arcing signatures.
If you change something and a protective device starts tripping, treat that as a safety signalnot an inconvenience to defeat.
The best outcome is finding a real issue before it becomes heat, smoke, or a midnight call to the fire department.
The “Smart Switch Needs Neutral” Plot Twist
Smart switches are amazinguntil you realize the box doesn’t have what the device needs. Many older switch locations were wired so the neutral stays up in the
fixture box, and only the hot is routed down to the switch. That setup can work fine for a basic mechanical switch, but it can frustrate smart controls.
People sometimes try to “get creative” with wiring to satisfy the device, which is a hard no. The real solutions are things like: choosing a device designed for
no-neutral applications (where appropriate), changing the wiring method with a professional, or relocating the smart control to a location with the correct
conductors. The bigger lesson: plan the device around the wiring you actually have, not the wiring you wish you had.
The “I Took a Photo… Thank Goodness” Win
One of the best habits you’ll hear from careful DIYers is documenting everything before they change anything. When you’re staring at multiple conductors,
splices, and a cramped box, it’s easy to forget what was where five minutes agoespecially if you get interrupted. Clear photos from multiple angles
become your best friend. Even if you never touch a conductor, that documentation can help an electrician quickly understand what’s going on, saving time
(and usually money).
The Confidence Upgrade (The Good Kind)
The best “experience” outcome isn’t “I wired it myself.” It’s “I understand what I’m looking at, I know what questions to ask, and I know when to stop.”
That’s real competence. If you can identify the switch type, understand why neutrals matter for certain devices, recognize overheating signs, and respect
AFCI/GFCI protections, you’re already ahead of the average homeowner. And if you pair that knowledge with a licensed pro for the hands-on work when needed,
you get the best of both worlds: learning plus safety.
Conclusion
“How to wire a wall switch” is less about bravado and more about process: identify, verify, document, and respect what you don’t know.
Use the 14 steps above as a safety and planning framework. If anything about the wiring is unclearor if the box shows signs of damage or overheatingpause and
bring in a licensed electrician. The goal isn’t just a working light. It’s a safe home and a switch you don’t have to think about ever again.
![18 Best Types of Charts and Graphs for Data Visualization [+ How to Choose]](https://corkopencoffee.org/wp-content/uploads/2026/05/18-best-types-of-charts-and-graphs-for-data-visualization-how-to-choose-qKM1PBYG-thumb.jpg)


