Table of Contents >> Show >> Hide
- Why Paper Art Hits Different
- My Core Styles: The “Paper Art Menu” I Rotate Through
- Tools & Materials I Actually Use (No Fancy Unicorn Equipment Required)
- My Process: How a Blank Sheet Becomes “Whoa, That’s Paper?!”
- Gallery: 16 Beautiful Paper Art Pieces
- How I Photograph Paper Art So It Looks as Good Online as It Does in Real Life
- Displaying & Preserving Paper Art (So It Doesn’t Age Like a Banana)
- Beginner-Friendly Ideas (If You Want to Try This Without Crying)
- Common Mistakes I’ve Made (So You Don’t Have To)
- FAQ: Quick Answers About Paper Art
- Personal Studio Notes: of Real Paper Art Experience
- Conclusion
Paper is basically the world’s most polite material. It sits there quietly, looks harmless, and thenboomyou
turn it into a dramatic shadow-box forest, a swirling marbled backdrop, or a tiny cut-paper portrait that makes
people lean in like they’re about to hear a secret. This post is a behind-the-scenes look at how I make
beautiful paper art, plus a gallery of 16 pieces (with photo placeholders you can swap for your own images).
Along the way, I’ll share what actually works: how to choose paper, how to plan layers, how to avoid the
classic “I glued my fingers together and now I live like this” moment, and how to display paper art so it stays
gorgeous instead of fading into a sad, beige memory.
Why Paper Art Hits Different
Paper art is the rare creative hobby that can be both low-cost and high-drama. One sheet can become a clean
minimalist silhouette, a chaotic collage, or a 3D sculpture with enough depth to cast shadows that look like
stage lighting. And unlike some art forms, paper gives you instant feedback. If the composition feels off,
you can literally move it around until it behaves.
I also love that paper art lives at the intersection of craft and fine art. Museums celebrate cut-outs and
silhouettes; crafters build flowers and pop-ups; book artists marbelize paper like they’re casting spells.
The same basic material supports all of itand you can pick the lane that fits your personality: precise and
geometric, soft and floral, or “I found a vintage map and now it’s emotionally important.”
My Core Styles: The “Paper Art Menu” I Rotate Through
1) Cut Paper & Silhouette Work
This is the style people recognize instantly: crisp edges, high contrast, and shapes that feel bold even when
they’re delicate. Silhouettes have a long history as portraiture, and modern artists have pushed the format
into larger, more complex storytelling. My approach is simpler: I treat the negative space like it’s the main
character, and I let tiny cuts do the heavy lifting.
2) Layered Paper Relief (a.k.a. Shadow-Box Magic)
Layering is where paper starts acting like sculpture. By stacking cut layers with small spacers (foam dots,
cardstock strips, or hidden folds), you get depth, shadows, and a “wait…that’s paper?!” reaction. I plan these
like little stage sets: background mood first, foreground details last.
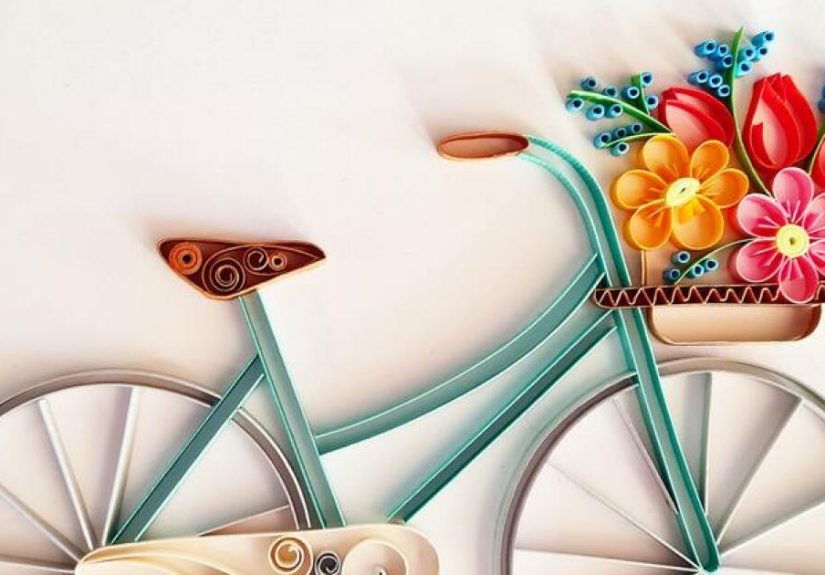
3) Quilling (Paper Rolls With Main-Character Energy)
Quilling looks fancy, but it’s basically rolling thin paper strips into coils, pinching them into shapes, and
gluing them into designs. It’s one of my favorite “I can’t think today, but I still want to make something”
techniques. It also scales beautifullyfrom tiny card embellishments to full wall pieces.
4) Paper Flowers & Botanicals
Paper flowers are the undefeated champions of party décor, home styling, and “I want something pretty that
will not die.” Crepe paper, tissue, cardstockeach gives a different look. I like mixing textures so the final
bouquet feels more “wild garden” than “craft store aisle.”
5) Marbled Paper (Swirls, Color, and Mild Sorcery)
Marbled paper has been used for centuries in book arts and decorative papers. Whether you do traditional
marbling or a simplified DIY version, the appeal is the same: organic, fluid patterning you can’t perfectly
repeat. I use marbled sheets as backgrounds, accents, or as “visual seasoning” in collage.
6) Kirigami & Pop-Ups
If origami is folding, kirigami is folding plus cuttingaka “folding with plot twists.” Pop-ups are perfect
when you want the art to feel interactive. It’s also a fun way to build architecture, letters, and layered
scenes that literally open up.
Tools & Materials I Actually Use (No Fancy Unicorn Equipment Required)
You can make paper art with scissors and glue, but a few tools make the process smoother (and less likely to
end in a glue-related identity crisis):
- Cutting tools: precision craft knife and/or sharp scissors (sharp beats fancy every time).
- Cutting surface: self-healing cutting mat (your table will thank you).
- Adhesives: pH-neutral glue stick for flat work, tacky glue for dimension, and a fine-tip applicator for tiny details.
- Measuring & shaping: metal ruler, pencil, eraser, bone folder (or the back of a spoon in a pinch).
- Paper choices: cardstock for structure, text-weight paper for smooth cuts, crepe/tissue for flowers, and specialty papers (like marbled or handmade) for accents.
Paper quality matters more than people think. Acidic papers can yellow and become brittle faster, so when I’m
making a “keep forever” piece, I lean toward acid-free, lignin-free, or archival-quality optionsespecially
for backgrounds, mats, and anything touching the artwork long-term.
My Process: How a Blank Sheet Becomes “Whoa, That’s Paper?!”
Step 1: Start With a Clear Concept (Even If It’s Tiny)
My favorite prompts are simple: “a rainy window,” “a quiet forest,” “a portrait with attitude,” “a bouquet
that looks like spring moved in.” Paper art gets messy fast if you don’t have a core idea guiding the cuts.
Step 2: Design for Paper’s Strengths
Paper loves silhouettes, layers, repeating shapes, and crisp edges. It hates ultra-thin bridges that snap if
you breathe too confidently. I always check: “Are my narrow connections strong enough to survive handling?”
Step 3: Build Depth Like a Movie Set
For layered pieces, I plan 3–7 layers: sky/background, midground shapes, detail layer, and a foreground
“hero.” Then I test shadows by holding the stack near a lamp. If the shadows don’t add drama, I adjust spacing
or simplify shapes.
Step 4: Cut Clean, Not Fast
Clean cuts come from steady pressure, sharp blades, and letting your hand move like it’s tracing a calm line
instead of trying to win a speedrun. I replace blades oftendull blades tear paper and create fuzzy edges,
which is paper’s way of complaining.
Step 5: Glue With Strategy (Not Chaos)
I glue from the center outward to avoid bubbles and warping. For tiny details, less glue is more. If glue
squeezes out, it dries shiny and screams, “I was applied in a moment of panic.”
Gallery: 16 Beautiful Paper Art Pieces
Below are 16 “pics” with placeholders. Swap the src with your own images (or keep the captions as
inspiration for your next project).


How I Photograph Paper Art So It Looks as Good Online as It Does in Real Life
Use Side Light for Texture
Layered paper relief lives and dies by shadow. I place a lamp or window light to the side so the depth reads
clearly. Front lighting can flatten everything.
Pick Simple Backgrounds
A neutral wall, foam board, or matte fabric keeps attention on the piece. If the background has a pattern, the
art starts competing for oxygen.
Shoot Straight-On, Then at an Angle
Straight-on captures the design. A slight angle captures depth. Posting both helps people understand the work
instantlyespecially for shadow-box pieces.
Don’t Over-Edit Whites
Paper whites are tricky. If you crank exposure too high, you lose cut edges and fine detail. I aim for “clean”
rather than “blinding.”
Displaying & Preserving Paper Art (So It Doesn’t Age Like a Banana)
Paper is sensitive to light, humidity swings, and low-quality framing materials. If you want your work to look
good long-term, think like a museum (but with fewer velvet ropes).
Framing Basics That Matter
- Avoid direct sun: prolonged light exposure can cause fading and discoloration over time.
- Use stable materials: acid-free mat board and backing help reduce yellowing and chemical reactions.
- Keep glazing off the surface: leave a tiny air gap so the art isn’t pressed against glass/acrylic.
- Control environment: avoid hot radiators, fireplaces, damp basements, and exterior walls with big temperature swings.
My “Home Gallery” Rule
If it’s a piece I’d be heartbroken to lose, I either display it in low light, rotate it seasonally, or display
a high-quality reproduction and store the original properly. Yes, that sounds dramatic. But so is watching a
favorite piece slowly fade like it’s trying to ghost you.
Beginner-Friendly Ideas (If You Want to Try This Without Crying)
Easy Win #1: A Two-Layer Cut-Out
Cut a simple shape (leaf, moon, mountain line), mount it over a contrasting color, and leave generous margins.
It looks clean, modern, and intentionallike you planned it that way (you did).
Easy Win #2: A Mini Quilling Floral
Roll a handful of coils, pinch a few into teardrops, glue into a small flower cluster, and mount it on a card.
Quilling feels fancy fast, even at tiny scale.
Easy Win #3: Paper Flower “One Bloom” Study
Make one large crepe-paper flower instead of a whole bouquet. You’ll learn shaping and assembly without
committing to a floral empire.
Easy Win #4: Collage With a Rule
Choose one constraintonly blues, only circles, only vintage textand build around it. Constraints make collage
feel curated, not chaotic.
Common Mistakes I’ve Made (So You Don’t Have To)
- Using a dull blade: it tears fibers and makes edges fuzzy.
- Over-gluing: warping and shiny spots appear, especially on thin paper.
- Designing fragile bridges: thin connections snap during lifting or framing.
- Skipping test cuts: some papers cut like butter; others cut like wet cardboard. Test first.
- Ignoring storage: stacking finished work without protection invites dents, creases, and heartbreak.
FAQ: Quick Answers About Paper Art
What paper weight should I use?
For crisp cut-outs, I like smooth cardstock or text-weight paper that holds edges well. For layered relief,
sturdier cardstock helps structure. For flowers, crepe paper and tissue give soft realism.
Is paper art “real art”?
Absolutely. Paper has deep roots in fine art, printmaking, book arts, and contemporary installations. Also,
“real art” is anything that makes someone feel somethingincluding joy, curiosity, or the sudden urge to buy a
cutting mat.
How do I keep my paper art from fading?
Reduce light exposure, avoid direct sun, use UV-filtering glazing when framing, and store originals in
protective conditions when not displayed.
Personal Studio Notes: of Real Paper Art Experience
The first time I tried “serious” paper art, I thought the secret was talent. Spoiler: the secret was a sharp
blade and the patience to not fight the material. I started with one tiny cut-outsomething simple enough
that I couldn’t talk myself out of it. The cut wasn’t perfect. The edges weren’t museum-clean. But when I
mounted that little shape over a contrasting color, it looked… intentional. That’s when paper art hooked me:
it rewards small efforts with big visual payoff.
Over time, I learned to treat paper like a collaborator instead of a victim. Paper has opinions. Some papers
love tight curves; others crack if you ask for drama. Some papers fold like silk; others crease like they’re
holding a grudge. Now I always do a test cut and a test glue on a scrap. It takes two minutes and saves me
from the kind of frustration that makes you stare at a glue stick like it personally betrayed you.
The biggest upgrade in my process wasn’t a fancy machineit was planning for strength. Early on, I made
designs with delicate little bridges connecting everything, because I wanted maximum detail. Then I lifted the
paper and watched it tear like a soap opera plot twist. These days, I design with “structural generosity.”
I keep connections thicker, hide supports in darker areas, and let negative space do more of the work. The
funny part is the pieces look cleaner, not simpler. Stronger designs give you the confidence to cut more
precisely.
Layered work taught me another lesson: shadows are part of the composition. I used to think layers were just
“extra,” like decorative pillows for paper. But the spacing between layers controls the mood. Tiny spacing
feels crisp and graphic. Wider spacing feels cinematic. Now I’ll literally hold a stack near a lamp and watch
the shadows appear. If the shadows aren’t interesting, I adjust the layer order or increase depth until the
piece starts “breathing.”
And then there’s the part nobody warns you about: finishing and preservation. Making the art is fun; keeping
it looking good is the grown-up part. I’ve learned to avoid harsh light, to use better backing materials, and
to store finished pieces flat and protected. I also learned that it’s okay to display a reproduction and keep
the original safeespecially for pieces that took days of cutting. Paper is humble, but it deserves respect.
Most of all, paper art taught me to enjoy the slow parts. Cutting is quiet. Rolling quilling strips is
repetitive in a soothing way. Even gluingwhen done calmlyfeels like assembling a tiny world. I still make
mistakes. I still occasionally glue my finger to something I definitely wanted to be finger-free. But every
time I finish a piece and someone says, “Wait…that’s PAPER?” I remember why I keep coming back.


