Table of Contents >> Show >> Hide
- What Is Mercury Glass (And What Are We Making Here)?
- Quick Overview: The Basic Technique
- Supplies and Tools
- Safety First (Because Spray Paint Is Not a Perfume)
- Step-by-Step: Mercury Glass DIY Tutorial (Easy Method)
- Step 1: Choose the right glass (and set expectations)
- Step 2: Clean it like it’s going on a cooking show close-up
- Step 3: Mix your magic mist
- Step 4: Decide: inside or outside?
- Step 5: First coatthin is in
- Step 6: Mist immediately
- Step 7: Blot for the classic speckle
- Step 8: Repeat in layers
- Step 9: Let it cure
- Pro Tips for a More Convincing Vintage Look
- Troubleshooting (AKA, “Why Does Mine Look Weird?”)
- Project Ideas That Look Way More Expensive Than They Are
- Styling Ideas: Where Mercury Glass Looks Best
- Care and Cleaning
- Conclusion: Your Home, But Make It Sparkly
- Real-World Experiences and Lessons People Learn Fast (Bonus )
Mercury glass has a special talent: it looks like it came from a fancy antique shop, but it also looks right at home next to your “I totally meant to buy throw pillows”
phase. The good news? You can get that sparkly, speckled, vintage mirror look in an afternoon with a couple of basic supplies and a tiny bit of patience (the kind you
can still have while snacking).
This tutorial walks you through a classic faux mercury glass technique using mirror-finish spray paint and a vinegar-water mist to create that signature mottled effect.
We’ll cover what mercury glass actually is, how to make it look convincingly “old,” how to avoid the most common rookie mistakes, and a bunch of project ideasbecause
once you make one vase, you’ll suddenly want to mercury-glass everything that holds still long enough.
What Is Mercury Glass (And What Are We Making Here)?
Traditionally, mercury glass (also called “silvered glass”) was made with a double-walled glass form where a reflective solution was introduced between the layers,
then sealed. Vintage pieces got their character from time, oxidation, and imperfect manufacturingaka the original “distressed” finish.
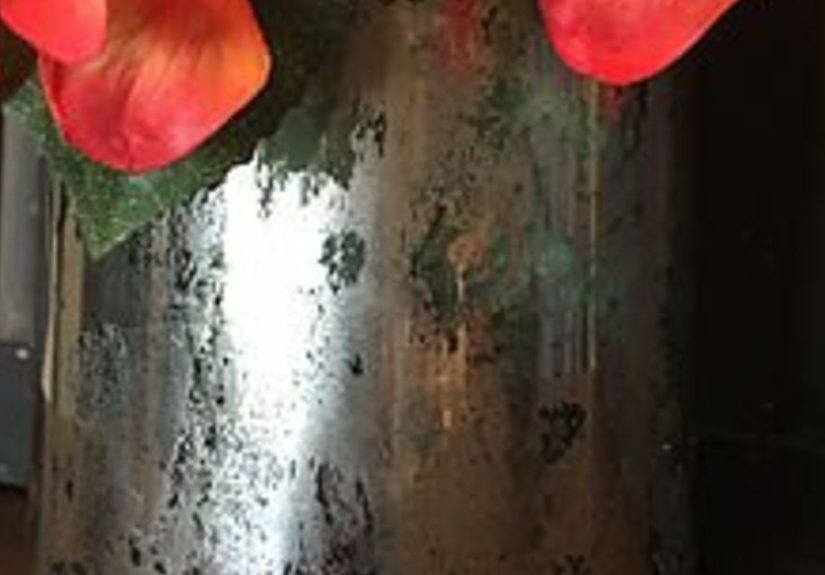
In this DIY, you’re not using mercury (nope, not even a little). You’re creating a faux mercury glass effect by applying a mirror-like coating on glass,
then intentionally disrupting it with a light mist and gentle blotting. The result is a reflective, cloudy, speckled finish that mimics antique mercury glasswithout
needing a time machine or a Victorian factory.
Quick Overview: The Basic Technique
Here’s the concept in plain English: you spray a mirror-finish paint onto glass, then mist a vinegar-water mix so the coating breaks up into spots and patches.
You repeat in thin layers until it looks “perfectly imperfect.” Most people apply the mirror paint on the inside of vases or candle holders so the outside stays smooth
and glossy-looking.
Supplies and Tools
Core supplies
- Clear glass item: vase, jar, votive holder, ornament, cloche, or a flat glass panel in a frame
- Mirror-finish spray paint (often labeled “Looking Glass” or “Mirror Effect”)
- White vinegar
- Water
- Spray bottle (fine mist setting is ideal)
- Paper towels or a soft cloth for blotting
Nice-to-have extras (for a more vintage look)
- Painters tape (to mask edges or protect the outside)
- Rubbing alcohol or glass cleaner (for prep)
- Black or dark spray paint (for backing a mirror on flat glass)
- Metallic spray paint (gold/bronze) for a warm, aged tone
- Hair dryer (especially helpful for ornaments)
Safety First (Because Spray Paint Is Not a Perfume)
Spray paints and coatings can produce fumes and overspray. Work outside or in a very well-ventilated area (garage door wide open is the bare minimum).
Protect nearby surfaces with cardboard or a drop cloth, and keep pets, siblings, and snack plates out of the spray zone.
- Ventilation matters: airflow reduces inhalation risks and helps your finish dry evenly.
- Wear protection: gloves and eye protection are smart; a properly fitted respirator is best for frequent spray projects.
- Adult help if you’re a teen: ask a parent/guardian to help with spraying and ventilation setup.
- Fire safety: keep spray paint away from flames, pilot lights, and heat sources.
Step-by-Step: Mercury Glass DIY Tutorial (Easy Method)
Step 1: Choose the right glass (and set expectations)
Clear glass with a smooth surface is your best friend. Wide-mouth jars and vases are easier because you can spray inside without turning your wrist into a pretzel.
If your glass has texture, you’ll still get a cool effectjust more “sparkly chaotic goblin” than “French flea market.”
Step 2: Clean it like it’s going on a cooking show close-up
Any fingerprints, dust, or oily residue will show up as dull spots or weird streaks. Wash with soap and water, dry completely, then wipe with glass cleaner or rubbing
alcohol. Let it air-dry for a few minutes so you’re not trapping moisture under the coating.
Step 3: Mix your magic mist
In your spray bottle, combine equal parts water and white vinegar (a 1:1 mix). Shake gently. The goal is a fine mistnot a water cannon.
If your nozzle only has “hurricane” as a setting, swap bottles. Your future self will thank you.
Step 4: Decide: inside or outside?
For most vases, votives, and jars: spray inside so the outside stays smooth and easy to clean. For flat glass panels (like a framed “antiqued mirror”),
you’ll typically spray the back side of the glass so the reflective finish shows through from the front.
Step 5: First coatthin is in
Shake the mirror spray paint well (follow your can’s instructions), then apply a very light coat. Hold the can at a steady distance and move smoothly.
Do not try to “finish it in one coat.” That’s how you get drips, puddles, and regret.
Step 6: Mist immediately
While the mirror coat is still wet, lightly mist the surface with the vinegar-water mix. You should see droplets forming. Those droplets are what create the broken,
antique pattern as the coating sets.
Step 7: Blot for the classic speckle
Gently dab (don’t wipe) with a paper towel. Blotting lifts and disrupts the coating in random patches, which makes the finish look naturally aged instead of
“printed pattern pretending to be old.”
Step 8: Repeat in layers
Wait a short moment (enough that it’s tacky, not dripping), then repeat: light mirror coat → mist → blot. Most projects look great after 3–5 thin cycles.
Stop when you like the balance of reflective areas and cloudy speckles.
Step 9: Let it cure
Set your piece aside to dry thoroughly. Even when it looks dry, coatings can still be curing. Give it time before handling heavily or decorating with it.
Pro Tips for a More Convincing Vintage Look
Tip 1: Control droplet size for different “eras” of vintage
Fine mist makes tiny pepper-like speckles. Larger droplets create dramatic cloudy patches. Want “dainty antique”? Use a finer mist and lighter blotting. Want “found it in
grandma’s attic”? Use slightly larger droplets and blot more aggressively in a few areas.
Tip 2: Warm it up with layered metallic tones
Classic mercury glass skews silver, but real vintage pieces often read warmer under light. Add a very light layer of gold or bronze (or even a tiny dusting of black on
the painted side of flat glass) to deepen the finish. Go slowone whispery coat can do a lot.
Tip 3: For flat glass mirrors, back it with black
If you’re antiquing a glass panel in a frame, a dark backing coat on the painted side can increase contrast and make the “missing” spots look authentically aged.
The mirror finish shows from the front, while the back layer adds depth.
Tip 4: Don’t aim for symmetry
Perfectly even speckles scream “manufactured.” Random patches, slightly heavier wear in corners, and uneven density look more believablelike time happened to it.
Troubleshooting (AKA, “Why Does Mine Look Weird?”)
Problem: Drips and runs
Cause: spraying too heavy or too close. Fix: let it dry, then lightly blot or gently remove the worst spots and redo with thinner coats. Next time, treat “light coat”
like it’s a rule, not a suggestion.
Problem: Dull, not mirror-like
Cause: dirty glass, too much moisture, or not enough mirror paint build-up. Fix: clean better next time and apply additional thin coats. Mirror effects often “pop”
as the coating dries and layers build.
Problem: Huge streaks
Cause: mist is too heavy or your bottle is sputtering. Fix: switch to a finer mist bottle and start with less spray. You can always add more droplets; removing rivers is
less fun.
Problem: The outside feels tacky or scratches easily
Cause: you sprayed the outside (or handled before curing). Fix: for future pieces, spray inside when possible. If you must spray outside, handle gently and consider
using it as decorative (not high-touch) décor.
Project Ideas That Look Way More Expensive Than They Are
- Mercury glass votives: perfect for soft, sparkly candlelight on tablescapes.
- Faux mercury glass vases: great for fresh flowers, dried stems, or “I forgot to water that” faux greenery.
- Ornaments: use a hair dryer between layers to speed drying and build depth.
- Antiqued mirror frame insert: turn a basic frame into a vintage-style mirror look.
- Cloche or apothecary jar: instant “holiday mantel” energy, even in July (no judgment).
- Lamp base: dramatic and glamjust mask carefully and work slowly.
Styling Ideas: Where Mercury Glass Looks Best
Mercury glass is basically a lighting enhancer disguised as décor. It loves candles, string lights, and anything that flickers. Try grouping three pieces of different
heights (classic styling rule: odd numbers look intentional), or tuck one mercury glass item into a bookshelf vignette to catch light without overpowering your space.
It’s also a sneaky way to elevate budget décor. A clear thrifted vase becomes “vintage glam.” A plain jar becomes “holiday centerpiece potential.” A few votives become
“I host dinner parties,” even if your dinner party is you and a sandwich.
Care and Cleaning
Faux mercury finishes are decorative coatings, not indestructible armor. If you sprayed inside a vase, keep water levels below the painted area (or place a smaller
water-filled container inside). For cleaning, use a gentle wipe on the outside; avoid harsh scrubbing on painted surfaces. Treat it like a fancy accessory: admire often,
abuse never.
Conclusion: Your Home, But Make It Sparkly
The faux mercury glass technique is popular for a reason: it’s fast, beginner-friendly, and delivers maximum “wow” for minimal effort. Once you nail your rhythm
(spray → mist → blot → repeat), you can customize the look from lightly speckled to dramatically distressed. And because every piece turns out a little different, it
feels charmingly one-of-a-kindlike you planned it that way the whole time.
Real-World Experiences and Lessons People Learn Fast (Bonus )
If you’ve never tried a mercury glass DIY before, the first experience usually follows a very relatable arc: excitement, confidence, mild confusion, then sudden pride.
People tend to start with a single “test jar” because it feels low-stakessomething like a leftover pasta sauce jar that has been “temporarily” living in the cabinet since
2021. And that’s the perfect place to start, because mercury glass is one of those crafts where you learn more in five minutes of doing than in thirty minutes of
overthinking.
One common first-time surprise is how much prep matters. Folks often think, “It’s just paint,” and then the finish comes out cloudy in a not-cute way.
After a quick redo with better cleaning, the difference feels almost suspiciouslike the glass is suddenly cooperating out of respect. The second surprise is how
thin coats change everything. When people spray too heavily, the effect gets streaky and the droplets run. When they switch to feather-light coats, the
speckling becomes crisp, the reflection looks brighter, and the whole thing starts to resemble those expensive holiday pieces everyone pretends they got on sale.
Another “aha” moment: the vinegar-water mist isn’t just a stepit’s a steering wheel. People notice that a fine mist gives delicate freckling, while larger droplets make
bolder, more dramatic patches. After a few rounds, many DIYers start intentionally varying droplet sizes in different areaslighter at the top, heavier at the bottom, or
more distressed around the “would naturally wear here” zones. The piece begins to look like it has a backstory. (You can absolutely invent one. “This was found in a
charming estate sale.” No one needs to know it was found next to the recycling bin.)
Styling is another part of the experience that sneaks up on people. The first finished jar looks pretty on its own, but the real magic shows up when you place it near
candlelight or string lights. DIYers often report that the finish looks “nice” in daylight and “wow” at night, because the reflected points of light make the speckling
shimmer. This is why mercury glass gets so popular around the holidaystiny lights plus reflective texture equals instant cozy sparkle.
People also learn quickly which shapes are easiest. Wide-mouth pieces feel forgiving because your hand and spray angle have room to behave. Narrow-neck bottles can turn
into a mini obstacle course: you’re trying to spray evenly without painting your own fingers, and suddenly the bottle is winning. Many crafters solve this by switching to
spraying the outside (for small items) or choosing ornaments and jars that are designed for easy access. Others embrace the chaos and call it “extra vintage.” Honestly?
That is an acceptable strategy.
Finally, the most repeated piece of real-world advice is also the simplest: make two. The first one teaches you the process; the second one becomes the
one you proudly display. Once someone finishes that second piece, the confidence snowballs. That’s when you see people creating sets of votives, mixing silver with warm
gold accents, or turning an ordinary tray display into something that looks styled by a professional. The technique is easybut the satisfaction is weirdly huge. It’s
basically crafting’s version of finding a perfect parking spot.


