Table of Contents >> Show >> Hide
- Why a Petite Vintage Buffet Is Worth the Effort
- Before You Start: Play Furniture Detective
- Choose the Right Makeover Direction
- Step-by-Step Petite Vintage Buffet Makeover
- Color Ideas That Make a Petite Buffet Look Expensive
- Mistakes That Can Ruin the Look
- How to Style Your Petite Buffet After the Makeover
- What a Petite Vintage Buffet Makeover Really Costs
- Experience Notes: Living With a Petite Vintage Buffet Makeover
- Conclusion
A petite vintage buffet is the kind of furniture piece that quietly dares you to underestimate it. It is not as flashy as a giant farmhouse hutch, not as dramatic as a carved armoire, and definitely not the diva of the dining room. But give it one solid weekend, a little elbow grease, and maybe a pep talk or two, and suddenly this modest sideboard becomes the hardest-working beauty in the house.
That is the magic of a petite vintage buffet makeover. You are not just repainting an old piece of furniture. You are reviving character, reclaiming storage, and giving a small-space hero a second act. In a world where flat-pack furniture often arrives with 97 screws and a personal grudge, a sturdy old buffet feels almost suspiciously well made. It has curves. It has drawers that have seen things. It has the kind of wood tone or detailing that modern furniture tries very hard to imitate and usually charges extra for.
Whether your buffet came from a thrift store, a family hand-me-down, Facebook Marketplace, or the curb with a sign that said “free” and a hint of mystery, the right makeover can turn it into a statement piece for a dining room, entryway, breakfast nook, or even a small kitchen. The trick is knowing when to paint, when to stain, when to preserve the patina, and when to stop before the piece ends up looking like it lost a fight with a craft store.
Why a Petite Vintage Buffet Is Worth the Effort
A small buffet works because it solves two design problems at once: storage and style. In a compact dining room, a petite buffet gives you a place to hide serving pieces, table linens, candles, chargers, and all those random entertaining accessories that somehow reproduce in drawers at night. At the same time, it gives the room a visual anchor. It can soften a blank wall, balance a table, or add a layer of warmth that makes the whole space feel more collected and less catalog-perfect.
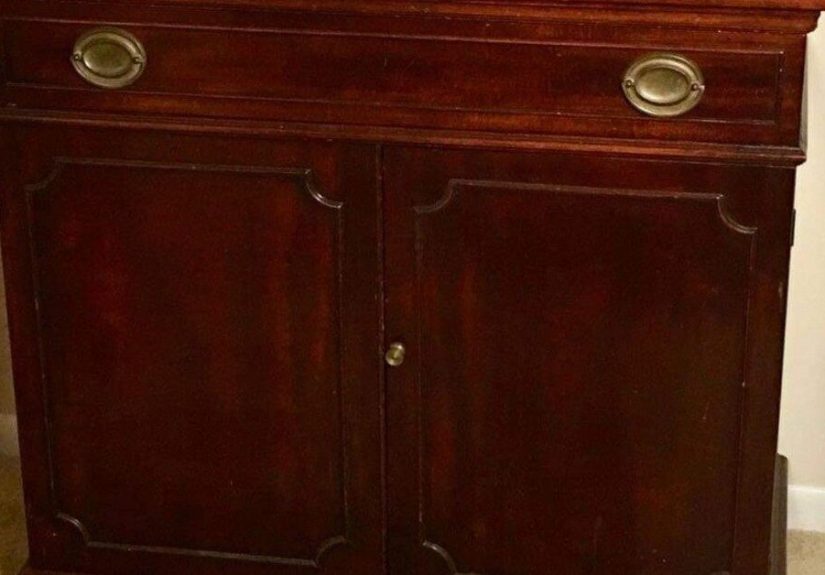
Vintage buffets are especially valuable because they usually bring details you would pay dearly to replicate today. Think dovetail drawers, curved legs, beveled edges, carved trim, inset panels, and solid wood construction. Even when the finish is tired, the bones are often excellent. And if the buffet is petite, that is actually a strength. Smaller-scale furniture is easier to place, easier to move, and far more forgiving in apartments, older homes, condos, and compact dining nooks.
In other words, a petite vintage buffet makeover is not just a cute DIY project. It is a practical upgrade with design credibility. That is a fancy way of saying it can look expensive without destroying your bank account.
Before You Start: Play Furniture Detective
Check the structure first
Before you fall head over heels for the color palette, inspect the buffet like a cautious detective in a home makeover mystery. Are the drawers sliding well? Are the joints tight? Do the doors line up? Is the top veneer lifting? Are there water rings, cracks, or missing trim? Cosmetic flaws are usually manageable. Structural disasters are a different story.
A good candidate for a makeover has sturdy legs, workable drawers, and damage that is more annoying than catastrophic. Loose hardware, chipped finish, scratched tops, and outdated stain are all fixable. If the piece smells musty, sits unevenly, or appears to be held together by hope and one heroic screw, budget more repair time before dreaming about paint colors.
Know the surface you are dealing with
Not every “wood” buffet is equally wood-ish. Some vintage pieces are solid wood, some have veneer, and some later pieces mix wood, engineered materials, and laminate. That matters because your prep plan changes depending on the surface. A true wood top may handle sanding and stain beautifully. Veneer needs a lighter touch. Laminate can absolutely be painted, but it usually needs the right primer to help the finish grip instead of peeling off dramatically like a bad sunburn.
Respect old finishes
If your buffet is genuinely old, especially if it may date to before 1978, slow down before sanding with abandon. Older painted finishes can contain lead, and that is not the kind of vintage authenticity anyone wants. Test the finish if needed, take proper precautions, and use a lead-safe approach when working on older painted furniture. Charming furniture makeover, yes. Toxic dust confetti, no.
Choose the Right Makeover Direction
The best petite vintage buffet makeover starts with a clear design decision. Not every piece wants the same finish, and forcing a buffet into the wrong style is like putting a tuxedo on a golden retriever. Technically possible. Emotionally confusing.
Option 1: Paint it
Painting is the most popular route because it can instantly modernize a dated finish and highlight beautiful lines. Creamy white, warm greige, moody green, inky blue, charcoal, and soft black are all strong options for a buffet. A painted finish works especially well when the original wood is blotchy, orange-toned, badly damaged, or simply not special enough to save.
Option 2: Strip and stain it
If the buffet has lovely wood grain, a stain makeover can feel richer and more timeless. Walnut, medium oak, and natural matte finishes all have a way of making a petite piece feel quietly luxurious. Staining usually takes more prep and patience, but the result can preserve the vintage soul of the buffet in a way paint sometimes hides.
Option 3: Go two-tone
Two-tone finishes are the overachievers of the buffet world. A painted body with a stained top is a classic choice because it keeps the piece feeling fresh while still honoring the wood. This approach works beautifully on small buffets, especially when you want contrast without making the piece feel bulky.
Step-by-Step Petite Vintage Buffet Makeover
1. Clean like you mean it
Years of wax, polish, kitchen residue, and mystery grime can sabotage a finish before you even open a paint can. Remove hardware, empty the drawers, and give every surface a thorough cleaning. This is not glamorous work, but it is the difference between “beautifully refreshed” and “why is my paint fisheyeing like it is possessed?”
2. Label and remove hardware
Take off knobs, pulls, hinges, and decorative plates. Put the screws in labeled bags unless you enjoy crawling on the floor later, whispering, “Where did you go, tiny brass screw?” Existing hardware can often be reused, cleaned, or spray-finished for a fresh look. Original hardware is sometimes part of the buffet’s charm, so do not replace it too quickly.
3. Repair before you refinish
Fill dents, glue loose veneer, tighten joints, and make any basic repairs before the finishing stage. For scratches and shallow damage, sanding can help. For deeper dings, wood filler may be necessary. On detailed areas, sanding sponges are useful because they reach curves and trim without flattening all the character out of the piece.
4. Sand with strategy, not aggression
Sanding matters, but this is not a punishment workout. If you are painting, the goal is usually to scuff and smooth the surface so primer and paint can bond properly. If you are staining, the sanding needs to be more thorough and even. In general, work with the grain, not against it. On wood surfaces, moving from a medium grit to a finer grit creates a smoother result. On veneer, keep a light hand. The goal is prep, not accidental archaeology.
5. Prime if painting, condition if staining
If you are painting, primer is your insurance policy. It helps with adhesion, blocks old stains or tannins from bleeding through, and gives your paint a more even starting point. For slick or previously finished surfaces, a bonding primer is especially helpful.
If you are staining, some woods benefit from a pre-stain conditioner to reduce blotchiness. This is particularly useful on softer or more porous woods where stain can absorb unevenly and create dark patches that were not part of your artistic vision.
6. Apply the finish in thin, patient coats
For paint, use a high-quality brush, fine-finish roller, or sprayer depending on the look you want. Thin, even coats usually beat one thick coat every time. Thick paint loves drips, texture, and regret. Let each coat dry properly before adding the next.
For stain, apply evenly and wipe off excess according to the look you want. Open-grain woods may need a little more attention to work the stain into the pores. The length of time you leave stain on the surface affects color depth, so test first instead of gambling on the top of your buffet like a reality show contestant.
7. Protect the finish
A buffet is not just decorative. It gets touched, wiped, leaned on, and loaded with trays, bowls, lamps, and occasionally someone’s handbag that absolutely did not need to be there. That means durability matters.
If the piece will see regular use, a clear topcoat usually provides better protection than wax alone. Wax can be lovely for low-traffic decorative finishes, but a harder protective finish is generally a smarter choice for tabletops and hardworking furniture. If you love the soft chalk-painted look, you can still keep that aesthetic while choosing a more practical sealer for the surface that takes the most abuse.
Color Ideas That Make a Petite Buffet Look Expensive
One of the easiest ways to elevate a petite vintage buffet makeover is to choose a finish that fits both the piece and the room around it.
Soft neutrals
Warm white, creamy ivory, mushroom, taupe, and greige work well when you want a buffet to feel bright but not sterile. These shades are especially useful in small dining rooms because they reflect light and keep the furniture from feeling visually heavy.
Moody classics
Deep green, navy, slate blue, and charcoal can make a modest buffet feel custom and dramatic. These colors look especially good with brass hardware, wood floors, and traditional or vintage-inspired decor.
Natural wood tones
Medium walnut, soft oak, and matte natural finishes are ideal when you want warmth and authenticity. A restored wood buffet often feels more timeless than a trendy painted piece, especially if the grain is attractive.
High-contrast two-tone
A painted base with a stained top is still one of the smartest buffet makeover ideas around. It adds dimension, protects the visual warmth of the wood, and helps a petite piece feel both updated and grounded.
Mistakes That Can Ruin the Look
Even a promising buffet can go sideways if the makeover gets rushed. The most common mistakes are skipping prep, over-sanding veneer, choosing hardware that is wildly oversized, using a finish that is too delicate for daily use, and picking a color that fights with the room.
Another mistake is over-distressing. A little edge wear can add charm. Too much distressing makes the piece look like it was dragged behind a bicycle. Vintage style should feel believable, not theatrical.
Finally, avoid styling the finished buffet like a yard sale. The best makeovers finish strong with restraint. A lamp, a tray, a stack of dishes, a small piece of art, or a vase with branches often looks far better than crowding the top with every decorative item you own.
How to Style Your Petite Buffet After the Makeover
Once the buffet is done, the styling should support the piece, not bury it. In a dining room, hang art or a mirror above it that is roughly proportional to the width of the furniture. On top, combine something tall, something organic, and something practical. A lamp adds height, a bowl or vase adds softness, and a tray keeps smaller objects from looking scattered.
In a breakfast nook or compact dining area, a petite buffet can also act as a mini command center for entertaining. Store napkins, placemats, candles, and serving utensils inside. On top, display a stack of everyday plates, a water carafe, or a coffee setup. Small spaces love furniture that knows how to multitask.
If your room is tight, lean into the buffet’s smaller scale. Do not try to make it compete with a giant table or oversized wall decor. Let it be the charming, useful supporting actor that steals the scene anyway.
What a Petite Vintage Buffet Makeover Really Costs
The beauty of this project is that it can be surprisingly affordable. If the buffet itself was inexpensive or secondhand, your main costs are usually cleaner, sandpaper, primer, paint or stain, topcoat, optional wood filler, and hardware. The final total can range from budget-friendly to boutique depending on your materials and whether you splurge on premium finishes or designer knobs.
Time-wise, expect more than one afternoon. A rushed makeover often looks rushed. Between cleaning, prep, drying time, and protective finishing, a better expectation is a weekend or several evenings. Furniture refinishing is not hard so much as it is stubborn. It rewards patience, and it punishes shortcuts with brush marks.
Experience Notes: Living With a Petite Vintage Buffet Makeover
Here is the part that does not always show up in a polished before-and-after photo: living with a newly made-over petite vintage buffet is where you really find out whether the project was worth it. And honestly, this is usually the moment when the answer becomes a very smug yes.
The first thing people notice is not always the paint color or the hardware. It is the fact that the piece suddenly looks like it belongs. Before the makeover, an old buffet can feel like a placeholder, a hand-me-down, or a “we’ll deal with it later” object. After the makeover, it starts acting like it paid rent all along. The room feels more finished. The storage becomes more useful. Even the little rituals around it change. You start placing flowers there. Lighting a candle there. Setting out dessert plates there like a person who definitely has their life together.
One of the biggest surprises with a petite buffet is how much function you get from such a compact footprint. In real life, it often becomes the drop zone for the things you actually use: cloth napkins, birthday candles, takeout menus, coffee supplies, holiday serving pieces, batteries, matches, and that one nice serving spoon that only appears during company. A small buffet does not have to be enormous to be valuable. It just has to be edited well, both inside and out.
There is also something satisfying about the imperfections that remain after a thoughtful makeover. Maybe one drawer still sticks a little on humid days. Maybe a carved detail is slightly uneven because it was made decades ago by human hands, not a factory robot with no personality. Maybe the top has a faint dip or a hidden repair you notice only when the light hits a certain way. Those details stop feeling like flaws and start reading as character. The piece feels real, not overly polished or suspiciously perfect.
Another real-life lesson is that finish choice matters more over time than it does on day one. Right after painting, almost any buffet can look fantastic. Six months later, the winners are the projects that used the right prep and a durable protective finish. The top does not scratch as easily. The edges do not look battered. Cleaning feels simple instead of nerve-racking. This is especially true if the buffet lives in a hardworking area where people set down grocery bags, mail, serving platters, or the occasional cup that absolutely should have used a coaster.
Styling evolves too. At first, there is a temptation to decorate every inch because you are proud of your handiwork. Then, after a few weeks, you realize the buffet looks better when it can breathe. A lamp, a bowl, a framed piece of art, maybe a stack of linen napkins in a tray, and suddenly it feels elegant instead of overcrowded. In that sense, the makeover often changes your decorating habits in a good way. You become a little less chaotic. Or at least your buffet does, which is close enough.
Most of all, a petite vintage buffet makeover changes how you see old furniture. You stop looking for perfection and start looking for potential. You notice the shape of the legs, the depth of the drawers, the curve of the apron, the warmth of the wood under a bad finish. And that is when the project becomes more than DIY. It becomes a skill. A very useful, slightly dusty, deeply satisfying skill.
Conclusion
A petite vintage buffet makeover is one of those rare home projects that can be practical, stylish, budget-conscious, and genuinely fun at the same time. It gives you better storage, stronger personality, and a one-of-a-kind piece that looks far more thoughtful than something bought in a rush.
The secret is simple: respect the bones, prep carefully, choose a finish that suits the piece, and protect it well enough to survive real life. Do that, and your little buffet will stop being background furniture and start becoming the kind of piece that makes people ask, “Wait, where did you get that?”
And then you get to smile and say, “Oh, that old thing? It had a glow-up.”


