Table of Contents >> Show >> Hide
- Why the Ziplock Trick Works (and When It Doesn’t)
- What You’ll Need
- How to Make the Ziplock Car iPad Holder (Removable Headrest Method)
- Step 1: Pick the seat and viewing height
- Step 2: Test the bag size before you cut anything
- Step 3: Mark the headrest post locations
- Step 4: Remove (or lift) the headrest safelythen put it back
- Step 5: Cut two small holes
- Step 6: Mount the bag on the headrest posts
- Step 7: Insert the tablet and set the angle
- Step 8: Lock down settings before you roll
- If Your Headrests Don’t Come Off: 3 Practical Alternatives
- Safety Checks Before You Hit the Road
- Screen-Time Sanity: Keep the Tablet From Becoming the Boss of the Car
- Make It Kid-Proof: Settings That Save Your Nerves
- Heat, Glare, and Cleaning
- Troubleshooting
- FAQ
- Road-Tested Experiences (The “We Tried This So You Don’t Have To” Section)
- Conclusion
Long car rides with kids have a special talent: they make “Are we there yet?” feel like it’s playing on a loop in your soul.
If you’ve ever tried to hold a tablet at the perfect angle for a backseat passenger while also, you know, drivingwelcome.
Here’s a surprisingly effective, ridiculously cheap solution: a sturdy Ziplock-style freezer bag + your front seat headrest posts.
In a few minutes, you can create a hands-free car iPad holder that keeps the screen visible, sticky fingers contained,
and your sanity at least somewhat in the chat.
This guide walks you through the Ziplock iPad holder method step-by-step, plus safety checks (because nothing ruins movie time like physics),
backup options for non-removable headrests, and practical road-trip tips that keep the tablet from turning into the family’s new CEO.
Why the Ziplock Trick Works (and When It Doesn’t)
The magic is simple: the headrest posts create two anchor points, and the bag becomes a clear, snug sleeve that can hold a tablet flat against
the seat back. You get a stable viewing angle without handing your kid a slippery rectangle that will inevitably fall, bounce, and somehow wedge
itself under a seat rail like it’s training for an obstacle course.
It works best when:
- Your front seat headrest is removable or can lift high enough to slide the bag into place.
- You use a heavy-duty freezer bag (thicker plastic = less tearing).
- Your iPad/tablet has a case (bonus grip and protection).
- You set it up while parked, then leave it alone while driving.
It’s not the best choice when:
- Your headrests are fixed and you can’t route anything around the posts safely.
- Your kid can reach the bag easily and is in a “tiny velociraptor” phase.
- You’re relying on a long charging cable that could dangle or loop where it shouldn’t.
- The seat design has airbags or seams in spots you’d need to wrap, pinch, or compress.
What You’ll Need
- 1 heavy-duty freezer Ziplock-style bag (gallon size is common for many tablets; go larger if needed)
- Scissors (or a hole punch if you’re feeling fancy)
- A marker (optional, but helps place holes cleanly)
- Your iPad/tablet (ideally in a case)
- Optional upgrades: clear packing tape, two small binder clips, a microfiber cloth, short charging cable
How to Make the Ziplock Car iPad Holder (Removable Headrest Method)
Step 1: Pick the seat and viewing height
Most families mount the tablet behind the front passenger seat so the driver isn’t tempted to glance back at
Finding Nemo at a red light (we’re all human, but let’s not). Adjust the front seat position first
moving the seat later can tug the bag or shift the screen angle.
Step 2: Test the bag size before you cut anything
Slide the tablet into the bag to confirm fit. If the bag is too tight, you’ll fight it every time and the plastic will stress at the seams.
If it’s too loose, the tablet may sag or tilt. You want “snug hoodie,” not “oversized poncho.”
Step 3: Mark the headrest post locations
Hold the bag flat against the back of the front seat, roughly where the tablet should sit.
Use the marker to make two small dots on the bag where the headrest posts would pass through. Keep the dots level.
A lopsided setup = a kid yelling, “It’s crooked!” every four minutes until the sun burns out.
Step 4: Remove (or lift) the headrest safelythen put it back
With the vehicle parked and the seat empty, remove the headrest according to your vehicle’s design (often there’s a release button).
If you can lift it high enough without fully removing it, that’s even better. The goal is to route the bag onto the posts
and then reinstall the headrest securely at an appropriate height for that seat’s occupant.
Don’t leave the headrest off “because it’s easier”head restraints exist for a reason.
Step 5: Cut two small holes
Cut two neat holes where you marked. Start smaller than you think you needplastic stretches, and you can always widen slightly.
If you cut giant circles immediately, the bag may slip down the posts like it’s trying to escape accountability.
Optional reinforcement: Place a small ring of clear tape around each hole before (or after) cutting to reduce tearing,
especially if you expect lots of screen taps.
Step 6: Mount the bag on the headrest posts
Slide the holes over the headrest posts so the bag lies flat against the seat back. Reinstall and lock the headrest in place.
Give the headrest a gentle tug to confirm it’s secure. If it’s not locked, fix it nowthis is not a “hope for the best” moment.
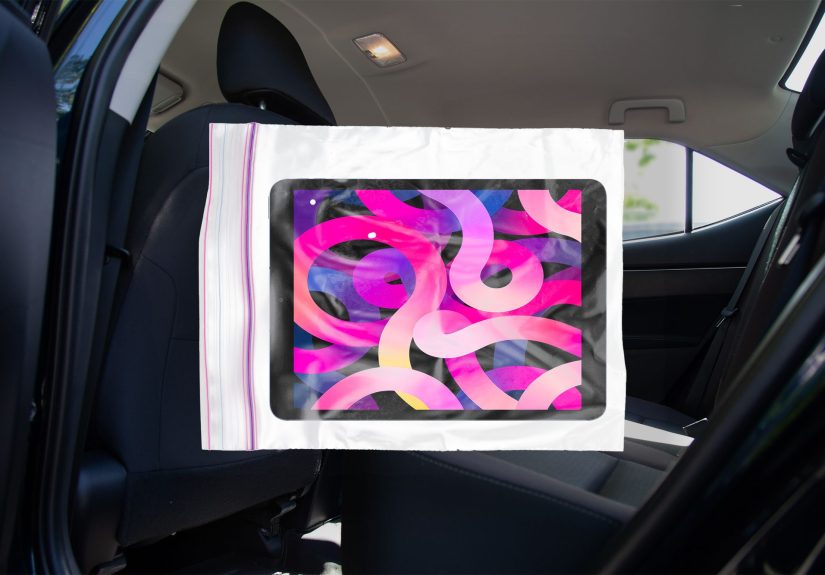
Step 7: Insert the tablet and set the angle
Put the tablet into the bag and zip it closed. Center the tablet so the screen is visible and the weight is balanced.
If the bag sags, adjust hole placement next time or use two small binder clips at the top corners of the bag
(clipped behind the seat fabric area, not to any airbag seam) to keep it taut.
Step 8: Lock down settings before you roll
Enable a kid-safe mode (like Guided Access on iPad), preload content offline, and set brightness to a comfortable level.
Do all of this while parked. Once you start driving, the only thing you should be adjusting is your patience.
If Your Headrests Don’t Come Off: 3 Practical Alternatives
Option A: The clear document pouch method
A sturdy clear binder pouch (the kind made for papers) can work like a tougher, reusable version of the Ziplock idea.
Many already have holes or reinforced edges. You can tie it to headrest posts with short straps or ribbonagain,
avoiding any airbag seams and keeping everything tight and tidy.
Option B: A soft strap-around headrest mount (no hard parts)
If you prefer not to DIY cut holes, a fabric/soft-strap tablet sleeve designed to wrap around the headrest can be easier and sturdier.
The big safety win is fewer sharp edges and less tearing. The big “read this twice” detail is to ensure the strap doesn’t interfere with any
seat features and that the mount stays secure without dangling pieces.
Option C: The “seat-back pocket + kick mat” compromise
Some seat-back organizers have a clear pocket sized for tablets. This keeps the device from becoming a free-range object
and adds storage for wipes, snacks, and the small plastic dinosaur that apparently must attend every trip.
Choose a soft organizer and keep it firmly attached so it doesn’t flop around.
Safety Checks Before You Hit the Road
Let’s talk about the part nobody wants to think about: in sudden stops or crashes, unsecured objects can move with serious force.
The goal is to keep the tablet contained and the setup stable.
Do this safety sweep:
- Set up while parked. Adjusting anything while driving is a distraction risk.
- Keep the mount soft. Avoid adding hard, heavy, or sharp accessories near passengers.
- Don’t block airbags or compress seat seams. If your seat has side airbags, don’t wrap straps or clips around seams where airbags deploy.
- Reinstall the headrest properly. A headrest should lock in place and be positioned for the seat occupant’s safety.
- Manage cables. Use a short charging cable, route it away from little necks/hands, and avoid loops.
- Mind the driver’s view. Keep screens where they won’t reflect into mirrors or tempt the driver to glance back.
Screen-Time Sanity: Keep the Tablet From Becoming the Boss of the Car
A tablet can be a road-trip lifesaver, but the long game is building habits that don’t end with your child negotiating
for “just one more episode” like a tiny Hollywood agent.
Realistic, parent-approved strategies:
- Use “chapters,” not endless autoplay. One movie or a curated playlist, then a break.
- Pair screen time with breaks. Snack, stretch, bathroomthen back to the show.
- Co-view when possible. If an adult can occasionally listen in or discuss the story later, it turns passive viewing into something richer.
- Set expectations before the car moves. “Two episodes, then music and window-watching.” Your future self will thank you.
- Create a family media plan. Having agreed rules helps reduce in-the-moment battles in the back seat.
Make It Kid-Proof: Settings That Save Your Nerves
On an iPad, consider:
- Guided Access to lock the device to one app and disable certain buttons.
- Volume limits (especially with headphones).
- Do Not Disturb so notifications don’t pop up at the worst moment.
- Offline downloads so streaming doesn’t buffer and spark a meltdown that rivals a natural disaster.
Heat, Glare, and Cleaning
Cars get hot fast, and electronics do not enjoy becoming dashboard toast. If the sun is blasting the screen,
bump brightness modestly, angle the front seat slightly, or use window shades (again, secured and not interfering with safety).
If the device shows a temperature warning, take it seriouslypause playback and let it cool.
Cleaning is the best part of this hack: the bag catches fingerprints, snack dust, and mystery goo. Wipe the outside of the bag with a microfiber cloth.
If the bag gets cloudy, scratched, or stretched out, replace it. Zip-top bags are not heirlooms.
Troubleshooting
The bag keeps sliding down
- Cut smaller holes (or reinforce with tape) so the posts hold the bag firmly.
- Move the holes slightly higher so the weight hangs correctly.
- Use two binder clips at the top corners to keep the bag taut (only if they don’t create a hard hazard or interfere with seat features).
Touchscreen response is weird
- Some thicker plastic reduces sensitivity. Try a different brand of freezer bag or a clearer, thinner (but still strong) option.
- Make sure the bag is pulled tight across the screenwrinkles can confuse touches.
- Consider a stylus designed for capacitive screens if your child struggles with tapping through plastic.
The audio is muffled
- Use Bluetooth headphones or a kid-safe wired pair with a short cable routed safely.
- If using the tablet speaker, keep the bag smooth and avoid covering speaker ports with thick folds.
FAQ
Is this actually safer than handing my kid the iPad?
Generally, a secured setup is better than a loose device bouncing around the cabin. The point is to reduce the tablet becoming a free object,
while also keeping the driver focused. But “safer” depends on how you set it upsoft, stable, no hard add-ons, and no interference with seat safety features.
Will this damage my seat?
A basic bag-on-posts setup usually doesn’t. Avoid adhesives on upholstery and avoid tightening anything around seams where airbags deploy.
If you add tape, keep it on the bagnot the seat.
Does it work with other tablets?
Yes. The idea is size + stability. Just choose a bag or sleeve that fits the device and doesn’t force stress on the plastic.
Road-Tested Experiences (The “We Tried This So You Don’t Have To” Section)
Parents love a hack that’s cheap, fast, and doesn’t require assembling a gadget that comes with seventeen screws and a mysterious extra part.
The Ziplock car iPad holder is exactly thatsimple enough to try once, tweak, and then quietly adopt as your “we’re traveling now” routine.
Here are a few common, real-world scenarios families run into, and what typically works best.
1) The first attempt is always too ambitious. Many people start by cutting big holes because it seems easier.
Then the bag slides down the posts the moment the car hits a bump, and the tablet ends up angled like it’s trying to show off its ceiling fan documentary.
The fix is boring but effective: cut smaller holes, reinforce them with tape, and keep the bag taut. If you want “set it and forget it,”
sturdiness matters more than speed.
2) The “sticky hands + touchscreen” reality check. If your child is young, they may tap like they’re trying to send Morse code.
Through plastic, that can mean missed touchesor a bag that wrinkles and makes the screen harder to use. Families who stick with this hack often
lean on simple solutions: Guided Access (so the app can’t be closed), fewer interactive games (more videos), and occasional “hands off while we drive”
reminders delivered in the calm voice you use when you’re definitely not calm.
3) The cable problem nobody thinks about until it’s too late. On longer drives, you’ll want charging.
The temptation is a long cable that snakes from the front console to the back seat like a budget jungle vine. Parents who’ve been through it will tell you:
shorter is safer and less annoying. Route the cable so it doesn’t dangle, doesn’t loop, and doesn’t end up wrapped around a car seat cup holder like a
spaghetti sculpture. A short cable plus a secure routing path reduces mess and worry.
4) Heat happens fastespecially during stops. Kids are happily watching, you pull into a rest area, and suddenly the tablet throws a temperature warning.
That’s not the device being dramatic; cars can heat up quickly, and electronics have limits. The families who avoid repeat overheating problems usually
do a few simple things: keep the tablet out of direct sun, use shades when appropriate, and take the device down during long parked breaks.
It’s also common to lower brightness once the sun setsless heat, less glare, fewer complaints.
5) The best win is the quiet you didn’t have to buy. Plenty of parents try expensive mounts and still end up with rattles, shifting arms,
or a device that bounces with every pothole. The Ziplock method works because it’s lightweight and flexible.
There’s not much to rattle, and the “holder” isn’t a rigid frame. For many families, the real victory isn’t the bagit’s the calm:
fewer dropped devices, fewer backseat arguments, and fewer moments where the driver is asked to reach behind them like a stressed-out octopus.
If you treat this as a “good enough” toolnot a luxury entertainment systemyou’ll get the best results. Keep it secure, keep it soft,
set expectations before the wheels move, and remember: a peaceful road trip doesn’t require perfection. It just requires fewer disasters per mile.
Conclusion
Turning a Ziplock bag into a car iPad holder is a classic parent move: practical, slightly ridiculous, and weirdly effective.
Use a heavy-duty freezer bag, cut small reinforced holes, mount it on the headrest posts, and lock down settings before you drive.
Add a few safety-minded habitssecure the headrest, manage cables, avoid airbags/seamsand you’ve got a low-cost setup that can make long rides
calmer for everyone. Because sometimes the best road-trip accessory isn’t a fancy gadget. It’s just plastic and determination.


