Table of Contents >> Show >> Hide
- Before You Start: Crate Basics & Safety
- 1. Build a Rolling Entryway Bench
- 2. Stack Crates into a Modular Bookshelf
- 3. Create a Coffee Table with Hidden Storage
- 4. Hang Crates as Wall Shelves
- 5. Turn Crates into a Rustic Kitchen Island or Bar Cart
- 6. Build a Mudroom Shoe and Gear Organizer
- 7. Build a Vertical Garden or Planter Wall
- 8. Make a Cozy Pet Bed
- 9. Design a Craft Room or Homework Command Center
- 10. Turn a Crate into a Bedside Table
- Finishing Touches: Paint, Stain, and Hardware
- Conclusion: Crates Are Your DIY Superpower
- Real-World Lessons from Crate Projects
Wooden crates are the LEGO bricks of the DIY world: simple, stackable, and ready to become almost anything.
You’ll find them at craft stores, big-box home centers, and even at the farmer’s market. With a little sanding,
some screws, and a splash of paint or stain, these humble boxes can become hardworking furniture, smart storage,
and eye-catching decor that looks custom-made.
Inspired by popular crate makeovers from home and DIY sites across the U.S., this guide walks you through
10 clever ways to transform crates into beautiful, budget-friendly pieces. Think benches, coffee tables,
bookshelves, garden storage, and morevery much in the spirit of a Hometalk-style community project:
approachable, creative, and totally doable on a weekend.
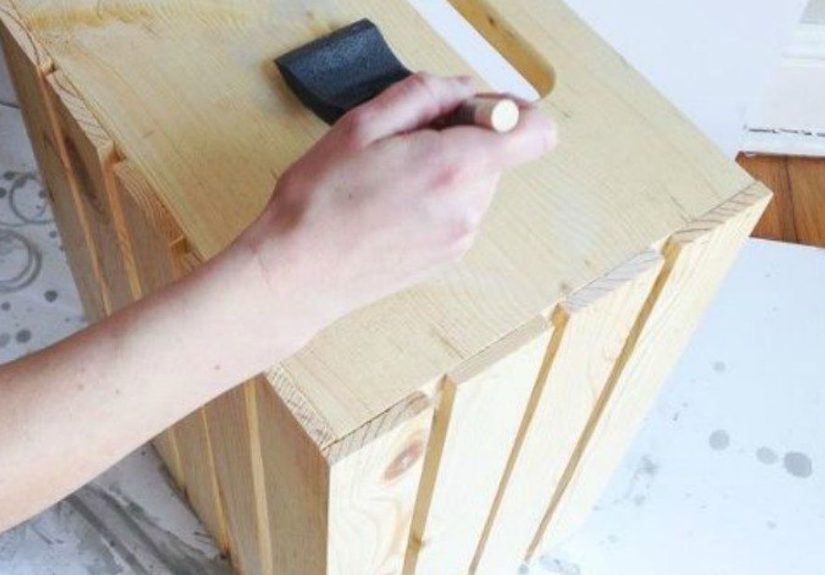
Before You Start: Crate Basics & Safety
Not all crates are created equal. Some are new, smooth, and ready for paint; others are rough, reclaimed,
and splintery enough to snag your favorite sweater. If you’re using secondhand or vintage crates, inspect
them for loose nails, cracked boards, and stains from old contents. A quick scrub with mild soap and water,
followed by thorough drying, is usually enough for cosmetic grime.
Most DIY experts recommend a fast sanding with medium- then fine-grit sandpaper so your finish goes on smoothly
and nobody gets a splinter when they reach for a book or blanket. Adding felt pads or casters under heavy
pieces helps protect your floors, and a water-based polyurethane or outdoor sealer keeps stained or painted crates
looking fresh, especially on benches, coffee tables, or garden projects exposed to moisture.
1. Build a Rolling Entryway Bench
If your entryway currently functions as a shoe avalanche zone, a crate bench can change everything. Line up
three or four crates side by side with the open sides facing out to create cubbies for shoes, baskets, and bags.
Secure them together with screws through the side boards and attach a solid board on top for a bench seat.
For a true “why didn’t I do this sooner?” moment, add casters to the underside so you can roll the bench
forward when cleaning or rearranging. Finish the piece with stain for a rustic look or paint it in a bold color
to brighten the space. Top it off with a long cushion or a few throw pillows, and you’ve got a functional,
custom bench that looks like it came out of a high-end catalog instead of the lumber aisle.
2. Stack Crates into a Modular Bookshelf
Crate bookshelves are a staple in DIY circles for a reasonthey’re endlessly configurable. Start with six to
eight identical crates. Stand them on end or lay them sideways, mixing vertical and horizontal orientations
to create interest. Stack them in a grid or a staggered layout, then screw adjacent crates together so the
whole unit behaves as one piece.
This flexible bookshelf is perfect for renters or anyone who rearranges furniture often. You can break the unit
apart into smaller groupings, add more crates over time, or reconfigure them around a TV or in a kid’s room
to corral books and toys. A single stain color pulls everything together, while painting each crate a different
pastel or jewel tone gives you a playful, eclectic, Hometalk-worthy look.
3. Create a Coffee Table with Hidden Storage
The classic crate coffee table uses four crates arranged in a square with their openings facing out. This layout
gives you storage on all four sides for books, blankets, baskets, or board games, plus a center “well” that can
hold a plant, a tray, or seasonal decor. Attach the crates to a plywood base, add furniture legs or casters, and
then stain or paint the entire piece so it reads as a single, cohesive table.
If you prefer a rectangular table, line up two or four crates instead and top them with wide boards spaced
slightly apart for a slatted farmhouse look. A darker stain makes the wood feel rich and polished; a light,
weathered finish leans coastal and casual. Either way, you end up with a coffee table that pulls its weight
in both style and storage.
4. Hang Crates as Wall Shelves
When floor space is tight, send your crates up the wall. Mounted crates make sturdy shelves for plants, books,
framed photos, or kitchen staples. Choose shallower crates for narrow hallways or deeper ones to display
chunky objects like mixing bowls and storage jars.
To install, locate wall studs with a stud finder and use long wood screws through the back slats of each crate.
For a more built-in look, group several crates together in a gallery-style arrangement: some horizontal,
some vertical, some stacked. Stain them all to match your existing woodwork or paint them in a monochrome palette
that blends with your walls, so your decor becomes the star.
5. Turn Crates into a Rustic Kitchen Island or Bar Cart
Crates shine in kitchens where extra storage is always welcome. For a mini island, build a simple rectangular
base from 2×2 or 2×4 lumber, then attach crates around it with the openings facing out. These cubbies are ideal
for cookbooks, mixing bowls, small appliances, or baskets filled with linens and utensils.
Add heavy-duty locking casters and a butcher-block or thick pine top, and you’ve got a portable island or bar
cart that rolls wherever you need itperfect for small apartments or open-plan spaces. A coat of food-safe oil
or sealer on the top makes it easy to wipe down after food prep, while painted crates underneath can tie into
your cabinet color or contrast for a two-tone effect.
6. Build a Mudroom Shoe and Gear Organizer
Mudrooms and back doors have a way of collecting everything: boots, backpacks, sports gear, dog leashes,
forgotten umbrellas. Crates can bring order to the chaos. Stack sturdy crates into columns against the wall,
leaving enough height for taller boots in the bottom row and smaller cubbies up top for hats and gloves.
For a more polished look, mimic the open-front stacking bins you see in big-box stores by cutting a low,
angled opening in the front panel of each crate. Sand the cut edge smooth and reinforce the corners if needed.
Label each crate with stenciled names or icons so kids know exactly where things belong. Suddenly, getting out
the door in the morning feels less like a scavenger hunt.
7. Build a Vertical Garden or Planter Wall
Outdoor crate projects are especially satisfying because they combine storage and greenery. For a vertical
garden, attach several crates to a fence or exterior wall, making sure the wood is sealed for outdoor use.
Line the bottom of each crate with landscape fabric or plastic with drainage holes, then fill them with potting
mix and your favorite herbs, trailing flowers, or succulents.
You can alternate planted crates with empty ones used as open shelves for watering cans, garden gloves,
or lanterns. Staggered heights add visual interest, and a mix of natural wood and painted crates feels eclectic
and charmingvery “I just casually built this Pinterest-worthy wall on a Saturday afternoon” energy.
8. Make a Cozy Pet Bed
Crates were practically born to become pet beds. A single crate turned on its side becomes a snug nook for a
small dog or cat. Sand any rough spots, paint or stain the outside, and screw on small casters or furniture feet
to keep it off cold floors. Add a thick cushion or a folded blanket inside, and your pet gets a comfy throne that
looks great in your living room.
For a custom touch, stencil your pet’s name on the front slat or use letter decals. If you have a larger dog,
you can join two crates side by side and add a single wide cushion on top. Just be sure the crate wood is sturdy
enough to handle the weight and won’t flex too much when your furry friend flops down dramatically.
9. Design a Craft Room or Homework Command Center
Crafters and students know that clutter kills creativity. Crates can step in as modular storage that grows
with your needs. Arrange them under a simple tabletop to create a desk with built-in shelving, or stack them
beside a worktable for vertical storage.
Use smaller crates or dividers inside the larger boxes to corral yarn, fabric, paints, or stationeries. You can
even dedicate one crate to “in-progress projects” so works-in-progress don’t take over the whole room. Labeling
each crate with chalkboard paint or clip-on tags makes it easy to reshuffle supplies when you switch hobbies or
seasonsholiday crafting, anyone?
10. Turn a Crate into a Bedside Table
A single crate can make a surprisingly stylish nightstand. Stand it upright so the opening faces out and add
short, chunky furniture legs or hairpin legs for height. The inside of the crate becomes shelf space for books,
a storage basket, or a small bin for chargers and gadgets.
For a more finished look, cut a solid top from plywood or reclaimed wood and attach it with screws or construction
adhesive. Paint the crate to match your headboard or leave it stained for a rustic cabin vibe. Either way,
you’ll have a functional bedside table that cost a fraction of the store-bought version and comes with built-in
bragging rights: “Oh, this old thing? I made it.”
Finishing Touches: Paint, Stain, and Hardware
Once you’ve built your crate masterpiece, the finish you choose will determine whether it reads as farmhouse,
modern, industrial, or coastal. Dark espresso stain feels rich and classic, while honey and natural tones look
airy and Scandinavian. White paint is a favorite for cottage-style spaces, especially when lightly distressed
around the edges to mimic age.
Don’t forget hardware: casters add mobility, metal corner brackets emphasize an industrial look, and leather or
rope handles make crates easier to pull out when they’re used as drawers. For high-use pieces like coffee tables,
benches, and mudroom organizers, seal everything with a clear topcoat to protect against scuffs, spills, and
the occasional muddy paw print.
Conclusion: Crates Are Your DIY Superpower
Wooden crates may be inexpensive and unassuming, but they’re incredibly versatile. With a bit of imagination,
they can become entryway benches, coffee tables, bookshelves, garden walls, pet beds, and more. Because they
stack, screw together, and take paint or stain easily, they invite experimentationif you get bored with one
layout, you can often unscrew and rebuild it into something new.
Whether you’re a seasoned DIYer or just starting your first weekend project, crate transformations are low-risk,
high-reward builds that make a big difference in how your home looks and functions. Start with one idea from this
list, tweak it to fit your space and style, and before long you’ll be the person friends text for advice when
they spot a stack of crates on sale. Hometalk would definitely approve.
Real-World Lessons from Crate Projects
People who dive into crate DIY projects tend to learn a few truths very quickly. First, the prep work matters
more than you think. The difference between a “Pinterest fail” and a piece that looks store-bought is often
twenty minutes with sandpaper and a drop cloth. Sanding down rough edges, wiping away dust, and doing a test
swipe of stain on the underside helps you avoid blotchy finishes and splinters later on. Many DIYers also
discover that pre-drilling screw holes into the thin crate boards prevents cracking and keeps the structure
stronger over time.
Another common lesson: measure your space twice, build once. Crate furniture can look light and airy in photos,
but four or six crates strapped together take up real visual weight. People who have built crate coffee tables
or shelving units often recommend taping out the footprint on the floor first or positioning empty crates in the
layout you’re considering. That way you can walk around it, test drawer clearances, and make sure doors and
closets still open fully before committing with screws and stain.
Finishes are another area where experience pays off. Many crafters try bright paint colors first and later move
toward more neutral stains or two-tone combos. A common strategy is to stain the main body of a crate piece in a
warm wood tone, then paint just the interior or the edges for contrast. This gives the furniture personality
without making it feel busy. In high-traffic areas like living rooms and mudrooms, people often regret skipping
a clear topcoatscuffs and water rings can show up quickly on unsealed woodso adding that final protective layer
is a smart habit to build.
Hardware choices also evolve with practice. At first, it’s tempting to grab the cheapest set of casters or legs,
but heavier pieces need quality hardware rated for the load, especially if you’re storing books, tools, or big
plants. DIYers who build crate benches or rolling coffee tables frequently recommend locking casters, so the
furniture won’t slide away when someone sits down or props their feet up. Likewise, small corner brackets and
flat mending plates on the back of a crate configuration can dramatically improve stability without changing the
design from the front.
Finally, people who work with crates again and again tend to embrace flexibility. A crate bookshelf might become
a toy organizer when kids arrive, then a craft storage wall later on. Because crates are modular and relatively
inexpensive, they encourage experimentation rather than perfectionism. The most successful crate projects grow
and change with a household: a vertical garden that turns into outdoor storage for cushions in winter, a
nightstand that migrates to the entryway as a shoe rack, or a coffee table that becomes a rolling art supply
station. Once you’ve built a few of these pieces, you start seeing crates not just as boxes, but as building
blocks for whatever your home needs next.
![18 Best Types of Charts and Graphs for Data Visualization [+ How to Choose]](https://corkopencoffee.org/wp-content/uploads/2026/05/18-best-types-of-charts-and-graphs-for-data-visualization-how-to-choose-qKM1PBYG-thumb.jpg)


