Table of Contents >> Show >> Hide
- 1) Start With a “Three-Layer” Lighting Plan (Ambient + Task + Accent)
- 2) Make Your Overhead Fixture a StatementWithout Letting It Boss Everyone Around
- 3) Use Dimmers Everywhere You Can (Yes, Everywhere)
- 4) Add a Floor Lamp That Solves a Real Problem (Reading, Dark Corners, or “The Sofa Ate the Light”)
- 5) Double Up on Table Lamps for Instant “Finished Room” Energy
- 6) Try Wall Sconces to Free Up Table Space (and Look Like You Hired a Designer)
- 7) Use Recessed Lighting Strategically (Not as a Grid of Doom)
- 8) Add Picture Lights or Art Lighting to Create a “Gallery Moment”
- 9) Use LED Strip Lighting for a Soft Glow (Coves, Shelves, and Behind the TV)
- 10) Get Smart About Warmth: Pick the Right Color Temperature (Kelvins)
- 11) Plan for Real Life: Brightness (Lumens), Glare, and “Zones”
- Putting It All Together: 3 Easy Lighting “Recipes”
- Common Living Room Lighting Mistakes (and the Quick Fixes)
- Experiences and Real-World Lessons From Living With Better Lighting (Extra Notes)
- Conclusion: Your Living Room Lighting Checklist
Lighting is the secret handshake of a great living room. You can have a gorgeous sofa, art that looks like it belongs in a gallery, and a rug that costs more than your first car… and still end up with a room that feels like a hospital waiting area if the lighting is wrong. The fix isn’t “buy one fancy fixture and pray.” It’s building a smart, flexible mix of ambient lighting, task lighting, and accent lightingthe holy trinity of living room lighting ideas.
Below are 11 lighting ideas that work in tiny apartments, open-concept family rooms, and everything in between. You’ll also find practical guidance on brightness (lumens), warmth (Kelvins), and placementbecause a living room should feel inviting, not like you’re being interrogated by overhead glare.
1) Start With a “Three-Layer” Lighting Plan (Ambient + Task + Accent)
If your living room has one lonely ceiling light doing all the work, it’s basically a one-person band trying to play a stadium show. Layered lighting spreads the job across multiple sources and heights, which makes the room look richer and feel more comfortable.
How to think about the layers
- Ambient lighting: Your baseline glowenough to walk around safely and not stub a toe.
- Task lighting: Focused light for reading, puzzles, crafting, or scrolling like it’s an Olympic sport.
- Accent lighting: The “wow” layerhighlights art, shelves, texture, plants, or architectural details.
Pro move: Put each layer on its own switch (or smart control). That’s how your living room goes from “weekday normal” to “movie night cave” to “friends are coming over, act classy” in seconds.
2) Make Your Overhead Fixture a StatementWithout Letting It Boss Everyone Around
A chandelier, pendant, or sculptural flush mount can anchor the room and instantly upgrade the vibe. The trick is using it as part of a team, not the entire lighting plan. Overhead lighting alone can feel flatlike taking a selfie under a ceiling fan and expecting magic.
Style ideas that work in most living rooms
- Modern globe chandelier: Great for balanced, all-over light and a clean silhouette.
- Oversized pendant: Especially good over a coffee table in a large or open-concept space.
- Soft fabric or paper shade: Diffuses light for a warm, gentle glow.
Tip: If you’re hanging a pendant over a surface (like a coffee table or console), a common guideline for pendants is roughly 30–36 inches above the surface, then adjust for sightlines and comfort.
3) Use Dimmers Everywhere You Can (Yes, Everywhere)
If you do only one thing from this list, make it dimmers. Dimmers turn your lighting from “on/off” into “perfectly tuned.” They also help when your living room is doing triple duty as hangout spot, work zone, and late-night snack headquarters.
Where dimmers shine the most
- Overhead fixtures that can feel intense at night
- Recessed lights (so they don’t read as “office ceiling grid” energy)
- Accent lighting (so highlights feel intentional, not blinding)
Renter-friendly option: Smart bulbs, plug-in dimmers, and smart plugs can often give you dimming control without rewiring.
4) Add a Floor Lamp That Solves a Real Problem (Reading, Dark Corners, or “The Sofa Ate the Light”)
Floor lamps are one of the fastest ways to upgrade both function and style. They also help you light a room from different heightswhich is exactly what makes layered lighting look designer-level.
Floor lamp picks by purpose
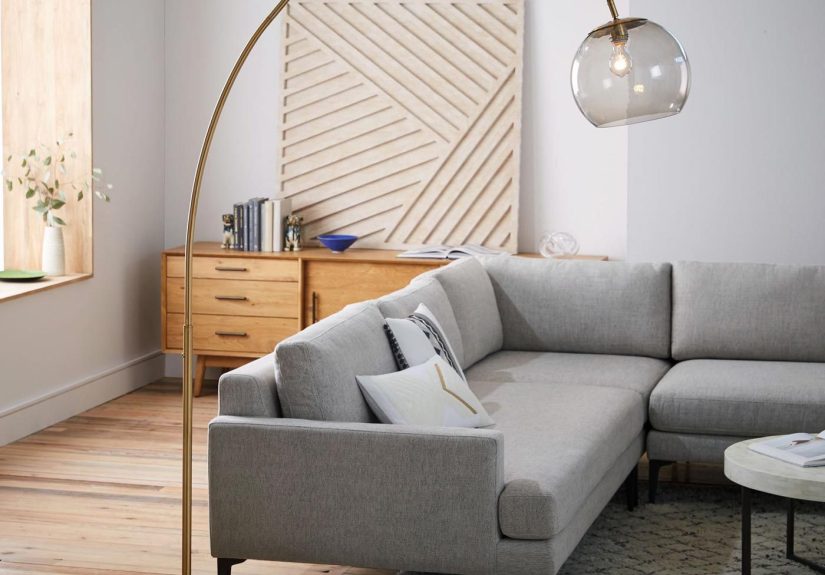
- Arc floor lamp: Reaches over a sectional or seating area without needing a side table.
- Torchiere: Bounces light off the ceiling for soft ambient glow.
- Adjustable task lamp: Best for reading chairs and hobby corners.
Placement tip: Put a reading lamp slightly behind and to the side of a chair or sofa seat so the light lands on your book (not in your eyes).
5) Double Up on Table Lamps for Instant “Finished Room” Energy
A pair of table lamps can make a living room feel balancedeven if the rest of the day is not. Symmetry isn’t mandatory, but it’s a reliable shortcut to calm visuals, especially around a sofa table, console, or built-ins.
Easy table-lamp setups
- Two lamps on a sofa table: Classic, polished, and great for wide rooms.
- One lamp on each side of the sofa: Perfect for conversation zones.
- One lamp + one floor lamp: Better if you’re short on surfaces or want asymmetry.
Shade tip: Fabric shades soften and spread light. Clear glass or metal shades can look cool but may cause glare if the bulb is exposed.
6) Try Wall Sconces to Free Up Table Space (and Look Like You Hired a Designer)
Wall sconces are the MVP for small living rooms and minimal surfaces. They also add “built-in” character, like your home came this way and definitely wasn’t a 2 a.m. online purchase spree.
Where sconces work beautifully in living rooms
- Flanking a fireplace or large piece of art
- Beside a reading nook
- Along a long wall to create rhythm and depth
Height guidance: A common range for sconces used as accent/task lighting is roughly 60–72 inches from the floor (adjust based on ceiling height and where glare disappears).
Renters: Look for plug-in sconces or other no-hardwire options so you can get the look without calling an electrician (or your landlord).
7) Use Recessed Lighting Strategically (Not as a Grid of Doom)
Recessed lights can be clean and modernif they’re planned with intention. Too many can make a living room feel sterile. The goal is even, comfortable coverage that supports your other layers.
Basic recessed layout tips
- Spacing rule of thumb: Roughly half the ceiling height between lights (an 8-foot ceiling often lands around ~4 feet apart).
- Wall distance: Start about 2–3 feet from walls on standard ceilings to reduce harsh edge shadows.
- Always dimmable: Non-negotiable for living rooms.
Design trick: Use recessed lights to wash walls or highlight zones (like a reading corner) instead of lighting every square inch equally.
8) Add Picture Lights or Art Lighting to Create a “Gallery Moment”
Art lighting makes a living room feel curated. Even inexpensive prints look more expensive when they’re intentionally lit. Picture lights, mini spotlights, or adjustable sconces can all work as accent lightingespecially on feature walls or above a console.
How to make art lighting look intentional
- Choose warm, consistent color temperature so artwork doesn’t look oddly blue.
- Angle light to reduce glare (especially behind glass frames).
- Light one hero piece, or create a rhythm across a gallery wall.
Bonus: If your living room has built-ins, small puck lights or mini downlights inside shelves can turn “storage” into “showcase.”
9) Use LED Strip Lighting for a Soft Glow (Coves, Shelves, and Behind the TV)
LED strips are a low-profile way to add atmosphereespecially in rooms that need warmth without adding clutter. They’re excellent for modern living rooms, media rooms, and anywhere you want the light source to disappear while the glow stays.
Where LED strips work best
- Behind the TV: Creates a soft halo and can reduce perceived harsh contrast in a dark room.
- Under floating shelves: Adds depth and highlights objects.
- Along a ceiling cove: Gives that “high-end hotel” ambient feel.
Practical note: Choose a warm white option for living rooms and keep the color temperature consistent with your other bulbs so the room doesn’t look like three different time zones.
10) Get Smart About Warmth: Pick the Right Color Temperature (Kelvins)
Brightness is only half the story. The other half is color temperature, measured in Kelvins (K). Living rooms usually look and feel best with warmer lightthink cozy, flattering, “everyone looks well-rested” lighting.
A simple living room guide
- 2700K–3000K: Warm, inviting, and popular for living rooms.
- Above 3000K: Can start feeling cool or harsh in a lounge space (great for task-heavy areas, less great for relaxing).
If your living room feels “off” at night: Check your bulbs. One rogue daylight bulb can make a warm room look weirdly icy.
11) Plan for Real Life: Brightness (Lumens), Glare, and “Zones”
Your living room isn’t one activityit’s a collection of moments. The best lighting plans create zones: a reading spot, a TV zone, a conversation area, maybe a desk corner. Lighting zones make the room feel flexible instead of overlit.
Brightness basics without the math headache
- Shop by lumens, not watts: Lumens measure brightness, while watts measure energy use.
- Ambient starting point: Many guides suggest around 10–20 lumens per square foot for a living room, then you layer task and accent on top.
- Watch glare: Use shades, diffusers, and indirect light (like torchieres or wall-wash lighting) to keep the room comfortable.
Quick example: If your room is 200 square feet, a baseline ambient target might land roughly in the 2,000–4,000 lumen rangethen you split that across multiple fixtures so it doesn’t feel like a stadium spotlight.
Putting It All Together: 3 Easy Lighting “Recipes”
Recipe A: Cozy Night In
- Dim overhead to low
- Turn on two table lamps (warm bulbs)
- Add a soft accent (LED strip behind shelves or a sconce)
Recipe B: Reading + Hobbies
- Task floor lamp aimed at the chair
- Ambient lighting at medium level
- Accent lighting optional (keep it subtle so the page is the star)
Recipe C: Hosting Mode
- Ambient lighting brighter (but still warm)
- Accent lighting on art or shelves for depth
- Table lamps or sconces to keep faces flattering
Common Living Room Lighting Mistakes (and the Quick Fixes)
- Mistake: Relying on one overhead light. Fix: Add two lamps at different heights.
- Mistake: Mixing bulb colors. Fix: Standardize your bulbs (warm range) across the room.
- Mistake: Too many bright recessed lights. Fix: Put them on dimmers and add softer accent sources.
- Mistake: Glare on screens and shiny surfaces. Fix: Use shades, indirect light, and reposition fixtures.
Experiences and Real-World Lessons From Living With Better Lighting (Extra Notes)
When people update a living room’s lighting, the biggest surprise is rarely “Wow, it’s brighter.” It’s usually “Wow, the whole room feels different.” Not because the furniture changedbut because the lighting finally started working with the room instead of against it.
Lesson one: the room instantly feels bigger when corners aren’t dark. A lot of living rooms have what designers sometimes call “dead zones”a chair that never gets used, a corner that feels oddly gloomy, or a walkway that’s fine during the day but feels shadowy at night. Once a floor lamp or sconce goes into that spot, the room suddenly feels more complete. People start using areas they ignored before, like a reading chair near a window or a small bench by the entry of the living space.
Lesson two: one “wrong” bulb can ruin the vibe faster than a bad throw pillow. It’s common to replace a burnt-out bulb with whatever was in the junk drawer, only to end up with one bright, cool spotlight that makes the rest of the room look yellow by comparison. The fix is simplestandardize your color temperatureyet it changes everything. Once the bulbs match (especially in that warm, cozy range), the room looks calmer and more intentional. People also notice their artwork and paint colors look more accurate and flattering, which is a nice bonus for something as unglamorous as buying a pack of bulbs.
Lesson three: dimmers feel like “luxury,” even when they’re not expensive. Living rooms are multi-purpose spaces, and the needs change by the hour. Bright light is great when you’re cleaning, finding a lost earring, or setting up snacks for guests. Softer light is better when you want the room to feel restful. Dimming makes those transitions easy, and that’s why the room starts feeling “high-end.” The lighting can follow the moment instead of forcing every moment to look the same.
Lesson four: lighting zones reduce stress (and arguments). This sounds dramatic, but it’s real: in many homes, one person wants it bright and another wants it cozy. When you create zones, you don’t have to choose one setting for the entire room. The reading chair can have a focused task lamp. The sofa area can stay softly lit with table lamps. The shelves can have subtle accents. Suddenly, everyone gets what they want, and nobody has to live under the “big light” like it’s a punishment.
Lesson five: indirect light is the comfort hack most people didn’t know they needed. A torchiere that bounces light off the ceiling, LED strips that glow from behind a shelf, or a sconce that washes a wallthese options create a soft, flattering atmosphere that makes the room feel relaxing. People often describe it as “cozier,” but what they really mean is that the lighting stopped attacking their eyeballs. Once someone lives with indirect light for a week, they usually don’t want to go back.
Lesson six: the best lighting plans leave room for change. Living rooms evolvenew furniture, different layouts, seasonal decor, maybe a new TV size (it happens). Portable lighting like floor and table lamps lets you adjust without redoing everything. Even with hardwired fixtures, thinking in layers helps because you can swap shades, change bulb warmth, or re-aim adjustable lights to match the room’s new setup.
In short: better lighting doesn’t just make a room brighter. It makes the living room more usable, more flattering, and more “you.” And that’s a rare home upgrade that pays off every single night.
Conclusion: Your Living Room Lighting Checklist
- Use at least two to three lighting layers (ambient, task, accent).
- Keep color temperature consistent (warm is usually best for living rooms).
- Put key lights on dimmers or smart controls.
- Light the corners and create zones for how you actually live.
- Choose lumens for brightness decisions, not watts.