Table of Contents >> Show >> Hide
- What Is the Thumbnail Cache in Windows?
- Before You Clear the Thumbnail Cache
- Method 1: Clear the Thumbnail Cache With Disk Cleanup
- Method 2: Clear the Thumbnail Cache From Settings in Windows
- Method 3: Delete the Thumbnail Cache Manually
- Which Method Is Best?
- What Happens After You Clear the Thumbnail Cache?
- If Thumbnails Still Are Not Showing
- Why This Matters More Than People Think
- Real-World Experiences With Clearing the Thumbnail Cache in Windows
- Conclusion
- SEO Tags
If File Explorer has started showing blank icons, old previews, wrong image thumbnails, or a mysterious parade of generic white boxes, your thumbnail cache may be the culprit. In plain English, Windows stores tiny preview images so folders load faster the next time you open them. That is usually helpful. Until it isn’t. When the cache gets corrupted, outdated, or just plain moody, File Explorer can act like it forgot how pictures work.
The good news is that clearing the thumbnail cache in Windows is usually quick, safe, and surprisingly satisfying. You are not deleting your actual photos, videos, PDFs, or other files. You are only removing the temporary preview database Windows uses to display those cute little mini-previews. Once cleared, Windows rebuilds the cache automatically as you browse your folders again.
In this guide, you’ll learn three simple ways to clear the thumbnail cache in Windows, plus when each method makes the most sense, what to expect afterward, and how to fix things if thumbnails still refuse to cooperate. Whether you use Windows 10 or Windows 11, these steps are practical, beginner-friendly, and much easier than yelling at your monitor.
What Is the Thumbnail Cache in Windows?
The thumbnail cache is a collection of temporary files Windows stores so File Explorer can quickly display previews of images, videos, documents, and sometimes folders. Instead of generating a fresh preview every single time you open a directory, Windows saves those mini-images in a cache database. That speeds things up and makes browsing feel smoother.
But speed has a downside. If the cache becomes outdated or corrupted, you may see:
- Blank or white file previews
- Wrong thumbnails attached to the wrong files
- Old previews that do not update
- Generic icons instead of actual image or video previews
- Slow-loading folders in File Explorer
That is usually your sign to rebuild the thumbnail cache. Think of it as asking Windows to toss out its old cheat sheet and make a fresh one.
Before You Clear the Thumbnail Cache
Before jumping in, there are two useful things to know. First, clearing the thumbnail cache does not erase your real files. Your photos, videos, and documents stay right where they are. Second, after you clear the cache, some folders may look slower for a little while because Windows has to generate new previews from scratch. That is normal. It is not your PC being dramatic. It is just rebuilding.
You should also make sure thumbnails are actually enabled in File Explorer. If the setting Always show icons, never thumbnails is turned on, clearing the cache will not do much because Windows is being told not to show previews in the first place.
Method 1: Clear the Thumbnail Cache With Disk Cleanup
This is the classic method, and for many people it is still the easiest. Disk Cleanup has been around forever, which in Windows years makes it practically a historical landmark. The tool can remove temporary system files, and one of the items it can delete is the thumbnail cache.
When to use this method
Use Disk Cleanup if you want the most familiar built-in option and prefer clicking through a simple utility rather than digging into folders or running commands.
Steps to clear thumbnails with Disk Cleanup
- Press the Windows key and type Disk Cleanup.
- Open the Disk Cleanup app.
- Select your Windows drive, which is usually C:, then click OK.
- Wait while Windows scans the drive.
- In the list of files to delete, check the box for Thumbnails.
- You can uncheck other items if you only want to clear the thumbnail cache.
- Click OK, then choose Delete Files.
That is it. Windows will delete the old thumbnail database, and the next time you browse image-heavy folders, it will start creating fresh previews.
Why this method works well
Disk Cleanup is easy, built in, and low risk. It is a great choice if your File Explorer thumbnails are showing the wrong image, refusing to update, or displaying blank placeholders. It also gives you a chance to remove other junk files if your system drive is getting crowded.
Small downside
Disk Cleanup is simple, but it is not always the fastest route if you want more control. If the cache is especially stubborn, manual deletion can be more direct.
Method 2: Clear the Thumbnail Cache From Settings in Windows
If you prefer modern Windows menus over older utilities, you can clear the thumbnail cache through Settings. In Windows 11 especially, this feels a little cleaner and more up to date. It is basically the same idea as Disk Cleanup, just wearing a newer outfit.
When to use this method
Use this method if you like working inside the Settings app, or if you are already managing storage and temporary files there.
Steps to clear thumbnail cache in Settings
- Open Settings.
- Go to System > Storage.
- Click Temporary files.
- Let Windows calculate what can be removed.
- Find and check Thumbnails.
- Click Remove files.
This method is especially handy if you also want to review other removable items like temporary files, Recycle Bin contents, or update leftovers. It turns a thumbnail fix into a mini digital spring cleaning session.
Why this method is useful
The Settings route is friendly, visual, and easy for less technical users. It is also nice if you are already trying to free up drive space in Windows. While the thumbnail cache usually does not take up a massive amount of room, clearing it along with other temporary files can still make your system feel tidier.
What to watch for
On some PCs, the list of temporary items can take a moment to load. Also, if File Explorer is actively using cached previews, you may not see instant magical results until you close and reopen folders or restart Windows Explorer.
Method 3: Delete the Thumbnail Cache Manually
If the built-in tools do not solve the problem, manual deletion is the more hands-on option. This method goes straight to the source: the thumbcache database files stored in your user profile. It is more advanced than the first two methods, but still very manageable if you follow the steps carefully.
When to use this method
Use manual deletion if:
- Disk Cleanup did not fix the problem
- Settings did not remove the corrupted cache
- Your thumbnails are still broken, missing, or mismatched
- You want the most direct way to rebuild the cache
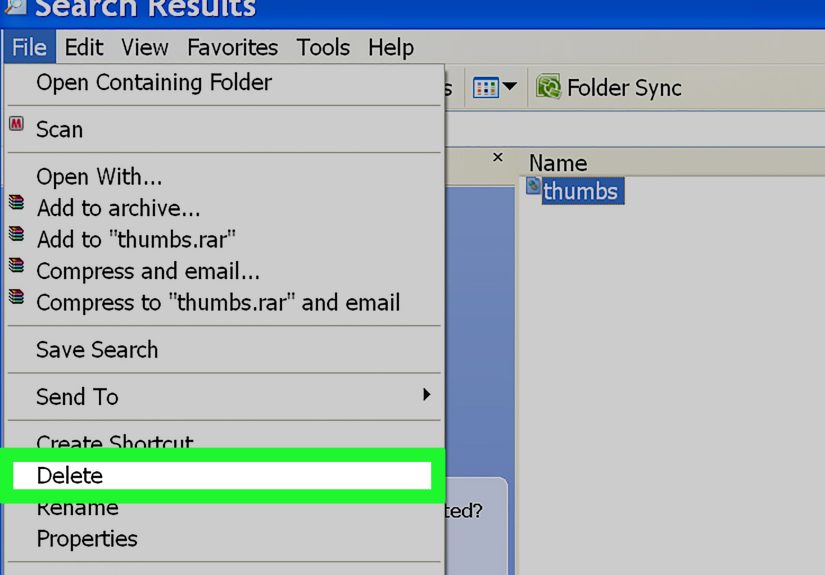
Option A: Delete thumbcache files in File Explorer
- Press Windows + R to open Run.
- Type %LocalAppData%MicrosoftWindowsExplorer and press Enter.
- Look for files named something like thumbcache_*.db.
- Select the thumbcache files and delete them.
- Restart your computer, or restart Windows Explorer.
Option B: Clear the thumbnail cache with Command Prompt
If Windows will not let you delete the files because Explorer is using them, Command Prompt is usually the cleaner path.
- Search for Command Prompt.
- Right-click it and choose Run as administrator.
- Type the following commands one at a time:
The first command closes File Explorer, the second deletes the thumbnail cache files, and the third starts File Explorer again. It is the Windows equivalent of clearing the table, sweeping the crumbs, and telling everyone they can come back in.
Why this method works
This approach targets the actual cache database files directly. If your thumbnail cache is badly corrupted, this method often succeeds when the easier methods do not.
A word of caution
Manual deletion is still safe when done correctly, but pay attention to the path and commands. You only want to remove the thumbcache files, not random files in the Explorer folder. Precision matters. This is a cleanup mission, not a treasure hunt with scissors.
Which Method Is Best?
If you want the short answer, here it is:
- Use Disk Cleanup if you want the easiest traditional method.
- Use Settings if you prefer a more modern Windows interface.
- Use manual deletion if the first two methods fail or you want a stronger reset.
For most users, Method 1 or Method 2 is enough. Method 3 is the backup plan when Windows decides to be extra complicated.
What Happens After You Clear the Thumbnail Cache?
Once the cache is cleared, Windows begins rebuilding thumbnails as you open folders. The first time you revisit image or video-heavy directories, thumbnails may appear slowly. That is expected. Windows is generating new previews from scratch and saving them again.
You may also notice that some folders look temporarily plain right after cleanup. Give it a little time. Browse through the folder, switch views if needed, and let File Explorer rebuild the preview data.
If your thumbnails return and look correct, congratulations. You just fixed one of the more annoying Windows visual glitches without downloading shady “PC cleaner” software from a website that looks like it was last updated during the flip-phone era.
If Thumbnails Still Are Not Showing
If clearing the cache does not solve the problem, the issue may not be the cache itself. Try these follow-up checks:
1. Make sure thumbnails are enabled
Open File Explorer options and confirm that Always show icons, never thumbnails is not checked.
2. Restart Windows Explorer
Sometimes the cache is fine, but File Explorer just needs a restart. Open Task Manager, find Windows Explorer, right-click it, and choose Restart.
3. Check file type support
Not every file format displays thumbnails natively in Windows. Some specialized formats need the right app, codec, or preview handler installed before Windows can generate thumbnails.
4. Install Windows updates
If thumbnails broke after a bug or glitch, a Windows update may help. File Explorer thumbnail issues do sometimes get fixed through system updates.
5. Test another folder view
Switch to Large icons or Extra large icons. If you are in a list-based view, you may not see previews even when the cache is working.
Why This Matters More Than People Think
At first glance, thumbnail problems sound small. Not exactly emergency-room material. But if you work with lots of images, videos, screenshots, design drafts, or project files, bad thumbnails can slow you down in a very real way. Instead of instantly spotting the file you need, you end up opening five wrong files in a row like you are playing a boring office version of roulette.
For photographers, content creators, marketers, designers, and everyday users with cluttered Downloads folders, a healthy thumbnail cache makes File Explorer much easier to use. This is not just about appearances. It is about workflow, speed, and preserving your patience.
Real-World Experiences With Clearing the Thumbnail Cache in Windows
Let’s talk about the part most how-to articles skip: what this problem actually feels like in real life. Because nobody wakes up and says, “Today I would love to study thumbnail databases.” Usually, the issue starts with confusion. You open a folder full of photos from a trip, a work project, or a family event, and half the previews are blank. A few are wrong. One image somehow has the face of a completely different file. At that point, Windows feels less like an operating system and more like an unreliable witness.
A common experience is the “everything looked fine yesterday” moment. Maybe you moved a bunch of files, renamed a folder, installed updates, or copied images from one drive to another. Then suddenly File Explorer starts showing generic icons instead of previews. Many people assume the photos are damaged, the hard drive is failing, or the file transfer went wrong. In reality, the files are often perfectly fine. It is just the thumbnail cache having a bad day.
Another familiar situation happens with people who manage lots of visual files for work. Think bloggers, designers, social media managers, video editors, online sellers, or anyone juggling screenshots and product images. When thumbnails break, simple tasks take longer. You stop recognizing files at a glance. You double-click more often. You waste time opening the wrong image, closing it, then opening another. Over the course of a day, that tiny annoyance adds up fast.
There is also the emotional side, which is rarely mentioned but very real. When visual previews disappear, people panic. If the folder contains vacation photos, client files, scanned paperwork, or old family pictures, the first thought is usually, “Did I lose something?” Clearing the thumbnail cache can be a huge relief because it reminds you that the issue is often cosmetic, not catastrophic. The files are still there. Windows just forgot how to introduce them properly.
Many users also notice that once the cache is cleared, File Explorer feels fresher. Not instantly faster in every possible way, but cleaner and more consistent. Folder previews update correctly. Image-heavy directories stop showing stale miniatures from last week. Videos display the right frame again. That “Ah, there you are” moment when the proper previews come back is weirdly satisfying for something so technical.
There is one more honest experience worth mentioning: the rebuild phase can look awkward for a little while. Right after clearing the cache, some folders may appear empty of previews, and users sometimes think the fix failed. It usually has not. Windows simply needs time to regenerate thumbnails as you browse. It is a little like cleaning your glasses and then waiting for your eyes to adjust. Give it a minute. Open the folder. Scroll a bit. Let Windows do its housekeeping.
In short, clearing the thumbnail cache is one of those small maintenance steps that feels minor until you need it. Then it suddenly becomes the hero of the hour. It is quick, built in, and often far more effective than people expect. Not glamorous, no. But neither is unclogging a sink, and that still feels amazing when the water starts flowing again.
Conclusion
If File Explorer previews are broken, outdated, or missing, clearing the thumbnail cache in Windows is one of the simplest fixes you can try. Start with Disk Cleanup if you want the classic approach. Use Settings if you prefer a modern interface. And if Windows is being stubborn, manually deleting the thumbcache files can give you the deeper reset you need.
The best part is that this fix is usually safe, fast, and effective. You are not deleting your original files. You are just removing the temporary preview data so Windows can build it again correctly. When File Explorer starts acting like it has forgotten what your files look like, this is the refresh button it probably needs.


