Table of Contents >> Show >> Hide
- Before You Start: Safety and Prep for Any Cleaning Method
- Method 1: Deep-Clean with Baking Soda and Vinegar (Low-Fume & Budget-Friendly)
- Method 2: Steam-Clean for Fast, Low-Effort Maintenance
- Method 3: Use the Self-Clean Cycle (With Caution)
- Extra Tips to Keep Your Electric Oven Cleaner Longer
- Real-Life Experiences: What Actually Works When Cleaning Electric Ovens
If your electric oven smokes every time you bake a frozen pizza, it’s not “extra flavor”it’s
baked-on grease begging for a good scrub. The good news? You don’t need expensive cleaners, a
whole weekend, or superhuman arm strength. With a few smart methods, you can clean your electric
oven safely and efficiently, and even keep it that way (mostly).
Below are three expert-approved ways to clean an electric oven: a gentle deep-clean with pantry
staples, a fast steam method, and the powerful (but sometimes controversial) self-clean cycle.
We’ll walk through when to use each method, step-by-step instructions, and safety tips so you can
pick the one that fits your oven, your schedule, and your tolerance for fumes.
Before You Start: Safety and Prep for Any Cleaning Method
Electric ovens are pretty low-maintenance, but cleaning them the wrong way can damage heating
elements, discolor racks, or even trip your circuit. Before you dive into any of the three
methods below, take a minute to prep.
General safety tips
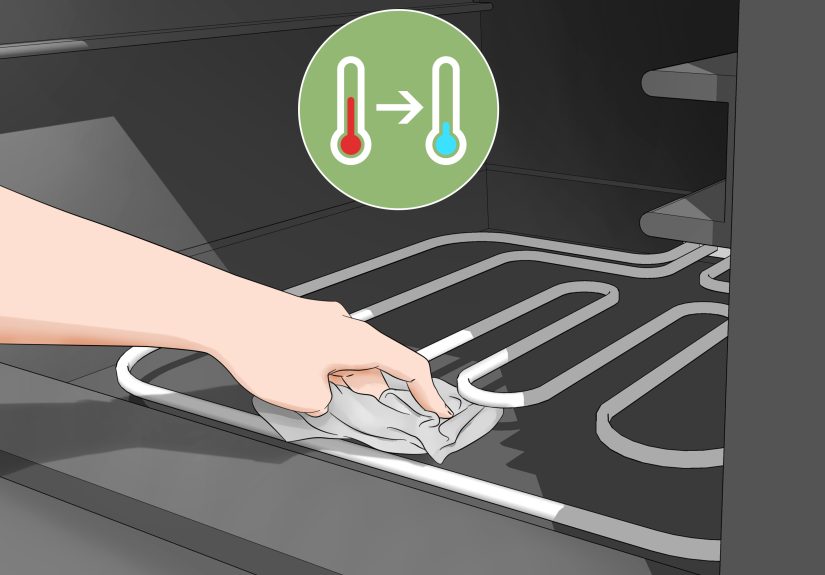
- Turn the oven off and let it cool completely. Never scrub a hot oven interior.
-
Unplug the oven or switch off the breaker if you’ll be working near heating
elements or electrical connections. -
Remove the racks and accessories. Take out oven racks, pizza stones, and
thermometers so you can reach all surfaces and clean parts separately. -
Ventilate the kitchen. Open a window, use your range hood, and keep pets and
kids awayespecially if you use stronger cleaners or the self-clean cycle. -
Never mix cleaners. Don’t combine bleach and ammonia, or mix commercial oven
cleaners with DIY solutions. Stick to one approach at a time.
What about the heating elements?
In an electric oven, the heating elements (usually one at the bottom and one at the top) are
crucial. Avoid scrubbing them aggressively or soaking them with liquid. Lightly wipe with a
damp cloth if needed, but don’t chip or scratch the surface.
Method 1: Deep-Clean with Baking Soda and Vinegar (Low-Fume & Budget-Friendly)
If you want to avoid harsh chemicals but still tackle serious grime, the classic combination of
baking soda and vinegar is your best friend. It’s recommended by many cleaning experts because
it’s gentle on your oven’s finish and safe to use around food surfaces when thoroughly rinsed.
What you’ll need
- 1/2–1 cup baking soda
- Warm water
- Spray bottle with white vinegar
- Rubber gloves and a non-scratch scrub pad or sponge
- Plastic or silicone scraper (optional but helpful)
- Microfiber cloths or old rags
Step-by-step: Baking soda & vinegar oven clean
-
Empty and wipe loose crumbs. Remove racks and big chunks of burned-on food
with a damp cloth or paper towel. This makes the paste work on the stubborn stuff, not crumbs. -
Mix a cleaning paste. In a bowl, combine baking soda with enough warm water
to make a spreadable pastethink thick frosting, not soup. -
Spread the paste everywhere (but skip the elements). Wearing gloves, smear
the paste over the oven floor, side walls, and inside of the door. Avoid directly coating
exposed heating elements or vents. Pay extra attention to dark, greasy areas. -
Let it sit for at least 8–12 hours. Overnight is ideal. The longer the paste
sits, the more it can soften baked-on grease and spills. -
Scrape and wipe. Use a plastic scraper or spatula to gently lift off the
softened gunk. Wipe everything with a damp cloth, rinsing frequently. -
Spritz with vinegar. Lightly spray vinegar on any remaining white residue.
It will fizz as it reacts with the baking soda, making the last film easier to wipe away. - Buff it dry. Finish with a clean, dry cloth to remove streaks and moisture.
Don’t forget the oven racks
While the paste is doing its thing, tackle the racks. Soak them in a bathtub or large bin with
hot water and a squirt of dish soap (or add a dishwasher tablet). After a few hours, scrub with
a non-scratch pad, rinse, and dry. For extra-tough spots, sprinkle on a little baking soda and
scrub again.
When this method is best
- If you want a natural, low-fume way to clean an electric oven
- If you don’t want to risk damage from very high heat
- If your oven has moderate to heavy grime but you’d rather scrub than smell fumes
Method 2: Steam-Clean for Fast, Low-Effort Maintenance
Many newer electric ovens come with a built-in steam clean cycle that uses a
small amount of water and moderate heat to soften light spills. Even if your oven doesn’t have
a dedicated steam button, you can mimic the effect with a pan of water.
If your oven has a steam clean setting
-
Check your manual. Every brand is slightly different, but most recommend
pouring about a cup of water onto the oven floor or into a designated reservoir. -
Remove racks if recommended. Some manufacturers ask you to leave racks in,
others recommend removing them. Follow your specific instructions. -
Run the steam clean cycle. This usually takes around 30–90 minutes, using
lower temperatures than a self-clean cycle. It loosens, but doesn’t incinerate, grime. -
Wipe while it’s still slightly warm. Once the oven is cool enough to touch
but still warm, wipe away the loosened residue with a cloth or sponge.
DIY steam clean (for ovens without the feature)
-
Place a large, oven-safe pan of water on the lowest rack. You can add a splash
of vinegar if you like, but water alone is fine. -
Heat the oven to 225–250°F (about 107–120°C). Let the water steam inside for
20–30 minutes. -
Turn the oven off and let it cool slightly. Carefully remove the pan and,
once the oven is warm but not hot, wipe down the interior. The steam should have softened
light grease and splatters.
When this method is best
- As a quick maintenance clean between bigger deep-cleans
- If your oven has light soil or fresh spills
- When you want less odor and lower temperatures than a full self-clean cycle
Steam cleaning won’t fix years of neglect, but if you use it regularlysay once a month or after
a messy roasting sessionit can prevent grime from getting to the “smokes every time I preheat”
stage.
Method 3: Use the Self-Clean Cycle (With Caution)
The self-clean cycle is the heavy hitter of oven cleaning. It heats your electric oven to
extremely high temperaturesoften 800–900°Fto burn food residue to ash that you can wipe away.
Many manufacturers design their ovens for occasional self-clean use, but appliance technicians
and consumer organizations also warn that overusing it can stress components and create smoke
or fumes.
Important warnings before you self-clean
-
Remove oven racks unless your manual says they’re self-clean-safe. High
heat can discolor racks and damage their finish. -
Ventilate aggressively. Open windows, turn on the hood fan, and keep pets
(especially birds) and people with asthma or respiratory issues out of the area. -
Don’t start a self-clean right before a big event. If something goes wrong
(like a blown fuse or lock issue), you don’t want that happening two hours before Thanksgiving
dinner. -
Use it only occasionally. Many pros recommend saving self-clean for once or
twice a year and relying on manual or steam cleaning the rest of the time.
How to run the self-clean cycle
- Remove racks and accessories. Take out everything that isn’t permanently fixed.
-
Wipe loose debris. A quick wipe with a damp cloth can reduce smoke during
the cycle. -
Lock the door and select “Self Clean.” Most ovens allow you to choose a
cycle length (for example, 2, 3, or 4 hours) based on how dirty the oven is. -
Let it run and do not open the door. The oven will lock automatically and
stay locked until it cools down to a safe temperature. -
After cooling, wipe out the ash. Use a damp cloth or sponge to remove the
fine gray ash left behind.
When this method is best
- If your oven has heavy, baked-on grease and you’d rather not scrub
- If your manufacturer recommends and supports using self-clean
- When you can supervise and ventilate for several hours
If the idea of high heat and fumes makes you nervousor if you’ve had a bad self-clean
experience beforestick to baking soda and steam. A little elbow grease is cheaper than a visit
from an appliance repair technician.
Extra Tips to Keep Your Electric Oven Cleaner Longer
-
Wipe spills as soon as the oven cools. The fresher the spill, the easier it
is to remove. -
Use baking sheets or drip trays. Place a rimmed pan under pies, casseroles,
and anything likely to bubble over. -
Avoid foil on the oven floor. Manufacturers often warn that foil can damage
the enamel or reflect heat and affect performance. -
Schedule a “mini clean” day. Once a month, give the oven a quick wipe with
warm soapy water or a light baking soda solution, plus a steam clean if you have it. -
Check the door gasket. A greasy or damaged seal can affect temperature and
make your oven work harder (and get dirtier).
Real-Life Experiences: What Actually Works When Cleaning Electric Ovens
Anyone who’s ever opened their oven and thought, “Wow, that’s… bad,” knows that cleaning is as
much about strategy and mindset as it is about products. Here are a few experience-based lessons
and scenarios that can help you decide which of the three methods to useand how to stay on top
of the mess without losing your weekend.
1. The “holiday aftermath” oven
Imagine you’ve just survived a big holiday dinner. You roasted a turkey, baked pies, and maybe
slightly forgot about that cheesy casserole that boiled over on the bottom rack. After a few
weeks of “I’ll deal with that later,” your oven smokes every time it hits 400°F.
In this situation, a lot of people instinctively reach for the self-clean button. But if your
oven is older or you’re worried about fumes, a combined approach works better: first, scrape off
large burned chunks with a plastic scraper, then apply the baking soda paste from Method 1 and
let it sit overnight. The next day, do a thorough scrub and follow up with a short DIY steam
session. This two-step approach takes a little more time but reduces the risk of a smoky,
stressful self-clean cycle.
2. The “busy weeknight cook” oven
If you’re constantly using your oven for sheet-pan dinners, frozen pizzas, or quick bakes,
messes are frequent but usually small. In that case, the best “experience hack” is to act fast
instead of waiting for a huge deep clean.
After a spill, let the oven cool until it’s warm, then wipe the floor with a damp cloth and a
drop of dish soap. Once a week, run a short steam clean (built-in or DIY) while you’re doing
other chores. People who follow this routine often find that they only need a big baking
soda-vinegar deep clean a couple of times a year.
3. The “I tried self-clean and got scared” oven
Many home cooks have a story that goes something like this: “I turned on the self-clean cycle,
the oven locked, smoke started pouring out, every window in the house was open, and the smoke
alarm gave its opinion.” If that’s you, you’re not alone.
Self-clean cycles can be perfectly safe when used carefully on a fairly clean oven, but they’re
not great for ovens that are already loaded with thick grease or sugary spills. In those
situations, doing a partial manual clean firstremoving the worst buildup with baking soda,
scraping, and wipingcan dramatically reduce smoke if you do choose to run self-clean later.
Some people decide to skip self-clean entirely afterward, and that’s okay too. Regular manual
cleaning and steam cycles are completely capable of keeping an electric oven in good shape.
4. The “natural cleaner only” oven
For households with small kids, pets, or sensitive lungs, harsh chemical oven cleaners and
high-heat cycles can be a no-go. Through trial and error, many people find that a steady
combination of baking soda, vinegar, hot water, and steam is enough for even heavy messesas
long as they’re consistent.
One realistic approach: once a month, spread a baking soda paste on the worst spots (especially
on the oven floor and near the door), let it sit for several hours, wipe, then follow with a
short steam session and a final rinse. It’s not instant, but over time the interior will look
brighter, and you’ll never have to deal with that eye-watering chemical smell.
5. The “set and forget” vs. “little and often” mindset
Experience also shows that how you think about oven cleaning makes a big difference.
If you wait until the oven looks tragic, any method is going to feel like a huge chore. On the
other hand, if you treat oven cleaning the way you treat doing dishessmall, regular sessions
instead of one giant projectit stops feeling like a big deal.
In practice, that might mean:
- Wiping obvious spills as soon as the oven cools
- Doing a quick DIY steam clean every few weeks
- Scheduling a baking soda deep clean twice a year, like spring and fall
Over time, people who follow this “little and often” mindset usually find that they no longer
need to rely on self-clean cycles or harsh products, and their electric ovens not only look
better but also heat more evenly and cook more predictably.
Ultimately, the best way to clean an electric oven is the one you’ll actually stick to. Whether
you’re a steam-clean minimalist, a baking-soda enthusiast, or an occasional self-clean user,
using these three methods strategically will keep your oven safe, efficient, and ready for
whatever you want to cook next.


