Table of Contents >> Show >> Hide
- Why Accurate Clothing Measurements Matter
- Before You Start: A Few Smart Prep Tips
- Method 1: Use String, Ribbon, or Cord Plus a Ruler
- Method 2: Use Everyday Objects With Standard Sizes
- Method 3: Measure a Well-Fitting Garment Instead of Your Body
- Which Method Is Best?
- Common Mistakes to Avoid
- How to Use These Measurements for Online Shopping
- Experience-Based Advice: What People Learn the Hard Way
- Final Thoughts
Let’s be honest: the moment you actually need a measuring tape is the exact moment it disappears into the same mysterious dimension as missing socks, lone bobby pins, and that one charger that definitely used to be right here. Maybe you’re ordering clothes online, listing a jacket for resale, starting a sewing project, or trying to figure out whether those “true to size” pants are telling the truth or just being emotionally manipulative.
The good news? You can absolutely take clothing measurements without a measuring tape. You just need a little creativity, a few everyday items, and the willingness to look mildly dramatic while wrapping string around your waist in front of a mirror. In this guide, we’ll walk through three practical ways to measure clothing or your body without a tape measure, plus tips to make your numbers more accurate and a longer experience-based section at the end so you can avoid the classic fit mistakes most people make.
If your goal is to get better sizing for online shopping, tailoring, sewing, or closet clean-outs, these methods can help you measure your bust, waist, hips, inseam, sleeve length, and garment width without fancy tools. No tape? No problem. Your kitchen drawer, desk, and closet are about to become your backup fitting room toolkit.
Why Accurate Clothing Measurements Matter
Before we get into the three methods, let’s give a little respect to measurements. They may not be glamorous, but they save time, money, and the emotional damage of trying on pants that stop somewhere around your kneecaps.
Accurate clothing measurements help you:
- Choose the right size when shopping online
- Compare your body measurements to brand size charts
- Measure garments for resale listings
- Alter clothes more precisely
- Start sewing or pattern-making with fewer surprises
- Avoid returns, exchanges, and dramatic sighing
Most clothing brands rely on a few key measurement points: bust or chest, natural waist, hips, inseam, sleeve length, and garment length. For tops, chest width and shoulder fit matter a lot. For pants and skirts, waist, hips, rise, and inseam usually decide whether you look polished or like you borrowed someone else’s laundry.
Before You Start: A Few Smart Prep Tips
No matter which method you use, a few best practices can make your results way more useful.
Wear close-fitting clothes
Bulky sweaters, puffy hoodies, and jeans with enough structure to stand on their own can throw off your numbers. If you’re measuring your body, wear fitted clothing or undergarments.
Stand naturally
Don’t suck in your stomach, puff out your chest, or transform into a military mannequin. Stand normally, breathe like a person, and keep your posture relaxed.
Measure the right spot
Your bust is usually the fullest part of the chest. Your natural waist is the narrowest part of your torso, often where your body bends side to side. Your hips are measured at the fullest part of your lower body, usually with your feet together.
Write everything down immediately
Do not trust your memory. “I’ll remember that” is how people end up buying a medium when they definitely needed a large.
Method 1: Use String, Ribbon, or Cord Plus a Ruler
This is the closest substitute for a real measuring tape, and for most people, it’s the best option. If you have string, ribbon, yarn, floss, a charging cable you’re willing to sacrifice for thirty seconds, or anything flexible, you’re in business.
How it works
Wrap the string around the area you want to measure, mark where it meets, then lay it flat against a ruler, yardstick, or other hard measuring tool.
How to do it step by step
- Grab a flexible item like string, ribbon, or cord.
- Wrap it around the body part you want to measure, such as your waist, bust, or hips.
- Make sure it sits level and snug, but not tight.
- Pinch or mark the meeting point with a pen, clip, or your finger.
- Lay the string flat on a table or floor.
- Measure the string using a ruler, yardstick, or even a printable ruler if needed.
Best uses for this method
- Bust or chest measurement
- Natural waist measurement
- Hip measurement
- Neck measurement
- Wrist, thigh, or arm circumference
Why this method works so well
Because clothing measurements often depend on circumference, you need something flexible enough to follow the body’s shape. String does that beautifully. It’s basically the understudy who steps in when measuring tape calls in sick.
Accuracy tip
If possible, ask another person to helpespecially for back measurements, sleeve length, or anything involving twisting like a pretzel. Measuring yourself solo is possible, but teamwork reduces weird angles and accidental guesswork.
Method 2: Use Everyday Objects With Standard Sizes
If you don’t have string and you also don’t have a ruler, you’re still not out of luck. Standard-size objects can work as rough measuring tools. This method is less precise, but it’s surprisingly handy when you need an estimate.
Objects you can use
- A U.S. dollar bill, which is 6.14 inches long
- A sheet of U.S. letter paper, which is 8.5 x 11 inches
- An index card or notebook with known dimensions
- A smartphone, if you know its exact height and width
- A credit card-sized card, if you know the dimensions
How to use this method
Let’s say you need to measure the width of a shirt laid flat or the length of an inseam. Place the standard-size object along the item, then count how many times it fits across or down the section you’re measuring.
For example, if a shirt’s body length is about three dollar bills long plus a little extra, you can estimate the length at around 18.5 to 19 inches. If a waistband spans about two sheets of paper placed edge to edge in width, you know you’re dealing with a much larger measurement than you first thought.
Best uses for this method
- Garment length
- Sleeve length
- Shoulder width
- Flat chest width
- Quick approximate body checks
When to be careful
This method is excellent for estimates, but not ideal for formal tailoring or precise sewing patterns. Think of it as “close enough to shop smart,” not “ready to cut couture silk.” If you need exact measurements, use Method 1 or combine this method with a ruler later.
Pro tip
Use the object consistently. If you start measuring with a dollar bill, don’t suddenly switch to folded paper halfway through unless you want your final numbers to read like modern art.
Method 3: Measure a Well-Fitting Garment Instead of Your Body
This is one of the smartest ways to get useful clothing measurements without measuring yourself directly. If you already own a shirt, dress, skirt, jacket, or pair of pants that fits well, use it as your fit model.
In fact, this trick is especially useful for online shopping and clothing resale, because many retailers and secondhand sellers list garment measurements rather than body measurements.
How to do it
- Choose a garment that fits the way you want.
- Lay it flat on a hard, smooth surface.
- Smooth wrinkles without stretching the fabric.
- Measure key points with a ruler, paper, dollar bill, or another known-size object.
- Double flat measurements where needed, like chest or waist width.
Common flat measurements to take
Shirt chest: Measure from armpit to armpit, then double it.
Waist on tops or dresses: Measure straight across the waist area, then double it.
Hip on skirts or dresses: Measure across the fullest area, then double it.
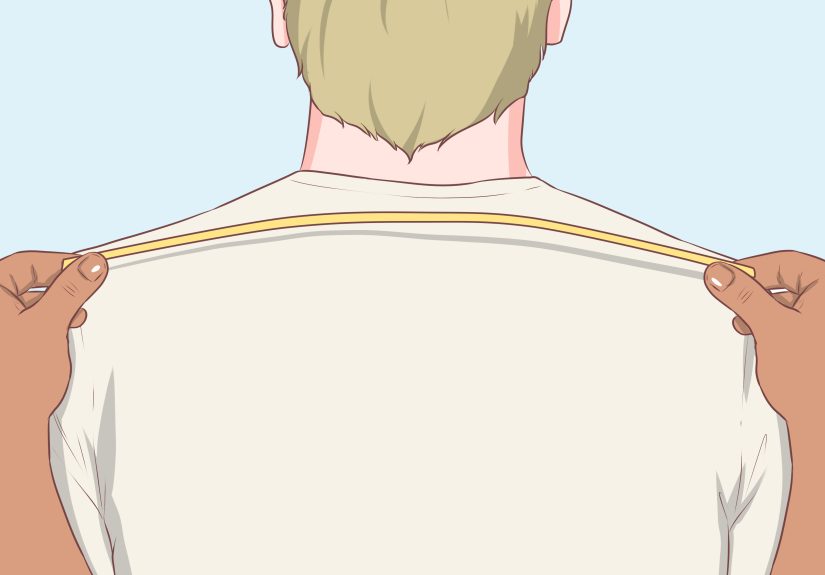
Shoulders: Measure seam to seam across the upper back.
Sleeve length: Measure from shoulder seam to cuff.
Pants waist: Measure across the waistband laid flat, then double it.
Inseam: Measure from crotch seam to hem.
Rise: Measure from crotch seam to top of waistband.
Why this method is so useful
Your favorite clothes are already telling you what works. Instead of trying to decode vague terms like slim fit, relaxed fit, or “modern silhouette,” you can compare actual garment dimensions. It’s like letting your best-fitting jeans testify on your behalf.
Which Method Is Best?
If you want the most accurate body measurements without a tape measure, use string plus a ruler. If you need a quick estimate, use everyday objects with known dimensions. If you want the most practical shopping comparison, use a garment that already fits you well.
Honestly, the smartest move is to combine methods. Measure your waist with string, compare it to a pair of pants you love, and double-check a jacket’s width using paper or a ruler. The more cross-checking you do, the less likely you are to end up saying, “Well, technically it closes.”
Common Mistakes to Avoid
Measuring over bulky clothing
A sweatshirt can add inches you don’t actually need in your final size.
Pulling too tight
Your goal is reality, not optimism. A too-tight string gives you fantasy sizing, and your future self will not appreciate the surprise.
Letting the string droop or twist
Keep it level and flat, especially around the bust, waist, and hips.
Forgetting to double flat measurements
If you measure a shirt from armpit to armpit while it’s laid flat, that’s only half the circumference. Double it to compare it to body measurements or size charts.
Using different measurement points every time
If one hip measurement is taken at the fullest point and another is taken higher up, your numbers won’t match. Consistency matters.
How to Use These Measurements for Online Shopping
Once you have your numbers, compare them to the brand’s size chartnot your usual size label. A medium in one brand can behave like a small in another and a large in a third. Clothing sizes are not a universal language; they are more like regional dialects with trust issues.
Here’s the easiest strategy:
- Start with your bust or chest for tops and jackets.
- Use waist and hips for pants, skirts, and dresses.
- Check inseam if you’re buying trousers or jeans.
- Compare garment measurements whenever possible.
- If you’re between sizes, think about fabric stretch and your preferred fit.
Experience-Based Advice: What People Learn the Hard Way
Now let’s talk about the part that doesn’t always show up in neat little size charts: real-life experience. Because measuring clothing without a measuring tape sounds simple until you’re balancing a piece of ribbon, a legal pad, and your last scrap of patience while trying to decide whether “snug” means fitted or mildly circulation-threatening.
One of the most common experiences people have is realizing that the number on the tag matters less than the actual measurement. Someone who always buys a size 8 in one store may suddenly need a size 12 somewhere else. Another person may discover that their favorite blazer fits beautifully not because of the brand name, but because the shoulder width and chest measurement happen to match their body shape better. This is often the moment when people stop shopping by label and start shopping by numbers. It’s an empowering little plot twist.
Another very common experience happens during online shopping. A person sees something gorgeous, reads “relaxed fit,” and assumes that means roomy and forgiving. Then the item arrives and turns out to be relaxed only if you are built like a decorative lamp. That’s where measuring a similar garment at home becomes incredibly useful. Once people compare a listed chest width, hip width, or inseam to something they already own and love, they get dramatically better at choosing the right size.
People who sew or alter clothes also learn quickly that body measurements and garment measurements are not the same thing. Your body needs room to move, sit, breathe, and enjoy lunch without consequences. That extra room is often called ease, and it explains why a shirt that measures exactly the same as your chest can still feel too tight. In experience, the best results come from comparing both your body and a favorite garment rather than relying on only one set of numbers.
Many people also discover that the waist is sneakier than expected. Some assume the waist is where low-rise jeans sit. Others measure at the belly button. Others choose the narrowest part of the torso. Then they wonder why a skirt fits in theory but not in real life. After a few attempts, most people get better results by bending side to side to find the natural waist and using that point consistently every time.
There is also the very relatable experience of measuring one side of a garment and forgetting to double it. This has humbled many confident shoppers. A shirt with a 20-inch pit-to-pit measurement is not a 20-inch chest. It is roughly a 40-inch chest when doubled. This tiny detail has saved many people from ordering clothes for either a child or a linebacker by mistake.
Another lesson people learn is that fabric changes everything. A woven cotton dress with no stretch and a knit T-shirt with plenty of give can share the same listed measurement and still fit completely differently. Experienced shoppers start paying attention not only to width and length, but also to material, cut, and how structured the item looks. Numbers matter, but context matters too.
Then there’s the mirror factor. When people measure themselves without a measuring tape, they often discover that using a mirror helps far more than expected. It shows whether the string is dipping in the back, riding up at the hips, or slanting across the bust like it’s trying to escape the assignment. A quick visual check can improve accuracy more than most people realize.
Perhaps the most reassuring experience is this: you do not need perfect tools to get useful results. Plenty of people have measured with ribbon, yarn, notebook paper, dollar bills, and rulers borrowed from a child’s homework station. The process may feel a little improvised, but the outcome can still be highly practical. Once you understand where to measure and how to compare those numbers, you become much better at choosing clothes that actually fit your body and your style.
So if you’re standing in your room with a piece of string and a suspicious amount of determination, you are not doing it wrong. You are simply joining a long tradition of people who refused to let one missing measuring tape ruin a perfectly good shopping, sewing, or wardrobe plan.
Final Thoughts
You do not need a measuring tape to get useful, reliable clothing measurements. With string and a ruler, everyday objects with known dimensions, or a well-fitting garment laid flat, you can figure out the numbers you need for better sizing decisions.
The secret is not fancy equipment. It’s consistency, patience, and measuring the correct points. Once you learn how to take clothing measurements without measuring tape, you’ll be able to shop smarter, sew better, resell more accurately, and spend a lot less time arguing with mystery sizing charts.
And if you do eventually find your missing measuring tape, congratulations. It was probably hanging out with the missing left sock the whole time.


