Table of Contents >> Show >> Hide
- Why Even Candle Burning Matters
- 1. Let the First Burn Create a Full Melt Pool
- 2. Trim the Wick Before Every Burn
- 3. Keep the Candle on a Level Surface and Away From Drafts
- 4. Burn for the Right Amount of Time and Fix Tunneling Early
- Common Mistakes That Cause Uneven Candle Burning
- What Regular Candle Users Learn From Experience
- Conclusion
- SEO Tags
There are few household disappointments more dramatic than a candle that tunnels straight down the middle like it has someplace urgent to be. You bought that candle for glow, fragrance, and maybe a little main-character energy for your living room. What you did not buy was a sad wax crater with untouched walls and a wick doing chaotic acrobatics in the center.
The good news is that learning how to burn candles evenly is not difficult. In fact, it usually comes down to a few small habits that make a surprisingly big difference. Burn time, wick care, room placement, and a little patience can help your candle last longer, smell better, and avoid wasting a chunky ring of wax around the edges. That means more ambiance, less annoyance, and fewer moments where you stare at a jar and think, “Well, that escalated oddly.”
This guide breaks down four practical ways to burn candles evenly, plus real-life experiences and lessons that regular candle users tend to learn the hard way. Whether you love soy candles, coconut wax candles, or classic jar candles, these tips can help you get a cleaner, steadier, more even burn from start to finish.
Why Even Candle Burning Matters
Before jumping into the four methods, it helps to know what goes wrong when a candle burns unevenly. The most common issue is candle tunneling. This happens when the flame melts wax only in the center, leaving a thick wall of unused wax around the sides of the jar. Once that pattern starts, the candle often keeps repeating it.
Uneven burning can also lead to a wick that mushrooms, a flame that flickers wildly, more soot on the jar, weaker scent throw, and a shorter overall burn life. In other words, an uneven candle is not just unattractive. It is inefficient. You lose wax, burn through fragrance faster, and end up with a candle that looks tired long before it should.
If you want your candle to burn evenly, smell great, and last as long as possible, start with the basics below.
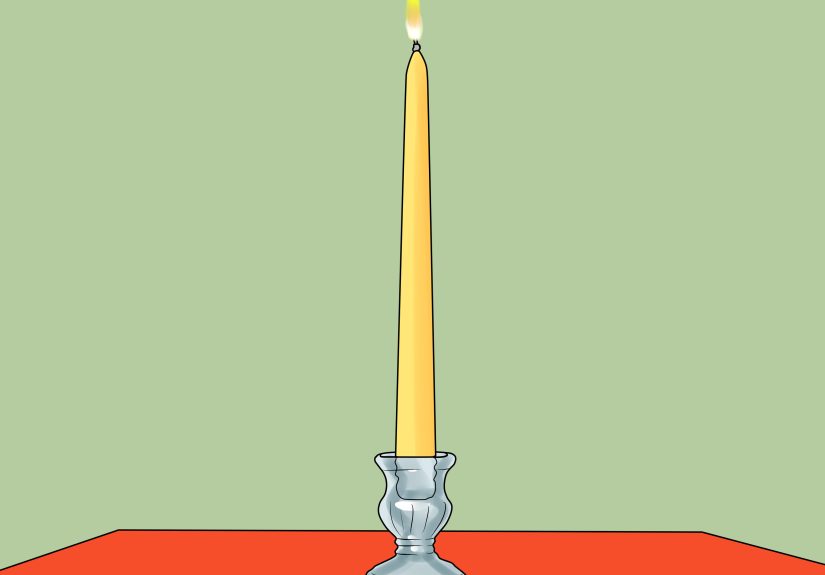
1. Let the First Burn Create a Full Melt Pool
If candle care had a golden rule, this would be it. The first burn sets the tone for the rest of the candle’s life. When you light a candle for the first time, allow the melted wax to reach the edges of the container before you extinguish it. This full wax pool helps prevent the dreaded memory ring that can lead to tunneling on future burns.
What a full melt pool means
A full melt pool simply means the top layer of wax has melted all the way across the surface. Depending on the size of the candle, that can take anywhere from about one to four hours. A good rule of thumb is to let the candle burn for roughly one hour per inch of its diameter. So if your candle is three inches wide, give it about three hours to do its thing.
Why this step matters so much
Wax is a creature of habit. If you extinguish the candle too early on the first burn, the wax tends to keep melting only in that smaller circle next time. That is how tunneling begins. A proper first burn helps the candle establish an even pattern, which means more wax gets used, the flame stays healthier, and the candle performs better overall.
What to do in real life
Do not light a brand-new candle when you only have 20 minutes before leaving the house. That is like starting a movie and quitting before the opening credits finish. Save first burns for a calm stretch of time when you can let the candle fully open up. A quiet evening, a work-from-home afternoon, or a slow weekend morning is perfect.
If your candle has already started tunneling, you may be able to fix it by relighting it long enough for the wax to reach the edge or by carefully using the aluminum foil method to trap heat and melt the outer ring. More on that later.
2. Trim the Wick Before Every Burn
The humble wick does more work than it gets credit for. If it is too long, your candle can burn too hot, too fast, and too unevenly. That leads to flickering, soot, mushrooming, and a melt pool that behaves like it had three espressos.
The ideal wick length
Before each burn, trim the wick to about 1/4 inch. This is the sweet spot for many container candles. It helps keep the flame controlled so the candle burns more cleanly and evenly.
Why a long wick causes problems
When the wick is too long, the flame gets larger and less stable. A large flame consumes wax faster, makes the jar hotter, and can create soot or black marks near the rim. It may also cause the wax to melt unevenly or make the wick lean off-center, which only adds to the problem.
How to trim a wick the right way
Use a wick trimmer if you have one, but small scissors or nail clippers can also work. Trim when the candle is cool and the wax has hardened. Try to cut the wick straight across, not at an angle. Then remove any charred bits or debris from the wax before relighting.
This step takes less than 15 seconds, but it can noticeably improve how a candle burns. Think of it as brushing your teeth, except it smells better and there is no mint involved.
3. Keep the Candle on a Level Surface and Away From Drafts
Sometimes the candle is not the problem. Sometimes the room is the drama. A drafty space can make the flame flicker, lean, and melt one side of the candle faster than the other. If your candle always seems to burn unevenly on one side, the culprit may be a fan, open window, air vent, or busy walkway.
How drafts affect candle burning
A steady flame creates a steadier melt pool. A dancing flame, on the other hand, tends to send heat unevenly across the wax. That can create lopsided melting, soot buildup, and excessive dripping in some candle types. Drafts also encourage the wick to bend or shift, which makes an even burn even harder to achieve.
Where to place a candle
Set your candle on a stable, heat-resistant, level surface. Keep it away from ceiling fans, open windows, heating or cooling vents, and high-traffic spots where people brush past it. If you burn more than one candle at a time, leave enough space between them so they do not affect each other’s heat or airflow.
Do not move the candle while the wax is liquid
This is another small habit that matters. Once the candle is burning and the wax has melted, leave it alone. Moving a candle while the wax is liquefied can disturb the wick, splash hot wax, or cause the candle to cool unevenly. If the wick drifts off-center, the candle may start favoring one side from then on.
In plain English: pick a good spot before lighting it, then let the candle live its best life there until it cools down.
4. Burn for the Right Amount of Time and Fix Tunneling Early
Even if your first burn went well, future burns still matter. A candle should burn long enough to maintain a full melt pool, but not so long that it overheats, produces excess soot, or develops an unstable flame.
The sweet spot for burn sessions
For many candles, 2 to 4 hours per session works well. That is often enough time for the wax to melt evenly without pushing the candle too far. If you burn much longer than that, the wick can mushroom, the container can get extremely hot, and the candle may start smoking or producing soot.
Let the candle cool before relighting
After extinguishing, allow the candle to cool fully before trimming and lighting it again. This gives the wax and wick time to reset. Relighting too quickly is not always a disaster, but candles generally perform better when they get a little recovery time between burn sessions.
How to rescue a tunneled candle
If tunneling has already started, do not assume the candle is doomed. In many cases, you can save it:
- Try a longer burn: Sometimes simply allowing a full melt pool on the next session is enough to correct a mild tunnel.
- Use the foil method: Wrap aluminum foil loosely around the top of the candle, leaving an opening in the center for the flame. This traps heat and can help melt the hardened wax ring around the edges.
- Use gentle external heat: Some candle care guides suggest carefully softening the top layer with a hair dryer on a low setting to level the surface before the next burn.
The key word here is early. A small tunnel is easier to fix than a candle that has been burrowing toward the earth’s core for three weeks.
Common Mistakes That Cause Uneven Candle Burning
If your candle is still acting difficult, one of these issues may be getting in the way:
- Lighting the candle for too short a time, especially on the first burn
- Skipping wick trimming
- Burning near a fan, vent, or open window
- Moving the candle while the wax is melted
- Burning for too many hours in one sitting
- Ignoring a wick that has drifted off-center
- Letting debris build up in the wax pool
None of these mistakes are rare. In fact, most candle lovers have probably committed at least three of them before lunch. The point is not perfection. The point is building better habits so your candle works with you instead of against you.
What Regular Candle Users Learn From Experience
Anyone who burns candles often will tell you that the learning curve is real. At first, it all seems simple. You light a wick, enjoy the glow, and assume the candle will handle the rest. Then one day you notice a wax wall forming around the jar, black soot creeping near the rim, and a flame that looks like it is auditioning for a wind tunnel test. That is when experience steps in and says, “Welcome. We have notes.”
One of the most common real-world lessons is that timing matters more than people expect. A lot of uneven burning starts because someone lights a candle casually while folding laundry, washing dishes, or answering email, then blows it out too soon. It feels harmless in the moment, but repeated short burns can slowly train the candle to tunnel. People often realize this only after the candle has used up the center wax and left a thick ring around the edges like a wax castle wall.
Another lesson is that wick trimming sounds optional until you skip it a few times. Many people think a wick is just a wick, but the difference between a trimmed wick and a neglected one is huge. A properly trimmed wick usually gives you a calmer flame, less smoke, and a cleaner jar. A long wick, meanwhile, can make the candle burn hotter and dirtier, leaving the glass looking like it had a minor chimney incident.
Regular candle users also learn that placement can make or break performance. A candle on a coffee table in a still room may burn beautifully. Move that same candle near an air vent or a drafty hallway, and suddenly one side melts faster, the flame starts leaning, and soot appears. It can feel mysterious until you realize the room is basically heckling the flame.
Then there is the lesson of patience. Some waxes, especially harder blends, simply need more time to form a full melt pool. People often assume something is wrong when the edges have not melted after an hour, but sometimes the candle just needs a little longer. This is especially true with larger jars or soy-based candles. In practice, the best candle experience often belongs to the person who lets it burn properly instead of checking it every 12 minutes like it is a sourdough starter.
Experience also teaches that early correction saves candles. If a tunnel starts forming, acting quickly can help. Letting the candle burn long enough on the next use, trimming the wick, or using a foil wrap to encourage edge melting can often rescue it. Waiting too long makes recovery harder. In candle terms, procrastination is not charming.
Finally, frequent candle users discover that even burning is not just about aesthetics. Yes, a smooth wax surface looks nice. But the bigger payoff is value. An evenly burning candle usually gives you better scent throw, more usable wax, and more hours of enjoyment. Instead of burning a narrow hole straight down the middle and quitting early, the candle performs the way it was meant to. That means less waste and a better experience from the first light to the final burn.
So if you have ever felt personally betrayed by a tunneling candle, take heart. Most candle frustration comes down to a few fixable habits. Once you understand how candles respond to wick length, airflow, timing, and heat, the whole process gets easier. And suddenly that cozy little jar on your shelf stops being moody and starts behaving like the well-mannered home accessory it always had the potential to be.
Conclusion
If you want to burn candles evenly, the formula is refreshingly simple: let the first burn reach a full melt pool, trim the wick to 1/4 inch, keep the candle away from drafts on a level surface, and limit burn sessions to a sensible length. Those four habits can help prevent tunneling, reduce soot, improve scent throw, and stretch the life of your candle.
You do not need a laboratory, a scented spreadsheet, or a ceremonial candle robe. You just need a little consistency. Treat your candles well, and they will return the favor with cleaner burns, better fragrance, and fewer wax-related heartbreaks. That is a pretty good deal for something whose main job is to sit there and glow.


