Table of Contents >> Show >> Hide
- Before You Start: A Quick Checklist (So You Don’t Argue With Plastic)
- Way 1: Let Windows 7 Find the Printer Automatically (Network Discovery)
- Way 2: Connect to a Shared Printer (\ComputerNamePrinterShare)
- Way 3: Add the Printer by IP Address (Standard TCP/IP Port)
- Way 4: Use IPP (Internet Printing) or LPR (Old-School, But Still Alive)
- Troubleshooting: When Windows 7 Can’t Find Your Printer (But You Can)
- Extra: of Real-World “Been There, Printed That” Experience
- Conclusion
- SEO Tags
Windows 7 may be “vintage,” but if your office still runs it (or you’re keeping an old laptop alive out of spite),
you can absolutely set up a printer on a network. The trick is knowing which setup path to usebecause
Windows 7 has multiple ways to get ink onto paper, and it loves to hide the best option behind a button labeled
something like “This is not the button you want.”
In this guide, you’ll get four practical methods to add a network printer in Windows 7, plus a set of
troubleshooting moves for when your printer plays hide-and-seek. We’ll keep it detailed, readable, and just
humorous enough that you don’t unplug the router in frustration.
Before You Start: A Quick Checklist (So You Don’t Argue With Plastic)
Before you pick a setup method, do a 60-second reality check. This saves you from spending an hour reinstalling
drivers when the actual problem is… the printer isn’t on the network.
- Confirm the printer is on the network. If it has Ethernet, check link lights. If it’s Wi-Fi, confirm it’s connected to the right SSID.
- Get the printer’s IP address. Many printers print a network/config page from the control panel. (This IP is gold for Method #3.)
- Make sure your Windows 7 PC is on the same network. “Same Wi-Fi name” usually means same subnetusually.
- Set the network location to Home or Work (not Public). Public mode can disable discovery and sharing features.
- Know your printer type: a true “network printer” has its own IP; a “shared printer” is plugged into another computer and shared out.
One more honest note: Windows 7 is end-of-life, so your environment may be locked down or missing updates that
affect printing (especially for newer printers or secure printing). The steps below still work, but you may need
the right driver package from the printer manufacturer.
Way 1: Let Windows 7 Find the Printer Automatically (Network Discovery)
This is the “easy button” when it works. Windows 7 can scan your network and list printers it can see. If your
printer supports discovery protocols and your network settings allow it, you’ll be printing in minutes.
Step-by-step (the classic Windows 7 route)
- Click Start → Devices and Printers.
- Click Add a printer.
- Select Add a network, wireless or Bluetooth printer.
- Wait for the scan to finish. Select your printer from the list.
- Click Next and let Windows install the driver (or choose a driver if prompted).
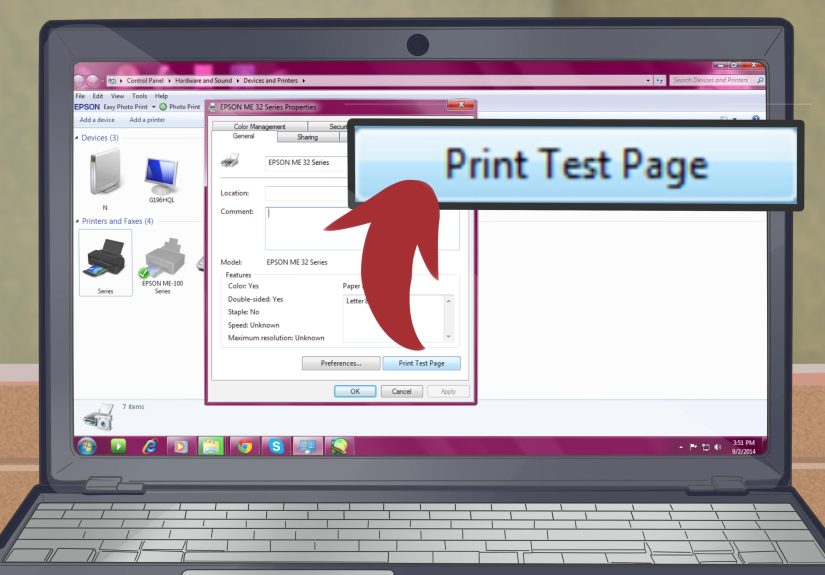
- Print a test page when offered, because printers love a ceremonial first print.
If it doesn’t show up
If your printer doesn’t appear, don’t panicWindows 7 is just being Windows 7. Click
The printer that I want isn’t listed, then jump to Way 3 (IP address) or Way 2 (shared printer),
depending on your setup.
Best fit for Way 1: modern office/home printers on a private network, where network discovery is enabled and the
printer is configured correctly. Worst fit: printers behind strict firewall rules, printers with flaky discovery
support, or networks where everything is “Public” because security folks get nervous (understandably).
Way 2: Connect to a Shared Printer (\ComputerNamePrinterShare)
This method is for a printer that’s physically connected to another Windows computer (USB or older parallel),
and that computer shares the printer to everyone else. Think of it as “print through the host PC.”
It’s convenientuntil the host PC goes to sleep, at which point the printer becomes a decorative object.
Part A: Share the printer on the host computer
- On the host PC (the one the printer is connected to), open Devices and Printers.
- Right-click the printer → Printer properties.
- Go to the Sharing tab.
- Check Share this printer and set a short, simple Share name (no weird symbols).
- Click Apply → OK.
Pro tip: keep the host PC awake during business hours. If it sleeps, client computers often can’t print.
Also, if the host is running a 32-bit OS and your client is 64-bit (or vice versa), you may need to install
additional drivers on the host so clients can download the correct driver automatically.
Part B: Add the shared printer from your Windows 7 client
On the Windows 7 computer you want to print from:
- Open Devices and Printers → click Add a printer.
- Choose Add a network, wireless or Bluetooth printer.
- If it appears, select it and click Next.
- If it doesn’t appear, click The printer that I want isn’t listed.
- Select Select a shared printer by name.
- Type the path in this format: \HostComputerNamePrinterShareName (example: \OFFICEPCLaserJet).
- Click Next, provide credentials if prompted, and finish the wizard.
Bonus trick: Add it as a “Local Port” pointing to the share
If the shared-printer wizard is being dramatic, you can add the network share as a local port (yes, it’s weird,
but it works). Start Add a printer → Add a local printer → Create a new port →
choose Local Port → set the port name to \HostComputerNamePrinterShareName. Then select the driver.
It’s like convincing Windows 7 it’s printing locally while it quietly prints over the network.
Way 3: Add the Printer by IP Address (Standard TCP/IP Port)
This is the most reliable method for a true network printerone that has its own IP address on your LAN. It’s also
the best solution when discovery fails, when you’re dealing with a print server device, or when Windows 7 refuses
to “see” a printer that is definitely right there, minding its own business.
When you should use IP printing
- The printer has Ethernet/Wi-Fi and a known IP address (like 192.168.1.50).
- You need stable printing even if discovery breaks.
- You’re in an office with multiple VLANs/subnets and browsing doesn’t work.
- You want to avoid “it worked yesterday” mysteries caused by name discovery.
Step-by-step: Create a Standard TCP/IP Port
- Click Start → Devices and Printers.
- Click Add a printer.
- Select Add a local printer. (Yes, even though it’s on the network. Welcome to Windows.)
- Choose Create a new port → select Standard TCP/IP Port → click Next.
- Enter the printer’s IP address or hostname → click Next.
- Let Windows detect the device, or choose a “Generic” option if detection is imperfect.
- Select the correct printer driver (or click Have Disk if you have the manufacturer driver package).
- Name the printer, decide whether to share it (optional), then print a test page.
Make IP printing rock-solid (so it doesn’t change next week)
If your printer IP comes from DHCP, it can change after a reboot. The fix is simple: set a DHCP reservation
on your router (preferred), or set a static IP on the printer. Then your Windows 7 TCP/IP port always points to
the right place.
Example scenario: Your printer is currently 192.168.1.50. You create a Standard TCP/IP Port using that IP.
Next month the printer reboots and grabs 192.168.1.84 instead. Suddenly Windows says “Printer Offline” and acts
surprised. A DHCP reservation prevents that plot twist.
Way 4: Use IPP (Internet Printing) or LPR (Old-School, But Still Alive)
Sometimes you’re not printing to a simple LAN printer. Maybe you’re printing through a print server, a Linux box,
a specialty appliance, or an environment where “standard” means “works on Tuesdays.”
That’s where IPP and LPR come in.
Option A: IPP (Internet Printing Protocol)
IPP lets you connect to a printer using a URL, often through a print server. In some environments you’ll see
URLs like http://server/printers/PrinterName or a more explicit IPP endpoint. Windows 7 can do this,
but you may need to enable the feature first.
- Open Control Panel → Programs → Turn Windows features on or off.
- Expand Print and Document Services.
- Check Internet Printing Client, then click OK.
- Go to Devices and Printers → Add a printer.
- Choose the option to connect using a URL (wording varies), then enter the printer’s URL.
A realistic caveat: IPP over HTTPS can fail if Windows 7 can’t validate the print server’s certificate
(especially if it’s self-signed). If you’re in a secure environment, the proper fix is to use a certificate Windows trusts
or install the correct certificate chainotherwise Windows may refuse to connect even when the URL is correct.
Option B: LPR/LPD (the “still works, still confusing” method)
LPR is common when printing through UNIX/Linux systems or older network print servers. Windows 7 can use LPR, but
you often need to enable the LPR port monitor first.
- Open Control Panel → Programs → Turn Windows features on or off.
- Expand Print and Document Services.
- Enable LPR Port Monitor (and/or related LPD services if required in your environment).
- Then add a printer and create a new port using LPR.
- Enter the server address and the queue name (the queue name is often provided by IT).
LPR is great when you have the right queue name and the server is configured correctly. If you don’t have those details,
it’s like trying to mail a package with “Steve” as the only address.
Troubleshooting: When Windows 7 Can’t Find Your Printer (But You Can)
If printing fails, resist the urge to immediately reinstall everything. Most Windows 7 network printing issues come down to
settings, visibility, or driversnot because the printer “forgot how to print” (though it will pretend).
Fast checks that solve a surprising number of problems
- Switch the network profile: If your network is set to Public, discovery/sharing may be blocked. Use Home or Work for trusted networks.
- Turn on Network Discovery and File/Printer Sharing: In Network and Sharing Center → Change advanced sharing settings, enable discovery and file/printer sharing.
- Confirm the printer’s IP is reachable: Open Command Prompt and try ping 192.168.1.50 (replace with your printer IP). No reply doesn’t always mean it’s down, but it’s a clue.
- Use IP method if discovery fails: If browsing doesn’t work, Way 3 usually does.
- Restart Print Spooler: Open services.msc → restart Print Spooler. (Classic fix. Still effective.)
- Driver mismatch: If the printer installs but prints garbage or nothing, try the manufacturer’s Windows 7 driver or a compatible PCL/PostScript driver.
- Shared printer credentials: If connecting to a shared printer prompts for a password, you may need an account on the host PC or to adjust password-protected sharing.
One smart diagnostic move
If you’re unsure whether the problem is “Windows can’t talk to the printer” or “the printer can’t print,” print a configuration page directly from
the printer’s control panel. If that works, the printer hardware is fine and the issue is network/driver-side. If it doesn’t, the printer has its
own drama to resolve (paper, toner, jams, existential dread).
Extra: of Real-World “Been There, Printed That” Experience
Over the years, I’ve learned that printer setup has less to do with technology and more to do with human expectations.
People expect printing to be like turning on a lamp: flip a switch, light appears. Printers are more like cats: they’ll comply,
but only if the mood is right and the environment is spiritually aligned.
The single most common Windows 7 network-printer faceplant I’ve seen is the “it worked yesterday” situation. Nine times out of ten, it’s because
the printer’s IP address changed. Someone rebooted the router, the DHCP pool shuffled, and the printer quietly moved from
192.168.0.25 to 192.168.0.114 like it was starting a new life. Windows 7, meanwhile, kept sending print jobs to the
old address with the confidence of a man yelling into a disconnected phone. The fix wasn’t a driver reinstallit was a DHCP reservation.
Once the IP stopped wandering, the printer stopped “randomly” going offline.
Another classic: the shared-printer host PC goes to sleep. Everything looks fine in Devices and Printers, but jobs pile up and then vanish like
socks in a dryer. Users blame Windows 7. IT blames the printer. The printer blames everyone. In reality, the host computer is asleep,
dreaming of a better life where it isn’t a print server. If you’re using Way 2, configure the host PC’s power settings so it stays awake during
printing hoursor move to Way 3 with a real network printer if you can.
Drivers are their own adventure, especially with older operating systems. Windows 7’s built-in driver library is helpful, but it’s not psychic.
Sometimes the “closest match” prints text perfectly but turns PDFs into abstract art. In those cases, manufacturer drivers (or a compatible
PCL/PostScript driver) save the day. My practical rule: if you’re printing invoices and forms, prioritize stability over fancy features.
You don’t need twelve photo filtersjust reliable black-and-white output that doesn’t rotate your page 90 degrees for fun.
And then there’s IPP/HTTPS. Secure printing is greatright up until the certificate is self-signed and Windows 7 refuses to trust it.
This is one of those “Windows is technically correct” moments: if it can’t validate the certificate, it protects you by declining the connection.
In a business setting, the right fix is to use a certificate chain Windows trusts (or deploy the certificate properly). In a home lab setting,
switching to HTTP or using standard TCP/IP printing is often the faster pathassuming your network is trusted and you understand the tradeoffs.
The good news: once you pick the right method, Windows 7 printing can be surprisingly dependable. The bad news: getting there sometimes feels like
negotiating with a tiny office goblin who demands tribute in the form of driver installers and network discovery settings.
Pay the tribute once, document the printer IP and share name, and you’ll save Future You from doing this all over again.
Future You deserves that.
Conclusion
Setting up a network printer on Windows 7 is easiest when you match the method to the environment:
use automatic discovery when it’s visible, connect by share name when a host PC is sharing it, switch to a Standard TCP/IP Port for reliable
IP-based printing, and use IPP/LPR when your network is more specialized. If you get stuck, don’t immediately reinstall everythingcheck the network
profile, discovery/sharing settings, IP address stability, and the print spooler. With a little patience (and maybe a snack), you’ll be printing again.
![18 Best Types of Charts and Graphs for Data Visualization [+ How to Choose]](https://corkopencoffee.org/wp-content/uploads/2026/05/18-best-types-of-charts-and-graphs-for-data-visualization-how-to-choose-qKM1PBYG-thumb.jpg)


