Table of Contents >> Show >> Hide
- Why DIY Halloween Decorations Are Worth It
- Before You Start: A Simple Halloween Decorating Plan
- 95 Easy DIY Halloween Decorations for Every Room and Porch
- Easy DIY Halloween Decorations for the Front Door
- DIY Halloween Porch Decorations
- Easy Outdoor Halloween Decorations for the Yard
- No-Carve Pumpkin Decorating Ideas
- Indoor Halloween Decorations for the Living Room
- DIY Halloween Mantel Decorations
- Halloween Table Decorations and Party Ideas
- Kid-Friendly Halloween Crafts That Double as Decor
- Budget-Friendly Halloween Decorations from Everyday Items
- Last-Minute DIY Halloween Decorations
- How to Make DIY Halloween Decorations Look Stylish, Not Chaotic
- Indoor vs. Outdoor Halloween Decorations
- Best Supplies for Easy DIY Halloween Decorations
- of Real-Life Experience: What Actually Works When Decorating for Halloween
- Conclusion
- SEO Tags
Note: This article is written in standard American English and synthesized from real U.S. home, craft, retail, and safety guidance. It is fully rewritten for web publishing, with no source-code explanation or unnecessary reference tags.
Halloween decorating does not have to require a garage full of fog machines, a suspiciously expensive skeleton army, or a degree in advanced pumpkin engineering. With a few affordable supplies, a little imagination, and maybe one brave family member willing to untangle last year’s string lights, you can turn your home into a charmingly spooky masterpiece.
These 95 easy DIY Halloween decorations are designed for real homes, real budgets, and real people who may or may not have glitter permanently embedded in their dining table. You will find indoor Halloween decorations, outdoor Halloween decorations, no-carve pumpkin ideas, porch displays, party decor, kid-friendly crafts, and clever ways to reuse things you already own. The best part? Most of these ideas can be made in an afternoon.
Why DIY Halloween Decorations Are Worth It
DIY Halloween decor gives your home personality. Store-bought pieces are convenient, but homemade decorations feel more playful, flexible, and memorable. You can make your porch cute instead of terrifying, gothic instead of goofy, or haunted-house dramatic without frightening the neighbor’s toddler into early retirement from trick-or-treating.
Another benefit is control. You decide the color palette, level of spookiness, and budget. Black paper bats can look elegant on a white wall. Painted pumpkins can last longer than carved ones. Battery-operated candles give you a warm glow without the stress of open flames. And old jars, cardboard boxes, sheets, branches, fabric scraps, and thrift-store frames can become surprisingly stylish Halloween decorations.
Before You Start: A Simple Halloween Decorating Plan
Choose a Theme
Pick one direction before you begin: classic haunted house, cute pumpkins, vintage Halloween, witch cottage, glam gothic, monster party, or family-friendly fall. A clear theme keeps your decorations from looking like a craft store sneezed in your living room.
Use Zones
Focus on the spaces guests notice first: front porch, entryway, mantel, dining table, windows, staircase, and yard. You do not need to decorate every inch. A strong porch, a spooky table centerpiece, and a few glowing windows can do more than twenty random plastic spiders hiding in places that will definitely scare you in December.
Keep Safety in Mind
Use battery-operated candles or LED lights inside pumpkins and lanterns whenever possible. Keep walkways clear, secure outdoor decorations against wind, avoid overloading extension cords, and place cords where guests will not trip. Halloween should be spooky, not a small claims court adventure.
95 Easy DIY Halloween Decorations for Every Room and Porch
Easy DIY Halloween Decorations for the Front Door
- Black Feather Wreath: Wrap a foam wreath form with black feathers, add a faux crow, and finish with a velvet ribbon.
- Monster Door Face: Cut giant eyes and teeth from poster board and tape them to your front door for a funny monster look.
- Bat Swarm Door: Cut bats from black cardstock and arrange them as if they are flying across the door.
- Spider Web Wreath: Stretch faux webbing over a wreath form and add plastic spiders in different sizes.
- Witch Hat Door Hanger: Fill a decorative witch hat with faux flowers, branches, and ribbon, then hang it like a bouquet.
- Skeleton Hand Knocker: Attach lightweight skeleton hands around a wreath or door knocker for a creepy welcome.
- Haunted House Silhouette: Cut a haunted house shape from black poster board and place it on the door with yellow paper windows.
- Ghost Garland Entry: String small tissue ghosts along the top of the doorway.
- DIY Trick-or-Treat Sign: Paint a scrap wood board with “Trick or Treat” and lean it beside the door.
- Gothic Picture Frame Door Decor: Spray-paint an old frame black and add bats, branches, or a spooky portrait print.
DIY Halloween Porch Decorations
- Pumpkin Topiary: Stack faux pumpkins in a planter and decorate them with paint, ribbon, or house numbers.
- Floating Witch Hats: Hang lightweight witch hats from porch ceiling hooks using clear fishing line.
- Glowing Ghost Jugs: Draw ghost faces on empty milk jugs and place LED lights inside.
- Spiderweb Railings: Stretch faux webs across porch railings and secure them with removable hooks.
- Broomstick Lineup: Tie twine, ribbon, and tags around old brooms for a witchy porch corner.
- Black Cat Planters: Add paper ears and painted faces to black pots, then fill them with fall mums.
- DIY Tombstones: Cut foam board into tombstone shapes, paint them gray, and add funny names like “Barry D. Alive.”
- Lantern Cluster: Group lanterns with battery candles, mini pumpkins, and faux leaves.
- Haunted Welcome Mat: Use a stencil and outdoor paint to add bats or “Boo!” to a plain doormat.
- Porch Pumpkin Patch: Mix real pumpkins, faux pumpkins, mums, hay bales, and cornstalks for a classic fall display.
Easy Outdoor Halloween Decorations for the Yard
- Yarn Spiderweb: Tie white yarn between trees, porch posts, or stakes to create a giant web.
- Trash Bag Spiders: Stuff black trash bags with newspaper, add pool noodle legs, and place them on the lawn.
- Ghost Pathway Stakes: Cover foam balls with white fabric, draw faces, and attach them to garden stakes.
- Glowing Eyes in Bushes: Cut eye shapes into toilet paper rolls, insert glow sticks, and hide them in shrubs.
- Skeleton Picnic: Pose skeletons around a small table with cups, plates, and a sign that says “Bone Appetit.”
- Monster Lawn Signs: Paint plywood or cardboard with funny monster faces and stake them in the yard.
- Witch Crash Display: Place striped legs and boots sticking out of a bush, planter, or hay bale.
- Cemetery Fence: Make a mini graveyard fence from painted cardboard tubes or thin wood strips.
- Pumpkin Path Lights: Use plastic pumpkins with LED tea lights to line the walkway.
- Scarecrow Skeleton: Dress a skeleton in flannel and denim for a farmhouse Halloween yard scene.
No-Carve Pumpkin Decorating Ideas
- Painted Polka Dot Pumpkins: Use acrylic paint or stickers to create simple dots in black, white, gold, or orange.
- Drip Paint Pumpkins: Pour paint from the stem and let it drip down for a messy-chic effect.
- Decoupage Pumpkins: Cover faux pumpkins with patterned napkins, book pages, or tissue paper.
- Spiderweb Pumpkins: Draw webs with a paint pen and add a tiny plastic spider.
- Chalkboard Pumpkins: Paint pumpkins with chalkboard paint and write spooky messages.
- Pressed Flower Pumpkins: Glue dried flowers to white pumpkins for a pretty cottagecore Halloween look.
- Glitter Stem Pumpkins: Paint only the stems with metallic paint or glitter glue for a subtle upgrade.
- Mummy Pumpkins: Wrap pumpkins in gauze and add googly eyes.
- Black Lace Pumpkins: Wrap lace around pumpkins and secure it with pins or hot glue.
- Mini Pumpkin Place Cards: Write guest names on mini pumpkins for a Halloween dinner table.
Indoor Halloween Decorations for the Living Room
- Paper Bat Wall: Fold black cardstock bats in half and tape them in a sweeping pattern above the sofa.
- Haunted Mirror: Add removable ghost decals or spooky lettering to a hallway mirror.
- Creepy Candle Cluster: Group LED candles on a tray with black ribbon, faux spiders, and mini skulls.
- Halloween Throw Pillow Covers: Use iron-on vinyl or fabric paint to decorate plain pillow covers.
- Floating Cheesecloth Ghosts: Shape cheesecloth over balloons, stiffen with fabric stiffener, and let dry.
- Spell Book Stack: Cover old books with black paper and label them “Potions,” “Curses,” or “Snacks I Hid From My Kids.”
- Branch Centerpiece: Spray-paint branches black and place them in a vase with hanging bats.
- DIY Potion Bottles: Remove labels from jars, add spooky labels, and fill with colored water or glitter.
- Skull Planter: Use a plastic skull as a planter for faux succulents or dark florals.
- Halloween Gallery Wall: Swap family photos temporarily with vintage-style spooky prints.
DIY Halloween Mantel Decorations
- BOO Banner: Cut letters from cardstock and string them across the mantel.
- Black Garland: Layer black tinsel, faux leaves, or paper chains for a dramatic mantel display.
- Mini Haunted Houses: Paint small cardboard houses black and add glowing LED lights inside.
- Bat Branch Garland: Attach paper bats to twine and drape it across the mantel.
- Stacked Pumpkins: Arrange mini pumpkins at different heights using books or candle stands.
- Witch Apothecary Shelf: Style jars, candles, old books, and dried herbs for a magical display.
- Ghost Portraits: Print old portraits and add white paint ghosts over the faces for a playful haunted look.
- Spider Candle Holders: Glue plastic spiders to thrifted candle holders and spray-paint them black.
- Black Rose Arrangement: Spray faux roses black and place them in a metallic vase.
- Moon Phase Garland: Cut moon shapes from metallic cardstock and string them above the mantel.
Halloween Table Decorations and Party Ideas
- Spiderweb Table Runner: Cut a web pattern from black felt and lay it over a white tablecloth.
- Eyeball Napkin Rings: Glue painted ping-pong balls to napkin rings for a silly spooky detail.
- Candy Corn Mason Jars: Paint jars in yellow, orange, and white stripes, then fill them with treats.
- Cauldron Candy Bowl: Fill a plastic cauldron with candy and add battery fairy lights underneath tissue paper.
- Mini Pumpkin Centerpiece: Fill a tray with mini pumpkins, candles, and eucalyptus or faux leaves.
- Black Paper Placemats: Cut placemats into bat, cat, or coffin shapes.
- DIY Cup Labels: Add removable labels with names like “Vampire Juice” or “Witch Water.”
- Floating Candle Ceiling: Hang paper towel roll candles with LED tea lights and fishing line.
- Ghost Chair Covers: Drape white fabric over chair backs and add felt eyes.
- Potion Drink Station: Arrange drinks in labeled bottles with black straws and smoky-looking dry ice alternatives, such as foggy printed labels or cotton batting.
Kid-Friendly Halloween Crafts That Double as Decor
- Paper Plate Pumpkins: Paint paper plates orange and add green paper stems.
- Handprint Spiders: Use black paint handprints to make spider art for the fridge or wall.
- Cotton Ball Ghosts: Glue cotton balls onto ghost shapes and add paper eyes.
- Toilet Paper Roll Monsters: Paint rolls bright colors and add paper teeth, horns, and googly eyes.
- Popsicle Stick Haunted Houses: Glue sticks into house shapes, paint them black, and add paper windows.
- Paper Chain Garland: Make orange, black, purple, and green paper chains for windows or stair rails.
- Egg Carton Bats: Cut egg carton sections, paint them black, and hang them with string.
- Foam Pumpkin Faces: Let kids decorate foam pumpkins with stickers and markers.
- Monster Rocks: Paint smooth rocks with funny monster faces and place them in planters.
- Halloween Window Clings: Use craft kits or homemade puffy paint designs to decorate windows.
Budget-Friendly Halloween Decorations from Everyday Items
- Sheet Ghosts: Drape old white sheets over balloons, foam balls, or tomato cages.
- Cardboard Coffins: Cut cardboard into coffin shapes and paint them black or gray.
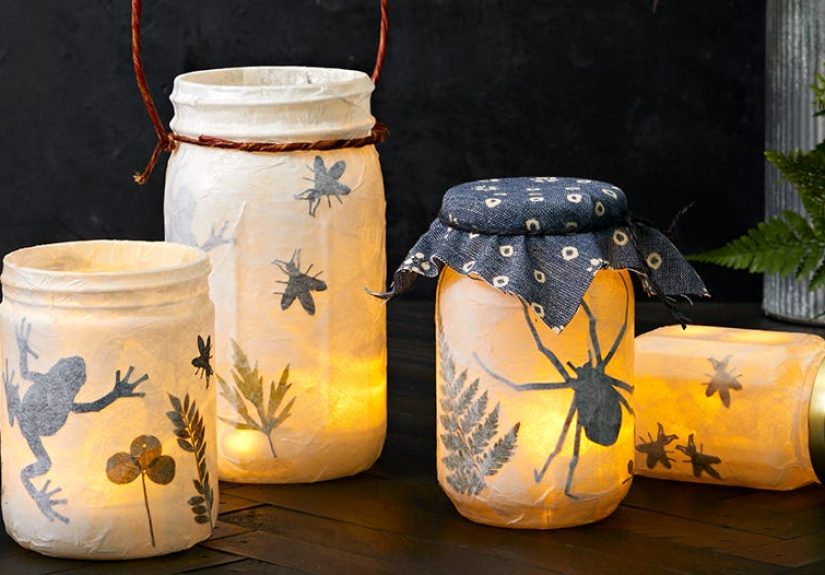
- Jar Lanterns: Wrap jars in tissue paper, add faces, and place LED candles inside.
- Old Bottle Potions: Save glass bottles and add labels like “Bat Wings” or “Dragon Tears.”
- Paper Bag Luminaries: Cut shapes into paper bags, weigh them with sand, and add battery tea lights.
- Pool Noodle Candles: Cut pool noodles into different heights, drip hot glue around the top, paint them, and add LED lights.
- Trash Bag Window Shadows: Cut spooky silhouettes from black trash bags and tape them inside windows.
- Clothespin Bats: Paint clothespins black and attach paper wings for garlands or treat bags.
- Hanging Yarn Ghosts: Wrap white yarn around cardboard, tie the top, and trim into ghost shapes.
- Recycled Can Lanterns: Punch holes in clean cans, paint them black, and use LED lights inside.
Last-Minute DIY Halloween Decorations
- Bloody Window Message: Use washable red window marker to write “Help!” or “Enter If You Dare.”
- Instant Spider Invasion: Stick plastic spiders around a doorway, lamp, or mirror with removable adhesive.
- Black Cloth Draping: Drape black fabric over furniture, mirrors, or shelves for quick haunted-house drama.
- Balloon Ghosts: Draw ghost faces on white balloons and let them float or tape them to walls.
- Emergency Candy Display: Pour candy into clear jars, add ribbon and a spooky label, and pretend this was your plan all along.
How to Make DIY Halloween Decorations Look Stylish, Not Chaotic
The secret to great Halloween decorating is repetition. Repeat one color, one shape, or one material throughout your home. For example, black bats can appear on the front door, mantel, and dining room mirror. Pumpkins can repeat on the porch, table, and staircase. A few repeated details make your home look intentionally decorated instead of accidentally haunted by a clearance aisle.
Lighting also matters. Halloween decorations come alive after dark, so add glow wherever you want attention. Use LED candles inside jars, pumpkins, lanterns, and paper bags. Place string lights under gauze or behind silhouettes. Swap one lamp bulb for a purple, orange, or green bulb if the fixture allows it safely. A spooky glow makes even simple paper crafts look theatrical.
Texture is another easy upgrade. Mix matte black paper, shiny glass jars, soft cheesecloth, rough twigs, faux cobwebs, velvet ribbon, and real pumpkins. When different textures sit together, the display feels richer. This is why a plain pumpkin next to a lantern, a branch, and a folded piece of black fabric suddenly looks like a magazine photo instead of a vegetable waiting for soup.
Indoor vs. Outdoor Halloween Decorations
Indoor Decorating Tips
Inside the home, focus on details people see up close. Decorate shelves, mantels, mirrors, dining tables, and entryway consoles. Indoor Halloween decorations can be more delicate because they are protected from weather. Paper bats, painted jars, cheesecloth ghosts, potion bottles, and candle displays work beautifully indoors.
Outdoor Decorating Tips
Outside, think bigger and sturdier. Porch decorations should survive wind, moisture, and excited trick-or-treaters. Use heavier planters, weather-safe lights, zip ties, garden stakes, and outdoor-rated extension cords. Keep pathways clear and make sure decorations do not block stairs, railings, or doorways.
Best Supplies for Easy DIY Halloween Decorations
You do not need a craft room the size of a pumpkin patch. A basic Halloween DIY kit can include black cardstock, scissors, removable tape, hot glue, twine, cheesecloth, acrylic paint, paint pens, faux spiders, LED tea lights, mason jars, ribbon, and a few faux pumpkins. For outdoor projects, add garden stakes, zip ties, foam board, outdoor paint, and weather-resistant lights.
Thrift stores and dollar sections are treasure caves for Halloween decorators. Look for old frames, candlesticks, glass bottles, baskets, trays, books, fabric, and small figurines. A coat of black spray paint can turn ordinary objects into gothic Halloween decor faster than you can say, “Where did I put the glue gun?”
of Real-Life Experience: What Actually Works When Decorating for Halloween
After experimenting with DIY Halloween decorations, one lesson becomes clear very quickly: simple ideas usually get the biggest reaction. A wall full of paper bats, for example, takes very little money and almost no technical skill, but guests notice it immediately. The trick is to use more bats than you think you need and arrange them as if they are moving in one direction. Five bats look like a craft. Fifty bats look like an event.
Porch decorating follows the same rule. One pumpkin is nice. A group of pumpkins in different sizes feels intentional. Add a lantern, a basket of mums, and a small sign, and suddenly the porch looks finished. The display does not need to be expensive; it just needs layers. Place taller items in the back, medium pieces in the middle, and small pumpkins or lights near the front. This makes even a small porch feel full without blocking the walkway.
Another practical lesson is that battery-operated candles are the unsung heroes of Halloween. They are safer, reusable, and much easier to manage than real candles, especially when decorations are near fabric, paper, dried leaves, or busy doorways. They also solve the classic problem of wind blowing out candles five minutes before trick-or-treaters arrive. Put LED candles inside jars, pumpkins, lanterns, and paper bag luminaries, and the whole house gets a warm haunted glow.
Painted pumpkins are also more forgiving than carved pumpkins. Carving is fun, but it can be messy, slippery, and short-lived. Painted pumpkins, especially faux pumpkins, can be reused year after year. A few black-and-white pumpkins can look modern, while orange pumpkins with silly faces feel classic and kid-friendly. If children are helping, no-carve pumpkins are usually the calmer choice. Everyone gets to decorate, and nobody has to supervise a tiny saw with the emotional intensity of a lifeguard.
One mistake many people make is decorating every room with unrelated items. A ghost here, a witch there, a neon skeleton in the bathroom, and suddenly the house feels confused. The better approach is to choose two or three repeating elements. For example, use black bats, white ghosts, and orange pumpkins throughout the home. Repetition makes the decorations look planned, even when half of them were made at the kitchen table while eating candy corn.
Storage matters too. DIY decorations are more enjoyable when they are easy to pack away. Flat paper bats, faux pumpkins, signs, wreaths, and fabric pieces store well. Delicate projects like cheesecloth ghosts or cardboard tombstones may need a labeled box so they do not get crushed. At the end of the season, take a quick photo of each display before packing it away. Next year, you will remember what worked, what fell over, and which spider decoration scared you every single morning.
Finally, the best Halloween homes are not necessarily the scariest. They are the ones that feel alive with personality. Maybe your decorations are cute, elegant, creepy, funny, or dramatic. Maybe your skeleton is having a tea party. Maybe your pumpkins wear sunglasses. If the display makes people smile, pause, or say, “I love this,” then you have done it right.
Conclusion
Decorating for Halloween should feel fun, not frighteningly complicated. With these 95 easy DIY Halloween decorations, you can create a home that feels festive from the porch to the party table. Start with a theme, repeat a few visual elements, use safe lighting, and choose projects that match your time and budget. Whether you make paper bats, painted pumpkins, glowing ghosts, potion bottles, or a full front-yard graveyard, the magic is in the personal touch.
The best DIY Halloween decorations do not need to be perfect. In fact, a slightly crooked ghost or a suspiciously lopsided pumpkin often has more charm than something flawless. Halloween is the one season when weird is welcome, dramatic is encouraged, and your front porch can legally look like a witch moved in and brought snacks.


