Table of Contents >> Show >> Hide
- Why American Black Walnut Is a Standout for Kitchens
- Countertop Construction: Edge Grain, Face Grain, or End Grain?
- Designing Countertops and Backsplashes as One System
- Performance Reality Check: Pros and Cons
- Budget Planning for Walnut Countertops and Backsplashes
- Installation Blueprint: Where Good Kitchens Go Right (or Wrong)
- Finishing Strategy: Food-Safe, Practical, and Low-Drama
- Backsplash Material Pairings That Work with Walnut
- Maintenance Plan You Can Actually Stick To
- Common Mistakes to Avoid
- Is American Black Walnut Butcher Block Worth It?
- Experience Notes (Extended): What Real Projects Teach You About Walnut (Approx. 500+ Words)
- Final Thoughts
If your kitchen mood board says “warm, rich, timeless, and quietly expensive,” there’s a good chance you’re already flirting with
American black walnut butcher block countertops. And honestly? Great taste. Walnut has that deep chocolate-to-plum tone that can make
even a weekday peanut-butter sandwich feel a little gourmet. Pair it with a matching or complementary backsplash and your kitchen starts looking like it
belongs in a magazine spread titled “I definitely know what I’m doing with lighting.”
This guide breaks down exactly how to plan, buy, install, and maintain
American black walnut butcher block kitchen counter tops and backsplashes without turning your remodel into a costly “learning experience.”
You’ll get practical advice on grain styles, finish choices, moisture management, sink and stove zones, costs, long-term care, and design combinations that
actually work in real homes.
Why American Black Walnut Is a Standout for Kitchens
It looks premium without screaming for attention
American black walnut (Juglans nigra) has a naturally rich, dark heartwood and a refined grain pattern that reads sophisticated in almost any style:
modern organic, transitional, classic farmhouse, and even high-contrast contemporary. It plays nicely with white cabinetry, black hardware, matte brass,
and soft greige walls. In other words, walnut doesn’t need to be loud to be the star.
It’s a true hardwood with practical durability
For butcher block use, walnut sits in a sweet spot: hard enough for daily life, but not so hard that it becomes difficult to fabricate or repair.
It sands beautifully, takes finish consistently, and can be refinished when life happens (because life will happen: pans, spills, and that one
relative who sets a hot skillet down “just for a second”).
It’s a premium species, so plan like one
Walnut is a valued American hardwood and generally priced above many mainstream species. The upside is undeniable visual depth and a luxury feel.
The tradeoff is budget and sourcing consistency. If you’re aiming for a full kitchen in walnut, smart planning matters: prioritize your highest-visibility
runs and decide where you want full walnut versus mixed-material zones.
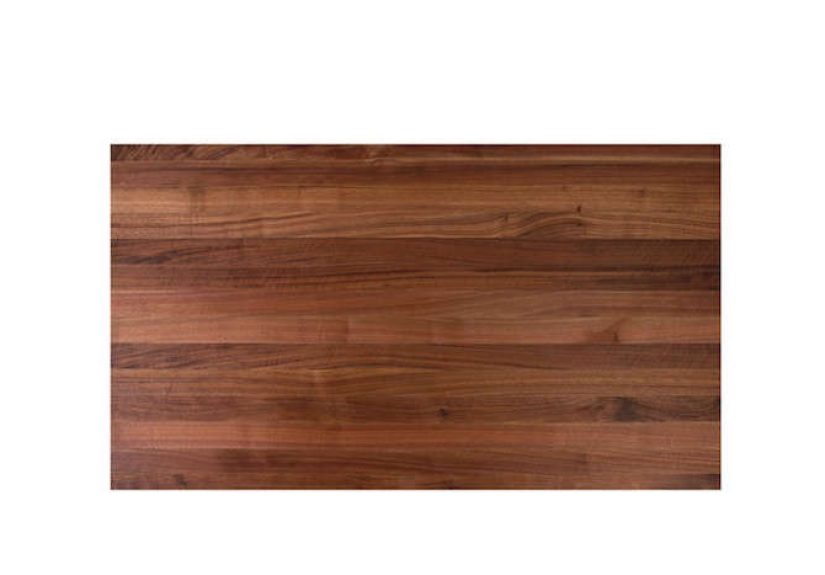
Countertop Construction: Edge Grain, Face Grain, or End Grain?
“Butcher block” is not one single thing. Your performance and appearance depend on how the wood is assembled:
Edge grain walnut
Narrow strips glued along their edges. This is the go-to for most kitchen runs: stable, durable, and typically more budget-friendly than end grain.
If you want a classic linear look and a good value-performance balance, edge grain is your safest bet.
Face grain (flat grain) walnut
Wider planks laid flat, showing broader cathedral patterns and dramatic grain movement. It looks furniture-grade and high-end, but can show wear more readily
in heavy prep zones. Best where aesthetics lead and chopping is done on boards.
End grain walnut
Checkerboard-style blocks with grain ends facing up. Very distinctive visually, usually more expensive, and often used as feature sections (island inserts or
prep zones) rather than full perimeter runs. Think “statement piece,” not necessarily “everywhere.”
Designing Countertops and Backsplashes as One System
Most people pick countertops first and backsplash second. With walnut, flip that mindset: design the two as a coordinated system.
Option A: Full walnut countertop + walnut backsplash
This creates a seamless, furniture-like kitchen envelope. It looks incredible in calm, minimal spaces with fewer upper cabinets. To avoid visual heaviness,
balance with lighter wall paint, reflective fixtures, and under-cabinet lighting.
Option B: Walnut countertop + tile backsplash
Probably the most practical and most popular combination. Walnut adds warmth at horizontal surfaces, while tile handles splash-heavy vertical zones near sinks
and cooking areas. Easy-clean porcelain or ceramic gives you performance without losing the walnut character.
Option C: Walnut island + perimeter stone + coordinated backsplash
The “best of both worlds” setup. Walnut where you gather (island), stone where you abuse (around sink/range), and a backsplash that bridges both.
This is often the smartest way to enjoy walnut without putting all moisture and heat stress on one material.
Performance Reality Check: Pros and Cons
Pros
- Warmth and character: Walnut gives kitchens depth that quartz-only layouts can struggle to achieve.
- Repairability: Minor scratches and dings are usually sand-and-refinish problems, not replacement problems.
- Custom feel: Grain, edge profile, and finish all let you tailor the look.
- Long service life: With consistent care, butcher block can perform for decades.
Cons
- Maintenance is not optional: Oiling/conditioning schedules matter.
- Moisture sensitivity: Around sinks and seams, detail work is everything.
- Movement with environment: Wood expands/contracts, so installation must include expansion allowances.
- Cost variability: Walnut ranges from “doable” to “luxury,” depending on grade, thickness, and labor.
Budget Planning for Walnut Countertops and Backsplashes
Cost depends on species grade, slab dimensions, grain style, local labor rates, cutouts, finish choice, and how complex your backsplash layout is.
Expect walnut to price above entry-level butcher block species. In many real projects, installed butcher block lands in mid-tier countertop budgets,
while premium walnut selections and custom fabrication push higher.
A practical budgeting framework:
- Material: Walnut usually commands a premium over maple/birch/oak.
- Fabrication: Sink/range cutouts, edge details, and seam matching add labor.
- Backsplash: Separate line item; wood backsplashes are often sold independently and installed as custom pieces.
- Finishing + maintenance: Food-safe oils, conditioners, occasional sanding, and periodic re-sealing are recurring costs.
Installation Blueprint: Where Good Kitchens Go Right (or Wrong)
1) Acclimate the wood before installation
Walnut needs time in the home environment before it gets cut and fixed in place. Skipping acclimation is one of the fastest routes to seasonal movement headaches.
2) Plan expansion gaps like you mean it
Wood moves. Leave perimeter allowance at walls and restrictive barriers. Gaps are usually concealed with trim, caulk, or backsplash detailing.
Zero-gap installs may look crisp on day one and problematic by season two.
3) Respect sink and faucet cutouts
Sink areas are stress tests for wood tops. Seal cut edges thoroughly, keep clearances appropriate, and use proper silicone detailing for water barriers.
If your sink setup restricts natural movement, you’re inviting cracks, swelling, or joint stress later.
4) Don’t glue the whole slab down rigidly
Full rigid attachment can fight the natural expansion/contraction cycle. Your installer should use fastening methods that secure the top while allowing movement.
5) Treat backsplash transitions as technical details, not decor trim
Whether you use wood or tile backsplash, the counter-to-wall interface needs a deliberate movement and moisture strategy. Pretty caulk lines are nice.
Functional caulk lines are mandatory.
Finishing Strategy: Food-Safe, Practical, and Low-Drama
Oil/wax systems
Great for natural feel and easy spot repair. These finishes are common for butcher-block-style surfaces and can be renewed without a full strip-and-refinish cycle.
They need routine maintenance, especially in active kitchens.
Film finishes (like polyurethane-type systems)
Better moisture/stain resistance when intact, but repairs can be more involved if the film gets damaged. Excellent for lower-contact sections or decorative runs.
Hybrid approach (recommended for many homes)
Use a robust protective approach near sinks and high-splash zones; keep natural-feel finishes where tactile warmth matters most (such as island seating sides or
lower-splash prep zones). The best finish is the one your household will actually maintain.
Backsplash Material Pairings That Work with Walnut
Walnut + handmade-look ceramic tile
Soft variation against walnut grain feels artisan and warm. Great in transitional or modern farmhouse kitchens.
Walnut + matte porcelain slab or large-format tile
Cleaner lines, fewer grout interruptions, easy maintenance. Perfect when you want wood warmth plus contemporary simplicity.
Walnut + metal accents (not full metal overload)
Brushed brass or blackened steel details add contrast. Keep it to hardware, shelving brackets, or hood trim for a balanced look.
Walnut + glass tile (strategic use)
Adds light bounce in darker kitchens. Use thoughtfully so the reflective texture supportsnot competes withthe walnut grain.
Maintenance Plan You Can Actually Stick To
Daily / after cooking
- Wipe with mild soap-and-water solution and dry promptly.
- Don’t leave standing water near seams or sink edges.
- Use cutting boards for heavy prep; avoid direct carving on the top.
Monthly (or as surface dryness appears)
- Apply food-safe conditioning oil/wax as recommended by your finish system.
- Inspect sink perimeter, faucet penetrations, and backsplash junction lines.
- Re-touch vulnerable edges before damage compounds.
Quarterly to annually
- Light sand and recondition traffic zones if needed.
- Evaluate whether re-sealing is due in high-use/wet zones.
- Refresh caulk and sealants where movement has opened micro-gaps.
Common Mistakes to Avoid
- Using cooking oils to “condition” wood: they can go rancid over time.
- Ignoring acclimation: what looks perfect today can shift tomorrow.
- Treating sink cutouts casually: unsealed edges are future trouble.
- Expecting zero maintenance: walnut rewards consistency, not neglect.
- Matching everything too perfectly: a little material contrast helps walnut shine.
Is American Black Walnut Butcher Block Worth It?
If you want a kitchen that feels lived-in yet elevated, and you’re okay with a realistic care routine, yesabsolutely. Walnut butcher block offers a rare combo:
tactile warmth, visual depth, repairability, and design flexibility. It is not the “install and forget forever” option. It is the “beautiful now, beautiful later
if you treat it right” option.
The smartest path for most homeowners is intentional zoning: place walnut where it delivers maximum visual and experiential value, then support it with practical
backsplash and sink-area detailing that protects your investment.
Experience Notes (Extended): What Real Projects Teach You About Walnut (Approx. 500+ Words)
Experience 1: The “All-Walnut Dream Kitchen” that needed one adjustment.
A homeowner in a bright suburban remodel chose full walnut perimeter counters, walnut island, and walnut backsplash. Stunning resultvisually cohesive and
magazine-ready. But after six months, the heavy wood envelope made evening lighting feel flatter than expected. The fix was simple: under-cabinet linear lighting
with warmer-neutral temperature and a lighter paint behind open shelving. Same counters, completely different mood. Lesson: walnut responds dramatically to lighting.
Budget for lighting from day one, not as an afterthought.
Experience 2: The sink zone that quietly saves the whole installation.
Another project used beautiful walnut with a farmhouse sink and bridge faucet. Installer sealed the top, but the client skipped routine edge checks around the sink.
Nine months in, there was slight darkening near the faucet penetration and at one back corner seam. No structural failure, but enough to require sanding and
refinishing in that zone. After rework, they added a simple monthly “sink-edge check” routine60 seconds with a dry towel and visual inspection. Problem solved.
Lesson: in walnut kitchens, sink detailing and follow-up habits matter more than heroic annual maintenance.
Experience 3: The hybrid material layout that reduced stress and looked better.
A busy household initially wanted walnut everywhere, then switched to walnut island + stone perimeter + walnut-toned tile backsplash accents. They worried it would
feel less cohesive. It felt more cohesive. Why? The island became the warm social centerpiece, while perimeter zones took the hardest abuse from water,
acidic splashes, and rushed cleanup. They still got the walnut experience where people touch, gather, and eat, with fewer anxiety points. Lesson: hybrid design
is not compromiseit’s strategy.
Experience 4: Finish confusion that became a practical policy.
One homeowner researched finishes for weeks and nearly froze the project. Oil, wax, hardwax, film, matte, satinanalysis paralysis. The final decision came from
a practical question: “Who will maintain this, and how often?” They chose a food-safe maintenance finish and set calendar reminders every month for conditioning.
No regrets. Minor wear became easy to correct, and the kitchen aged gracefully. Lesson: the “best” finish is the one your household can maintain consistently.
A perfect finish with zero upkeep plan is just expensive optimism.
Experience 5: The backsplash detail everyone notices last.
In one renovation, the team focused heavily on counter slab selection and ignored backsplash transitions until late. That almost led to a rushed seam plan behind
the range and sink. They paused, redesigned transitions, and selected a backsplash material with easier cleaning near high-splatter zones while keeping walnut as
a visual anchor. The final look was cleaner, more durable, and easier to maintain. Lesson: backsplashes are not “extra.” With walnut counters, they’re part of the
performance system. Treat wall transitions, edge terminations, and cleaning behavior as design inputsnot cleanup tasks.
Big takeaway from all five: American black walnut butcher block succeeds when design beauty and technical details are planned together.
People who love their walnut kitchens long-term usually do three things: (1) they choose smart zones, (2) they respect movement/moisture rules at installation,
and (3) they adopt a lightweight but consistent care routine. If you do those three, walnut doesn’t just survive daily lifeit gets better-looking with age.
Final Thoughts
American Black Walnut Butcher Block Kitchen Counter Tops and Backsplashes can deliver one of the most inviting and sophisticated kitchen aesthetics
available today. If your goal is a space that feels warm, premium, and personalnot sterilewalnut is a powerful choice. Plan details carefully, keep your maintenance
realistic, and your kitchen will reward you for years.