Table of Contents >> Show >> Hide
- What Makes a Pantry “Designer,” Anyway?
- Step 1: Do the “Empty-It-Out” Reset (Yes, All of It)
- Step 2: Plan Your Zones Like a Grocery Store (But Prettier)
- Step 3: Get the Shelving Right (So Food Stops Disappearing)
- Step 4: Add “Access Tools” (Pull-Outs, Turntables, and Bins)
- Step 5: Decant Strategically (Not Everything Needs a Matching Jar)
- Step 6: Labels That Don’t Feel Like Homework
- Step 7: Lighting Is Non-Negotiable (Yes, Even in a Tiny Pantry)
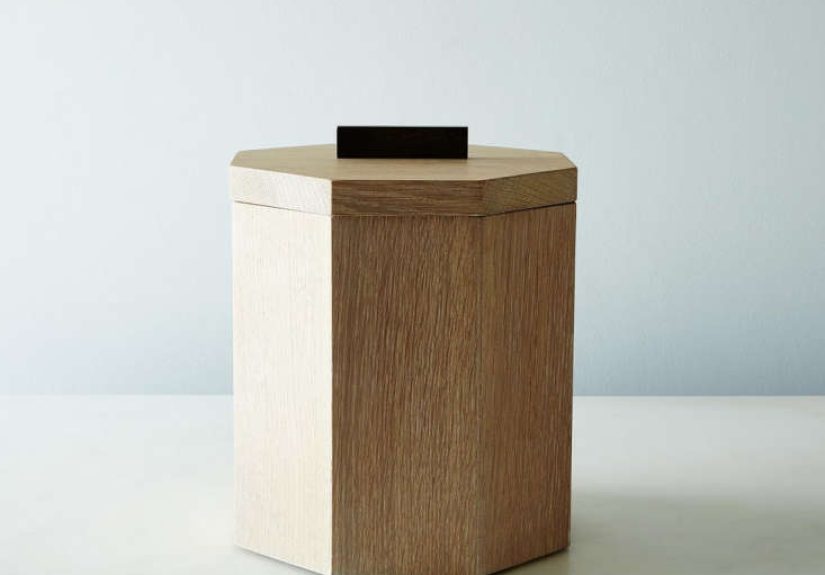
- Step 8: Add Designer Details (The Fun Part)
- Budget, Midrange, and “We’re Going Full Glam” Options
- Maintenance: The 10-Minute Routine That Keeps It Beautiful
- Conclusion: Your Pantry, But Make It Practical (and Gorgeous)
- Experiences: Real-Life Lessons From a Designer Pantry Makeover (The Stuff You Only Learn After Living With It)
A pantry can be one of two things: a calm, well-lit, beautifully organized “mini market” that makes dinner feel easy… or a snack avalanche waiting to happen the second you reach for the rice. A designer pantry makeover fixes both problems. It’s part function (so you can actually find the cumin) and part style (so you don’t whisper “sorry” to your shelves).
The goal isn’t a museum where nobody’s allowed to eat the granola bars. The goal is a pantry that matches how you live: what you cook, what you buy, who puts groceries away, and which family member thinks “put away” means “shove behind the cereal.” Let’s turn your pantry into a space that’s gorgeous, practical, and shockingly easy to keep tidy.
What Makes a Pantry “Designer,” Anyway?
Designer doesn’t have to mean expensive. It means your pantry is intentional: planned zones, the right shelving dimensions, smart storage, and a cohesive look that feels like an extension of your kitchen. A designer pantry makeover typically includes:
- Layout that makes sense: zones for daily use, backstock, and appliances.
- Storage that behaves: pull-outs, bins, lazy Susans, risers, and containers chosen for your items.
- Lighting you don’t hate: bright, even light so you can see what’s in the back.
- Visual calm: a consistent container style, labels, and a color palette that doesn’t scream at you.
- Maintenance-friendly: easy wipe surfaces, fewer “mystery piles,” and a system the whole household can follow.
Step 1: Do the “Empty-It-Out” Reset (Yes, All of It)
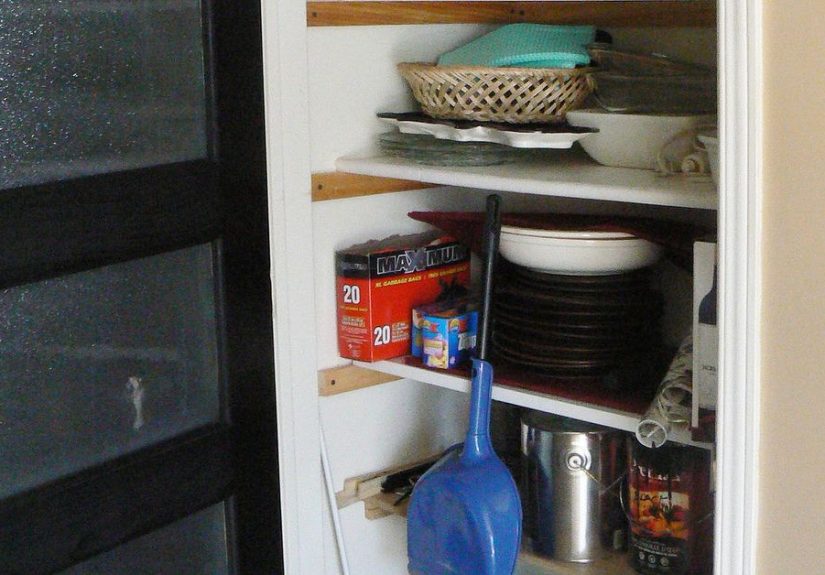
If you skip this step, your pantry makeover will be a glow-up on top of chaos. Pull everything outfood, appliances, baskets, the mysterious bag of something that might be chia seeds or might be bird foodand clean the shelves. A full reset is where the magic starts because it shows you what you actually own (and what has been expired since a different presidency).
Quick Sorting Method That Won’t Melt Your Brain
- Toss: expired items, stale snacks, and anything that smells like regret.
- Donate: unopened, still-good food you realistically won’t use.
- Keep: items you use now (not the fantasy version of you who bakes sourdough every morning).
- Relocate: items that don’t belong (paper plates, candles, and that one screwdriver that lives everywhere).
Step 2: Plan Your Zones Like a Grocery Store (But Prettier)
Designers and pro organizers love “zones” because they cut down on clutter and decision fatigue. When everything has a home, the pantry stops being a dumping ground and starts being a system.
High-Function Pantry Zones
- Daily grab zone: snacks, breakfast, lunch items, and go-to staples at eye level.
- Cooking zone: oils, vinegars, sauces, canned goods, grains, pastagrouped by how you cook.
- Baking zone: flour, sugar, chips, sprinkles, extracts, and baking tools in one spot.
- Backstock zone: duplicates and bulk items, clearly labeled, stored up high or down low.
- Appliance garage: mixers, air fryers, slow cookersanything that hogs counters.
- “Wild card” zone: party supplies, pet treats, lunch containers, or whatever your household uses constantly.
The secret sauce: design your zones around your habits. If you make smoothies daily, that becomes a zone. If you don’t, don’t build your pantry around aspirational chia.
Step 3: Get the Shelving Right (So Food Stops Disappearing)
Shelving is the backbone of a designer pantry makeover. If shelves are too deep, items vanish into the shadow realm and you buy duplicates. If shelves are too shallow, boxes hang off the edge like they’re cliff-diving.
Designer-Friendly Shelf Dimensions
- Depth: Aim for shelves that keep items visible and reachable. Many pros prefer shallower shelving so everything stays “front and center.”
- Varied depths: Use slightly deeper areas for cereal boxes and serving platters, and shallower shelves for cans and jars.
- Spacing: Leave enough vertical clearance for cereal boxes, canisters, and bottlesthen adjust based on what you actually store.
Built-In vs. Freestanding: A Smart Split
Built-ins look seamless and high-end. Freestanding shelving is flexible and budget-friendly. A designer move is mixing both: built-ins where you need polish (main wall, appliance zone), freestanding racks where you need adaptability (backstock corner).
Step 4: Add “Access Tools” (Pull-Outs, Turntables, and Bins)
Beautiful pantries aren’t just styledthey’re engineered. If you can’t reach it, you won’t use it. Access tools make every inch usable, especially in deep pantries and corners.
The MVPs of Pantry Function
- Pull-out shelves or drawers: So you can grab items from the back without unloading the front like a pantry Jenga game.
- Lazy Susans: Perfect for sauces, spices, oils, and small bottles that love to hide.
- Clear bins: Great for snacks, packets, baking add-ins, and corralling categories.
- Tiered risers: Makes canned goods visible like stadium seating for soup.
- Door storage: Over-the-door racks for wraps, spices, or small items can unlock serious space.
A designer rule: choose organizers based on your inventory, not your social feed. If you buy giant cereal bags, get bins that fit them. If you buy a dozen sauces, plan a turntable zone. The pantry should serve you, not audition for a photoshoot.
Step 5: Decant Strategically (Not Everything Needs a Matching Jar)
Decantingtransferring food into containerscan look sleek and help keep items fresh. But doing it for absolutely everything can turn into a full-time job. Designer pantries decant where it matters most:
What’s Worth Decanting
- High-use staples: flour, sugar, rice, oats, pasta.
- Snack chaos: crackers, pretzels, cookies (if they last long enough to store).
- Small loose items: baking chips, nuts, dried fruit.
What Can Stay in Original Packaging
- Items with clear labeling you rely on: cooking instructions, allergy info, or nutrition labels you reference.
- Things you rarely use: that one specialty ingredient you swear you’ll use again.
- Backstock: keep it simplebin it, label it, move on with your life.
Pro tip: if you decant, keep an eye on expiration dates and rotation so older items get used first. A designer pantry is pretty, but it’s also quietly preventing food waste.
Step 6: Labels That Don’t Feel Like Homework
Labels are the difference between “organized” and “organized for 48 hours.” They help everyone put things back correctly, especially in busy households. You don’t need fancy calligraphy unless that sparks joy. You need clarity.
Labeling That Actually Works
- Category labels: “Snacks,” “Baking,” “Breakfast,” “Pasta,” “Backstock.”
- Container labels: so nobody opens five bins to find the chocolate chips.
- Shelf labels: helpful when multiple people unload groceries.
If you want the designer look, keep label styles consistent: same font, same color, same placement. It’s a small detail that makes the whole pantry feel intentional.
Step 7: Lighting Is Non-Negotiable (Yes, Even in a Tiny Pantry)
Pantry lighting is like good mascara: you don’t realize how much it matters until you try it. Poor lighting makes it harder to find things, which leads to duplicates and clutter.
Lighting Upgrades That Feel High-End
- LED strip lighting: under shelves or along vertical panels for even light.
- Motion-sensor puck lights: easy for rentals and quick upgrades.
- Ceiling fixture upgrade: if you have a walk-in pantry, treat it like a real room.
Choose lighting that’s bright and clean, then aim it where you actually need itinside shelves, not just the ceiling. The moment you can see every label without squinting, you’ll wonder why you waited.
Step 8: Add Designer Details (The Fun Part)
Once the pantry works, make it feel like yours. This is where a pantry makeover becomes a designer pantry makeover: cohesive finishes, pretty textures, and small moments of delight.
Easy High-Impact Style Moves
- Paint or wallpaper: a bold color or a subtle pattern makes the pantry feel intentional.
- Hardware upgrade: matching knobs and pulls instantly elevate cabinets and drawers.
- Basket textures: mix in woven baskets to soften the look and hide visual clutter.
- Matching containers: pick one style (square, stackable, clear) for a clean visual rhythm.
- “Counter moment”: if you have space, add a small prep counter or coffee station.
Bonus designer trick: carry a detail from your kitchen into the pantrycabinet color, hardware finish, or countertop tone. It makes the pantry feel like a true extension of the home, not a storage closet that accidentally got famous.
Budget, Midrange, and “We’re Going Full Glam” Options
Budget Pantry Makeover
- Deep clean + declutter reset
- Bins, risers, and one or two turntables
- Simple labels (printable or handwritten)
- Stick-on lighting
Midrange Pantry Makeover
- Adjustable shelving updates or added shelves
- Consistent container system for staples + snacks
- Pull-out baskets in key areas
- Upgraded light fixture or integrated LED strips
Full Designer Pantry Makeover
- Custom built-ins with a mix of shelves and drawers
- Appliance garage + dedicated coffee/snack station
- High-end lighting plan (layered + task lighting)
- Wallpaper, paint, upgraded hardware, and cohesive finishes
Maintenance: The 10-Minute Routine That Keeps It Beautiful
The best pantry system is the one you’ll maintain without needing a pep talk. Keep it simple:
- Weekly: quick scan for spills, empty boxes, and “almost out” staples.
- Every grocery trip: place new items behind older ones so you use the oldest first.
- Monthly: wipe shelves, check expirations, and re-center bins that migrated.
- Seasonally: re-evaluate zones (snack needs change; so do you).
If the pantry starts slipping, don’t panic. That’s normal. Reset one zone at a timesnacks today, baking next week. A designer pantry is a living system, not a one-time performance.
Conclusion: Your Pantry, But Make It Practical (and Gorgeous)
A designer pantry makeover isn’t about perfection. It’s about making your daily life easier: faster cooking, fewer duplicates, less food waste, and a space that feels calm when everything else is loud. Start with a reset, build zones around your habits, choose shelving and organizers that match your inventory, and finish with lighting and style details that make you smile every time you open the door.
And if someone in your house still shoves chips behind the oatmeal? Greatnow you’ll find them immediately. That’s the power of design.
Experiences: Real-Life Lessons From a Designer Pantry Makeover (The Stuff You Only Learn After Living With It)
Here’s the funny thing about pantry makeovers: the “after” photo is only the beginning. The real test is week three, when you’re hungry, late, and trying to cook with one hand while the other hand is digging for paprika like it’s buried treasure. Over time, a designer pantry teaches you what works in real lifeand what looks cute but quietly sabotages your sanity.
1) The Pantry Isn’t One SpaceIt’s Many Micro-Spaces
In theory, your pantry is one tidy room. In practice, it’s a collection of micro-zones competing for attention: the “snack vortex,” the “baking shelf that doubles as a dumping ground,” and the “backstock corner where duplicates go to multiply.” The most successful makeovers treat each micro-space differently. Snacks need wide, grab-and-go bins (because kids and guests aren’t going to alphabetize granola bars). Baking needs a contained zone with a clear “refill” system. Backstock needs strict rules, like “duplicates live here and nowhere else,” or you’ll end up with three open boxes of pasta in three different spots.
2) Deep Shelves Require a Strategy (Or They Become Food Storage Theater)
Deep shelves look efficient, but they can turn into a black hole. The solution isn’t just “buy bins”it’s matching bins to behavior. In real pantries, people don’t pull out six items to reach one jar. So the bin becomes the drawer: you pull the whole bin forward, pick what you need, and slide it back. Once you experience this, it’s hard to go back. It’s also the moment you realize why a few pull-outs in the right places can feel like a luxury upgrade, even if the rest of the pantry stays simple.
3) Labels Work Best When They’re Boring
Fancy labels are fun, but the labels that keep a pantry tidy are the ones nobody has to interpret. “Baking,” “Breakfast,” “Snacks,” “Pasta,” “Cans,” “Backstock.” That’s it. The more “creative” the label, the more likely somebody will hesitate, shrug, and toss the item wherever it fits. One household’s “quick meals” is another person’s “random shelf.” Clear, boring labels winespecially for families or shared kitchens.
4) The ‘Backstock Bin’ Prevents Duplicate Chaos
One of the best real-world upgrades is a dedicated backstock bin (or two). This is where the extra ketchup, spare peanut butter, and bulk pasta live. The magic is psychological: it gives duplicates a single, official home. Without it, duplicates get scattered across zones and you lose track. With it, you can do a 10-second scan: “We have two jars of marinarano need to buy more.” Over time, it noticeably reduces waste and makes grocery shopping faster.
5) Styling Is Easier When the System Is Solid
People often try to style firstmatching containers, pretty baskets, coordinated labelsbefore the pantry has a functional plan. That’s backwards. Once the zones and containers fit your inventory, styling becomes almost effortless. You naturally get clean lines, consistent grouping, and visual calm. Then you can add the designer touches that make the pantry feel like a room: a small runner, a bold paint color, a wallpaper moment, or a warm light fixture. The pantry starts to feel like a place you want to be, not a place you endure.
6) The Best “Luxury” Upgrade Is Lighting
If you do one splurge, make it lighting. Good lighting changes how the pantry functions every single day. You stop buying duplicates because you can see what you have. You stop losing small items behind tall boxes. You stop feeling like you need to remove half a shelf to find one spice. Even a simple motion-sensor setup can feel like a designer-level improvement because it removes friction from the most common pantry tasks.
After living with a designer pantry makeover, the biggest lesson is this: perfection doesn’t keep a pantry beautifulclarity does. Clear zones. Clear containers. Clear labels. Clear lighting. When your pantry is clear, it stays calm, it stays functional, and it stays good-lookingeven on the weeks when life is not.