Table of Contents >> Show >> Hide
- Why painting over gloss paint can go wrong
- What you will need before you start
- Easy Ways to Paint over Gloss Paint: 14 Steps
- Step 1: Check the condition of the old gloss paint
- Step 2: Clean like the paint’s life depends on it
- Step 3: Protect the area before prep gets messy
- Step 4: Repair dents, nail holes, and cracks
- Step 5: Scuff sand the glossy surface
- Step 6: Use a deglosser when sanding is awkward
- Step 7: Remove every trace of dust
- Step 8: Choose the right primer for glossy paint
- Step 9: Prime the surface evenly
- Step 10: Sand the primer lightly for a smoother finish
- Step 11: Pick the right paint finish for the surface
- Step 12: Apply the first coat with a light, controlled hand
- Step 13: Let the paint dry, then add a second coat
- Step 14: Let it cure before hard use
- Common mistakes to avoid when painting over gloss paint
- Best places to use this method
- Conclusion
- Real-world experiences painting over gloss paint
- SEO Tags
Gloss paint looks sharp, wipes clean, and has a talent for making trim, doors, and cabinets look fancy. It also has a second talent: making new paint slide around like it is late for a meeting. If you have ever rolled fresh paint onto a glossy wall or slick baseboard and watched it act suspiciously shiny, streaky, or downright rebellious, you already know the problem. Gloss paint is durable because it dries into a hard, smooth finish. That same smoothness can make adhesion harder for the next coat.
The good news is that painting over gloss paint is absolutely doable. You do not need magic, and you do not need to strip every surface to bare wood in a dramatic cloud of dust. What you do need is the right prep, the right primer, and enough patience to let each layer do its job. Below is a simple, practical guide that walks you through 14 easy steps so your new finish sticks, levels well, and stays put.
Why painting over gloss paint can go wrong
Gloss and high-gloss coatings are smooth, nonporous, and resistant to wear. That is exactly why they are common on trim, cabinets, doors, and other hardworking surfaces. Unfortunately, new paint likes a surface with a little “tooth.” If you skip prep and paint straight over gloss, the most common results are peeling, chipping, poor coverage, roller marks, or a finish that scratches too easily. In other words, the paint may look okay on day one and betray you by day ten.
So the real secret is not “just buy better paint.” The secret is surface preparation. Think of it as setting the table before dinner. Sure, you can toss the pasta straight onto the wood, but nobody is going to call that a serving plan.
What you will need before you start
- Degreasing cleaner or TSP substitute
- Microfiber cloths or sponges
- Painter’s tape and drop cloths
- Sandpaper or sanding sponge
- Dust cloth, tack cloth, or vacuum with brush attachment
- Wood filler or spackling compound if needed
- Caulk for gaps and trim joints
- Bonding primer or stain-blocking primer
- Interior or exterior paint suited to the surface
- Brush, roller, or sprayer
- Safety glasses, gloves, and good ventilation
Easy Ways to Paint over Gloss Paint: 14 Steps
Step 1: Check the condition of the old gloss paint
Before you do anything, inspect the surface closely. If the existing gloss paint is peeling, cracking, bubbling, or flaking, do not paint over the damaged parts and hope for the best. Remove loose material first. New paint only sticks as well as the surface underneath it. If the old finish is failing, your fresh coat will fail right along with it.
This is also the moment to think about age. If you are working in a home built before 1978, disturbed paint can create hazardous lead dust. That is not a “maybe I’ll Google it later” issue. It is a real safety issue. Use lead-safe practices and be extra careful before sanding older surfaces.
Step 2: Clean like the paint’s life depends on it
Because it does. Dirt, grease, wax, cooking residue, soap film, and furniture polish are all enemies of adhesion. Wash the glossy surface with a suitable cleaner or degreaser, especially in kitchens, bathrooms, and around hand-touched trim and doors. Rinse if the cleaner requires it, then let the surface dry completely.
A lot of paint failures blamed on “bad primer” are really cleaning failures wearing a fake mustache. If the surface feels slick, grimy, or dusty, clean it again.
Step 3: Protect the area before prep gets messy
Lay down drop cloths, tape off adjacent surfaces, and remove hardware when possible. This matters more than people think. Proper prep often means cleaning, patching, sanding, and priming, and all of that is easier when you are not trying to dodge hinges, doorknobs, switch plates, or decorative items. If you are painting cabinets or doors, removing hardware usually leads to a neater finish and less frustration.
Step 4: Repair dents, nail holes, and cracks
Gloss paint highlights imperfections. That is its hobby. Fill holes, dents, and shallow gouges with wood filler or spackling compound, depending on the surface. If you are working on trim or woodwork, caulk open seams and gaps where appropriate. Let repairs dry fully, then sand them smooth so they blend into the surrounding area.
If you skip this step and paint anyway, the new sheen will turn tiny defects into headline news.
Step 5: Scuff sand the glossy surface
This is the big one. Most glossy painted surfaces need to be lightly sanded so the new coating can grip. You do not usually need to sand down to bare wood or completely remove the old finish. The goal is simply to dull the shine and create a slightly rougher profile.
For many projects, a light scuff sand with a medium-to-fine grit works well. Trim, furniture, and cabinets often respond nicely to a careful pass that removes the sheen without chewing up the profile. Focus on even, light pressure. You are trying to turn “glass-smooth” into “ready for primer,” not carve a canyon system into the door frame.
Step 6: Use a deglosser when sanding is awkward
If the surface has detailed molding, grooves, spindles, or tight corners, a liquid deglosser can be a helpful sidekick. Some products both clean and degloss, which is especially useful on glossy cabinets, trim, or furniture with lots of profile work. Always follow label directions and safety guidance. Deglossers are practical, but they are not permission slips to ignore prep entirely.
Many pros still combine light sanding with a deglosser for extra insurance on stubborn glossy finishes. Think of that as the suspenders-and-belt approach. Not glamorous, very effective.
Step 7: Remove every trace of dust
Once sanding is done, remove all dust. Vacuum with a soft brush attachment, wipe with a damp microfiber cloth, or use a tack cloth if appropriate for the surface. This step sounds small, but dust left behind can create rough texture, weak adhesion, and little bumps that make your finish look amateurish.
If you run your hand over the surface and it feels powdery, you are not done yet.
Step 8: Choose the right primer for glossy paint
Primer is often the difference between a finish that lasts and a finish that starts flaking the minute someone closes the door too enthusiastically. For glossy surfaces, a bonding primer is usually the safest bet. It helps the topcoat adhere to smooth, previously painted surfaces and can be especially useful on trim, cabinets, laminate-like finishes, and older enamel coatings.
If the old paint has stains, tannin bleed, smoke damage, or tricky discoloration, a stain-blocking primer may make more sense. The best primer depends on the surface and what you are painting over, but one rule stays constant: glossy surfaces usually benefit from priming, even if the topcoat claims heroic things on the can.
Step 9: Prime the surface evenly
Apply one even coat of primer with the right tool for the job. Use a quality angled brush for trim details, a foam or microfiber roller for flatter sections, or a sprayer if you are experienced and working in a proper setup. Avoid flooding corners or laying primer on too thick. Heavy coats tend to sag, dry unevenly, and create more sanding later.
Then let the primer dry fully according to the manufacturer’s directions. Not “mostly dry.” Not “it feels emotionally ready.” Fully dry.
Step 10: Sand the primer lightly for a smoother finish
Once the primer has cured enough, inspect the surface for raised grain, drips, rough patches, or brush marks. A light sanding can smooth things out and create a more polished finish for the topcoat. This is especially useful on trim, cabinets, doors, and furniture where a smoother final look really matters.
Wipe away the sanding dust again before painting. Yes, again. Paint projects are basically a long conversation with dust, and the dust keeps answering back.
Step 11: Pick the right paint finish for the surface
Now it is time for the topcoat. Match the paint to the project. Walls often look best in eggshell or satin, while trim, cabinets, and doors usually need a tougher finish such as satin, semi-gloss, or an enamel-style coating designed for durability. If you are repainting something that gets touched constantly, like baseboards, kitchen cabinets, or interior doors, prioritize washability and hardness over bargain-bin temptation.
If you are painting over an older oil-based gloss finish, do not guess. Make sure your prep and primer are compatible with the topcoat you plan to use.
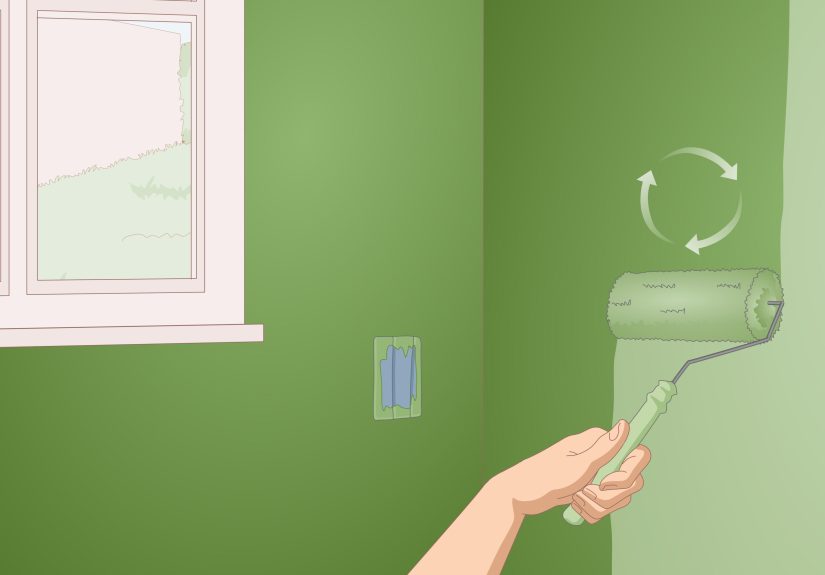
Step 12: Apply the first coat with a light, controlled hand
Brush or roll the paint in thin, even coats. Resist the urge to bury the surface in one thick pass. Thick coats are more likely to sag, show lap marks, stay soft longer, and dry unevenly. Cut in carefully, keep a wet edge, and work methodically.
On trim and doors, long smooth strokes help the finish level better. On cabinets, a foam roller or fine finish roller can reduce texture. On walls, use the recommended nap for your surface. Good application technique cannot fix bad prep, but it absolutely rewards good prep.
Step 13: Let the paint dry, then add a second coat
Most projects covering glossy paint look and perform better with two finish coats. Wait the full recommended recoat time before applying the second coat. Rushing this step can lead to dragging, tackiness, or a finish that cures poorly.
The second coat usually improves uniform color, sheen consistency, and durability. It also helps cover areas where gloss underneath may still be affecting the look of the surface.
Step 14: Let it cure before hard use
Dry and cured are not the same thing. Paint can feel dry to the touch long before it reaches full hardness. That matters a lot on glossy trim, cabinets, shelves, doors, and furniture. Be gentle for the first several days, or longer if the product label says so. Avoid scrubbing, stacking items, rehanging hardware too aggressively, or slamming doors like you are in a courtroom drama.
A little patience at the end protects all the work you did at the beginning.
Common mistakes to avoid when painting over gloss paint
- Skipping the cleaning step: Grease and grime ruin adhesion.
- Painting over shine without scuffing: The smoother the old finish, the harder new paint has to work.
- Using the wrong primer: Glossy and slick surfaces often need bonding help.
- Applying heavy coats: Thick paint creates drips, slow drying, and soft finishes.
- Ignoring cure time: Touch-dry paint is not ready for abuse.
- Forgetting safety in older homes: Pre-1978 paint may require lead-safe precautions.
Best places to use this method
This approach works well for painted trim, doors, cabinets, built-ins, glossy furniture, stair railings, and some wall areas previously finished in semi-gloss or gloss. It also helps when you want to tone down a shiny old finish and move to a softer sheen, such as taking glossy trim to satin or painting semi-gloss walls with eggshell.
For very slick specialty surfaces like tile, glass, laminate, or metal, the strategy is similar but the product choices become more surface-specific. In those cases, a specialty bonding primer can matter even more.
Conclusion
If you want an easy way to paint over gloss paint, the formula is simple: clean, dull the sheen, repair flaws, prime smart, and paint with patience. The process is not difficult, but it is unforgiving if you skip steps. Gloss paint is durable and handsome, but it demands respect before it agrees to be covered.
Do the prep well and your new paint can look smooth, hold up to daily use, and spare you from the heartbreak of peeling corners a month later. In painting, as in life, the boring part is usually the part doing all the heavy lifting.
Real-world experiences painting over gloss paint
The first time many homeowners paint over gloss, they assume the shiny surface is the problem and the new paint will somehow “grip harder” if they buy a premium can. Then they roll on a coat, admire the color, and wonder why the finish scratches with a fingernail a few days later. That experience is incredibly common, especially on baseboards, doors, and older kitchen cabinets. The issue usually is not the color coat at all. It is the missing prep underneath.
One of the most common real-life examples happens in kitchens. Cabinets often look clean from a distance, but once you start wiping them down, the cloth tells the truth. Grease, cooking oils, fingerprints, and polish residue can build up for years on glossy cabinet paint. Many people sand first and clean second, which basically grinds grime into the surface. The better order is to wash thoroughly, let everything dry, then scuff sand and remove dust. That one change often improves the final result more than switching brands.
Doors are another classic lesson. A glossy door seems flat until daylight hits it from the side. Suddenly every old patch, nick, and brush mark announces itself like it paid for a billboard. Painters with experience know that door prep matters just as much as door paint. A little filler, a little sanding, a careful primer coat, and a light sanding after priming can turn a tired door into something that looks almost factory-finished. Skip those steps and even expensive paint can look rushed.
Trim work teaches patience too. Baseboards and window casings are easy to underestimate because they are small, but glossy trim usually gets touched, bumped, vacuumed, and cleaned more than walls ever do. That means adhesion matters more, not less. Many DIY painters learn the hard way that trim painted at night may look perfect by morning, only to stick to weatherstripping, chip at corners, or scuff when furniture brushes past it. Letting the paint cure properly is not glamorous, but it is one of the biggest differences between a quick refresh and a finish that actually lasts.
There is also a psychological side to painting over gloss paint. Prep work feels slow, and painting feels productive. So people naturally want to rush to the colorful part. Experienced painters know the opposite is true: the prep is the project. Once you accept that, everything gets easier. You stop looking for shortcuts that sabotage the finish and start building a system that works. Clean first. Sand smart. Prime honestly. Paint in thin coats. Let it cure. It is not flashy advice, but it saves time, money, and plenty of muttered regrets.