Table of Contents >> Show >> Hide
- Why an Ornament Wreath Is the Perfect Budget Holiday DIY
- What You Need to Make a DIY Ornament Wreath
- Best Materials for a Beautiful Ornament Wreath
- How to Make an Ornament Wreath for Around $10
- Simple Cost Breakdown for a Cheap Ornament Wreath
- How to Make Your Wreath Look More Expensive Than It Is
- Indoor vs. Outdoor Ornament Wreaths
- Common Mistakes to Avoid
- Creative Style Ideas for Your Ornament Wreath
- Why This Holiday Craft Never Goes Out of Style
- Experiences, Lessons, and Little Holiday Truths From Making Ornament Wreaths
- Conclusion
Note: Prices are approximate and can vary by store, season, sales, and whatever mysterious force makes you leave a craft aisle with five extra things you did not plan to buy.
If you want holiday decor that looks cheerful, polished, and far more expensive than it really is, a DIY ornament wreath is one of the smartest little tricks in the festive handbook. It is bright, classic, easy to personalize, and surprisingly budget-friendly when you start with inexpensive ornaments, a simple base, and a plan that does not involve panic-buying glitter reindeer at the last second.
The best part? You do not need professional crafting skills, a workshop, or an elite holiday decorating budget. You can create a beautiful ornament wreath for around $10 by using low-cost plastic ornaments, a wire base or bent hanger, ribbon, and a few basic supplies. The result looks full, sparkly, and custom-made for your front door, mantel, gallery wall, or tiny apartment entry that deserves a little seasonal drama.
This guide walks you through how to make a budget ornament wreath, which materials work best, how to avoid the most common mistakes, and how to make the whole thing look stylish instead of “help, my ornaments are escaping.”
Why an Ornament Wreath Is the Perfect Budget Holiday DIY
A traditional evergreen wreath is beautiful, but it can dry out, shed, or cost more than you expected. An ornament wreath solves several holiday decorating problems at once. It gives you the color and sparkle people love at Christmas, stays pretty throughout the season, and can be customized to match nearly any decorating style.
Want a classic red-and-green look? Easy. Prefer gold and white for a more elegant vibe? Also easy. Love candy-colored holiday decor that looks like a peppermint latte exploded in a good way? You are extremely in luck.
A DIY ornament wreath is also great for people who want:
1. A low-cost Christmas wreath idea
If you shop smart, especially at discount stores, dollar stores, or craft sales, you can pull together a wreath that looks much more expensive than its actual price tag.
2. A lightweight wreath for easy hanging
Using plastic ornaments instead of glass helps keep the wreath lighter and safer, especially on doors that get opened and closed all day long.
3. A custom holiday decor project
Color palette, size, shape, bow, texture, finish, and sparkle level are all up to you. Your wreath can be traditional, modern, rustic, whimsical, glam, farmhouse, or somewhere in the magical zone between “tasteful” and “joyfully over-the-top.”
What You Need to Make a DIY Ornament Wreath
You do not need an endless craft haul. In fact, the charm of this cheap holiday wreath is how simple the supply list can be.
Basic supply list
- 1 wire wreath form or 1 wire coat hanger
- 20 to 40 small plastic ornaments, depending on size
- Ribbon for hanging or making a bow
- Hot glue gun and glue sticks, optional but helpful
- Floral wire or twist ties, optional for extra security
- Wire cutters or sturdy scissors
Optional extras
- Mini bells
- Faux greenery sprigs
- Pinecones
- Berry picks
- Glitter spray or faux snow
- A monogram, wooden word sign, or small holiday accent
If you are aiming for the around-$10 version, your most affordable route is usually a wire hanger, shatterproof ornaments from a discount store, and ribbon from your wrapping stash. If you already own glue sticks and a bow or two, congratulations: you are practically crafting with house money.
Best Materials for a Beautiful Ornament Wreath
The prettiest ornament wreaths are not necessarily the most expensive. They are the ones with good contrast, balanced placement, and enough texture to look intentional.
Use plastic ornaments instead of glass
This is the budget-friendly and sanity-friendly choice. Plastic ornaments are lighter, safer, and less likely to shatter if the wreath bumps a wall, slips off a hook, or gets enthusiastically “helped” by a child, pet, or holiday guest who should not be unsupervised near decorations.
Mix finishes for depth
A wreath made from all shiny ornaments can look flat. Try mixing glossy, matte, glittered, and metallic pieces. That simple change makes a low-cost wreath look much more layered and designer-ish.
Choose two or three colors max
This is the difference between “curated holiday style” and “the ornament bin staged a coup.” Stick to a small palette for a cleaner look. Good combinations include:
- Red, white, and silver
- Gold, champagne, and cream
- Green, copper, and wood tones
- Pink, red, and rose gold
- Blue, silver, and icy white
Add one soft element
Ribbon, velvet, faux greenery, or even a touch of frosted pine can keep an ornament wreath from looking too hard or overly shiny. The contrast makes the whole piece feel warmer and more finished.
How to Make an Ornament Wreath for Around $10
Here is the easiest step-by-step method for a Christmas ornament wreath that looks full, festive, and sturdy enough to survive the season.
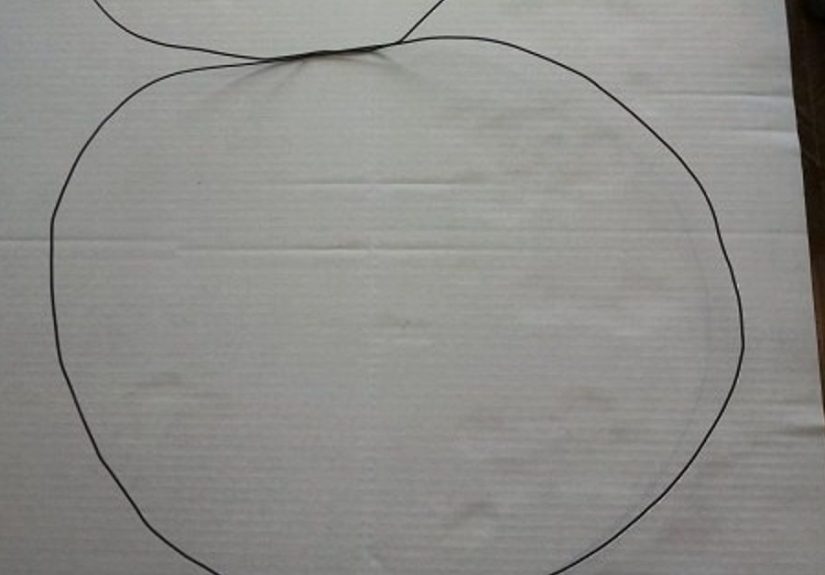
Step 1: Build your base
If you are using a wire hanger, untwist the top and bend the hanger into a circular shape. It does not have to be mathematically perfect. Once the ornaments go on, nobody will be standing there with a protractor.
If you are using a wire wreath form, you can attach ornaments with floral wire or hot glue directly onto the frame.
Step 2: Sort your ornaments by size and finish
Lay everything out before attaching anything. Separate large, medium, and small ornaments. Put glitter pieces in one group, matte in another, shiny in another. This little prep step makes arranging the wreath much faster and helps you avoid clumping all the same colors in one sad corner.
Step 3: Add the largest ornaments first
Start with your largest pieces and space them evenly around the wreath. They act like anchors for the overall design. If you are threading ornaments onto a hanger, slide them on in a balanced sequence. If you are gluing to a wreath form, place them around the ring before committing with glue.
Step 4: Fill in with medium ornaments
Now add the medium-size ornaments between the large ones. This creates shape and fullness. Rotate finishes as you go so the eye moves naturally around the wreath.
Step 5: Tuck in small ornaments and extras
Use the smallest ornaments to fill gaps. This is where the wreath stops looking like “a circle with decorations” and starts looking lush and finished. You can also tuck in a few faux greenery sprigs, berries, or pinecones if you want extra texture.
Step 6: Secure loose pieces
If any ornaments wobble, add a dab of hot glue where they touch each other or the frame. Do not go wild with the glue gun. You are building a wreath, not sealing a submarine hatch.
Step 7: Close the frame and add a ribbon
Twist the hanger back closed if you used one, then shape the top into a hanging loop. Add a ribbon for hanging or tie a bow at the top. A velvet, satin, plaid, or burlap ribbon can completely change the style of the wreath.
Simple Cost Breakdown for a Cheap Ornament Wreath
Here is one realistic example of how to stay close to the $10 goal:
- Plastic ornament multipack: $5 to $7
- Wire hanger or basic wire form: free to $2
- Ribbon: $1 to $2
- Glue: already owned, or about $1 worth of glue sticks used
Total: around $8 to $11, depending on what you already have at home.
If you shop after the holiday season, you can make an even nicer ornament wreath for less. That is one of the least glamorous but most satisfying truths in all of seasonal decorating: the best time to become a holiday genius is when everything is 70 percent off and nobody else wants red glitter anymore.
How to Make Your Wreath Look More Expensive Than It Is
Budget decor only looks cheap when it feels random. A few thoughtful choices can make your DIY Christmas wreath look much more polished.
Keep the color story tight
Use one dominant color, one supporting color, and one accent. This works whether your style is traditional or modern.
Repeat shapes and finishes evenly
Scatter glitter, matte, and glossy pieces throughout the wreath instead of clustering them. Repetition creates visual rhythm and makes the design look intentional.
Use a statement bow
A good bow can rescue a basic wreath and make it look custom. Wide ribbon with a bit of structure usually works best.
Leave a little breathing room
You want the wreath to look full, not stuffed to the point where it resembles a holiday traffic jam. Let some individual ornaments be visible.
Indoor vs. Outdoor Ornament Wreaths
Before hanging your ornament wreath outside, think about weather and materials. If your front door is covered by a porch, your wreath has a better chance of staying pretty all season. If it is fully exposed to rain, strong sun, or wind, choose weather-resistant materials and expect a shorter decorative lifespan.
For outdoor use, plastic ornaments are the smart choice. They handle bumps better and are more practical than delicate glass. If your wreath includes paper, velvet, unfinished wood, or bargain glitter that sheds when you breathe near it, it will be happier indoors.
If you want the best of both worlds, hang the ornament wreath inside on a wall, over a mantel, or in an entryway mirror moment. It still brings the holiday look without battling the elements.
Common Mistakes to Avoid
Using too many large ornaments
If every ornament is oversized, the wreath gets bulky fast and can lose its round shape.
Ignoring the back side
You do not need to decorate the back like the front, but you do want it reasonably flat so the wreath hangs properly against a door or wall.
Choosing weak ornament caps
Some super-cheap ornaments have loose top caps. Test a few before building the whole wreath. If needed, secure caps with a dot of glue.
Over-gluing everything
Hot glue is useful, but too much can look messy and make rearranging impossible. Use it as backup, not as your entire personality.
Forgetting storage
Once the season ends, store the wreath in a wreath bag, large box, or soft wrapping so the ornaments do not get crushed. Future You deserves a smooth December.
Creative Style Ideas for Your Ornament Wreath
Classic Christmas ornament wreath
Use red, green, and gold ornaments with a plaid bow. Add a few faux cedar sprigs for texture.
Modern metallic wreath
Try champagne, silver, white, and a few matte black accents. Finish with a sleek satin ribbon.
Candy-inspired holiday wreath
Mix pink, red, white, and peppermint stripes. This is playful, cheerful, and perfect for a family room or kids’ space.
Farmhouse ornament wreath
Use muted greens, creams, soft gold, and burlap ribbon. A little faux pine keeps it grounded.
Mini wreath collection
Instead of one large wreath, make three small ones for cabinet doors, pantry doors, or grouped wall decor.
Why This Holiday Craft Never Goes Out of Style
An ornament wreath works because it blends nostalgia with flexibility. It feels familiar, but it can be reinvented every year. You can make it sophisticated, playful, rustic, glamorous, colorful, understated, or extra enough to make your neighbors whisper, “Okay, but that is actually adorable.”
It also turns inexpensive materials into something festive and personal. That is the heart of a good holiday DIY. You are not just saving money. You are making decor that feels like yours.
Experiences, Lessons, and Little Holiday Truths From Making Ornament Wreaths
One of the most charming things about making a DIY ornament wreath is that the experience itself becomes part of the holiday memory. People often start this project because they want a cheap Christmas wreath or a quick holiday craft, but they end up remembering the process just as much as the finished decoration. It is the kind of project that easily turns into a seasonal ritual.
For first-time crafters, the biggest surprise is usually how forgiving the wreath can be. At the beginning, the scattered ornaments and bent wire base may look like the setup for a holiday disaster. Then, somewhere around the point when the medium-size ornaments go in and the gaps start disappearing, the whole thing suddenly clicks. What looked random starts looking intentional. It is a nice reminder that a lot of decorating works exactly like that: awkward, awkward, awkward, then weirdly fabulous.
Families often enjoy this project because it is flexible enough for different age groups. Adults can shape the base and handle the glue gun, while kids can sort ornaments by size or color and vote on where the shiny red one should go. Even when the opinions in the room are strong, ornament wreaths are pretty democratic. There is usually room for classic taste, glitter enthusiasm, and one slightly questionable ornament choice that somehow becomes the favorite.
People decorating small spaces also tend to love this project. If you live in an apartment, condo, or dorm-friendly setup where a giant tree is not practical, an ornament wreath delivers a lot of visual holiday impact without taking up valuable square footage. Hung on a front door, over a mirror, or above a console table, it can become the focal point of the whole room. That is a big win for a project built from humble supplies and determination.
Another common experience is discovering that budget decor does not have to feel temporary or second-rate. A well-made ornament wreath can look polished year after year if it is stored carefully. Many people start by making one “just for this season,” only to pull it back out the next year and realize it still looks great. Then comes the next completely reasonable thought: maybe this year calls for a second one in a different color scheme.
There is also something especially satisfying about making holiday decor with materials that are easy to find. You do not need rare supplies or advanced craft skills. You just need a good eye, a little patience, and enough self-control not to add seventeen more ornaments after the wreath is already done. That last skill is admittedly the hardest.
Perhaps the best part of the ornament wreath experience is that it gives people a chance to slow down. The holidays can be busy, noisy, expensive, and full of pressure to make everything feel magical on command. A simple DIY project pushes back against that a little. It says the season can also be made from ordinary things: ribbon, plastic ornaments, a wire hanger, music in the background, and an hour spent making something cheerful with your own hands. That is a pretty beautiful return on a ten-dollar investment.
Conclusion
If you have been looking for a budget-friendly Christmas craft that feels festive, stylish, and actually doable, a DIY ornament wreath is hard to beat. It is affordable, customizable, beginner-friendly, and full of holiday personality. Whether you go classic, modern, playful, or glam, the trick is simple: use lightweight ornaments, keep the color palette focused, build in layers, and finish with a ribbon that makes the whole thing feel complete.
For around $10, you can create holiday decor that looks bright, welcoming, and far more expensive than it is. Not bad for a project that starts with a handful of ornaments and a dream.