Table of Contents >> Show >> Hide
- Before You Start: Quick Copper Reality Check
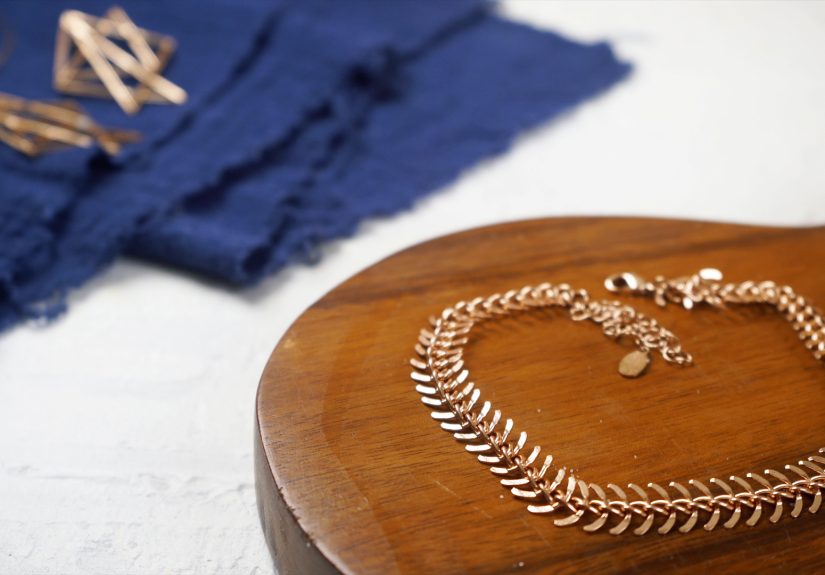
- What You’ll Need
- How to Clean Copper Jewelry: 13 Steps
- Step 1: Identify what you’re cleaning
- Step 2: Decide your goalshine or “just clean”
- Step 3: Do a 30-second spot test
- Step 4: Remove surface dirt first (the “don’t scrub sand into metal” rule)
- Step 5: Wash gently with warm soapy water
- Step 6: Rinse and dry thoroughly
- Step 7: If tarnish remains, choose ONE targeted tarnish-removal method
- Step 8: Method A Lemon + salt rub (fast, classic, but keep it brief)
- Step 9: Method B Vinegar + salt + flour paste (great for stubborn dullness)
- Step 10: Method C Baking soda paste (for spot-cleaning, use a light hand)
- Step 11: Method D Ketchup (yes, really)
- Step 12: Final buff for a smooth shine
- Step 13: Protect it so you don’t have to do this every week
- Troubleshooting: When Copper Jewelry Still Looks “Off”
- Conclusion
- Real-Life “Copper Moments”: of Experiences (Relatable Edition)
Copper jewelry is like that friend who looks amazing in photos… and then shows up to brunch with a mysterious greenish “glow.” That’s not copper being dramatic. It’s chemistry. Copper reacts with air, moisture, and whatever your day throws at it (sweat, lotion, perfume, humidity, the ocean, your “I’ll just spritz once” body spraysure).
The good news: you don’t need a lab coat to bring copper back to a warm, shiny, penny-fresh finish. The better news: you can do it safelywithout scratching your jewelry, loosening stones, or accidentally removing a protective coating you didn’t know was there. Follow these 13 steps and you’ll go from “tarnished tragedy” to “copper comeback tour.”
Before You Start: Quick Copper Reality Check
Tarnish vs. patina (aka “Is this a problem or a vibe?”)
Some copper pieces are meant to darken and deepen over time. That aged look is often called a patina. If you love the antique, rustic, “found this in an enchanted market” look, you may only need a gentle washnot a full shine restoration.
Watch out for coatings, plating, and glued parts
Many copper jewelry pieces are sealed with a clear lacquer to slow tarnish. Others may be copper-plated (thin copper over a base metal), or include glued stones/beads. Aggressive scrubbing, soaking, or acidic cleaners can damage coatings, cloud finishes, or loosen adhesives. When in doubt, go gentle first.
What You’ll Need
- Mild dish soap
- Warm water
- Soft microfiber cloths (2–3)
- Soft toothbrush or jewelry brush (new or very clean)
- Cotton swabs for crevices
- Optional DIY cleaners (choose one method): lemon + salt, vinegar + salt + flour, baking soda paste, or ketchup
- Optional: copper polishing cloth or a non-abrasive copper cream cleaner (jewelry-safe)
- Optional for prevention: anti-tarnish strips, small zip bags, silica gel packets
How to Clean Copper Jewelry: 13 Steps
-
Step 1: Identify what you’re cleaning
Look closely under bright light. Is it solid copper, copper-plated, lacquered, or mixed-metal? If it has gemstones, pearls, opals, turquoise, or other porous/soft stones, skip harsh DIY methods and stick to mild soap and water. If anything is glued (cabochons, beads), avoid soaking.
-
Step 2: Decide your goalshine or “just clean”
If you want the patina, you’re mostly removing skin oils and grime. If you want a brighter finish, you’ll remove tarnish (the dull brown/black film). Pick the gentlest method that gets you there.
-
Step 3: Do a 30-second spot test
Choose a less-visible area (inside of a ring band or clasp). Use your chosen method lightly. If color changes fast, coating lifts, or plating looks uneven, stop and switch to mild soap onlyor take it to a jeweler for a safe clean.
-
Step 4: Remove surface dirt first (the “don’t scrub sand into metal” rule)
Rinse the piece briefly under lukewarm water (if it’s safe to get wet). This removes dust and grit that can cause micro-scratches when you start rubbing.
-
Step 5: Wash gently with warm soapy water
Mix warm water with a few drops of mild dish soap. Dip a soft cloth or brush, gently wipe the jewelry, and clean around details with a cotton swab. This alone often restores brightness if the piece isn’t heavily tarnished.
-
Step 6: Rinse and dry thoroughly
Rinse under lukewarm water (or wipe with a clean damp cloth if you’re avoiding soaking). Dry immediatelyseriously. Copper and water left to air-dry can lead to spots and faster tarnish. Buff lightly with microfiber.
-
Step 7: If tarnish remains, choose ONE targeted tarnish-removal method
Pick the method based on your piece:
- Best gentle upgrade: a copper polishing cloth or a non-abrasive copper cream (often safest for plain copper).
- DIY for plain copper (no delicate stones/glue): lemon + salt, vinegar paste, baking soda paste, or ketchup.
- Avoid: harsh abrasives, metal scouring pads, and long soaks for jewelry with stones or coatings.
-
Step 8: Method A Lemon + salt rub (fast, classic, but keep it brief)
Sprinkle a little salt on a cut lemon (or make a paste with lemon juice + salt). Rub gently in small circles for 30–90 seconds. Don’t leave acid sitting on copper for agesquick polish, then rinse. This method is great for lightly tarnished, uncoated copper.
-
Step 9: Method B Vinegar + salt + flour paste (great for stubborn dullness)
Mix white vinegar and salt, then add enough flour to make a spreadable paste. Apply a thin layer to the copper (avoid stones), let it sit for 2–5 minutes, then rub gently with a soft cloth. Rinse thoroughly and dry. This paste can lift tarnish evenly without needing aggressive scrubbing.
-
Step 10: Method C Baking soda paste (for spot-cleaning, use a light hand)
Make a paste with baking soda and a little water (or baking soda with a small splash of vinegar/lemon for extra action). Use it only on tarnished areas, and rub gentlybaking soda can be mildly abrasive. Rinse fully and dry immediately.
-
Step 11: Method D Ketchup (yes, really)
Ketchup is acidic, which helps dissolve tarnish. Put a thin layer on the copper, let it sit for 1–3 minutes, then wipe and rinse. If you need a touch more polishing power, add a pinch of salt to your clothgently. Rinse well (unless you want your bracelet to smell like fries).
-
Step 12: Final buff for a smooth shine
Use a clean microfiber cloth to buff lightly. For textured or engraved pieces, wrap the cloth around a cotton swab to reach grooves without scratching. The goal is a clean, even finishnot “polish it like you’re sanding a deck.”
-
Step 13: Protect it so you don’t have to do this every week
Copper will tarnish againit’s what copper does. But you can slow it down:
- Wipe jewelry after each wear (skin oils speed tarnish).
- Store dry in an airtight bag or container with an anti-tarnish strip.
- Avoid water, sweat-heavy workouts, pools/hot tubs, and harsh cleaners while wearing copper.
- Apply lotions/perfume first, let them dry, then put jewelry on last.
Some people use a jewelry sealant or clear protective coating to reduce tarnish. If you go that route, test firstcoatings can change the look and may wear unevenly over time.
Troubleshooting: When Copper Jewelry Still Looks “Off”
“My skin turns greendid I break myself?”
The green residue is usually from copper reacting with sweat, acids on skin, lotions, or humidity, creating copper salts that transfer to skin. It’s common and typically harmless, but if you get irritation, stop wearing the piece and consider sealing it or switching to a lined/finished copper item.
“It’s shiny… but blotchy.”
Blotches often happen when tarnish was uneven or a coating is partially intact. Wash again with mild soap, then try a very short, gentle polish method and buff evenly. If it’s plated, blotchiness may indicate worn platingprofessional help is your best bet.
“My piece has stoneswhat’s safest?”
For copper jewelry with delicate/porous stones, pearls, opals, or glued settings, stick with warm water + mild soap, gentle brushing, quick rinse/wipe, and thorough drying. If tarnish is heavy near stone settings, let a jeweler handle it.
Conclusion
Cleaning copper jewelry isn’t hardit’s just picky. Start gentle, remove grime first, then choose a tarnish-removal method that matches your piece. Keep acids brief, skip harsh abrasives, rinse thoroughly, and dry like you mean it. Do that, and your copper jewelry can stay bright, warm, and wearablewithout turning your wrist into a modern art project.
Real-Life “Copper Moments”: of Experiences (Relatable Edition)
If you’ve worn copper jewelry long enough, you’ve probably lived through at least one of these totally normal, slightly hilarious events. (These are common scenarios people run intothink of them as the copper version of “character development.”)
The “Why Is My Neck Green?” Surprise
You put on a cute copper necklace, feel instantly artsy, and head out the door. Hours later, you catch your reflection and realize your collarbone has a faint green shadow like you lost a paintball fight. This is usually the copper reacting with sweat, skincare, or humidity. The fix is rarely dramatic: clean the necklace gently, dry it well, and wipe it after wearing. If it keeps happening, storing it dry and using a protective sealant (or choosing a lacquered copper piece) can help. But also: congratulations, you just learned copper has moods.
The “I Tried a Hack and Now It’s Weird” Phase
Copper-cleaning hacks are everywhere. Someone swears by lemon. Someone else says ketchup (which sounds like a prank until it works). The experience many people have is this: the first try makes the jewelry brighter… but maybe a little uneven. That’s usually because tarnish isn’t uniform, or because the piece had a clear coating that you partially removed. The best lesson here is the unglamorous one: spot test first, and keep your cleaning method consistent across the whole piece. Copper likes fairness. If you scrub one side like you’re trying to start a campfire and barely touch the other side, copper will absolutely tell on you.
The Thrift-Store Treasure Rescue
One of the most satisfying copper experiences is rescuing a tarnished thrift find. You pick up a bracelet that looks like it survived a pirate ship, but the design is perfect. You bring it home, wash it, and realize it’s not dirtyit’s just heavily oxidized. A gentle paste (like vinegar + salt + flour) can be the turning point: you wipe it off and suddenly warm copper tones appear like a reveal on a makeover show. The key experience here is patience. Quick, gentle passes beat aggressive scrubbing, and drying thoroughly is what makes that shine stick around.
The “I Forgot to Take It Off” Lesson
People often learn copper care the same way they learn not to wear suede in the rain: by doing it once and regretting it immediately. Showering with copper jewelry, swimming, or working out in it can speed up tarnish and leave spots. The experience afterward is predictable: you spend extra time cleaning, and you promise yourself you’ll take it off next time. (You will. Probably. Maybe.)
The takeaway from all these copper experiences is simple: copper is beautiful, affordable, and full of personalitybut it rewards gentle care. Clean it thoughtfully, store it dry, wipe it after wear, and you’ll spend less time polishing and more time enjoying that warm glow that made you buy copper in the first place.


