Table of Contents >> Show >> Hide
- Why Kitchen Cabinets Get So Greasy (Even If You’re Not a Deep-Fryer Person)
- Before You Start: A 3-Minute Cabinet “Safety Check”
- The Best “Default” Method: Warm Water + Dish Soap (Safe for Most Cabinets)
- How to Remove Tough Grease Stains (Without Going Full “Chemical Warfare”)
- Material-Specific Cabinet Cleaning (Because Cabinets Have Feelings)
- Don’t Skip the “Grease Hotspots” Everyone Forgets
- Deep Clean the Inside (Without Turning It Into a Weekend Movie Trilogy)
- How Often Should You Clean Kitchen Cabinets?
- Prevention: Keep Grease From Coming Back Like a Bad Sequel
- Troubleshooting: Common Cabinet Cleaning Problems (and Fixes)
- Real-World Experiences: What People Learn the Hard Way (500+ Words of Cabinet-Cleaning Reality)
- Conclusion
- SEO Tags
Kitchen cabinets are basically the kitchen’s “background actors”until they’re not. One day you’re making tacos,
the next day you notice your cabinet doors have a mysterious sheen that can only be described as
“fried chicken adjacent.” The good news: you can get cabinets genuinely clean without wrecking the finish,
stripping paint, or accidentally creating a sticky soap museum.
This guide walks you through safe, effective cabinet cleaningfrom quick weekly wipe-downs to tackling
tough grease stains near the stove. You’ll also get material-specific tips (painted, wood, laminate, thermofoil),
plus a long “real-life lessons” section at the end for the stuff people only learn after their first cleaning disaster.
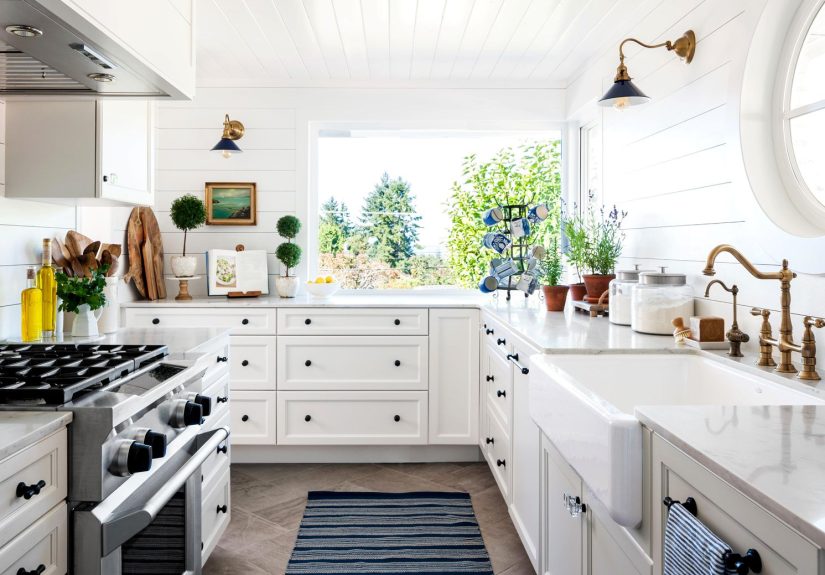
Why Kitchen Cabinets Get So Greasy (Even If You’re Not a Deep-Fryer Person)
Grease on cabinets isn’t just “dirt.” It’s airborne cooking oils that float up as tiny particles, settle on doors and frames,
then combine with dust. That combo turns into a stubborn filmespecially around handles, above the range,
and on the underside of upper cabinets (aka the place you never look… until the sunlight hits it).
The trick is to lift grease, not just smear it. That means a gentle cleaner, the right cloth,
a little dwell time, and a rinse-and-dry routine that doesn’t leave residue behind.
Before You Start: A 3-Minute Cabinet “Safety Check”
1) Identify the cabinet surface (because cleaners aren’t one-size-fits-all)
- Painted cabinets: Durable, but can dull or chip if you use abrasives or harsh chemicals.
- Finished wood (stained/sealed): Usually safe with mild soap + minimal water, but hate soaking.
- Laminate or thermofoil: Generally easy to clean, but avoid harsh scrubbing and excessive moisture at seams.
- Unfinished/antique wood: Extra cautiontest everything and use as little liquid as possible.
- Glass/metal inserts: Simple, but avoid spraying cleaner directly into seams.
2) Do a patch test (yes, even if you’re “pretty sure”)
Pick an inconspicuous areainside the door edge or a bottom corner. Apply your cleaner, wait 2 minutes,
wipe, then dry. If you see discoloration, dulling, or tackiness, adjust the solution (usually: dilute more) or switch methods.
3) Gather tools that won’t scratch or shed lint
- Microfiber cloths (at least 3: one for washing, one for rinsing, one for drying)
- Soft sponge (non-scratch)
- Small bowl or bucket of warm water
- Mild grease-cutting dish soap
- Soft toothbrush or detailing brush (for corners and carvings)
- Optional: baking soda (for spot stains), citrus-based cleaner (for stubborn grease), step stool
The Best “Default” Method: Warm Water + Dish Soap (Safe for Most Cabinets)
If you do nothing else, do this. Mild dish soap is designed to cut grease without destroying finishes,
and warm water helps soften the oily film so it releases more easily.
Step-by-step: everyday cabinet cleaning
- Dust first. Dry-wipe cabinet faces with a clean microfiber cloth so you don’t turn dust into sludge.
- Mix a gentle solution. In warm water, add a small squirt of dish soap (more soap isn’t better; it can leave residue).
- Wring your cloth well. You want “damp,” not “dripping.” Too much water can seep into joints and edges.
-
Wipe top to bottom. Start with upper cabinets, then lowersgravity is undefeated.
Work in small sections so cleaner doesn’t dry on the surface. - Detail the grime zones. Use a soft toothbrush around handles, trim, and panel corners.
- Rinse. Wipe the same area with a second cloth dampened with clean water (no soap).
- Dry immediately. Buff dry with a third cloth. This prevents water spots and swelling at edges.
Pro move: For cabinets near the stove, clean the underside lip and bottom edge of doors
that’s where grease builds first and makes cabinets feel “sticky” even when they look fine.
How to Remove Tough Grease Stains (Without Going Full “Chemical Warfare”)
If warm soapy water isn’t enough, don’t jump straight to harsh degreasers or abrasive pads.
Go up in “cleaning strength” gradually. Your cabinet finish will thank you by not peeling off in protest.
Level 1: Add dwell time + gentle agitation
- Re-wipe the greasy area with your soapy solution.
- Let it sit for 1–2 minutes (don’t let it dry on the surface).
- Gently rub with a non-scratch sponge or microfiber cloth.
- Rinse and dry.
Often, “tough grease” is just grease that never got a chance to soften. A minute of dwell time can do more than ten minutes of angry scrubbing.
Level 2: Baking soda paste for spot treatment (not a full-cabinet scrub)
Baking soda is a mild abrasivehelpful in small doses, risky if you scrub your whole kitchen like you’re sanding a deck.
Use it as a spot treatment for stubborn grease dots, fingerprints that won’t quit, or gunk around pulls.
- Mix a paste: 1 part baking soda + 2 parts water (thick but spreadable).
- Dab onto the stain with a soft cloth (don’t grind it in).
- Let sit 2–5 minutes.
- Wipe away with a damp cloth, then rinse and dry.
If your cabinets are high-gloss or freshly painted, use extra cautionabrasives can dull shine.
Patch-test first.
Level 3: Citrus-based degreaser or multipurpose cleaner (for truly stubborn buildup)
Citrus oils are commonly used in degreasers because they help dissolve oily residue.
This can be especially useful on factory-finished cabinets, laminate, or heavily handled areas.
Always patch-test and follow label directions.
- Apply cleaner to a cloth (not directly to the cabinet if seams/edges are vulnerable).
- Hold on the greasy area for 30–60 seconds.
- Wipe clean, then rinse and dry thoroughly.
Avoid the temptation to use overly aggressive “industrial” degreasers on wood finishes.
Some can strip sheen, discolor paint, or leave a tacky residue that attracts dirt faster than a dropped pancake attracts a toddler.
Material-Specific Cabinet Cleaning (Because Cabinets Have Feelings)
Painted kitchen cabinets
- Stick with mild dish soap + warm water for routine cleaning.
- Avoid abrasive scrubbers and harsh chemicals that can dull or damage the paint film.
- Don’t over-wet the surfacewater can creep into seams and soften paint at edges over time.
- For tough grease, use short dwell time and gentle wiping; spot-treat with baking soda only if patch-tested.
Finished wood cabinets (stained/sealed)
- Use minimal water. Wring cloths well and dry immediately.
- Rinse soap residue offleftover soap can make wood look hazy or feel sticky.
- Skip oil-heavy polishes unless the product is specifically recommended for your finish; residue buildup can attract grime.
Unfinished wood or older cabinets with a delicate finish
Go gentle. Start with a barely damp microfiber cloth and a tiny amount of mild soap. Avoid vinegar-heavy mixes here;
acidic solutions can be risky on some finishes and on bare wood. Patch-test, rinse, and dry immediately.
If you’re unsure, treat it like a nice leather jacket: clean carefully, don’t soak it, and don’t experiment wildly.
Laminate cabinets
- Mild soap and warm water usually work best.
- Avoid heavy pressure scrubbing (you can dull the surface).
- Be careful around edges and seamsdon’t let water sit there.
- For grime, try dwell time first, then a non-scratch sponge, then rinse and dry.
Thermofoil cabinets
- Use a soft cloth with mild dish soap and warm water; wring well.
- Avoid heat + harsh chemicals (thermofoil can be sensitive over time).
- Don’t let water pool at door edges or around hardware.
Glass fronts and metal accents
- Spray cleaner onto the cloth, not directly onto the glass (to avoid seepage into frames).
- Use ammonia-free glass cleaner if possible, and wipe dry to prevent streaks.
Don’t Skip the “Grease Hotspots” Everyone Forgets
- Handles and pulls: Grease + skin oils + dust = sticky black halo.
- Edges and rails: Where fingers actually touch.
- Undersides of upper cabinets: Direct line of fire above the stove.
- Tops of cabinets: If your cabinets don’t reach the ceiling, this is where dust goes to retire.
- Toe-kick area: Spills, pet hair, and mystery crumbs.
How to clean cabinet hardware (knobs and pulls)
- If possible, remove hardware (take a quick photo first so everything goes back correctly).
- Wash in warm soapy water, use a soft toothbrush for crevices.
- Rinse and dry completely before reinstalling.
Note: some cabinet manufacturers advise avoiding metal polishes on certain finishes. When in doubt, mild soap + water and a thorough dry is the safest route.
Deep Clean the Inside (Without Turning It Into a Weekend Movie Trilogy)
You don’t need to deep clean cabinet interiors every week. But a couple times a year (or after “The Great Olive Oil Spill of 2026”),
a simple reset helps.
- Empty one cabinet at a time (keeps your kitchen functional and your sanity intact).
- Vacuum crumbs with a crevice tool.
- Wipe shelves with a damp cloth + mild soapy water.
- Rinse with a clean damp cloth and dry fully.
- Return items only after everything is dry to prevent musty smells.
How Often Should You Clean Kitchen Cabinets?
Frequency depends on how much you cook, whether you use the range hood, and how many people in your home believe handles are optional.
A solid schedule:
- Weekly: Quick wipe of the cabinets nearest the stove and the most-touched doors.
- Monthly (or every 1–3 months): Full degrease of cabinet fronts in heavy-cooking kitchens.
- Twice a year: Deep clean interiors, shelves, and drawer boxes.
Prevention: Keep Grease From Coming Back Like a Bad Sequel
- Use the range hood (and let it run a few minutes after cooking).
- Wipe splatters immediatelyfresh grease is easier than “cured” grease.
- Keep a microfiber cloth handy for a 30-second wipe after frying or sautéing.
- Use a splatter screen when pan-frying.
- Don’t overuse soaptoo much can leave residue that traps grime.
Troubleshooting: Common Cabinet Cleaning Problems (and Fixes)
“My cabinets look clean, but they feel sticky.”
This is usually leftover cleaner, not leftover grease. Fix it by wiping with a cloth dampened with clean water,
then drying thoroughly. Next time, use less soap and rinse every section.
“Now they look dull or cloudy.”
Cloudiness can come from soap residue, hard-water minerals, or micro-scratches from abrasive cleaning.
Try a clean-water wipe + dry buff first. If the finish was scratched, avoid abrasives going forward and focus on gentle cleaning.
“The grease comes back fast.”
If you cook often, grease buildup is normal. The real win is a quick weekly wipe around the stove area,
plus using the hood fan so less oil becomes airborne in the first place.
Real-World Experiences: What People Learn the Hard Way (500+ Words of Cabinet-Cleaning Reality)
If you’ve ever tried to clean kitchen cabinets and felt like the grease was personally mocking you, you’re not alone.
In many homes, cabinet grime builds so slowly that nobody notices… until one weekend you decide to “freshen things up”
and suddenly your microfiber cloth looks like it just fought a pizza.
Experience #1: The “I didn’t realize grease could travel” kitchen.
People who cook with oil frequently (stir-fries, bacon, skillet dinnersbasically anything delicious) often discover
that grease doesn’t stay politely on the stovetop. It floats upward and settles onto cabinet faces and undersides.
The most common mistake here is scrubbing harder instead of smarter. When someone attacks greasy cabinets with a rough sponge,
the cabinet may look temporarily better… and then dull patches appear because the finish was abraded.
The better approach most people end up adopting is the “soften, then lift” method:
warm soapy water, a short wait time, gentle wiping, then rinse and dry. Once they switch, cleaning becomes faster
because they’re removing grease instead of spreading it.
Experience #2: Painted cabinets and the mystery of the disappearing shine.
Painted shaker cabinets are popular for a reasonthey look crisp, modern, and clean (making them the ultimate liars
when grease shows up). Homeowners often report that harsh cleaners or abrasive tools can turn painted doors slightly
chalky or uneven, especially around the pulls where cleaning happens most.
After one “oops,” many people settle into a simple routine: a quick wipe with mild soap and a microfiber cloth,
plus an occasional spot treatment for stubborn fingerprints. They also learn to wring cloths well and dry edges immediately,
because water tends to collect around seams and can lead to softening or wear over time. The lesson: painted cabinets love
consistency and gentle care, not heroic cleaning marathons.
Experience #3: The sticky-cabinet paradox (when “cleaning” causes stickiness).
This one is incredibly common: someone cleans cabinets with an all-purpose spray, then notices the cabinets feel
tacky a day later. The instinct is to spray more cleaner, which makes the tackiness worse.
What’s happening? Often it’s residuetoo much soap, too concentrated a product, or a cleaner that wasn’t rinsed.
The fix is almost comically simple: wipe everything down with clean water, then dry thoroughly. After that,
use less product and always rinse. Many people swear that once they adopt a rinse-and-dry step,
the cabinets stay cleaner longer because residue isn’t trapping new dust.
Experience #4: “I inherited these cabinets and they’re basically a time capsule.”
In older homes or rentals, cabinet grime can include years of cooking oils plus dust plus who-knows-what.
People often find that the first deep clean takes longer, but every clean after that is dramatically easier.
The winning strategy tends to be working in small sections and escalating gradually:
start with warm soapy water, then try dwell time, then spot-treat with baking soda paste or a citrus-based cleaner
only where needed. Patch-testing becomes non-negotiable here because older finishes can be unpredictable.
The biggest takeaway from these “time capsule” cabinets: progress is real, but it’s usually achieved by repetition,
not brute force.
Experience #5: The prevention glow-up.
After people finally get cabinets clean, they often realize the secret isn’t a magic cleanerit’s preventing
the next grease layer from bonding. The most effective habits are small:
running the hood fan, wiping cabinet handles weekly, and doing a quick pass under the upper cabinets near the stove.
Those micro-habits can keep cabinets looking fresh so you only need a deep degrease occasionally, not constantly.
Conclusion
Cleaning kitchen cabinets doesn’t have to be a dramatic event featuring three rolls of paper towels and a personal crisis.
Start with the safest methodwarm water, a little dish soap, and a microfiber cloththen level up only where grease
refuses to cooperate. Patch-test, rinse, dry, and treat baking soda as a spot-fix rather than a full-house exfoliation.
Once you’ve tackled the tough grease stains, the real win is maintenance: a quick weekly wipe near the stove and handles,
plus using the range hood so less oil ends up floating around your kitchen like it pays rent.


