Table of Contents >> Show >> Hide
- Why Cleaning Your Split Air Conditioner Matters
- Safety First: Prep Before You Clean
- Step-by-Step: How to Clean the Indoor Unit
- How to Clean the Outdoor Unit (Condenser)
- How Often Should You Clean a Split Air Conditioner?
- When to Call a Professional Instead
- Extra : Real-Life Split AC Cleaning Experiences and Tips
If your split air conditioner has gone from “cool breeze” to “weak sigh,” it’s probably not plotting against you it’s just dirty.
Dusty filters, grimy coils, and a slimy drain pan can all make your system work harder, cool less, and cost more. Regular cleaning
can improve efficiency, protect your health, and even extend the life of your unit, according to efficiency and HVAC maintenance
guidance from U.S. energy and manufacturer sources.
The good news? With a little prep and some simple tools, you can safely clean your split air conditioner (also called a mini split
or ductless system) yourself. Below is a step-by-step guide inspired by expert HVAC recommendations and yes, we’ll even tell you
where those “pictures” should go so you can create your own how-to photo story.
Why Cleaning Your Split Air Conditioner Matters
Split air conditioners constantly pull air through filters, across evaporator coils, and over a blower fan. Over time, dust, pet hair,
and outdoor gunk build up on those parts. Energy and HVAC organizations note that clogged filters and dirty coils can:
- Reduce airflow and cooling performance
- Increase energy use and utility bills
- Make the system run longer and wear out faster
- Contribute to poor indoor air quality and musty odors
In other words, if you don’t clean your split AC, you’re basically paying extra to blow dusty air around the room. Routine cleaning of
filters every month or so and deeper cleaning at least once a year is widely recommended by energy-efficiency programs and HVAC pros.
Safety First: Prep Before You Clean
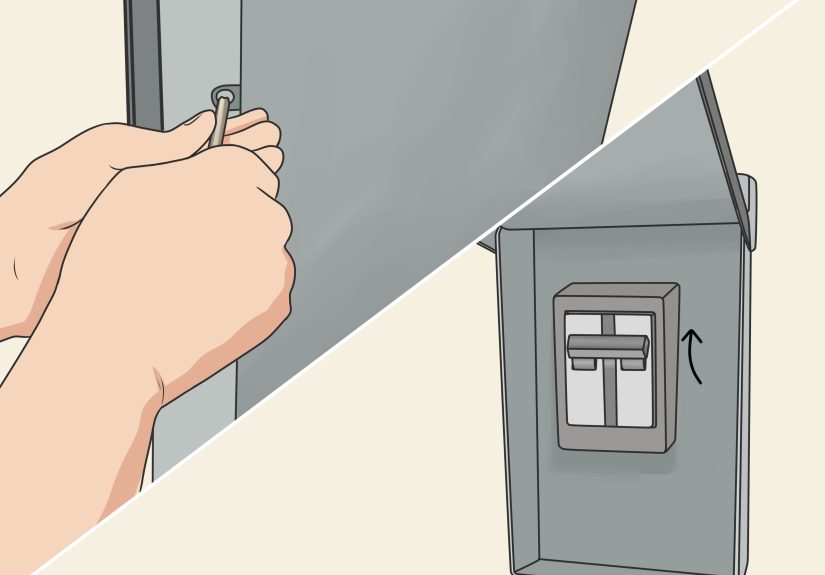
1. Turn Off and Disconnect Power
Before you touch anything, turn the split system completely off not just with the remote. Many HVAC guides recommend disconnecting power
at the outdoor disconnect switch or flipping the circuit breaker to fully de-energize the system.
Picture idea: A shot of your hand switching off the breaker labeled for the AC.
2. Gather Your Tools
- Step ladder (for wall-mounted indoor units)
- Soft cloths and microfiber rags
- Soft brush (paintbrush or small fin brush)
- Vacuum with a brush attachment
- Mild dish soap and water, or coil cleaner specifically labeled safe for indoor coils
- Mini-split cleaning bag/jacket or large plastic sheet to catch drips (optional but very handy)
- Spray bottle with clean water
- Gloves and safety glasses (optional but smart)
Picture idea: Lay all tools on a table and snap a “flat lay” shot labeled with each item.
Step-by-Step: How to Clean the Indoor Unit
Step 1: Protect the Wall and Floor
Place a mini-split cleaning bag around the unit, or tape up plastic sheeting and spread towels on the floor. This catches dirty water
and debris so your cleaning session doesn’t turn into an “accidental indoor car wash.” Guides for deep cleaning mini splits often use
a cleaning bag to funnel dirty rinse water into a bucket.
Picture idea: Front view of the unit wrapped neatly in a cleaning bag with a bucket underneath.
Step 2: Open the Front Panel
Most split AC indoor units have a front panel that swings up. Gently pull at the notches along the bottom or sides and lift until it
stays open. If it doesn’t move easily, don’t force it check for hidden clips or consult your manual.
Picture idea: A close-up of hands lifting the front panel, arrows indicating the hinge points.
Step 3: Remove and Clean the Air Filters
You’ll usually see one or two mesh filters directly behind the front panel. Slide them out carefully.
- Vacuum first. Use a vacuum with a brush attachment to remove loose dust from both sides of the filter.
-
Wash if washable. Most mini-split filters are washable. Rinse with lukewarm water and a tiny bit of mild dish soap if needed,
as recommended in manufacturer maintenance guides. - Let them dry completely. Set filters upright in a shaded, well-ventilated area until they are completely dry before reinstalling.
ENERGY STAR and other energy-efficiency programs stress that keeping filters clean is one of the most important DIY steps for performance
and longevity.
Picture idea: Filters propped against a wall, water dripping off, with a “Do not install wet!” caption.
Step 4: Gently Clean the Evaporator Coils and Fins
Behind the filters you’ll see the evaporator coils usually a blue- or silver-colored metal surface made of thin vertical fins. This is
where dust and gunk love to hide.
-
Brush lightly. Use a soft brush to gently sweep dust off the fins, moving in the same direction as the fins (usually vertically).
Avoid scrubbing back and forth, which can bend the fins. -
Use coil cleaner or mild soap solution. Many HVAC manufacturers caution against harsh household cleaners that can damage aluminum fins
or cause corrosion. Instead, use a coil cleaner designed for indoor AC coils or a very diluted mild detergent. -
Apply and wait. Spray the cleaner or mild soap solution onto the coils according to the product directions and let it sit for the
recommended time so it can loosen dirt. -
Rinse gently. Use a spray bottle with clean water to lightly rinse the coils, letting dirty water drain into the cleaning bag or onto
your protective sheet. Avoid high-pressure water experts warn it can bend the delicate fins.
Picture idea: Side view showing a hand spraying coils with cleaner, with a note “low pressure only.”
Step 5: Clean the Blower and Drain Pan (Basic Surface Clean)
Look under the coil and you’ll see the drain pan, where condensation collects, and the blower wheel (fan). Light buildup can often be wiped
away, but heavy mold or slime ideally needs professional service.
- Use a damp cloth to wipe exposed plastic surfaces in the pan area.
- Carefully wipe any accessible surfaces on the blower wheel without bending its fins.
- If you see heavy mold, standing water, or frequent drain clogs, HVAC pros recommend professional cleaning and drain line flushing.
Picture idea: Close-up of a rag wiping the interior pan with the coil and blower visible in the background.
Step 6: Reassemble and Test
- Reinstall the fully dry filters.
- Close and latch the front panel securely.
- Remove the cleaning bag or plastic sheeting and clean up any drips.
- Restore power at the breaker or disconnect.
- Turn the system on and run it in cooling mode, listening for unusual noises and checking for leaks.
Picture idea: Finished, closed unit with a little “sparkle” icon edited in to show it’s fresh and clean.
How to Clean the Outdoor Unit (Condenser)
The outdoor unit handles heat rejection and collects leaves, dust, and sometimes entire tumbleweeds of yard fluff. Cleaning it keeps air
flowing freely across the condenser coils.
Step 1: Power Down Again
Just like with the indoor unit, shut off power at the disconnect or breaker before removing any panels or spraying water.
Step 2: Clear Debris and Check Clearance
- Remove leaves, twigs, and trash from around the unit.
- Trim shrubs or grass so there’s at least 2 feet of clearance around all sides, as commonly recommended for outdoor units.
Step 3: Gently Clean the Condenser Coils
- Brush off loose dirt. Use a soft brush to remove surface dirt from the fins.
-
Use low-pressure water. HVAC coil-cleaning resources emphasize using plenty of water at low pressure, never a pressure washer, to avoid
bending fins. Spray from the inside out if possible so you push debris out rather than farther in. -
Apply outdoor coil cleaner (optional). If the manufacturer allows it, you can use a condenser coil cleaner specifically designed for
outdoor coils, following label instructions.
Picture idea: Someone gently washing the outdoor unit with a garden hose angled downward, not blasting straight into the fins.
How Often Should You Clean a Split Air Conditioner?
Different organizations and manufacturers give slightly different timelines, but they all agree on one thing: clean filters and coils
often enough that they never get seriously clogged.
-
Filters: U.S. energy-efficiency programs suggest checking filters monthly and cleaning or replacing them every 1–3 months depending on
use, pets, and dust levels. - Heavy use or dusty areas: Some manufacturer guides recommend cleaning filters every 2 weeks for daily use or especially dusty environments.
-
Deep cleaning: A deeper cleaning of coils and the outdoor unit is typically suggested at least once a year, more often if you notice
reduced performance or unpleasant odors.
If you’re not sure what schedule to follow, pick a simple rule: check filters the first weekend of every month and plan a
deeper split AC cleaning every spring before peak cooling season.
When to Call a Professional Instead
DIY cleaning is great for filters, light dust on coils, and basic outdoor coil rinsing. But there are times when calling a licensed HVAC
technician is the smarter (and safer) move.
- Persistent musty or moldy odors even after cleaning
- Visible heavy mold inside the unit or on the blower wheel
- Refrigerant lines iced over or frequent system freezing
- Water leaking down the wall or repeated condensate drain clogs
- Severely bent fins, damaged coils, or suspected refrigerant leaks
- Units that haven’t been opened or serviced in years
HVAC pros highlight that using the wrong chemicals or high-pressure tools on coils can damage them and even lead to refrigerant leaks, which
require professional repair. Many manufacturers and energy-efficiency programs
also recommend annual professional maintenance, especially for older systems or those used heavily.
Extra : Real-Life Split AC Cleaning Experiences and Tips
Reading a step-by-step split AC cleaning guide is one thing. Actually climbing a ladder with a screwdriver and a cleaning bag is…
a little different. Here are some real-world style experiences and lessons people often discover the first time they clean a
wall-mounted split air conditioner.
1. Take Photos Before You Remove Anything
One of the most common “uh-oh” moments happens after you’ve enthusiastically removed a panel, a couple of small covers, and maybe a bracket –
and then can’t remember which screw went where. Before you remove filters, trim pieces, or small panels, take clear photos with your phone
from several angles. When it’s time to reassemble, you can zoom in and use your own pictures as a visual manual.
This is especially helpful on mini split models where the front panel doesn’t just swing up but actually detaches or where side clips are hidden.
A quick photo record turns that confusing jigsaw puzzle into a simple “match the picture” exercise.
2. Respect the Ladder and the Location
Most indoor split units sit high on the wall, which means you’ll be on a ladder or step stool while handling water, cleaner, and a bulky
cleaning bag. People often underestimate how awkward that can be. Set your ladder on a flat surface, don’t overreach to one side, and keep
your tools within easy reach on a nearby chair or small table instead of balancing them on the top rung.
It also pays to look around the unit before you start. Is it above a bed, a TV, or a white fabric sofa? If so, put down extra plastic and
towels. A few minutes of prep can save you from explaining why the couch now has a permanent “mystery water ring.”
3. The “Airflow Glow-Up” Is Real
People are often surprised by how dramatic the difference feels after a thorough split AC cleaning. Once filters, coils, and the blower
are clean, airflow typically feels stronger even at the same fan setting. Rooms cool faster, and the unit may cycle off more often instead
of running endlessly.
If you track your electric bill, you may see a drop in energy use after you start cleaning filters regularly and keeping coils reasonably
clean. It’s not magic it’s basic physics. When air flows freely and heat transfer surfaces aren’t caked in dust, the system doesn’t have
to struggle to do its job.
4. Allergy Relief and Odor Control
Another real-world benefit people notice is fewer sneezing fits and less “old gym sock” smell when the AC kicks on. Dusty filters and slimy
drain pans can circulate allergens and odors. Once they’re clean, the air coming out of the split system tends to feel fresher.
For households with pets or smokers, it’s common to see darker, gray-brown dust coating the filters and even the coil fins. Cleaning those
regularly can make a noticeable difference, especially in bedrooms and home offices where the mini split runs for hours at a time.
5. Create a Simple Maintenance Ritual
Most people don’t need a complicated maintenance spreadsheet just a comfortable routine. For example:
- Every month: Quick check and vacuum of filters.
- Every 3 months: Filter wash and a light coil dust-off.
- Once a year: Full indoor-plus-outdoor cleaning and a visual inspection for damage or leaks.
Tie this to something you already do: the start of each season, your smoke detector battery check, or even your deep house cleaning day. The
more automatic it feels, the less likely you’ll be staring at a straining, noisy mini split in the middle of a heatwave wondering when you
last touched those filters.
6. Know Your Limits and Your Warranty
Finally, part of a good DIY experience is knowing when to stop. If your mini split is still under warranty, read the documentation before
you start removing deeper internal parts. Basic filter and coil cleaning with gentle methods is usually encouraged; disassembling electrical
components or opening sealed panels might not be.
If you hit a point where you’re not sure how to proceed a stubborn screw, an odd smell, or a coil that looks damaged it’s perfectly
reasonable to call an HVAC technician. Think of DIY split AC cleaning as routine care, not major surgery.
Put all of that together, and you’ve got a straightforward routine: shut off power, protect the area, clean filters and coils gently, rinse
with low pressure, and repeat regularly. Your split air conditioner will reward you with cooler rooms, cleaner air, and fewer panicked
“Why is it not cooling?” moments when summer arrives.
SEO JSON


