Table of Contents >> Show >> Hide
- Why Cleaning Your AeroGarden Matters
- How Often Should You Clean an AeroGarden?
- Supplies You Need to Clean Your AeroGarden
- Before You Start: Safety and Setup
- Step-by-Step: How to Clean Your AeroGarden
- Can You Put AeroGarden Parts in the Dishwasher?
- How to Remove Algae From an AeroGarden
- How to Remove Mineral Buildup
- Cleaning an AeroGarden While Plants Are Still Growing
- Common AeroGarden Cleaning Mistakes to Avoid
- Best Cleaning Schedule for Healthy AeroGarden Plants
- Troubleshooting After Cleaning
- Extra Experience: What Cleaning an AeroGarden Teaches You Over Time
- Conclusion: A Clean AeroGarden Grows Better
Your AeroGarden may look like a tiny countertop miracle machineand honestly, it kind of is. One day you drop in seed pods, add water and nutrients, and suddenly basil is acting like it owns the kitchen. But behind every thriving indoor herb jungle is one less glamorous hero: a clean water bowl.
Because AeroGardens are hydroponic systems, plants grow in a water-based nutrient solution instead of soil. That means the reservoir, pump, grow deck, and pod openings all work together like a miniature spa for plant roots. When the system is clean, roots get oxygen, water circulates properly, nutrients stay balanced, and your plants can focus on growing instead of auditioning for a swamp documentary.
The good news? Learning how to clean your AeroGarden is simple. You do not need fancy tools, professional gardening skills, or a dramatic soundtrack. With a few household supplies, a little patience, and a rinse that actually rinses, you can keep your indoor garden healthy from one planting cycle to the next.
Why Cleaning Your AeroGarden Matters
An AeroGarden is compact, efficient, and delightfully low-mess compared with soil gardening. Still, it is not maintenance-free. Water, plant food, light, roots, and warmth create a perfect environment for growthwhich is great when we are talking about herbs, lettuce, tomatoes, or peppers. It is less charming when mineral residue, old roots, algae, or biofilm start building up inside the system.
Cleaning helps prevent several common problems:
- Mineral buildup around the grow deck and water line
- Algae growth caused by light reaching the water
- Clogged pump parts or blocked water flow
- Unpleasant smells from old nutrient solution
- Weak root health caused by poor circulation
- Slow plant growth after starting a new seed pod kit
Think of it like changing the water in a vase of flowers. Fresh water keeps things lively; old water turns into a science fair project. Your AeroGarden is more advanced than a vase, but the same basic idea applies: clean water and clean surfaces support healthier plants.
How Often Should You Clean an AeroGarden?
There are two main types of AeroGarden cleaning: routine maintenance while plants are growing and deep cleaning between planting cycles.
Routine Rinse and Refill
During an active grow cycle, emptying and refilling the water bowl about every four to six weeks is a smart habit. Many gardeners like to do it around the same time they add plant food. This keeps the nutrient solution fresher, reduces mineral concentration, and gives you a chance to inspect the roots and pump area.
A routine rinse and refill does not mean scrubbing the whole unit while your basil is still trying to live its best life. It simply means carefully removing old water, adding fresh cool water, and replacing nutrients according to your model’s instructions.
Deep Cleaning Between Plantings
After a crop is finished, deep clean the AeroGarden before starting new seed pods. This is the best time to remove roots, scrub residue, sanitize the bowl and grow deck, and check whether the pump needs attention. If your last crop was a large plant such as tomatoes or peppers, expect roots to be more dramatic. Tomato roots do not quietly leave the building; they make a statement.
Supplies You Need to Clean Your AeroGarden
Gather your supplies before you begin so you do not end up wandering around with a dripping grow deck in one hand and regret in the other.
- Soft sponge or non-abrasive cloth
- Small scrub brush or old toothbrush
- Mild dish soap
- Distilled white vinegar or unscented household bleach
- Clean water
- Paper towels or a clean towel
- Gloves, especially if using bleach
- Sink, bucket, or tub for rinsing parts
Use either vinegar or bleach, not both. Never mix bleach with vinegar, ammonia, or other cleaners. Mixing cleaning chemicals can create dangerous fumes, and your indoor garden does not need that level of drama.
Before You Start: Safety and Setup
First, unplug your AeroGarden. Water and electricity are not friends, no matter how cute your parsley looks. Move the unit close to a sink if possible, or place towels underneath it to catch spills.
If plants are still growing and you are only doing a rinse and refill, be gentle when lifting the grow deck. Roots can be delicate, and breaking too many roots can stress the plant. If the growing cycle is finished, remove old plants and seed pods completely before deep cleaning.
Step-by-Step: How to Clean Your AeroGarden
Step 1: Unplug the Unit and Remove Plants
Turn off and unplug the AeroGarden. If the crop is finished, remove the plants, seed pods, grow baskets, and any pod labels. Old roots may be tangled through the deck or around the pump area, so work slowly. Pulling too hard can damage small parts.
If you plan to reuse plastic grow baskets, remove root pieces and rinse them thoroughly. Foam or sponge grow media from old pods should usually be discarded, especially if it is packed with roots or residue.
Step 2: Empty the Water Bowl
Carefully pour out the old water. It may contain plant food, root debris, and mineral sediment, so avoid splashing it on surfaces you care about. If your AeroGarden is large or awkward to lift, use a small cup, siphon, or turkey baster-style tool to remove water gradually.
Once empty, inspect the bowl. You may see brownish mineral deposits, green algae, or bits of root. None of this means you failed as a gardener. It means plants were growing, water was circulating, and now it is cleaning day.
Step 3: Remove Loose Roots and Debris
Use your fingers, a paper towel, or a soft brush to remove loose roots from the bowl, grow deck, and pump intake area. Roots are the number one reason water flow can slow down in an AeroGarden. Even healthy roots can wander into places they should not, like curious little noodles.
Check small openings in the grow deck. If roots have grown through nozzles or slots, gently pull them free. For stubborn pieces, use tweezers or a small brush rather than sharp tools.
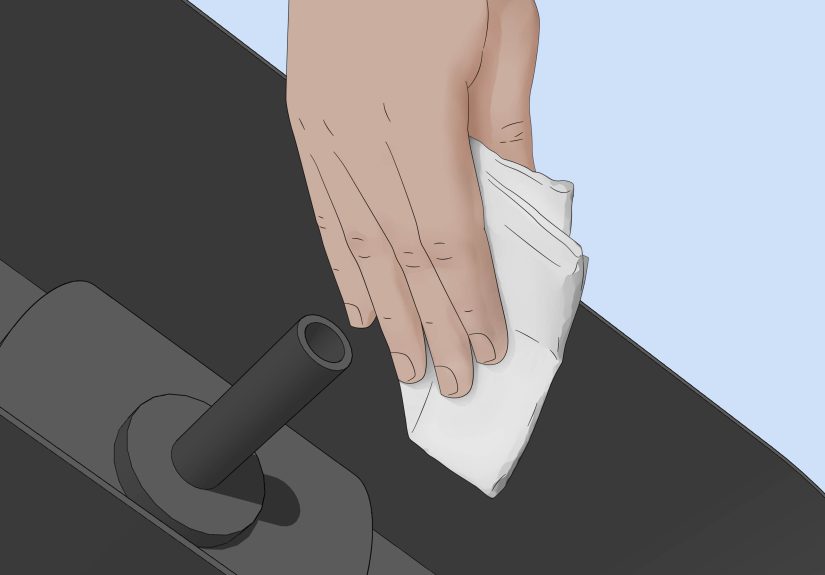
Step 4: Wash the Bowl and Grow Deck
Wash the water bowl and grow deck with warm water and mild dish soap. Scrub gently with a sponge or cloth. For corners, pod holes, and textured areas, use a toothbrush or small cleaning brush.
Avoid abrasive pads that can scratch plastic. Scratches create tiny hiding places for residue and make future cleaning harder. Your goal is smooth and clean, not sanded like a woodworking project.
Step 5: Clean the Pump Area
The pump is the heart of the AeroGarden’s circulation system. If water is not moving properly, roots may not receive enough oxygen and nutrients. Remove the pump if your model allows it, then rinse the exterior and clear away roots, algae, or mineral buildup.
Use a soft brush to clean around the intake cover. Do not force parts apart unless your model’s manual says they are removable. If the pump has stubborn mineral deposits, a vinegar soak can help loosen them. Rinse thoroughly before reinstalling.
Step 6: Sanitize With Vinegar or Bleach
After washing away visible dirt, sanitize the system. You have two common options: distilled white vinegar or unscented chlorine bleach. Vinegar is popular for dissolving mineral deposits and handling light cleaning. Bleach is stronger for sanitizing between crops, but it must be rinsed very thoroughly.
For a vinegar cleaning, fill the bowl with distilled white vinegar according to your unit’s care guidance, let the pump circulate it briefly, then empty and rinse. For a bleach cleaning, use a diluted unscented bleach solution, circulate it briefly, empty the bowl, and rinse several times with clean water.
Important: choose one cleaning method. Do not combine vinegar and bleach. Also avoid scented bleach, splash-less bleach, toilet cleaners, or random “cleaning hacks” from the internet. The AeroGarden is for growing food and herbs, not testing chemistry experiments from a suspicious comment section.
Step 7: Run a Clean Water Rinse Cycle
After sanitizing, refill the bowl with clean water and run the pump for several minutes. Then empty it and rinse again. This step matters most if you used bleach. Leftover cleaning solution can harm tender roots and interfere with plant growth.
When in doubt, rinse one more time. Your future lettuce will not complain about extra clean water.
Step 8: Dry and Reassemble
Wipe the outside of the unit and allow parts to air-dry. Reinstall the pump, grow deck, and any removable pieces. Make sure cords and connections are secure before plugging the unit back in.
If you are starting a new garden, add fresh water to the fill line, insert new seed pods, add plant food as directed, and reset reminders on the control panel if your model includes them.
Can You Put AeroGarden Parts in the Dishwasher?
Many AeroGarden bowls and grow decks are top-rack dishwasher safe, depending on the model. However, pumps, cords, and electronic components should not go in the dishwasher. Use a warm or cold cycle and skip heated dry, because high heat can warp plastic parts.
The dishwasher can be convenient between plantings, especially when the bowl has light residue. For heavy root buildup, remove debris by hand first. Otherwise, you may simply move the mess from your AeroGarden to your dishwasher filter, which is not exactly a victory lap.
How to Remove Algae From an AeroGarden
Algae usually appears as green film around pod holes, the water line, or exposed surfaces where light reaches moisture. A little algae is common in hydroponic gardens, but you should still control it because heavy algae can compete for nutrients, clog surfaces, and make the system look like it is growing a side project.
Block Light From the Reservoir
Algae needs light to grow. Cover unused pod holes with plant spacers or approved covers. If you do not have official spacers, choose a safe, clean, opaque cover that blocks light without falling into the bowl. Do not leave empty holes open for weeks.
Keep the Water Fresh
Old nutrient solution encourages residue and algae. A monthly rinse and refill helps reduce buildup and keeps the reservoir cleaner. Also avoid overfilling the bowl beyond the recommended line.
Clean Around Pod Openings
During routine care, wipe around pod openings with a damp cloth. This small habit prevents green rings from becoming stubborn. It also gives you a chance to check whether roots are crowding the deck.
How to Remove Mineral Buildup
Brown, tan, or whitish crust around the grow deck is often mineral buildup from water and liquid plant food. It is common and usually not harmful, but it can look messy and become harder to remove over time.
Distilled white vinegar is helpful for loosening mineral deposits. Apply vinegar to the affected area, let it sit briefly, then scrub gently with a soft brush. Rinse well before using the system again. If your tap water is very hard, consider using filtered or distilled water for future grows to reduce deposits.
Cleaning an AeroGarden While Plants Are Still Growing
Sometimes your plants are still productive, but the reservoir needs attention. In that case, do a careful rinse and refill rather than a full deep clean.
- Unplug the unit.
- Lift the grow deck gently, supporting the plants.
- Remove old water with a cup or siphon.
- Wipe easy-to-reach residue from the bowl.
- Add fresh cool water and nutrients.
- Lower the deck carefully and plug the unit back in.
Avoid harsh cleaning solutions while live plants are in place. If roots look brown, slimy, or smell bad, the issue may be more serious than routine dirt. In that case, inspect water temperature, pump function, nutrient schedule, and plant health.
Common AeroGarden Cleaning Mistakes to Avoid
Using Too Much Bleach
More bleach does not mean cleaner plants. It means more rinsing, stronger fumes, and a greater chance of residue. Use a diluted solution and rinse thoroughly.
Forgetting the Pump
A spotless bowl with a clogged pump is like a clean car with no engine. Water circulation matters. Always check the pump intake and surrounding area during deep cleaning.
Leaving Empty Pod Holes Open
Open holes let light into the reservoir, and light invites algae. Cover unused openings from the beginning of the grow cycle.
Scrubbing With Abrasive Tools
Steel wool and harsh pads can scratch plastic. Use soft tools and patience. If residue is stubborn, soak it instead of attacking it like a medieval knight.
Mixing Cleaners
This is the big one. Never mix bleach with vinegar, ammonia, hydrogen peroxide, or other cleaners. Use one product at a time, rinse well, and keep your cleaning routine boringin this case, boring is safe.
Best Cleaning Schedule for Healthy AeroGarden Plants
A simple schedule keeps maintenance from turning into a giant weekend chore.
- Weekly: Check water level, wipe splashes, inspect pod openings, and look for algae.
- Every two weeks: Add plant food as directed by your model or seed kit instructions.
- Every four to six weeks: Do a rinse and refill with fresh water and nutrients.
- Between crops: Deep clean, remove roots, sanitize the bowl and deck, and inspect the pump.
This rhythm works because it matches the way hydroponic systems behave. Small maintenance steps prevent big cleaning battles later. It is much easier to wipe a little residue now than to chisel mineral crust off the deck after ignoring it for three months.
Troubleshooting After Cleaning
The Pump Sounds Weak
Check whether the pump is fully connected and seated correctly. Look for trapped roots near the intake. Make sure the water level is high enough for proper circulation.
The Water Looks Cloudy
Cloudy water can happen after adding nutrients, but persistent cloudiness may mean old residue remains. Do a rinse and refill, inspect roots, and clean the bowl if needed.
Plants Wilt After Cleaning
Plants may droop temporarily if roots were disturbed. Keep the water level correct, avoid over-pruning roots, and give them time to recover. If you used bleach, make sure the system was rinsed thoroughly before plants went back in.
Algae Comes Back Quickly
Look for light leaks. Cover unused pod holes, keep the reservoir lid properly seated, and avoid placing the AeroGarden where direct sunlight hits the water bowl.
Extra Experience: What Cleaning an AeroGarden Teaches You Over Time
After you clean an AeroGarden a few times, you start noticing patterns. The first cleaning may feel like a small operation: towels everywhere, parts lined up by the sink, and one suspicious root clump that looks like it could become sentient. But by the second or third round, the process becomes quick and almost satisfying.
One useful lesson is that the grow deck tells a story. If you see heavy mineral crust, your water may be hard or nutrients may be concentrating as water evaporates. If algae keeps returning, light is probably sneaking into the reservoir. If the pump is struggling, roots may be crowding the intake. Cleaning is not just about making the unit look pretty; it is a checkup for the whole growing system.
Another experience many AeroGarden owners share is that herbs and leafy greens are forgiving, while fruiting plants can be messier. Basil, parsley, dill, and lettuce usually create manageable roots. Tomatoes and peppers, however, can build large root systems that wrap around the bowl and pump area. They are productive, but they leave behind a root situation that requires patience. The best approach is to remove large roots by hand first, then wash and sanitize. Trying to rinse everything away at once usually just creates a sink full of floating plant spaghetti.
You also learn not to postpone the rinse and refill. When plants look healthy, it is tempting to keep topping off the water and pretend the reservoir is fine. For a while, that works. Then one day the water smells stale, the deck has crusty edges, and the basil looks personally offended. Regular fresh water keeps the system more stable and makes deep cleaning easier later.
Vinegar becomes especially handy if you deal with mineral deposits. It is not magic, but it softens buildup enough that you can scrub gently instead of scraping aggressively. The trick is to give it a few minutes to work. Many people make cleaning harder by applying vinegar and immediately scrubbing like they are late for a bus. Let the vinegar sit briefly, then brush and rinse.
Bleach, on the other hand, is best treated with respect. It is useful for sanitizing between crops, especially after a long grow cycle, but it should never be used casually around live plants or mixed with other cleaners. Good ventilation, gloves, careful measuring, and repeated rinsing make the process safer. If the bowl still smells strongly of bleach after rinsing, rinse again. The goal is a clean start, not a swimming pool for seedlings.
One practical tip is to clean immediately after harvesting the last crop. Do not leave old roots and water sitting in the unit for days. Once plants are finished, the reservoir can get unpleasant faster than expected. Cleaning right away also makes the next planting feel exciting instead of like a chore you have been avoiding.
Another helpful habit is keeping a small AeroGarden cleaning kit nearby: a toothbrush, soft sponge, microfiber cloth, plant spacers, and a small measuring cup. When everything is ready, maintenance feels simple. When supplies are scattered around the house, cleaning becomes a treasure hunt with more dripping.
Finally, cleaning your AeroGarden gives you better results because it makes you pay attention. You notice root color, water movement, plant spacing, and residue before they become real problems. Healthy hydroponic gardening is not about perfection. It is about small, consistent care. Your plants do not need a luxury resort; they just need clean water, good light, nutrients, airflow, and a reservoir that does not look like it belongs in a swamp-themed escape room.
Conclusion: A Clean AeroGarden Grows Better
Cleaning your AeroGarden is one of the easiest ways to support healthy plants, stronger roots, and better harvests. By rinsing and refilling regularly, removing old roots, cleaning the pump, blocking light from the reservoir, and sanitizing between plantings, you create the fresh environment your herbs, greens, and vegetables need to thrive.
The process is simple: unplug, empty, remove debris, wash, sanitize, rinse, dry, and reassemble. Once you make it part of your routine, AeroGarden cleaning becomes less of a chore and more of a reset button. Your plants get a cleaner home, your kitchen gets a fresher-looking garden, and you get to enjoy homegrown flavor without wondering what that mysterious green film is doing near the basil.
Note: Always unplug your AeroGarden before cleaning, use only one cleaning solution at a time, rinse thoroughly before replanting, and follow the care instructions for your specific model.