Table of Contents >> Show >> Hide
- Before You Start: Know What You’re Plugging In
- Step-by-Step: How to Connect a Router to a Modem
- Step 1: Power Everything Down (Yes, Really)
- Step 2: Make Sure the Modem Is Connected to the Internet Line
- Step 3: Connect the Modem to the Router (The One Cable That Matters Most)
- Step 4: Power Up in the Correct Order (This Is Where Most Setups Win or Lose)
- Step 5: Connect to the Router’s Wi-Fi (or Use Ethernet for Setup)
- Step 6: Finish Router Setup in the App or Web Browser
- Step 7: Confirm You Have Internet
- Troubleshooting: When the Lights Are On but the Internet Isn’t
- Problem: “Connected to Wi-Fi” but “No Internet”
- Problem: You Have an ISP Gateway (Modem/Router Combo) and Added Your Own Router
- Problem: The Router Setup Says “No IP Address” or “No WAN IP”
- Problem: Your ISP Requires PPPoE Login (Common with Some DSL/Fiber)
- Problem: You’re on Fiber and Have an ONT
- Problem: Wi-Fi Works in One Room and Disappears in Another
- Best Practices After You’re Connected (Do These Once, Thank Yourself Later)
- Quick Checklist: Router-to-Modem Connection in 60 Seconds
- Real-World Experiences That Make This Easier (Extra )
- Conclusion
So you bought a shiny new router, your internet is giving you the silent treatment, and your modem is just sitting there like,
“I don’t know her.” Don’t worryconnecting a router to a modem is usually a simple, cable-and-power-order kind of problem.
This guide walks you through the whole setup with clear steps, “picture-style” visuals, and the most common gotchas (because
the internet loves a plot twist).
Before You Start: Know What You’re Plugging In
Modem vs. Router (and the Combo Device That Causes Drama)
A modem connects your home to your internet service provider (ISP). A router creates your home network
and shares that internet connection with your devices (Wi-Fi and Ethernet). Some ISPs give you a gateway, which is a
modem + router combo in one box.
If you have a combo gateway and you’re adding your own router, you may need to enable Bridge Mode (or something similar,
like IP Passthrough) so you don’t end up with “double NAT,” aka: “Why does my online game hate me now?”
What You’ll Need
- Your modem (or ISP gateway)
- Your router
- One Ethernet cable (Cat5e or Cat6 is ideal)
- Power adapters for both devices
- A phone or laptop to complete setup
- (Optional) A paperclip for a factory reset pinhole
Step-by-Step: How to Connect a Router to a Modem
Step 1: Power Everything Down (Yes, Really)
- Unplug the power from your modem.
- Unplug the power from your router.
- Wait at least 30–60 seconds.
This “power cycle” clears out stale connections and helps the modem recognize your router as the new device asking for internet.
It’s the networking equivalent of turning it off and on againbecause it works more often than we’d like to admit.
Step 2: Make Sure the Modem Is Connected to the Internet Line
Check that the modem is connected to the correct incoming line:
- Cable internet: coax cable screwed into the modem
- DSL: phone line connected to DSL port
- Fiber: you may have an ONT (Optical Network Terminal) feeding Ethernet to your router/modem
- Fixed wireless: may use an ISP-provided receiver that feeds Ethernet
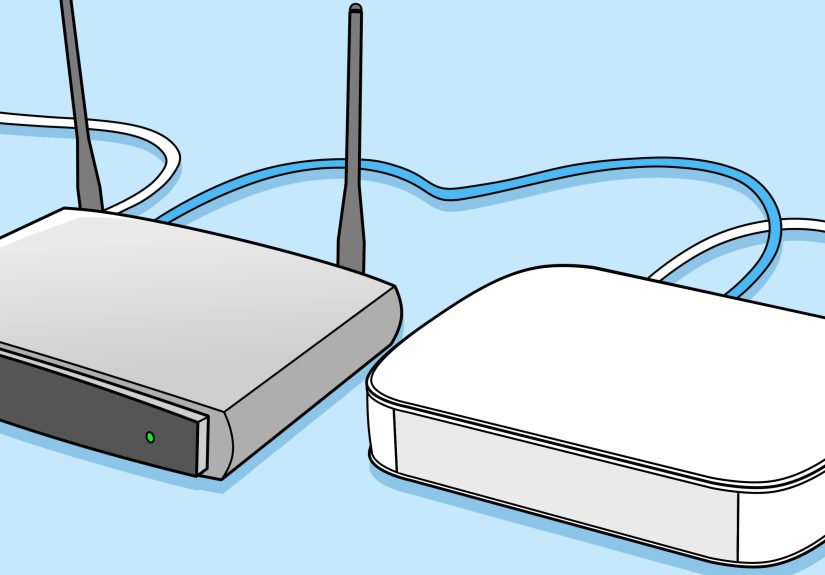
Step 3: Connect the Modem to the Router (The One Cable That Matters Most)
Take your Ethernet cable and plug:
- One end into the modem’s LAN / Ethernet port (sometimes it’s the only Ethernet port).
- The other end into the router’s WAN / Internet port (often a different color from the LAN ports).
If you accidentally plug into a router LAN port instead of the WAN/Internet port, the router may still light up and act confident
but you’ll get no internet. Routers are very good at looking busy.
Step 4: Power Up in the Correct Order (This Is Where Most Setups Win or Lose)
- Plug in and power on the modem first.
- Wait until it fully boots (watch for stable “Online/Internet” lights).
- Then plug in and power on the router.
- Wait another minute or two for the router’s internet/WAN light to stabilize.
Step 5: Connect to the Router’s Wi-Fi (or Use Ethernet for Setup)
Most routers ship with a default Wi-Fi name (SSID) and password printed on a sticker or card. On your phone or laptop:
- Open Wi-Fi settings.
- Select the router’s default network name.
- Enter the printed password.
If you prefer maximum stability while setting up (or your Wi-Fi is shy), connect your computer to a router LAN port using Ethernet.
Step 6: Finish Router Setup in the App or Web Browser
Many routers use a mobile app for setup; others use a browser-based admin page. Common router login addresses include:
192.168.1.1, 192.168.0.1, or a branded URL (printed on the label or in the manual).
During setup, you’ll usually be asked to:
- Create a new admin password (do thisdefault logins are a party invitation for trouble).
- Name your Wi-Fi network (SSID).
- Set a strong Wi-Fi password and security mode (prefer WPA2/WPA3 if available).
- Confirm your internet connection type (usually Automatic/DHCP for cable/fiber; sometimes PPPoE for DSL/fiber).
Step 7: Confirm You Have Internet
Open a browser on a connected device and load a couple of websites. If it works, congratulationsyour router and modem are officially on speaking terms.
If it doesn’t work yet, don’t panic. Most problems fall into a few common categories, and they’re fixable without performing an interpretive dance.
Troubleshooting: When the Lights Are On but the Internet Isn’t
Problem: “Connected to Wi-Fi” but “No Internet”
- Check the Ethernet cable ports: modem LAN → router WAN/Internet.
- Power cycle again: unplug modem + router; modem first, wait; router second.
- Try a different Ethernet cable: cables fail in the most unhelpful ways.
Some ISPs “lock” the modem to the last connected device’s MAC address. Power cycling the modem (and waiting long enough) often forces it to assign a fresh connection to your router.
Problem: You Have an ISP Gateway (Modem/Router Combo) and Added Your Own Router
If your ISP device is also acting as a router, your new router may end up behind it. That can still “work,” but you might see:
double NAT warnings, strict NAT in gaming, broken port forwarding, or weird smart home behavior.
Fix options (choose one):
- Bridge Mode: turn the ISP gateway into “modem-only” and let your router do the routing.
- IP Passthrough / DMZ: some providers (especially fiber gateways) offer a passthrough mode for your router.
- Accept double NAT: okay for basic browsing/streaming, not great for advanced networking.
Problem: The Router Setup Says “No IP Address” or “No WAN IP”
This usually means the router isn’t receiving an address from the modem/ISP. Common causes:
- Modem didn’t fully boot before the router powered on.
- ISP requires modem activation for new equipment.
- Internet type mismatch (DHCP vs. PPPoE).
Problem: Your ISP Requires PPPoE Login (Common with Some DSL/Fiber)
If your ISP gave you a PPPoE username/password, you’ll need to enter those into the router’s internet/WAN settings.
If you don’t have them, you may need to retrieve them from your ISP account portal or customer support.
Problem: You’re on Fiber and Have an ONT
Fiber setups vary. In many homes, the ONT outputs Ethernet. Your router’s WAN/Internet port should connect directly to that Ethernet output
(or to the ISP gateway if your provider requires it). If your provider previously used coax from the ONT to the router, you may need the ISP to switch the WAN output method to Ethernet.
Problem: Wi-Fi Works in One Room and Disappears in Another
That’s not a modem problemthat’s physics. Place your router:
//
- In a central, open area (not inside a cabinet like a grounded teenager).
- Off the floor and away from metal objects, microwaves, and thick walls.
- Closer to where you use Wi-Fi the most.
For large homes, consider a mesh system (multiple nodes) rather than cranking one router to “shout across the house.”
Best Practices After You’re Connected (Do These Once, Thank Yourself Later)
Update Firmware
Router firmware updates patch security issues and improve stability. Many routers can update through the setup app or admin page.
Do this earlybefore you forget and your router decides it’s a museum piece.
Secure Your Network
- Change the default admin login/password.
- Use WPA2/WPA3 encryption with a strong Wi-Fi password.
- Disable WPS if you don’t need it.
- Create a guest network for visitors and smart gadgets you don’t fully trust.
Name Your Wi-Fi Like a Responsible Adult (or Don’t)
Your network name can be anything. It can be “SmithFamilyWiFi” or “ItHurtsWhenIP.” Just avoid personally identifying info if you can.
Quick Checklist: Router-to-Modem Connection in 60 Seconds
- Power off modem + router.
- Confirm modem is connected to ISP line (coax/DSL/fiber/ONT).
- Ethernet from modem LAN → router WAN/Internet.
- Power on modem; wait for stable lights.
- Power on router; wait for WAN/Internet light.
- Connect device to router; complete setup; confirm internet.
Real-World Experiences That Make This Easier (Extra )
Here’s the part nobody tells you in the glossy “setup in 3 minutes!” pamphlet: most router-to-modem problems aren’t complicatedthey’re
fussy. And “fussy” issues have a special talent for making smart people feel like they’ve forgotten how electricity works.
1) The “I Didn’t Wait Long Enough” Trap
The most common mistake is powering on the router before the modem is truly ready. A modem can look “alive” (lights blinking!) but not be
finished negotiating with your ISP. If you plug the router in too early, the router asks for an internet connection, the modem shrugs, and you
get the infamous “connected, no internet” message. Waiting an extra 60–120 seconds after the modem boots feels sillyuntil you realize it solves
the problem in one move.
2) The WAN Port Mix-Up (aka “Why Do Routers Have So Many Holes?”)
I’ve seen people plug the modem into a router LAN port and then stare at the blinking lights like they’re trying to decode Morse code.
The router will happily provide Wi-Fi, your phone will connect, and everything will look normalexcept the router isn’t actually connected to the internet.
If you remember one thing, remember this: modem → router WAN/Internet. LAN ports are for your devices.
3) The “My ISP Box Is Also a Router” Surprise
ISP gateways are sneaky because they can behave like a modem and a router at the same time. If you add your own router behind it, you might
still get working Wi-Fiso you assume all is welluntil you try online gaming, remote access, a work VPN, or a smart doorbell that suddenly
forgets where it lives. That’s when double NAT shows up like an uninvited guest. In the real world, the cleanest fix is often enabling Bridge Mode
on the ISP gateway (or IP Passthrough on certain fiber gateways), so your personal router gets the “real” internet handoff.
4) The “Modem Remembers the Old Device” Problem
Some modems cling to the last device they were connected to. You might swap from “laptop plugged into modem” to “router plugged into modem”
and wonder why nothing works. A proper power cycle usually forces the modem to forget the old device and hand the connection to your router.
If it’s still stubborn, unplugging the modem for a full minute (sometimes two) can make the difference. It’s annoying, but it’s also a lot cheaper
than replacing equipment that isn’t actually broken.
5) The “Placement Matters More Than You Think” Lesson
After the internet is up, people immediately blame the modem if Wi-Fi is weakwhen the real culprit is placement. Routers shoved behind TVs,
inside cabinets, or next to big metal objects can lose performance fast. The best upgrade you can make without spending money is moving the router
to a more central, open spot. It’s the only “hardware improvement” that requires zero screws and minimal emotional commitment.
The big takeaway: router-to-modem setup is 80% cables, 20% patience, and 100% worth doing carefully once so you don’t troubleshoot it at 1:00 a.m.
while your streaming app buffers like it’s loading the entire internet on a hamster wheel.


