Table of Contents >> Show >> Hide
- Why Disinfect Nail Clippers in the First Place?
- Cleaning vs. Disinfecting vs. Sterilizing
- Before You Start: What You Need
- Method 1: Disinfect Nail Clippers With 70% Rubbing Alcohol
- Method 2: Disinfect Nail Clippers With a Diluted Bleach Solution
- Method 3: Use an EPA-Registered Disinfectant
- Common Mistakes That Make Nail Clippers Less Clean Than You Think
- How Often Should You Disinfect Nail Clippers?
- When to Replace Nail Clippers Instead of Disinfecting Them
- When to See a Doctor Instead of Playing Bathroom Surgeon
- Final Thoughts
- Real-Life Experiences: What People Notice When They Start Disinfecting Nail Clippers Regularly
- SEO Tags
Nail clippers are tiny, useful, and weirdly good at collecting things you do not want hanging around your bathroom. Think nail dust, skin debris, moisture, and the occasional invisible hitchhiker like fungus or bacteria. Charming, right? The good news is that disinfecting nail clippers is easy, fast, and far less dramatic than most people imagine. You do not need a lab coat, a microscope, or a suspiciously intense playlist. You just need the right method and a few minutes.
If you use clippers on your fingernails and toenails, share tools with someone else, trim nails after the gym, or have dealt with athlete’s foot, nail fungus, or a wart, regular disinfection is not overkill. It is basic hygiene. In fact, one of the biggest mistakes people make is assuming a quick rinse under the faucet counts as “clean enough.” It does not. Water helps, but it does not do the whole job.
In this guide, you will learn how to disinfect your nail clippers with three easy methods: rubbing alcohol, a bleach solution, and an EPA-registered disinfectant. You will also learn when each method makes the most sense, how to avoid common mistakes, and when it is smarter to replace your clippers instead of trying to rescue them like they are a beloved family heirloom.
Why Disinfect Nail Clippers in the First Place?
Your nail clippers touch skin, nails, and sometimes tiny cuts you do not even notice. That matters because broken skin gives germs an easy entry point. If you trim thick toenails, clip around hangnails, or use clippers on a nail that looks yellow, crumbly, or irritated, you increase the odds of spreading whatever is living there to another nail, another toe, or another person.
Disinfecting your nail clippers helps reduce the risk of spreading:
- Nail fungus, especially from toenails
- Warts, which can spread through shared tools
- Bacteria that can irritate or infect small nicks in the skin
- General grime and buildup that make tools less hygienic and less effective
Even if your nails seem healthy, it is still smart to clean and disinfect your clippers regularly. Germs do not send calendar invites before showing up.
Cleaning vs. Disinfecting vs. Sterilizing
These words sound similar, but they are not the same thing.
Cleaning
Cleaning removes visible dirt, nail dust, and debris. This is the first step every single time. If your clippers are dirty, disinfectants work less effectively. Translation: if nail gunk is still hanging on for dear life, your disinfecting step is already losing.
Disinfecting
Disinfecting uses a chemical solution, such as 70% isopropyl alcohol, diluted bleach, or an EPA-registered disinfectant, to reduce germs on hard, nonporous surfaces like metal nail clippers.
Sterilizing
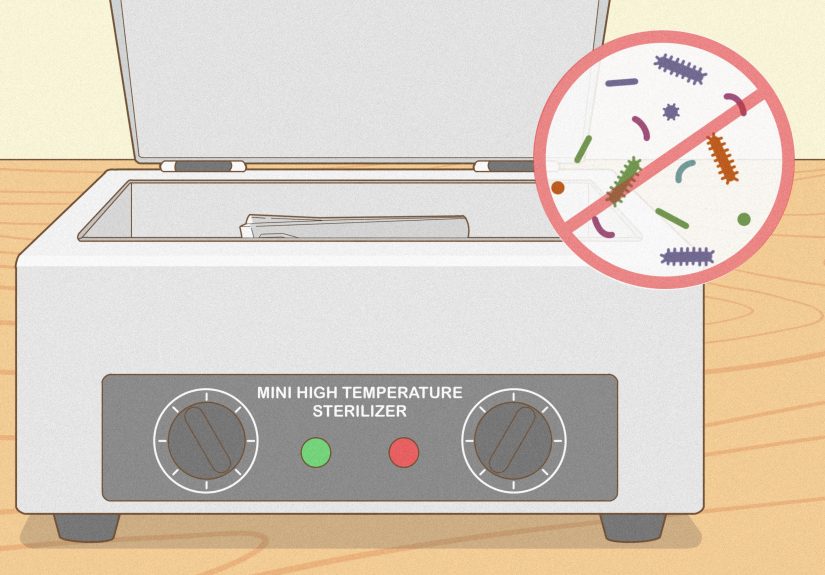
Sterilizing is a higher-level process used in medical or professional settings to destroy all forms of microbial life. Most people at home are not truly sterilizing nail clippers. For personal care, proper cleaning followed by disinfection is the practical goal.
Before You Start: What You Need
Before using any of the three methods below, gather the basics:
- Warm water
- Mild soap or dish soap
- A small scrub brush, old toothbrush, or clean cloth
- Paper towels or a clean dry towel
- One disinfecting option: 70% rubbing alcohol, diluted bleach, or an EPA-registered disinfectant
- A small cup or container used only for cleaning tools if you are soaking them
If the clippers are rusty, dull, cracked, or loose at the hinge, skip the spa day and replace them. Damaged tools are harder to disinfect well and more likely to tear the nail instead of trimming it cleanly.
Method 1: Disinfect Nail Clippers With 70% Rubbing Alcohol
This is the easiest method for routine at-home use. It is quick, affordable, and practical for metal nail clippers that are not visibly contaminated by an active infection.
Best for
- Regular home maintenance
- Personal-use nail clippers
- Clippers used on healthy nails
How to do it
- Remove debris first. Open the clippers and tap out any nail fragments.
- Wash with soap and warm water. Use your brush to scrub around the blades, hinge, and underside.
- Rinse well. Get rid of soap residue.
- Disinfect with 70% rubbing alcohol. Either wipe the clippers thoroughly or soak them for about 5 minutes.
- Let them air-dry completely. Do not store them while damp.
This is the “most people should actually do this” method. It is simple enough that you will repeat it, which is the real secret to keeping tools clean. The perfect method you never do is not better than the good method you actually use.
Method 2: Disinfect Nail Clippers With a Diluted Bleach Solution
If your clippers were used on a nail with a possible fungal infection, wart, or another obvious problem, bleach is the stronger at-home option. This is not the time for half-measures and optimistic thinking.
Best for
- Clippers used on a nail with fungus, a wart, or visible infection concerns
- Situations where extra disinfection is wise
- Households where someone is treating nail fungus
How to do it
- Clean the clippers first. Remove nail bits and scrub with soap and warm water.
- Mix a fresh bleach solution. Use 1 cup of water with 1 tablespoon of bleach.
- Soak the clippers for 5 minutes. Make sure the metal parts are fully exposed to the solution.
- Remove and rinse carefully. Rinse with water after soaking.
- Dry completely. Air-dry or dry with a clean towel before storing.
Important bleach safety tips
- Never mix bleach with other cleaning products
- Use it in a well-ventilated area
- Make a fresh solution rather than storing it indefinitely
- Keep it away from children and pets
If the clippers are inexpensive and you used them on a clearly infected nail, replacing them is also a completely reasonable option. Sometimes peace of mind costs about the same as a coffee.
Method 3: Use an EPA-Registered Disinfectant
If you want the most professional-feeling home routine, use an EPA-registered disinfectant labeled for hard, nonporous surfaces. State salon disinfection rules commonly rely on these products for metal manicure and pedicure tools, provided the tools are cleaned first and the product is used exactly as directed.
Best for
- People who want a salon-style hygiene routine at home
- Shared household tools
- Frequent nail grooming
How to do it
- Read the label first. Look for a disinfectant intended for hard, nonporous surfaces.
- Clean the clippers with soap and water. This is still step one.
- Apply or soak according to the product directions. Some products require full immersion, while others are designed for wipes or sprays.
- Respect the contact time. The clipper needs to stay visibly wet for the amount of time listed on the label.
- Rinse if the label says to rinse, then dry thoroughly.
This method works especially well for all-metal clippers. Just do not assume every product works the same way. The label is not decoration. It is the instruction manual that makes the disinfectant actually do its job.
Common Mistakes That Make Nail Clippers Less Clean Than You Think
1. Skipping the wash step
Disinfectants work best on clean surfaces. If you go straight from clipping to soaking, you may leave debris behind in the hinge or cutting edge.
2. Storing the clippers while damp
Moisture encourages rust and can create a friendlier environment for microbes. Dry them fully before closing them up in a pouch, drawer, or toiletry bag.
3. Sharing tools casually
Sharing clippers with a partner, roommate, sibling, or “just this once” houseguest is an easy way to share more than nail care. Keep your own set.
4. Using one clipper for infected and healthy nails
If you are treating toenail fungus, consider using separate clippers for affected nails and healthy nails. That extra step can help reduce cross-contamination.
5. Treating porous tools like metal tools
Metal clippers can be cleaned and disinfected. Porous items like some nail files and buffer blocks are a different story. They are harder to disinfect thoroughly and may need to be discarded, especially if exposed to broken skin or unhealthy nails.
How Often Should You Disinfect Nail Clippers?
If you want the safest simple answer: after each use.
That is especially important if:
- You use the clippers on toenails
- You have athlete’s foot or nail fungus
- You nicked the skin while clipping
- Someone else has used the tool
- You keep clippers in a gym bag, travel kit, or shared bathroom
At an absolute minimum, do a full clean-and-disinfect routine regularly, not just when the clippers start to look suspicious. By then, they are already hosting more than you invited.
When to Replace Nail Clippers Instead of Disinfecting Them
Disinfection is useful, but it is not magic. Replace the clippers if you notice:
- Rust
- A loose hinge
- Dull or jagged cutting edges
- Pitting, cracks, or damage that trap debris
- Persistent grime you cannot fully remove
A bad clipper can tear the nail, damage nearby skin, and create tiny injuries that invite infection. In other words, a cheap replacement can be much cheaper than an irritated toe.
When to See a Doctor Instead of Playing Bathroom Surgeon
Home disinfection is useful, but it is not a substitute for medical care. If you have redness, swelling, pus, significant pain, a bad smell, or a nail that is getting thicker, more discolored, or misshapen, it is time to get professional advice. Also get help sooner rather than later if you have diabetes, poor circulation, nerve problems, or a weakened immune system.
And one more thing: do not dig into an ingrown nail with your clippers like you are defusing a bomb in a spy movie. That usually makes things worse.
Final Thoughts
Learning how to disinfect your nail clippers is one of those tiny habits that pays off in a surprisingly big way. It helps protect your nails, your skin, and anyone else in your household from preventable problems. The best method depends on the situation:
- Use rubbing alcohol for everyday disinfection
- Use diluted bleach when infection is a concern
- Use an EPA-registered disinfectant for a more professional-grade routine
Whichever method you choose, remember the golden rule: clean first, disinfect second, dry completely, and do not share your clippers. It is not glamorous, but neither is toenail fungus.
Real-Life Experiences: What People Notice When They Start Disinfecting Nail Clippers Regularly
A lot of people do not think much about nail clipper hygiene until something slightly gross, slightly painful, or slightly embarrassing happens. Maybe it is a yellowing toenail that suddenly makes them suspicious. Maybe it is an irritated hangnail after a rushed trim. Maybe it is the moment they borrow a clipper from a family member, pause dramatically, and realize they have no idea where that thing has been. That is usually when nail clipper disinfection goes from “nice idea” to “new household rule.”
One common experience is simply noticing how much hidden debris lives in the hinge of a clipper. People wash their hands, keep their bathroom neat, and still get surprised when they scrub the tool for the first time and see tiny bits coming loose. It is not exactly a glamorous discovery, but it is effective motivation. After that, the idea of clipping nails and tossing the tool right back into a drawer feels a lot less innocent.
Another frequent experience is relief. Once people start cleaning and disinfecting their clippers after each use, the whole routine feels more controlled and less questionable. This is especially true for anyone dealing with thick toenails, athlete’s foot, or a past fungal nail infection. Instead of wondering whether the tool is spreading the problem around, they know they are taking a practical step to reduce that risk. It is not a miracle cure, of course, but it does make the routine feel cleaner, safer, and far more intentional.
Families also notice a difference when they stop sharing clippers. In many homes, there is one random clipper floating around like it pays rent. It lives in the bathroom, migrates to a travel bag, disappears, and reappears near the sink like a tiny metal boomerang. Once households switch to one-person-one-clipper, it removes a lot of the guesswork. No one has to wonder whether the tool was used on healthy fingernails, a questionable toenail, or someone who clipped in a hurry and put it back wet.
People who travel often mention another useful shift: they start treating their grooming kit more like a hygiene kit instead of a junk drawer in zipper form. A quick alcohol wipe before packing and after using clippers on the road becomes an easy habit. That matters because travel kits collect moisture, lint, and general mystery. If your clipper has ever shared a pouch with a razor cap, old bandages, and one rogue cotton swab, you already know the vibe.
Perhaps the most underrated experience is peace of mind. Regular disinfection removes that low-level uncertainty that hangs around after nail care. You are not wondering if the clipper is clean enough. You are not nervously side-eyeing your toe the next day. You just know the tool was washed, disinfected, dried, and stored properly. For such a small habit, that is a pretty satisfying payoff.
And yes, there is also the oddly satisfying feeling of becoming the person who actually knows how to disinfect nail clippers correctly. It is not the flashiest life skill. It will not win applause at parties. But it does make your grooming routine smarter, cleaner, and less likely to end with you Googling “why does my toenail look weird” at 11:47 p.m.