Table of Contents >> Show >> Hide
- Before You Start: What to Know About Manic Panic Hair Dye
- What You Need
- How to Dye Your Hair With Manic Panic Hair Dye: 12 Steps
- Step 1: Pick a Shade That Matches Your Base
- Step 2: Do a Patch Test First
- Step 3: Do a Strand Test Like a Responsible Rebel
- Step 4: Prep Your Hair the Right Way
- Step 5: Protect Your Skin, Clothes, and Bathroom
- Step 6: Section Your Hair
- Step 7: Apply the Dye Generously
- Step 8: Comb It Through for Even Saturation
- Step 9: Cover With a Plastic Cap
- Step 10: Let It Process for 30 to 45 Minutes
- Step 11: Rinse Carefully and Skip the Hot Water
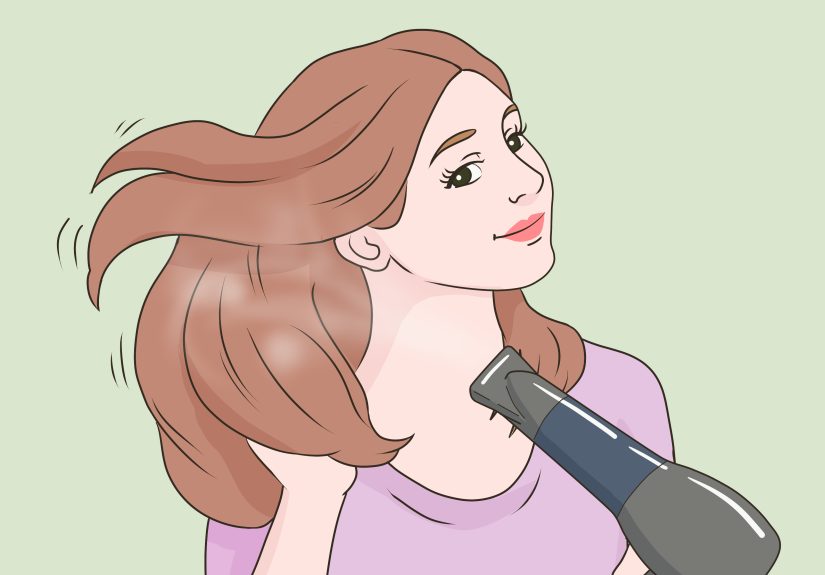
- Step 12: Dry, Style, and Protect the Color
- Common Mistakes to Avoid
- How Long Does Manic Panic Last?
- Experiences With Manic Panic Hair Dye: What People Often Learn the Hard Way
- Final Thoughts
If you have ever looked at a jar of Manic Panic and thought, “Yes, I would like to resemble a mystical creature with excellent taste,” you are in exactly the right place. Manic Panic is one of the most famous names in vivid, semi-permanent hair color, and for good reason: it is beginner-friendly, wildly creative, and far less intimidating than permanent dye when you want a bold change without signing a lifelong contract with your bathroom mirror.
That said, “semi-permanent” does not mean “zero effort.” Bright hair color still rewards good prep, patience, and a tiny bit of chaos management. The color you see in the jar is not always the color you get on your hair, especially if your base is dark, brassy, patchy, or still recovering from a rough relationship with bleach. The good news? If you follow the right process, dyeing your hair with Manic Panic at home can be surprisingly straightforward.
This guide walks you through 12 practical steps for using Manic Panic hair dye, especially the classic cream-style semi-permanent formulas that many people know best. You will also find tips on how to prep your hair, avoid rookie mistakes, keep color from fading too fast, and make your bathroom look less like a crime scene in a rainbow factory.
Before You Start: What to Know About Manic Panic Hair Dye
Manic Panic is best known for its semi-permanent hair color, which deposits pigment without the developer used in permanent color. That makes it a favorite for people who want vivid shades like purple, blue, red, green, pink, or silver without committing forever. It is especially popular for fashion shades, color refreshes, and creative at-home transformations.
Here is the most important truth up front: your starting hair color matters more than your optimism. If your hair is already pale blonde, many Manic Panic shades can look bright and close to the color shown on the label. If your hair is medium brown or darker, the same shade may appear as a subtle tint, a soft cast in sunlight, or a full-on “why is this barely showing?” situation.
For example, some Manic Panic shades can show some tone on unbleached hair, but many vibrant shades look best on pre-lightened hair. Darker reds may work on a medium blonde base, while true blues, violets, silvers, pastels, and grays usually need a much lighter blonde canvas to look crisp and bright. That is why a strand test is not optional if you care about the final result.
What You Need
- Manic Panic hair dye
- Gloves
- Old T-shirt or color cape
- Clarifying shampoo
- Petroleum jelly or barrier cream
- Hair clips for sectioning
- Tint brush and bowl, or gloved hands if you prefer
- Wide-tooth comb
- Plastic cap
- Dark towel you do not love too much
- Mirror, timer, and patience
How to Dye Your Hair With Manic Panic Hair Dye: 12 Steps
Step 1: Pick a Shade That Matches Your Base
Before you even open the jar, decide whether your current hair can realistically support the shade you want. This is where many at-home color stories take a dramatic turn. If your base is yellow-blonde, a blue shade may lean green. If your hair is dark brown, a pastel lavender is not going to suddenly beam through like moonlight in a fairy tale.
Think of your hair like a wall and the dye like paint. The lighter and more even the wall, the more accurate the color. If your hair is not light enough, your result may be softer, darker, warmer, or less visible than expected. If you are after a neon or pastel effect, you usually need very light blonde hair. If you are going for a richer jewel tone, you may have a little more flexibility.
Step 2: Do a Patch Test First
Yes, even if you have dyed your hair before. Yes, even if the jar looks harmless and fun. Yes, even if you are impatient.
A patch test helps check whether your skin reacts badly to the product. Apply a small amount of the specific shade behind your ear or on the inner elbow, let it dry, and leave it undisturbed according to the brand’s guidance. If you notice itching, redness, swelling, burning, or irritation, stop there. Hair color is supposed to change your look, not your weekend plans.
Step 3: Do a Strand Test Like a Responsible Rebel
A strand test tells you what the shade will actually look like on your hair. Choose a small hidden section, apply the dye, process it, rinse it, and check the result in natural light. This is the step that saves people from accidental swamp-green blue, dull purple, and patchy pink.
If the result is too faint, your base may need more lightening. If the result looks uneven, your hair may be porous in some areas and resistant in others. Either way, the strand test gives you useful information before you coat your whole head in glorious uncertainty.
Step 4: Prep Your Hair the Right Way
For classic Manic Panic semi-permanent color, clean hair matters. Wash with a clarifying shampoo to remove buildup, oil, and product residue. Skip conditioner before dyeing. This is one of those rare moments in life when softness is not your best friend. Conditioner can leave a coating that interferes with how evenly direct dye grabs onto the hair.
After washing, dry your hair thoroughly. Slight dampness can water down the deposit and make the result less even. If your hair has a lot of buildup from dry shampoo, styling cream, hair oil, or leave-in products, do not skip this step. Color wants a clean stage, not a crowded one.
Step 5: Protect Your Skin, Clothes, and Bathroom
Manic Panic can stain. Not permanently on everything, but enough to make you question your life choices if you go in unprepared.
Put on an old shirt, drape a towel over your shoulders, and wear gloves. Apply a thin layer of petroleum jelly or barrier cream around your hairline, ears, and the back of your neck. Lay down old towels or paper around the sink. Keep wipes or a damp cloth nearby for quick cleanup. If color lands somewhere it should not, wipe it immediately instead of hoping it will “sort itself out.” That is not how dye works. That is how legends begin.
Step 6: Section Your Hair
Divide your hair into manageable sections, usually four to six depending on thickness. Clip each section up. This makes application neater and helps you avoid the classic beginner mistake of coloring the top layer beautifully while the underneath looks like it missed the memo.
Sectioning also helps you work faster and more evenly. If you are doing a full-head application, organization matters. If you are doing streaks, panels, dip-dyed ends, or color blocking, it matters even more.
Step 7: Apply the Dye Generously
Now comes the fun part. Using a tint brush or gloved hands, apply Manic Panic hair dye from roots to ends, making sure every strand is coated. Do not be stingy. Semi-permanent color works best when the hair is fully saturated. Dry spots and thin areas can lead to uneven results.
If you are touching up roots and lengths separately, be especially careful where old color meets new hair. Feather the product through the transition zone so you do not create harsh bands. For vivid shades, “close enough” is not a strategy.
Step 8: Comb It Through for Even Saturation
Once each section is coated, comb through gently with a wide-tooth comb. This spreads the dye evenly and helps ensure every strand gets proper coverage. Manic Panic’s classic instructions specifically emphasize combing the product through thoroughly, and that advice is gold.
If the dye gets slightly frothy, do not panic. That can happen during distribution. The important thing is even saturation, especially on long, thick, or layered hair where hidden dry spots love to ruin the party.
Step 9: Cover With a Plastic Cap
After application, cover your hair with a plastic cap. This helps keep the dye moist and in place while it processes. It also keeps you from absentmindedly leaning your freshly colored head against a white wall, a cream sofa, or your own shoulder.
If you are doing multiple colors, make sure each section stays where it belongs. Purple and green can look amazing on purpose and much less charming when they accidentally blend into mystery mud.
Step 10: Let It Process for 30 to 45 Minutes
For many classic Manic Panic shades, the recommended processing time is 30 to 45 minutes. Some people also use gentle heat for part of the processing time, since warmth can help open the cuticle a bit and encourage better deposit. If you do this, keep it controlled and sensible. You are helping the color settle in, not trying to roast your scalp like a Thanksgiving side dish.
Most importantly, do not ignore the clock. More time is not always more magic. Follow the product instructions for your exact formula, especially if you are using a newer kit, gel format, or a specialty shade.
Step 11: Rinse Carefully and Skip the Hot Water
Rinse thoroughly with cool to lukewarm water until the water runs mostly clear. Avoid hot water, which can encourage fading faster. In many semi-permanent routines, a full shampoo right after coloring is not necessary. Instead, rinse well and follow with a color-safe conditioner if needed.
Be patient during rinsing, especially with strong shades like red, blue, and purple. They can keep releasing tint for a bit. Use an old towel afterward and blot gently rather than rubbing aggressively. Freshly dyed hair deserves tenderness, not a wrestling match.
Step 12: Dry, Style, and Protect the Color
Once rinsed, gently towel-dry or blow-dry and style as usual. Then switch into maintenance mode. To keep your Manic Panic semi-permanent hair color looking good for longer, wash less often, use cool water, choose sulfate-free or color-safe products, and go easy on heat styling. Dry shampoo can help you stretch time between washes.
Color fade is normal. It is not a betrayal. It is just the lifecycle of semi-permanent dye. If your shade starts looking dull, you can refresh it with another application, a tinted conditioner, or a strategic touch-up instead of redoing the entire head every time.
Common Mistakes to Avoid
- Skipping the patch test: brave does not mean reckless.
- Skipping the strand test: this is how people accidentally invent colors no one asked for.
- Applying to dirty or product-heavy hair: buildup can interfere with even color.
- Using conditioner before dyeing: this can reduce grab for many direct dyes.
- Expecting pastel on dark hair: the math is not on your side.
- Using hot water after coloring: fast track to fade city.
- Overlapping messy sections: patchiness loves confusion.
How Long Does Manic Panic Last?
In general, classic Manic Panic shades last around 4 to 6 weeks, though the exact timeline depends on your hair porosity, your wash routine, your products, and the shade itself. Amplified formulas may last longer, while pastel shades and very porous hair can fade faster.
If you want the color to stay vivid as long as possible, think low drama: fewer washes, cooler water, gentler shampoo, less heat, and more moisture. Dry, damaged, overly porous hair can either grab too much color in odd places or let it slip away quickly. Hair can be complicated like that.
Experiences With Manic Panic Hair Dye: What People Often Learn the Hard Way
One of the most common experiences people have with Manic Panic hair dye is realizing that vivid color is half creativity and half preparation. The first-timer often focuses on the fun part, which is picking a spectacular shade name and imagining the final reveal. Then reality enters wearing gloves and carrying a clarifying shampoo.
A lot of people are pleasantly surprised by how soft their hair feels after using semi-permanent direct dye, especially compared with harsher color processes. That is one reason Manic Panic has stayed popular for so long. When the hair is properly prepped, the application can feel more like painting color onto the hair than forcing a chemical transformation. People often describe the process as easier than expected, especially once they section the hair and stop trying to rush.
At the same time, there are some very predictable lessons. The first is that bleach and dye are not the same step, even if they happen close together in your mental plan. Many users discover that their real challenge is not applying the Manic Panic color itself but getting the hair light enough and even enough beforehand. If one part of the hair is pale blonde and another part is warm yellow or orange, the final result can vary dramatically. Blue might look navy on one section, teal on another, and vaguely regretful on the rest.
Another common experience is underestimating how much product is needed. Thick, long, or very dense hair can drink up color fast. People often start confidently, then halfway through realize they have the coverage of a budget home renovation. Buying enough product matters. Running out near the back of your head is a truly humbling event.
Then there is the staining issue. Most people become much wiser after one colorful sink incident. Hairline stains, fingertips, grout, white towels, pillowcases, and shirt collars all have a way of becoming part of the learning curve. The experienced at-home dyer usually develops a ritual: gloves on, barrier cream applied, dark towel ready, old shirt selected, sink wiped down immediately. It is not glamorous, but it is effective.
People also tend to learn that aftercare decides whether the color stays cute or quits early. The difference between washing every day with hot water and washing less often with cool water is huge. Many users notice that their shade stays brighter when they use a color-safe conditioner, skip frequent shampooing, and avoid blasting their hair with heat tools every morning like they are trying to win a duel.
Finally, there is the emotional experience, which is honestly part of the charm. Dyeing your hair with Manic Panic can feel playful, expressive, and weirdly empowering. It is one of those beauty routines that can be practical and theatrical at the same time. You prepare your tools, apply your chosen shade, wait around looking suspicious in a plastic cap, and then rinse into a new version of yourself. Sometimes the result is exactly what you wanted. Sometimes it is a little different. But either way, most people come away smarter, bolder, and much more respectful of sectioning clips.
Final Thoughts
If you want to know how to dye your hair with Manic Panic hair dye, the answer is simple: prep well, test first, saturate thoroughly, and treat aftercare like part of the color job. The formula itself is not the hard part. The hard part is respecting the process instead of trying to freestyle your way into flawless electric lavender at 11:40 p.m. on a Tuesday.
Follow these 12 steps, be honest about your base color, and give the dye the clean, even canvas it deserves. Do that, and your chances of getting vivid, beautiful, bathroom-mirror-worthy results go way up. And if nothing else, you will at least look like someone with excellent stories.


