Table of Contents >> Show >> Hide
- Table of Contents
- Why ceiling cracks happen
- When to worry (and call in help)
- Tools and materials checklist
- Pick the right repair method for your ceiling
- Step-by-step: Repair a drywall ceiling crack (the long-lasting way)
- 1) Protect the room and check for moisture
- 2) Remove loose material and open the crack
- 3) Stabilize the area (if the crack shows movement)
- 4) Apply tape (yes, even if you really want to skip it)
- 5) First coat: embed and cover
- 6) Second and third coats: feather wide (wider than you think)
- 7) Sand lightly, then clean thoroughly
- Special cases: corners, nail pops, plaster, and textured ceilings
- Prime and paint so the patch disappears
- Time, cost, and what to expect
- Troubleshooting: why cracks come back
- How to help prevent future ceiling cracks
- of real-world “ceiling crack repair” experience (so you don’t learn the hard way)
- Final thoughts
A ceiling crack can feel like your house is raising an eyebrow at you. The good news: most ceiling crack repair jobs are absolutely DIY-friendly,
and with the right prep, you can make the fix blend in so well you’ll forget it ever existed (until you look up at 2 a.m. and start overthinking again).
This guide walks you through how to fix a crack in the ceiling the durable waymeaning: not just “smear and pray,” but
“repair, reinforce, and repaint so it doesn’t come back for an encore.” You’ll also learn when a crack is likely cosmetic versus when it’s time
to call a pro before your ceiling starts auditioning for a disaster movie.
Table of Contents
- Why ceiling cracks happen
- When to worry (and call in help)
- Tools and materials checklist
- Pick the right repair method for your ceiling
- Step-by-step: Repair a drywall ceiling crack (the long-lasting way)
- Special cases: corners, nail pops, plaster, and textured ceilings
- Prime and paint so the patch disappears
- Time, cost, and what to expect
- Troubleshooting: why cracks come back
- How to help prevent future ceiling cracks
- of real-world “ceiling crack repair” experience (so you don’t learn the hard way)
Why ceiling cracks happen
Before you repair a crack, it helps to understand the causebecause the “right” fix depends on whether the ceiling is simply settling,
moving seasonally, or dealing with moisture or structural stress.
Common (usually non-scary) causes
- Normal settling: Homes shift slightly over time, especially in newer construction. Hairline cracks can show up as things “find their place.”
- Seasonal movement: Temperature and humidity changes cause framing and drywall to expand/contract. This can open up joints and seams.
- Drywall joint issues: Cracks often follow taped seams if the joint wasn’t taped/embedded well or the compound was applied too thick.
- Truss uplift: In some climates/attics, roof trusses can move seasonally, causing cracks where the ceiling meets the wall (classic winter surprise).
Causes that deserve immediate attention
- Water damage: Cracks paired with stains, bubbling paint, or soft drywall often mean a leakroof, plumbing, or HVAC.
- Ongoing structural movement: Cracks that widen, multiply, or return quickly after repair can indicate bigger issues (foundation, framing, load problems).
- Sagging or bowing: If the ceiling is drooping, the problem may not be cosmeticand repairs may require replacement or reinforcement.
When to worry (and call in help)
You can repair many ceiling cracks yourself, but don’t treat every crack like it’s just “character.” Use this quick reality check:
Call a pro (or at least get an inspection) if you notice:
- Width: A crack around 1/8 inch or wider, or one that’s clearly widening over time.
- Growth: The crack is longer, deeper, or spreading.
- Water signs: Brown/yellow staining, dampness, bubbling paint, or recurring moisture.
- Movement symptoms: Doors sticking, new gaps around windows, sloping floors, or multiple new cracks across rooms.
- Sagging: Any droop, soft spots, or “pillowy” drywall that flexes.
Translation: if the crack looks like it’s trying to form a map of the Mississippi River AND your door suddenly won’t close, don’t just sand harder.
Get the underlying issue checked first.
Tools and materials checklist
Here’s what you’ll typically need for ceiling crack repair. (Not all items are required for every crackchoose based on your ceiling type.)
Must-haves
- Drop cloths and plastic sheeting
- Safety glasses and a dust mask/respirator (especially for sanding)
- Step ladder (stable, tall enough so you’re not doing drywall yoga)
- Utility knife
- Putty knife or taping knives (6-inch plus a wider 10–12-inch is ideal)
- Drywall joint compound (see below)
- Drywall tape (paper or fiberglass mesh)
- Sanding sponge/paper (120–220 grit range)
- Primer + ceiling paint (flat/matte usually hides repairs best)
Nice-to-haves (that save sanity)
- Shop vacuum (dust control = fewer regrets)
- Work light or flashlight (raking light reveals bumps before paint does)
- Stud finder (for cracks that need stabilization screws)
- Setting-type joint compound (“hot mud” in 20/45/90 minutes) for stronger first coats
- Stain-blocking primer (for water stains)
- Texture product (spray texture or patch) for popcorn/orange peel/knockdown ceilings
Joint compound: which kind should you use?
For ceilings, a smart combo is:
setting-type compound for the first coat (stronger, less shrinkage),
then lightweight/all-purpose premixed compound for second and finish coats (easier sanding).
If you’re repairing a tiny hairline crack with no movement, lightweight compound may be enoughbut tape plus compound is what makes repairs last.
Pick the right repair method for your ceiling
Drywall ceilings (most common)
Most drywall ceiling cracks happen at seams. The durable fix usually involves:
cleaning the crack, possibly adding screws to stabilize, then
taping and applying multiple thin coats of compound.
Plaster ceilings (older homes)
Plaster can crack from movement, age, or separation from lath. Small cracks can be patched similarly to drywall (clean, tape, compound),
but if plaster is loose, it may need reattachment before cosmetic repairs.
Textured ceilings (popcorn, orange peel, knockdown)
The crack repair steps are the same, but the finishing is different:
you’ll patch smooth first, then re-create the texture. Also: if your popcorn ceiling is older and you’re scraping, consider asbestos testing
before disturbing the material.
Step-by-step: Repair a drywall ceiling crack (the long-lasting way)
This method is built for cracks that appear along joints or seams and have a tendency to return. It’s not hardit’s just a little fussy,
like frosting a cake upside down.
1) Protect the room and check for moisture
- Move furniture or cover it completely.
- Lay down drop cloths. Ceiling dust travels like it has vacation plans.
- If there’s staining or dampness, fix the leak first and let everything fully dry.
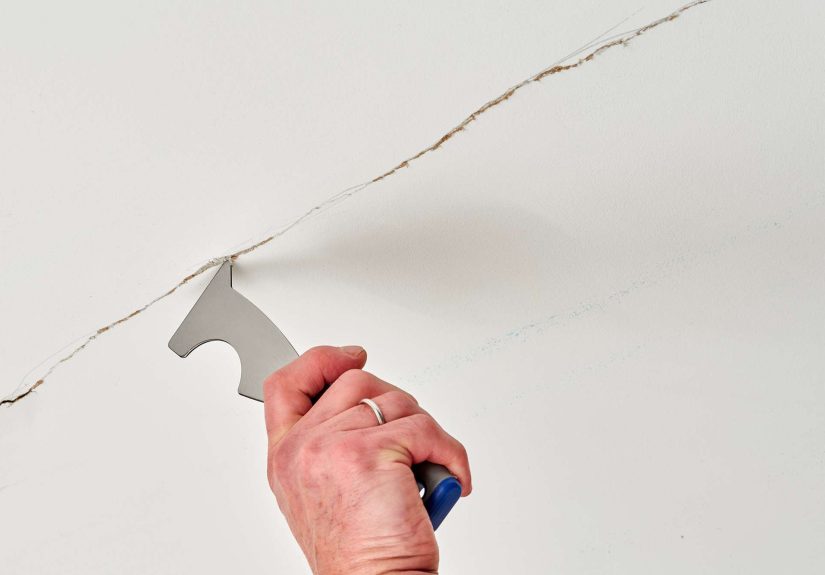
2) Remove loose material and open the crack
Use a utility knife to scrape away loose paint and crumbly compound. Then lightly cut a shallow V-groove along the crack.
This creates space for compound to bond instead of just sitting on the surface like a bad cover-up job.
Wipe or vacuum dust. A clean surface is the difference between “smooth repair” and “mysteriously peeling patch.”
3) Stabilize the area (if the crack shows movement)
Press gently around the crack. If the drywall feels like it moves or flexes, fasten it to framing with drywall screws.
Use a stud finder to locate joists/studs nearby. Drive screws just deep enough to dimple the paper without tearing it.
This step is especially helpful for recurring cracksbecause you can’t “mud” your way out of structural movement.
4) Apply tape (yes, even if you really want to skip it)
Tape is reinforcement. Compound alone can shrink and crack again.
- Paper tape: Best embedded in a thin bed of compound. Great for durability.
- Fiberglass mesh tape: Easier for beginners because it sticks on first, but typically performs best with setting-type compound.
Center the tape over the crack. Press it flatwrinkles now become “texture” later, and not the kind you want.
5) First coat: embed and cover
Apply a thin coat of joint compound over the tape with a 6-inch knife, pressing firmly to embed tape and remove excess.
Don’t build a mountain. Thick compound is more likely to shrink and crack.
6) Second and third coats: feather wide (wider than you think)
Once dry, apply a wider coat with a 10–12-inch knife, feathering edges outward. The goal is a gentle transition,
not a visible ridge. A third thin coat may be needed for a seamless finish.
Pro tip: work under a strong light angled across the ceiling. If you can see a hump before paint, you’ll definitely see it after paint.
7) Sand lightly, then clean thoroughly
Use 150–220 grit sanding sponge/paper. Sand just enough to smooth high spotsdon’t sand through tape.
Vacuum dust and wipe with a slightly damp cloth (let it dry fully before priming).
Special cases: corners, nail pops, plaster, and textured ceilings
Cracks where the wall meets the ceiling
These are common with seasonal framing movement or truss uplift. The best repair is similar:
remove loose tape/compound, retape the joint, and apply thin coats of compound.
For tiny, non-moving gaps, paintable caulk can be a cosmetic solutionbut if it’s moving, tape + compound is the longer-lasting route.
Nail pops or screw pops
If you see little circular bumps or cracks, the drywall fastener may have shifted.
Drive a drywall screw into framing near the pop, remove the loose fastener if needed, then skim with compound, sand, prime, and paint.
Plaster ceiling cracks
First, check whether plaster is firmly attached. If it sounds hollow or moves, cosmetic patching won’t last.
For small stable cracks:
- Scrape loose material and clean dust.
- Apply compound/plaster patch material into the crack.
- Reinforce with tape (where appropriate) and feather coats.
- Sand lightly, then prime and paint.
If plaster is loose, you may need reattachment methods (often involving specialized fasteners/adhesives) before finishing.
Textured or popcorn ceilings
Repair the crack smooth first (steps above), then match texture. For small areas, texture sprays or patch products can help you blend popcorn,
knockdown, or orange peel. Practice on cardboard firstspray texture has one setting: “surprise.”
If your ceiling texture is older and you plan to scrape or disturb a lot of material, consider having it tested for asbestos before doing major removal.
Water-damaged cracks
If drywall is soft, sagging, or crumbling, replacement may be required. Even after repair, water stains can bleed through paint.
Use a stain-blocking primer before repainting, and make sure the leak is truly fixed.
Prime and paint so the patch disappears
This is where many otherwise good repairs go to die: paint “flashing” (a dull/shiny patch) or a visible outline.
Primer is your best friend because joint compound absorbs paint differently than the surrounding ceiling.
Best practice for ceiling repainting
- Spot prime the repaired area (or prime the whole ceiling for large patches).
- Use flat/matte ceiling paint to minimize sheen differences.
- For the most invisible blend, paint the ceiling wall-to-wall or corner-to-corner, especially if the ceiling is older or slightly yellowed.
If you only touch up a small square, you might be creating a “patch spotlight” that appears at certain angleslike your ceiling is subtly pointing at your DIY skills.
Time, cost, and what to expect
Most DIY ceiling crack repairs are inexpensive in materials, but they take time because of drying between coats.
Plan for:
- Active work time: 30–90 minutes total for a typical crack, spread over multiple sessions.
- Drying time: Often 24 hours between coats depending on humidity and compound type (setting-type compound speeds this up).
- Material cost: Often $20–$60 if you already have basic tools; more if you need primer, paint, or texture products.
Hiring out varies by location and severity. Small crack repairs can sometimes fall in the low hundreds, while larger or non-cosmetic ceiling problems cost more,
especially when water damage, texture matching, or repainting whole ceilings are involved.
Troubleshooting: why cracks come back
Problem: The crack reappears in the same spot
- Likely cause: Movement (seasonal framing shift, truss uplift, loose drywall).
- Fix: Add stabilization screws, re-tape, and consider setting-type compound for the first coat.
Problem: Tape bubbles or lifts
- Likely cause: Not enough compound underneath, dust, or rushing application.
- Fix: Cut out loose tape, re-bed properly, feather wider coats.
Problem: Your repair looks like a “speed bump”
- Likely cause: Coats weren’t feathered wide enough.
- Fix: Apply a wider skim coat (think 12–24 inches wide depending on the crack), then sand lightly.
Problem: Paint looks different over the patch
- Likely cause: No primer, or ceiling paint sheen doesn’t match.
- Fix: Prime, then repaintoften best to repaint the entire ceiling plane for perfect blending.
How to help prevent future ceiling cracks
- Control humidity: Use bathroom/kitchen exhaust fans, dehumidifiers, and proper attic ventilation.
- Don’t rush coats: Thin coats dry stronger. Thick coats shrink, crack, and then mock you.
- Use tape for seams: Compound alone is not reinforcement.
- Choose the right compound: Setting-type compound is tougher for first coats on cracks that tend to return.
- Address movement: If framing movement is ongoing, the best “prevention” is stabilizing and repairing correctlyor addressing the underlying structural cause.
of real-world “ceiling crack repair” experience (so you don’t learn the hard way)
If you’ve never repaired a ceiling crack before, here’s what the experience usually feels like in real lifebased on the most common DIY
“oops” moments people run into (and how to dodge them).
First, there’s the moment you realize ceilings are not walls. On a wall, your tools are politely cooperating with gravity. On a ceiling, gravity is
an unpaid intern who shows up only to knock things over. That means your biggest practical upgrade isn’t a fancy compoundit’s prep:
wider drop cloth coverage than you think you need, a hat you don’t care about, and a plan for dust containment. Sanding dust doesn’t fall straight down;
it drifts until it finds the one clean surface you hoped to protect.
Next comes the “I’ll just use a little compound” phase. Then you apply it, step back, and think, “Huh, looks a bit low. I’ll add more.”
This is the ceiling crack repair version of “just one more episode.” Too much compound creates a hump, and humps create a sanding marathon.
The best finishes usually come from multiple thin coats feathered wider each time. The goal isn’t to fill the Grand Canyon in one pass;
it’s to blend the repair so your eye can’t find the edges.
Another extremely common experience: you fix the crack, it looks perfect… then a week later it reappears like a sequel nobody asked for.
That’s not (always) because you did it “wrong.” It’s often because the ceiling is movingseasonally, from truss uplift, or because the drywall isn’t tight
to the framing. The durable fix usually includes stabilizing the drywall with screws near the crack and reinforcing with tape.
People skip tape because it feels like an “extra step,” but tape is what turns a cosmetic patch into a reinforced repair.
Then comes paintingthe stage where many repairs go from “invisible” to “why is there a rectangle on my ceiling?”
Fresh compound absorbs paint differently. Without primer, you can get a dull or shiny patch that shows up under certain light angles.
The most consistent real-world approach is: spot prime the repaired area, then repaint. If your ceiling paint is old or slightly yellowed,
don’t be surprised if the best blend happens when you repaint the whole ceiling plane. It’s annoying, yes. It’s also the moment your ceiling stops
“raising an eyebrow” at you every time the sun hits it.
Finally: give yourself permission to practice. Texture matching especially is a learnable skill, not a magical gift bestowed on drywallers at birth.
Spray onto cardboard first. Adjust distance. Let it dry. Then commit to the ceiling. The best DIY experience is the one where you test first and panic later
(ideally not at all).
Final thoughts
Fixing a crack in the ceiling is mostly about doing the boring parts well: cleaning, reinforcing with tape, applying thin coats,
and priming before paint. Take your time, widen your feathering area, and remember: if the crack is wide, growing, stained, or paired with sagging,
investigate the cause before you repair the surface. Your future self (and your neck) will thank you.


