Table of Contents >> Show >> Hide
If a chocolate chip cookie and a deep-dish pizza had a wildly delicious baby, you’d get a
pizookie a warm skillet cookie with crispy edges, a gooey center, and a big scoop of
melting ice cream on top. It’s the kind of dessert that turns a random Tuesday into a mini party and makes
everyone at the table suddenly “need just one more bite.”
In this in-depth guide, we’ll walk through how to make the best pizookie recipe at home:
from the ingredients that give you that perfect chewy-meets-gooey texture to little tricks that make your
skillet cookie taste like it came straight from a dessert restaurant (looking at you, BJ’s Pizookie fans).
What Is a Pizookie, Anyway?
A pizookie is basically a deep-dish chocolate chip cookie baked in a skillet (usually cast
iron) and served warm, right in the pan, topped with cold ice cream. The name is a mashup of “pizza” and
“cookie” because you cut it into wedges like pizza, but flavor-wise it is 100% cookie heaven.
Restaurant versions, especially the famous one from BJ’s Restaurant & Brewhouse, are known for their
contrast: golden-brown, slightly crisp edges and a center that’s still soft, gooey, and loaded with
chocolate. At home, your goal is the same: a skillet cookie that’s just underbaked in the middle
and dramatically topped with scoops of ice cream that melt into all the nooks and crannies.
Ingredients for the Best Homemade Pizookie
The base of this pizookie recipe is similar to a classic chocolate chip cookie, but tweaked
to bake perfectly in a skillet. Here’s what you’ll need for a 10-inch skillet.
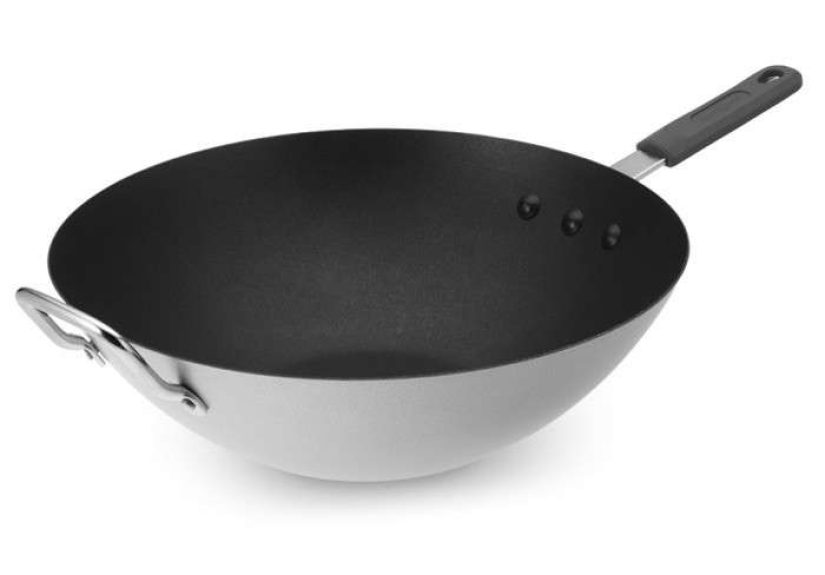
Equipment
- 10-inch cast iron skillet or any heavy, oven-safe skillet
- Heatproof spatula or wooden spoon
- Medium saucepan or skillet (for browning butter)
- Mixing bowls and whisk
Dry Ingredients
- 1 ¾ cups all-purpose flour
- ½ teaspoon baking soda
- ½ teaspoon baking powder
- ¾ teaspoon fine salt (or ½ teaspoon table salt)
Wet Ingredients & Mix-Ins
- ¾ cup (1 ½ sticks) unsalted butter, browned and slightly cooled
- 1 cup packed light or dark brown sugar
- ½ cup granulated sugar
- 1 large egg + 1 egg yolk, at room temperature
- 2 teaspoons vanilla extract
- 1 ¼ cups semisweet or bittersweet chocolate chips or chunks
- Optional: ½ cup chopped toasted pecans or walnuts
- Vanilla ice cream, for serving (French vanilla or vanilla bean work beautifully)
Browning the butter is a small extra step that gives your skillet cookie a deep, toffee-like flavor. Once
you try it, it’s hard to go back to regular melted butter.
Step-by-Step: How to Make This Pizookie Recipe
1. Prep the Pan and Oven
- Preheat your oven to 350°F (175°C).
-
Lightly grease your 10-inch cast iron skillet with a thin layer of butter or nonstick spray. If your
skillet is very well-seasoned, you may not need much.
2. Brown the Butter
- Add the butter to a medium saucepan or light-colored skillet.
- Melt over medium heat. The butter will foam, then the milk solids will start to turn golden.
-
Once it smells nutty and turns a warm amber color with tiny brown flecks on the bottom, remove from heat
immediately. -
Pour into a heatproof bowl and let cool 5–10 minutes. It should still be liquid and warm, but not
scorching hot.
Browning the butter concentrates the flavor and removes some water, which helps create a rich, chewy
texture in your pizookie.
3. Mix the Wet Ingredients
- Whisk the brown butter with the brown sugar and granulated sugar until it looks thick and glossy.
- Add the whole egg and egg yolk and whisk until the mixture lightens slightly in color.
- Whisk in the vanilla extract.
The extra yolk adds richness and chewiness exactly what you want in a deep-dish cookie.
4. Add the Dry Ingredients
- In a separate bowl, whisk together flour, baking soda, baking powder, and salt.
-
Gently fold the dry ingredients into the wet mixture using a spatula. Stop when no visible streaks of
flour remain.
Try not to overmix here; overworking the dough can make the pizookie tough instead of tender and gooey.
5. Stir in Chocolate (and Nuts, If Using)
- Fold in the chocolate chips or chunks until they’re evenly distributed.
-
If you’re using nuts, stir those in as well, leaving a small handful of chocolate chips to sprinkle on
top for a bakery-style look.
6. Press into the Skillet
- Transfer the cookie dough into the prepared 10-inch cast iron skillet.
-
Use a spatula or clean hands to press the dough into an even layer. Make sure it reaches the edges so
it bakes evenly. - Sprinkle any reserved chocolate chips on top.
7. Bake to Gooey Perfection
- Place the skillet on the center rack of your oven.
-
Bake for 18–22 minutes, or until:
- the edges are golden brown and set, and
- the center looks puffed but still slightly soft and a bit shiny.
-
If you prefer a more set, sliceable skillet cookie, add 2–4 more minutes. For extra gooey, start checking
at 16–17 minutes.
Remember: the pizookie continues to cook a little from carryover heat after you take it out of the oven, so
don’t wait for the center to look completely firm.
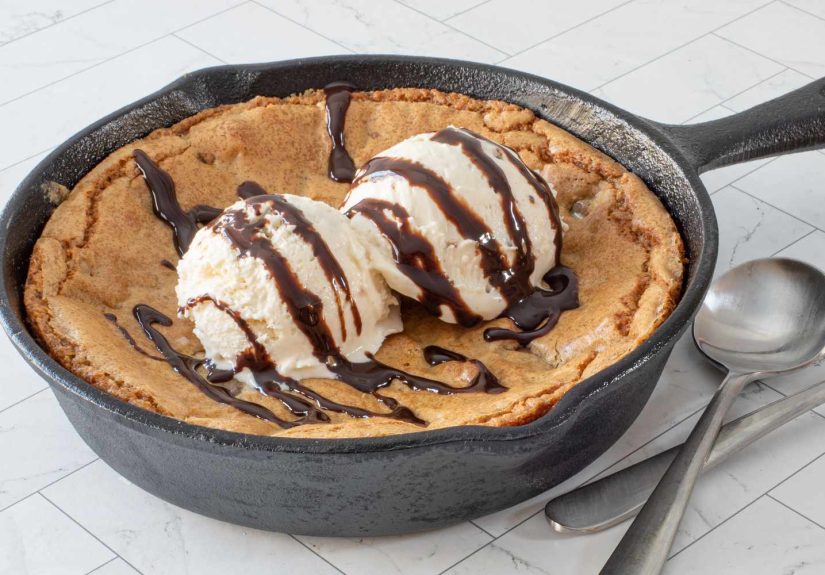
8. Serve with Ice Cream
- Let the pizookie cool for 5–10 minutes so it’s warm but not lava-level hot.
- Top with 2–3 big scoops of vanilla ice cream right in the center.
- Grab spoons and dig in straight from the skillet, or cut into wedges like a deep-dish cookie pizza.
Flavor Variations and Fun Twists
Once you master the classic chocolate chip version, it’s dangerously easy to riff on this
pizookie recipe. Try some of these ideas:
Peanut Butter Pizookie
- Swap ¼ cup of the butter for ¼ cup creamy peanut butter.
- Add peanut butter chips along with the chocolate chips.
- Top with peanut butter drizzle or chopped peanut butter cups.
Double Chocolate Pizookie
- Replace ¼ cup of the flour with ¼ cup unsweetened cocoa powder.
- Use a mix of semisweet and milk chocolate chunks.
- Serve with vanilla or coffee ice cream for a mocha twist.
Salted Caramel Skillet Cookie
- Press half the dough into the skillet.
-
Drizzle on a few tablespoons of thick caramel sauce and sprinkle with a pinch of flaky sea salt, then
top with the rest of the dough. - Finish with extra caramel and sea salt after baking.
Mini Skillet Pizookies
Have a few small 5–6 inch skillets or oven-safe ramekins? Divide the dough among them and bake for 10–14
minutes. You’ll get perfectly portioned mini pizookies great for dinner parties or date night.
Serving, Storage, and Make-Ahead Tips
Best Way to Serve
- Serve warm, 5–15 minutes after baking, so the center is still soft and the ice cream melts slowly.
-
Add toppings like hot fudge, caramel, chopped nuts, or crushed cookies if you want full “over-the-top
dessert menu” energy.
Can You Make a Pizookie Ahead of Time?
Yes! For the best texture, assemble ahead and bake right before serving:
- Make the dough up to 24–48 hours in advance. Press it into the skillet, cover tightly, and refrigerate.
-
When ready to bake, let the skillet sit at room temperature for 20–30 minutes, then bake. You may need
to add a couple of extra minutes to the bake time.
Storing Leftovers (If You Somehow Have Any)
- Cool completely, then cover the skillet tightly or transfer slices to an airtight container.
- Store at room temperature for up to 2 days, or in the fridge for up to 4 days.
-
Reheat slices in the microwave for 15–20 seconds, or warm the whole skillet in a 300°F oven for
8–10 minutes.
Troubleshooting Your Pizookie
“My Pizookie Is Too Raw in the Middle”
- Check your oven temperature with an oven thermometer; many ovens run hot or cold.
-
If the center is very underdone but the edges are dark, tent loosely with foil and bake a few
more minutes. -
Next time, press the dough a little thinner in the center or use a larger skillet (like 12-inch) for a
thinner cookie.
“My Skillet Cookie Is Dry or Crumbly”
- Use a digital scale if possible; too much flour will dry it out.
- Don’t overbake. Pull it when the center still looks slightly soft.
-
Make sure you used the full amount of butter and didn’t let the brown butter burn and evaporate too
much.
“The Edges Are Burning Before the Center Is Done”
- Move your oven rack to the middle or slightly lower position.
- Bake at 325°F instead of 350°F and add a few extra minutes.
- Tent the edges with a ring of foil if they’re browning too fast, leaving the center exposed to heat.
My Pizookie Kitchen Notes & Experiences
The first time you pull a bubbling hot skillet cookie out of the oven, you suddenly
understand why restaurants serve this dessert in its own pan. It’s not just about taste it’s the drama.
The sizzling skillet, the mountain of ice cream, the way people at the table lean in like they’re watching
a live performance. You don’t slice a pizookie; you unleash it.
One of the most fun parts of making a pizookie at home is figuring out your household’s “perfect doneness.”
Some people are team ultra-gooey, where the center is basically warm cookie dough with structural ambitions.
Others like a more set cookie they can slice into neat wedges. After a couple of test runs, you’ll know your
sweet spot: maybe 18 minutes for a goo-fest, 20–22 minutes for something more shareable, or a bit longer if
you want sturdy slices for plating.
This dessert is also a surprisingly great icebreaker when you have guests who don’t know each other well.
Passing a bunch of spoons around and telling everyone to “just dig in on that side” breaks down formality
pretty fast. I’ve seen people go from polite small talk to laughing over who grabbed the giant chocolate
pocket in about 30 seconds. It’s casual, slightly chaotic, and very human in the best way.
From a practical standpoint, a pizookie is also the ultimate “I didn’t plan dessert, but I want to look like
I did” move. Most of the ingredients are pantry staples flour, sugar, butter, chocolate chips. If you keep
a tub of vanilla ice cream in the freezer, you’re always one preheated oven away from a restaurant-style
dessert. And unlike individual cookies, you don’t have to portion or rotate baking sheets. One skillet, one
bake, maximum payoff.
Another bonus? Kids love helping with this recipe. They can whisk the dry ingredients, sprinkle chocolate
chips on top, or “supervise” the ice cream scooping. Because it’s all going into one pan, you don’t need to
worry about perfect cookie shapes, and the slightly rustic look makes it even more charming.
Over time, you’ll probably find yourself customizing your go-to pizookie recipe based on
what’s in your pantry or what you’re craving. Maybe you swirl in Nutella, toss in leftover holiday candy, or
use chopped dark chocolate bars instead of chips. Once you see how forgiving a skillet cookie is, it becomes
less of a strict recipe and more of a template. As long as you keep the basic ratios in balance and don’t
bake it to death, it’s hard to mess up.
The real “experience tip” is simple: serve it hot, with more ice cream than you think you need, and give
yourself permission to eat dessert straight from the pan. A good pizookie isn’t just about flavor it’s
about that cozy, slightly over-the-top moment when everyone gathers around the skillet and forgets their
phones for a while. That’s the kind of memory a basic bowl of ice cream just can’t compete with.
Conclusion
A homemade pizookie is everything we love about a chocolate chip cookie, dialed up to dessert-restaurant
status: gooey center, crisp edges, melty ice cream, and a bit of drama from serving it in the skillet. With
this step-by-step pizookie recipe, you can recreate that experience anytime movie night,
birthdays, date night in, or just because the cookie craving hits hard. Keep a bag of chocolate chips and a
tub of vanilla ice cream nearby, and your oven is always one preheated cycle away from pure, shareable
comfort food.