Table of Contents >> Show >> Hide
- Before You Start: What “Arm Tone” Really Means
- The 15 Steps
- Step 1: Swap the goal from “smaller arms” to “stronger arms”
- Step 2: Accept the “no spot reduction” ruleand use it to your advantage
- Step 3: Take a baseline (so you can notice progress)
- Step 4: Train arms inside an upper-body plan (2–3 days/week)
- Step 5: Make pushing stronger (push-ups, presses, dipsmodified as needed)
- Step 6: Add a triceps “finisher” (because yes, the back of the arm matters)
- Step 7: Don’t forget pulling (rows are the “secret” to better-looking arms)
- Step 8: Train biceps and forearms for balanced shape
- Step 9: Strengthen shoulders (delts = instant “arm frame” upgrade)
- Step 10: Use progressive overload (tiny upgrades = big results)
- Step 11: Add cardio, but keep it supportivenot punishing
- Step 12: Increase daily movement (the quiet superpower)
- Step 13: Eat for muscle: balanced meals, enough protein, no extremes
- Step 14: Hydrate and recover like it’s part of the workout (because it is)
- Step 15: Prioritize sleep and stress management (your “hidden” body composition tools)
- A Simple Weekly Plan (Copy/Paste Friendly)
- Common Mistakes (So You Can Skip the Frustrating Part)
- FAQ: Quick Answers That Save You a Rabbit Hole
- Extra : Real-Life “Experience” Notes (What It Feels Like When This Works)
- Conclusion
If you’ve ever waved at someone and felt like your upper arms waved back… welcome to the club. “Flabby arms” is a super common way people describe
softer upper arms, especially around the triceps area (the back of the arm). And while the internet loves selling “one weird trick” solutions, real,
lasting arm definition usually comes from a not-so-secret trio: strength training, overall movement, and
recovery + balanced nutrition.
Good news: you don’t need a complicated routine, fancy equipment, or a life-changing relationship with celery. You need a plan you can actually do
consistentlyand a few smart adjustments that help your body build muscle and improve overall body composition over time.
Quick safety note: If you’re under 18, still growing, or returning from injury, focus on getting stronger, moving more, and fueling your body well
not extreme dieting or punishing workouts. If pain (sharp, stabbing, joint pain) shows up, pause and get guidance from a qualified clinician or trainer.
Before You Start: What “Arm Tone” Really Means
Most people want two things: (1) stronger arms that feel firm and capable, and (2) less softness in the upper arm area. Here’s the science-y part in plain
English: you can build the muscles underneath (biceps, triceps, shoulders), and you can reduce overall body fat over timebut your body decides
where fat comes off first. That’s why “spot reduction” (losing fat in one exact area by training that area) is mostly a myth.
So your goal isn’t “do 1,000 triceps kickbacks until the jiggle is banished.” Your goal is to train your upper body intelligently, stay active overall,
and support recoveryso your arms change as your whole body adapts.
The 15 Steps
Step 1: Swap the goal from “smaller arms” to “stronger arms”
A mindset shift that actually helps: aim for strength, posture, and function. When you train for capabilitypush-ups, rows, presses,
carriesyour arms often look more defined as a side effect. Plus, strength goals are measurable and motivating (unlike staring at your arms under bathroom
lighting, which is basically a hobby no one needs).
Step 2: Accept the “no spot reduction” ruleand use it to your advantage
You can’t force your body to burn fat from just your triceps. But you can do two powerful things: build triceps muscle so the back of your arm
has more shape, and improve overall fitness so body composition changes over time. Think “targeted toning + whole-body strategy,” not “magic arm-only fat
loss.”
Step 3: Take a baseline (so you can notice progress)
Pick two or three non-obsessive metrics. Examples:
- How many quality incline push-ups can you do?
- How long can you hold a plank with good form?
- Arm measurements (optional), taken once every 4 weeks, not daily.
- How your shirts fit around the shoulders/upper arms.
Progress happens slowlytracking keeps you from quitting two weeks before it shows.
Step 4: Train arms inside an upper-body plan (2–3 days/week)
Arms respond best when you train the whole upper body: chest, back, shoulders, biceps, triceps. If you only do tiny isolation moves, you’ll miss the big
muscle-building payoff of compound exercises (push, pull, press). A simple cadence:
- 2 days/week upper-body strength (or full-body strength)
- Optional 3rd day lighter “pump + mobility” session
Step 5: Make pushing stronger (push-ups, presses, dipsmodified as needed)
Pushing builds the triceps, chest, and shoulders. Choose a version you can do with good form:
- Wall push-ups → easiest
- Incline push-ups (hands on bench/counter)
- Knee push-ups (only if form stays solid)
- Standard push-ups
- Dumbbell or band chest press (floor press works great at home)
Form cue: keep your body in one straight line, elbows at a comfortable angle (not flared straight out), and don’t shrug your shoulders up to your ears.
Step 6: Add a triceps “finisher” (because yes, the back of the arm matters)
The triceps are the main muscle on the back of your upper arm, so they’re often the “tone” difference-maker. Pick 1–2 triceps exercises per session:
- Overhead triceps extensions (dumbbell or band)
- Triceps pushdowns (band anchored in a door)
- Close-grip push-ups or diamond push-up variations (only if wrists feel good)
- Bench dips (be cautiousshoulders should feel stable, not pinchy)
Aim for 2–3 sets of 8–15 reps with control. If the last 2 reps feel challenging but your form stays clean, you’re in the sweet spot.
Step 7: Don’t forget pulling (rows are the “secret” to better-looking arms)
Rows build your upper back and biceps and improve postureoften making arms look better instantly because your shoulders sit in a stronger position.
Options:
- One-arm dumbbell rows (supported on a chair/bench)
- Resistance band rows
- Inverted rows (under a sturdy table, if safe)
- Lat pulldown machine (gym)
Step 8: Train biceps and forearms for balanced shape
If you only train triceps, arms can feel “unfinished.” Balanced arm work helps your elbows and shoulders too. Add:
- Biceps curls (dumbbell, band, or cable)
- Hammer curls (great for forearms and elbow comfort)
- Farmer carries (hold heavy objects and walksimple and brutally effective)
Step 9: Strengthen shoulders (delts = instant “arm frame” upgrade)
Shoulders create the silhouette that makes arms look firmer. Add 1–2 shoulder moves:
- Overhead press (dumbbells/bands)
- Lateral raises (light weight, slow control)
- Face pulls (band/cable) for rear delts and posture
Pro tip: keep the weight lighter than your ego wants. Shoulder joints appreciate humility.
Step 10: Use progressive overload (tiny upgrades = big results)
Your body changes when you gradually ask it to do more. Progress doesn’t have to be dramatic. Choose one:
- Add 1–2 reps per set
- Add a set (from 2 sets to 3)
- Increase weight slightly
- Slow the lowering phase (3 seconds down)
- Reduce rest time a little (without rushing form)
Do one upgrade at a time. Collect small wins like they’re Pokémon.
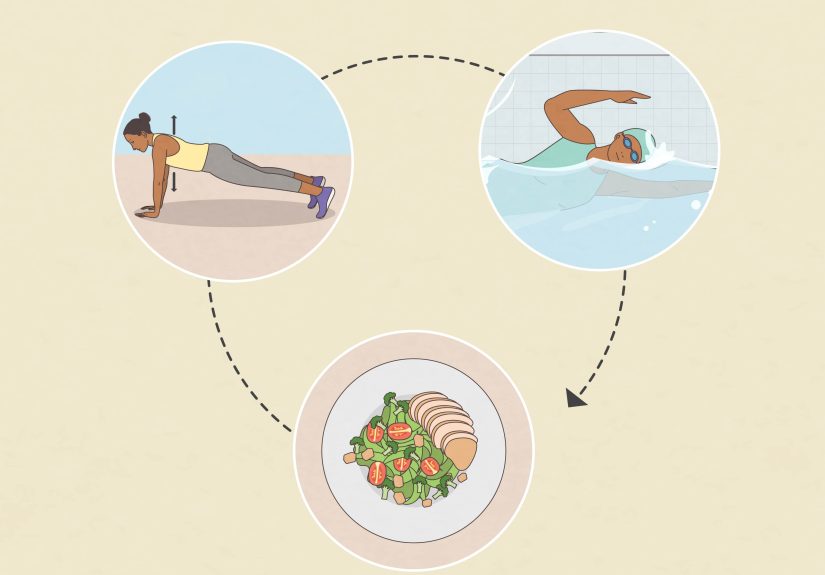
Step 11: Add cardio, but keep it supportivenot punishing
Cardio supports heart health and can help with overall body composition. Pick what you’ll actually do:
- Brisk walking
- Cycling
- Swimming
- Dancing
- Sports
You don’t need “arm cardio gadgets” that look like medieval props. Build a routine you can repeat.
Step 12: Increase daily movement (the quiet superpower)
If your day is mostly sitting, your total movement matters just as much as workouts. Try:
- Short walking breaks
- Stairs when possible
- 10-minute “mini sessions” (push-ups + rows + stretches)
- Active hobbies (basketball, skateboarding, gardening, etc.)
Step 13: Eat for muscle: balanced meals, enough protein, no extremes
Muscles are built from training + recovery + fuel. You don’t need a “bro” diet. You need consistency:
- Protein at meals (eggs, yogurt, beans, tofu, fish, chicken, lean meats, nuts)
- Carbs for energy (fruit, oats, rice, potatoes, whole grains)
- Color for micronutrients (vegetables and fruit)
- Healthy fats (olive oil, avocado, nuts, seeds)
If you’re a teen: avoid aggressive dieting. Your body needs energy for growth, learning, and training. If nutrition feels confusing, a registered dietitian
is a great resource.
Step 14: Hydrate and recover like it’s part of the workout (because it is)
Dehydration and poor recovery make workouts feel harder and progress slower. Keep it simple:
- Drink water throughout the day (more if you sweat a lot)
- Warm up (5–8 minutes) and cool down (2–5 minutes)
- Give arms at least a day between hard strength sessions
Step 15: Prioritize sleep and stress management (your “hidden” body composition tools)
Sleep supports muscle repair, energy, mood, and training consistency. Stress management helps your body recover too. Aim for a regular sleep schedule,
reduce late-night screen brightness, and build a wind-down routine that doesn’t involve doom-scrolling until your eyes feel like sandpaper.
A Simple Weekly Plan (Copy/Paste Friendly)
Option A: Two Strength Days + Movement
- Mon: Strength Day 1 (Push + Pull + Arms)
- Tue: 20–40 min walk/sport + light stretch
- Wed: Strength Day 2 (Shoulders + Back + Arms)
- Thu: Movement (walk, bike, dance) + mobility
- Fri: Optional short circuit (10–15 min)
- Sat/Sun: Fun activity + rest
Strength Day 1 (40–55 minutes)
- Incline or standard push-ups – 3 sets of 6–12
- One-arm row (dumbbell/band) – 3 sets of 8–12 each side
- Overhead press – 3 sets of 8–12
- Overhead triceps extension – 2–3 sets of 10–15
- Hammer curls – 2–3 sets of 10–15
- Plank – 2 rounds of 20–45 seconds
Strength Day 2 (40–55 minutes)
- Floor press (dumbbells/band) – 3 sets of 8–12
- Band rows or lat pulldown – 3 sets of 8–12
- Lateral raises – 2–3 sets of 12–15
- Triceps pushdown (band/cable) – 2–3 sets of 10–15
- Biceps curls – 2–3 sets of 10–15
- Farmer carry – 3 rounds of 30–60 seconds
Common Mistakes (So You Can Skip the Frustrating Part)
- Doing only tiny arm exercises and skipping push/pull basics.
- Training arms every day and wondering why they feel cranky (muscles grow during recovery).
- Going too heavy too soon and turning every rep into interpretive dance.
- Expecting results in 7 days. Most visible changes take weeks, not minutes.
- Undereating or skipping meals, which can tank energy and consistencyespecially for teens.
FAQ: Quick Answers That Save You a Rabbit Hole
How long does it take to see arm definition?
Many people feel stronger within 2–4 weeks. Visible changes often show up around 6–12 weeks, depending on starting point, consistency, sleep, and overall
activity. Photos every 4 weeks can show progress better than the mirror’s daily mood swings.
Do I need weights?
Not necessarily. Bodyweight and resistance bands can build strength. Weights make progression easier, but they’re not mandatory.
What if my arms are soft even though I work out?
Totally possibleand normal. Genetics and overall body composition play a role. Keep building strength, keep moving, and let the timeline be realistic.
Extra : Real-Life “Experience” Notes (What It Feels Like When This Works)
Here’s the part most guides skip: the emotional and practical experience of trying to change your arms. Because the first few weeks can feel weirdly
anticlimacticlike you’re doing the work, but your arms haven’t gotten the memo yet.
Week 1–2: “Why are push-ups so humbling?” This is the phase where your muscles and nervous system are learning coordination. You might feel
shaky on presses, and your triceps may get sore in places you didn’t know existed. That’s normal. A surprisingly common win in this stage is
better posture: your shoulders sit a little taller because you’re strengthening your back and upper body. Even if your arms look the same, your
body can start to carry itself differently.
Week 3–4: “Oh… I’m actually stronger.” This is where you start adding reps without realizing it. The incline push-ups that felt impossible
now feel doable, and rows feel smoother. People often notice functional upgrades first: carrying groceries is easier, your backpack feels lighter, you can
hold a plank longer, or you stop avoiding sleeveless tops because you feel more confidentnot because your arms became “perfect,” but because you feel
more in control of your strength.
Week 5–8: The ‘shape’ phase begins. If you’ve been consistent, muscle tone starts to showespecially in shoulders and triceps. The back of
the arm can look firmer when the triceps develop. This is also when some people hit a plateau because they forget progressive overload. The fix is rarely
dramatic: add a set, slow the lowering phase, or bump the resistance slightly. The goal isn’t to annihilate yourself; it’s to give your body a new
reason to adapt.
Real talk: life interrupts. Travel happens. School gets busy. Work ramps up. The most successful people aren’t the ones who never miss a
workoutthey’re the ones who treat consistency like a long game. If you miss a week, you don’t “start over.” You resume. A simple strategy is having a
fallback plan: a 12-minute home session (push-ups, band rows, curls, triceps extensions) that keeps the habit alive when time is tight.
The confidence shift is sneaky. Many people report a moment where they realize they’re no longer “checking” their arms constantly. The
focus moves from appearance to capability: “I can do real push-ups now,” or “My shoulders feel stable,” or “I can lift heavier than I thought.” That’s a
healthier kind of progressand it tends to last.
Finally, remember: arms are supposed to move, carry, hug, lift, throw, and live life. When you train them with respectstrength, recovery, fuelyou’ll
usually get the look you want and a body that feels better to live in. That’s the real upgrade.
Conclusion
Getting rid of “flabby arms” isn’t about punishing your triceps into submission. It’s about building upper-body strength, staying active overall, and
supporting recovery with sleep and balanced nutrition. Stick to the 15 steps, train 2–3 times per week, progress gradually, and give it enough time for
your body to adapt. Strong arms aren’t a trickthey’re a habit.


