Table of Contents >> Show >> Hide
- Quick Navigation
- Before You Start (Avoid Regret)
- Tools & Materials Checklist
- Measure & Plan: Door Size, Swing, Rough Opening
- Remove the Old Door & Prep the Opening
- Install a Prehung Interior Door (Step-by-Step)
- Install a Prehung Exterior Door (Weatherproof Edition)
- Step 1: Prep the Sill (Flat, Solid, and Not Rotting)
- Step 2: Install Sill Pan / Pan Flashing
- Step 3: Flash the Opening (Think “Shingles”)
- Step 4: Dry-Fit, Then Seal
- Step 5: Plumb, Shim, and Fasten (Same Concept, Higher Stakes)
- Step 6: Insulate and Seal the Perimeter
- Step 7: Install Exterior Trim and Final Flashing Details
- Hang a Slab Door in an Existing Frame
- Trim, Hardware, and Finish Work
- Door Troubleshooting (Sticking, Gaps, Latch Issues)
- Safety & Code Notes
- Conclusion + DIY Door “Experience” Notes + SEO Tags
Installing a door sounds like the kind of thing you do once, swear loudly, and then pay someone forever after. The truth? With the right prep, a few basic tools, and a willingness to shim things that feel like they should already be straight (welcome to homeownership), you can absolutely nail a DIY door installation.
This guide covers the two common paths: installing a prehung door (door already mounted in a frame) and hanging a slab door (just the door panel, no frame). We’ll also talk interior vs. exterior doors, weatherproofing, hardware, troubleshooting, and the tiny gaps (reveals) that separate “pro-looking” from “my door is haunted.”
Before You Start (Avoid Regret)
A door install goes smoothly when you do three things upfront: pick the right door type, confirm measurements, and plan for flooring and trim.
Prehung vs. Slab: Which DIY Door Installation Is Best?
- Prehung door: Door is already attached to a jamb/frame. Usually the easiest DIY choice for replacing a door and frame together, especially if your current frame is damaged or out of square.
- Slab door: Just the door panel. Best when the existing jamb is in great shape and you want to keep your trim and frame. More precision work: hinge mortises, knob/latch boring, and fitting the slab to the opening.
Interior vs. Exterior Doors (Different Rules, Different Headaches)
Interior doors are mostly about fit, swing, and clean reveals. Exterior doors are about all of that plus water management, air sealing, and security. If it’s an exterior entry door, assume water is plotting against you and build accordingly.
Tools & Materials Checklist
You don’t need a truck full of tools, but you do need the right ones. Borrow, rent, or bribe a handy friend with pizza.
Core Tools
- 6′ level (or a 4′ level and patience)
- Tape measure and pencil
- Hammer or finish nailer (optional but faster)
- Drill/driver with bits (Phillips and/or square/torx as needed)
- Utility knife
- Shims (lots of themthis is not a “two shims” kind of project)
- Pry bar (for removal)
- Speed square (handy for checking corners and hinge layout)
For Slab Door Work
- Chisel set (sharp!)
- Router with hinge template/jig (optional but very nice)
- 2-1/8″ hole saw for the knob bore (typical)
- 1″ spade bit or hole saw for latch bore (typical)
- Planer or sanding block (for fine fitting)
- Circular saw + straightedge (for trimming door height/width)
For Exterior Doors
- Flashing tape
- Sill pan (store-bought or site-built) and/or pan flashing materials
- Exterior-grade caulk/sealant
- Minimal-expanding spray foam (window/door type)
- Long screws (3″ is a common choice for hinges and jamb anchoring)
Measure & Plan: Door Size, Swing, Rough Opening
1) Confirm Door Size (And What “Size” Means)
Doors get described by nominal size (like 30″ x 80″, often written as 2/6 x 6/8). But the actual slab and frame dimensions vary by manufacturer. If you’re buying a prehung door, check the label for the unit size and the recommended rough opening.
2) Check Door Swing (Left-Hand vs. Right-Hand)
Stand on the side where you pull the door toward you. If hinges are on the left, it’s a left-hand door; hinges on the right = right-hand. Also confirm if you want it to swing inward or outward (most exterior entry doors swing inward in the U.S., but there are exceptions).
3) Rough Opening Basics (The “Give Me Room to Shim” Rule)
A rough opening needs to be slightly larger than the prehung unit so you can shim it plumb, level, and square. Many manufacturer instructions target roughly about 1/2″ extra in width and height over the assembled unit. A common rule of thumb is that the rough opening is about 2″ wider and 2″ to 2-1/2″ taller than the nominal slab sizebut always trust the door’s specific instructions.
4) Flooring and Clearance: The Sneaky Detail
If you’re installing new flooring soon, plan for it now. The bottom gap (undercut) matters: too low and the door scrapes; too high and you get the “Why is there a wind tunnel in my hallway?” look. For exterior doors, the sweep should meet the threshold evenly to seal without binding.
Remove the Old Door & Prep the Opening
Remove an Interior Door (Quick Version)
- Pop hinge pins (tap upward with a nail set or screwdriver).
- Lift the slab off and set it aside.
- If replacing the whole unit, carefully pry off casing/trim.
- Cut nails/screws holding the jamb to studs and remove the frame.
Inspect the Opening
- Check the subfloor: Is it solid and level at the opening?
- Check studs: Are the trimmer studs straight? Any rot or damage?
- Check square: Measure corner-to-corner (diagonals). Not perfect? That’s what shims are for, within reason.
If the opening is wildly out of level or the framing is compromised, fix that first. A door can’t “average out” a bad opening. It will simply become a daily reminder.
Install a Prehung Interior Door (Step-by-Step)
Prehung interior door installation is the sweet spot for DIY: big visual payoff, manageable complexity. The goal is simple: hinge side plumb, head level, and even reveal around the slab.
Step 1: Dry-Fit and Brace
- Set the prehung unit into the rough opening.
- Center it so the jamb is reasonably even relative to the wall surface (so trim sits nicely later).
- Use a couple of temporary screws through the jamb (near hinge locations) to hold it loosely.
Step 2: Shim the Hinge Side Plumb (This Is the Boss Level)
Start on the hinge jamb. If the hinge side is wrong, everything is wronglike building a sandwich with the bread crooked.
- Place shims behind each hinge location between jamb and stud.
- Adjust shims until the hinge side jamb is perfectly plumb.
- Fasten through the jamb at shim points (finish nails or screws).
Pro-ish move: replace at least one short hinge screw with a long 3″ screw that bites into the stud. That helps keep the door aligned over time.
Step 3: Set the Reveal (Even Gap) and Secure the Latch Side
Close the door gently and look at the gap between door and jamb (the reveal). You’re chasing a consistent reveal, often around 1/8″ along the sides and top (manufacturer guidance wins if it differs).
- Shim the latch side near the strike plate area first (above and below where the latch will hit).
- Shim near the top and bottom on the latch side to keep the jamb straight.
- Fasten at shim points, checking the reveal as you go.
Step 4: Level the Head Jamb
If the head jamb is out of level, the reveal at the top will look like a slow-motion landslide. Adjust with shims behind the head jamb as needed, but don’t crush the frame.
Step 5: Final Fastening and Shim Trimming
- Open the door and add fasteners at remaining shim locations (hinge side and latch side).
- Score shims with a utility knife and snap them off flush with the wall.
- Test swing: door should open/close smoothly without rubbing.
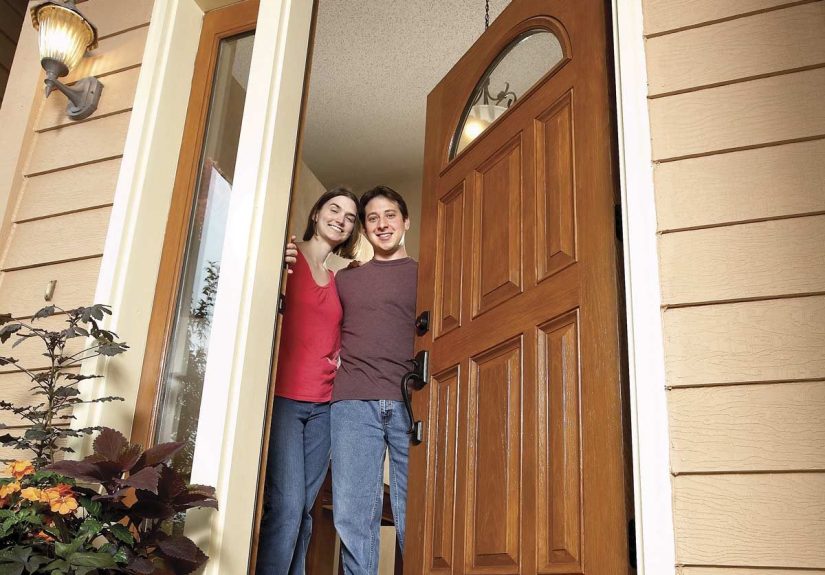
Install a Prehung Exterior Door (Weatherproof Edition)
Exterior door installation is half carpentry, half waterproofing strategy. The door can be perfectly plumb but if the sill pan and flashing are wrong, you’re basically inviting moisture to move in and start a book club in your subfloor.
Step 1: Prep the Sill (Flat, Solid, and Not Rotting)
- Remove old caulk, debris, and any rotted wood.
- Confirm the sill area is flat and stable.
- If needed, use shims or filler strips to create a level bearing surface for the threshold.
Step 2: Install Sill Pan / Pan Flashing
A sill pan helps direct any water that sneaks past the door back outside, instead of into your framing. Whether it’s a manufactured pan or site-built, it should be installed so water drains to the exterior (and seams should be sealed appropriately).
Step 3: Flash the Opening (Think “Shingles”)
Flashing tape should overlap in a way that directs water from top to bottom and outlike shingles, not like a backwards rain gutter. Many DIY guides recommend taping the sill first, then the sides, then the top.
Step 4: Dry-Fit, Then Seal
- Dry-fit the prehung exterior door to confirm it sits correctly.
- Remove it, then apply exterior-grade caulk/sealant per the manufacturer’s instructionsoften along the sill/pan and at jamb contact points.
- Set the door into the opening (this is easier with a helper unless you enjoy juggling heavy rectangles).
Step 5: Plumb, Shim, and Fasten (Same Concept, Higher Stakes)
- Plumb the hinge side first with shims behind hinge locations.
- Check the reveal and the way the slab sits against weatherstripping.
- Shim and fasten the latch side near lock/strike areas.
- Check that the door sweep meets the threshold evenly.
Step 6: Insulate and Seal the Perimeter
Use minimal-expanding foam made for windows and doors. Regular foam can expand like it’s trying to win a bodybuilding contest and bow your jamb inward, turning your “new door” into a “new problem.”
Step 7: Install Exterior Trim and Final Flashing Details
Add exterior casing/brickmold as needed, keep caulk joints neat, and ensure your flashing integrates with the water-resistive barrier so water flows down and out. Exterior doors reward careful layering.
Hang a Slab Door in an Existing Frame
Hanging a slab door is for DIYers who like precision. The payoff is keeping your existing jamb and trim, but you’ll be doing hinge layout, mortising, fitting, and boring.
Step 1: Confirm the Slab Will Fit (And Mark the “Top”)
- Measure the existing frame opening width and height in multiple spots.
- Compare to the slab size. Many slabs allow limited trimmingcheck the door’s documentation.
- Mark the top of the slab and the hinge edge so you don’t accidentally install it “upside down.” (It happens.)
Step 2: Transfer Hinge Locations
- Use the old door as a template if hinge spacing matches and the old door fit well.
- Otherwise, measure hinge positions from the existing jamb hinges and transfer to the new slab.
Step 3: Mortise Hinges (Chisel or Router)
Mortising means recessing the hinge leaf so it sits flush with the door edge and jamb. Flush hinges = smooth swing.
- Outline hinge with a knife (reduces tear-out).
- Chisel out to the depth of the hinge leaf, checking often.
- If you go too deep, shim behind the hinge leaf with thin material and try not to make eye contact with your mistake.
Step 4: Trim the Door (If Needed)
If the slab is slightly oversized, trim carefullypreferably with a straightedge guide. Remove small amounts and test fit. Door trimming is like haircuts: you can always take more off, but putting it back is… not a thing.
Step 5: Bore for the Lockset and Latch
Typical interior knob bore is 2-1/8″, with a latch bore often around 1″. Use a template/jig if possible. Confirm backset (commonly 2-3/8″ or 2-3/4″) so the latch aligns with your strike plate.
Step 6: Hang the Door and Fine-Tune
- Attach hinges to the slab, then set the slab in place and insert pins.
- Check gaps and swing.
- If the latch doesn’t hit cleanly, adjust strike plate position (or slightly enlarge the strike opening if necessary).
Trim, Hardware, and Finish Work
Install Door Casing/Trim
Once the unit is solid and operating correctly, install casing. Keep reveal around the jamb consistent so it looks intentional, not like you were chased away mid-cut by a swarm of angry tape measures.
Install Handle, Lock, and Strike Plate
- Follow hardware instructions for latch orientation and depth.
- If the latch sticks, check alignment before forcing it.
- Tighten screws evenlyover-tightening can bind some latch mechanisms.
Paint or Stain (Timing Matters)
Many doors are easier to finish before installation (especially slab doors). If you finish after, protect hinges, weatherstripping, and floors. Also: paint adds thickness. That can slightly change fit on a “perfect” doorso leave a little breathing room.
Door Troubleshooting (Sticking, Gaps, Latch Issues)
Problem: Door Rubs the Jamb
- Likely cause: hinge side not plumb, jamb bowed, or hinge screws loose.
- Fix: tighten hinges, add long screws into studs, and re-check plumb. Minor rubbing can sometimes be solved by adjusting hinge shims.
Problem: Big Gap at Top or Side (Reveal Looks Wrong)
- Likely cause: jamb not square, shims uneven, head jamb not level.
- Fix: adjust shimsespecially on the latch sideuntil reveal is consistent.
Problem: Latch Won’t Catch
- Likely cause: strike plate misaligned or door is sagging slightly.
- Fix: confirm hinges are tight, then adjust strike plate. If needed, carefully enlarge the strike opening (small amounts!) and keep it neat.
Problem: Exterior Door Leaks Air or Light Shows Around the Seal
- Likely cause: door not set correctly against weatherstripping, or threshold not adjusted.
- Fix: adjust threshold (if adjustable), confirm shimming at lock side, and verify the unit isn’t twisted.
Safety & Code Notes
- Exterior doors: in many areas, proper flashing/pan details are expected to prevent water intrusion. Follow manufacturer instructions and local code requirements.
- Between house and garage: these doors are often required to be fire-rated and self-closing depending on jurisdiction. Check local rules before swapping it for “whatever was on sale.”
- Tools: sharp chisels are safer than dull ones (dull tools slip). Eye protection is not optional if you like seeing.
Conclusion + DIY Door “Experience” Notes + SEO Tags
DIY door installation is mostly a game of patience and geometry. If you keep the hinge side plumb, shim thoughtfully, and chase a consistent reveal, your door will swing like it belongs in the housenot like it wandered in from a different dimension. Prehung doors are the easiest route for most homeowners; slab doors are great when the frame is worth keeping and you’re up for detail work.
Take your time, measure twice, and remember: doors are heavy, shims are cheap, and “close enough” becomes “why is this door weird?” every single day you live there.
What DIYers Learn the Hard Way (About of Real-World Wisdom)
Here’s the funny thing about installing a door: the door isn’t the hard part. The house is. Walls are rarely perfectly straight, floors are often out of level, and framing lumber has spent years quietly developing opinions. That’s why experienced DIYers obsess over the opening before they ever touch a screw gun. If your subfloor dips at the hinge side, the door can end up “self-closing” like a polite but pushy butler. If the header leans, your reveal becomes a modern art project.
Another lesson: don’t rush the shims. It’s tempting to shove a shim in, drive a fastener, and move onespecially when the door is awkwardly balanced and your arms are slowly turning into noodles. But shims are not just fillers; they’re steering wheels. A tiny tweak behind a hinge can fix a rubbing corner. A slightly thicker shim near the strike can stop a latch from being stubborn. The best approach is incremental: shim, check, fasten lightly, re-check, then commit. Think of it as relationship advice for carpentry.
Exterior doors teach a completely different flavor of humility: water management. Plenty of doors are “installed” in the sense that they stand upright and open and close. But the difference between a good exterior install and a future repair bill is the boring stuff sill pans, properly overlapped flashing tape, careful sealant placement, and insulation that doesn’t warp the frame. Minimal-expanding foam is a hero here. Over-expanding foam is a villain with excellent marketing.
Hardware has its own learning curve. The latch not catching is rarely a doorknob problemit’s usually alignment. Before you start carving the strike plate opening like you’re auditioning for a pumpkin-carving contest, check for hinge sag. Tighten hinge screws. Consider swapping one short screw for a long screw that grabs framing. Those small upgrades often fix the problem at the source instead of “treating the symptom.”
Finally, there’s the psychological experience: doors magnify tiny errors. A cabinet can be slightly off and nobody notices. A door that binds or shows a weird gap announces itself every time it moves. The upside is that doors are also incredibly teachable. By the time you’ve installed one, you understand plumb, level, square, reveals, and why carpenters carry shims the way chefs carry salt. The next door goes faster, looks better, and requires fewer “creative new words.” And that’s the real DIY win: not perfectionconfidence.


