Table of Contents >> Show >> Hide
- What Is a Toggle Switch?
- Before You Begin: Safety Comes First
- Tools and Materials You Will Need
- Choose the Right Toggle Switch
- Understand the Wiring Basics
- How to Install a Toggle Switch: Step-by-Step
- Step 1: Turn Off the Power
- Step 2: Verify the Power Is Off
- Step 3: Remove the Old Switch
- Step 4: Identify Line, Load, and Ground
- Step 5: Prepare the Wires
- Step 6: Connect the Ground Wire
- Step 7: Connect the Hot Wires
- Step 8: Fold the Wires Back Into the Box
- Step 9: Mount the Switch
- Step 10: Install the Cover Plate
- Step 11: Restore Power and Test
- Installing a Toggle Switch in a Low-Voltage Project
- Common Mistakes to Avoid
- When to Call an Electrician
- Troubleshooting After Installation
- Practical Experience Tips for Installing a Toggle Switch
- Conclusion
Installing a toggle switch sounds simple: remove the old switch, connect the new one, flip it, and enjoy the tiny click of victory. In real life, however, electrical work deserves more respect than that. A toggle switch may be small enough to fit in your palm, but it controls power that can shock you, damage equipment, or create a fire hazard if handled carelessly.
This easy step-by-step guide explains how to install a toggle switch safely, whether you are replacing a basic household light switch or adding a toggle switch to a low-voltage project, vehicle accessory, small appliance panel, or workshop control box. We will cover tools, switch types, wiring basics, safety checks, troubleshooting, and real-world experience tips that make the job smoother.
Important note: This guide is educational. Electrical codes vary by location, and some work may require a permit or licensed electrician. If you are not completely sure what you are looking at inside the electrical box, stop and call a qualified professional. Electricity is very useful, but it has terrible customer service.
What Is a Toggle Switch?
A toggle switch is a mechanical switch with a lever that moves between positions, usually up and down. It opens or closes an electrical circuit. In plain English, it either allows current to flow or stops it. Toggle switches are common in household lighting, equipment panels, automotive accessories, boats, shop tools, hobby projects, and control boxes.
The most familiar version is the standard wall light switch. You flip the lever up, the light comes on. You flip it down, the circuit opens, and the light goes off. Other toggle switches may control fans, pumps, LED light bars, battery-powered devices, or multiple circuits.
Before You Begin: Safety Comes First
The most important step in any toggle switch installation is not wiring. It is turning off the power and verifying that the power is off. Never rely on the switch position alone. A light being off does not always mean the box is safe. A circuit can still contain live wires, especially in older homes, multi-switch setups, or boxes with more than one circuit.
Basic Safety Rules
- Turn off the correct breaker before touching wires.
- Use a non-contact voltage tester or multimeter to confirm the wires are not energized.
- Never work on wet surfaces or with damp hands.
- Use switches rated for the voltage and amperage of the circuit.
- Do not install damaged, cracked, loose, or overheated switches.
- Call an electrician if you see aluminum wiring, burnt insulation, cloth-covered wire, buzzing, sparks, or unknown wiring.
For household 120-volt wiring, follow local electrical code and manufacturer instructions. For low-voltage projects, such as 12-volt DC accessories, the risk of shock is lower, but the risk of short circuits, melted wires, and battery fires still exists. Low voltage does not mean “no danger.” It just means the danger wears a smaller hat.
Tools and Materials You Will Need
Gather your tools before opening the box. Nothing ruins a confident DIY moment like holding a half-removed switch while hunting for a screwdriver with your elbow.
Common Tools
- Flathead screwdriver
- Phillips screwdriver
- Non-contact voltage tester
- Wire stripper
- Needle-nose pliers
- Electrical tape
- Wire connectors, if needed
- Multimeter, optional but helpful
- Flashlight or work light
Common Materials
- Correctly rated toggle switch
- Matching wall plate or mounting panel
- Grounding pigtail, if needed
- Mounting nut or screws, depending on switch style
- Replacement electrical box, only if the existing box is damaged or too small
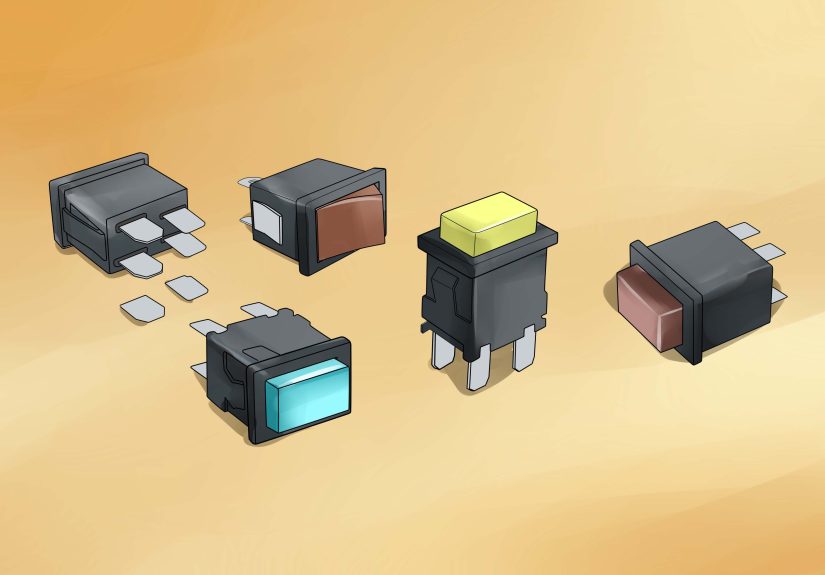
Choose the Right Toggle Switch
Toggle switches are not all the same. Before installation, match the switch to the job. The switch must be rated for the circuit’s voltage, amperage, current type, and wiring arrangement. A switch designed for a tiny electronics project should not be used on a household lighting circuit. Likewise, a household wall switch is not automatically the best choice for a DC battery circuit.
Single-Pole Toggle Switch
A single-pole switch controls one circuit from one location. This is the most common household light switch. It usually has two brass or dark terminal screws for the hot wires and one green ground screw.
Three-Way Toggle Switch
A three-way switch controls one light or fixture from two locations, such as at the top and bottom of a staircase. It has a common terminal and two traveler terminals, plus a ground screw. Do not replace a three-way switch with a single-pole switch unless the circuit is being redesigned correctly.
DPST and DPDT Toggle Switches
Double-pole and double-throw toggle switches are often used in equipment, automotive, marine, and electronic projects. A DPST switch can control two conductors at once. A DPDT switch can change the direction of current or switch between outputs. These are useful, but they require careful wiring based on the switch diagram.
AC vs. DC Ratings
A switch rating matters. AC and DC circuits behave differently when contacts open. A toggle switch rated for 15 amps at 120 volts AC may not be rated for the same amperage at DC voltage. Always read the label or product data. If the switch is not clearly rated for your application, choose another switch.
Understand the Wiring Basics
In a standard household single-pole switch, the switch usually interrupts the hot wire, not the neutral wire. The hot wire brings power in, the switched hot wire carries power out to the light or load, and the ground wire provides a safety path in case of a fault.
Typical Wire Colors in U.S. Residential Wiring
- Black or red: Usually hot wires.
- White or gray: Usually neutral wires, though sometimes re-marked as hot in older switch loops.
- Bare copper or green: Ground wire.
Do not rely on color alone. Previous repairs, older wiring methods, and unusual switch loops can make wire colors misleading. Always test and label wires before disconnecting them.
How to Install a Toggle Switch: Step-by-Step
The following steps describe replacing a basic single-pole wall toggle switch. For vehicles, boats, electronics, machinery, or control panels, the physical mounting may differ, but the same principles apply: disconnect power, identify wires, connect the correct terminals, secure the switch, and test safely.
Step 1: Turn Off the Power
Go to the electrical panel and turn off the breaker that controls the switch circuit. If the panel is poorly labeled, turn the light or device on first, then switch breakers off until the light or device shuts off. Once you find the correct breaker, leave it off.
For low-voltage battery systems, disconnect the battery or power supply. If there is a fuse, remove it. For vehicles, disconnect the negative battery terminal when appropriate. The goal is simple: no power should be present while you work.
Step 2: Verify the Power Is Off
Remove the wall plate screws and carefully take off the cover plate. Use a non-contact voltage tester around the switch terminals and wires. Test the voltage tester on a known live source before and after checking the switch so you know the tester is working.
If the tester indicates power, stop. You may have turned off the wrong breaker, or the box may contain more than one circuit. Do not continue until all wires you will touch are confirmed de-energized.
Step 3: Remove the Old Switch
Unscrew the mounting screws holding the switch to the electrical box. Gently pull the switch out without yanking the wires. Take a photo before disconnecting anything. This one-minute habit can save you from a long evening of staring into a wall like it owes you money.
Look at how the wires are attached. If the old switch uses screw terminals, loosen the screws and remove the wires. If it uses push-in backstab connections, release the wires according to the switch design or cut and re-strip them if enough length remains. Many electricians prefer side screw terminals because they provide a more secure connection.
Step 4: Identify Line, Load, and Ground
On a basic single-pole switch, one hot wire is the line, bringing power from the panel. The other is the load, carrying power to the light or device. A basic mechanical single-pole switch usually does not care which brass screw gets line or load, but identifying them is still good practice.
The bare copper or green wire is the ground and should connect to the green screw on the switch. If the electrical box is metal, it may also need to be bonded to ground with a grounding pigtail.
Step 5: Prepare the Wires
Inspect the wire ends. If they are nicked, burnt, loose, or badly bent, cut off the damaged end and strip fresh insulation. Most switches include a strip gauge on the device body or instructions. Strip only the amount required. Too much bare copper creates a short-circuit risk; too little may create a loose connection.
For screw terminals, bend the wire into a small hook with needle-nose pliers. Wrap the hook clockwise around the screw so tightening the screw pulls the wire in instead of pushing it out.
Step 6: Connect the Ground Wire
Attach the bare copper or green ground wire to the green ground screw. Tighten it securely. The ground connection is not decorative. It is a key safety feature that helps reduce shock risk if a fault occurs.
Step 7: Connect the Hot Wires
Connect one hot wire to one switch terminal and the second hot wire to the other switch terminal. Tighten the screws firmly, but do not over-tighten to the point of damaging the device. No bare copper should be exposed beyond the terminal area.
If the new switch has different colored screws, read the manufacturer’s instructions. For a standard single-pole switch, the two main terminals are usually interchangeable. For three-way, four-way, illuminated, pilot-light, smart, or specialty switches, terminal placement matters a lot.
Step 8: Fold the Wires Back Into the Box
Carefully fold the wires into the box. Do not crush them. Do not force the switch into a crowded box. If the box is too full, damaged, or missing proper grounding, pause and fix the underlying issue. Electrical boxes have fill limits, and stuffing wires into a too-small box is not a clever shortcut. It is a tiny electrical closet with claustrophobia.
Step 9: Mount the Switch
Place the switch into the box and align it vertically. Tighten the mounting screws. For a wall switch, the word “ON” should usually be readable when the switch is installed correctly. If the switch has no marking, many people install it so the light turns on when the toggle is flipped upward.
Step 10: Install the Cover Plate
Reinstall the wall plate or panel cover. Tighten the screws until snug. Avoid over-tightening plastic plates because they can crack. A cracked plate may seem minor, but it can expose gaps and make the installation look like it lost a fight with a screwdriver.
Step 11: Restore Power and Test
Turn the breaker or power supply back on. Flip the toggle switch and confirm the connected light or device works correctly. Listen for buzzing. Smell for burning odors. Feel near the switch plate after a few minutes; it should not become unusually warm. If the breaker trips, the switch sparks, the fixture flickers, or anything seems wrong, turn the power off immediately and inspect the wiring or call an electrician.
Installing a Toggle Switch in a Low-Voltage Project
For 12-volt or 24-volt projects, such as LED strips, fans, automotive lights, or small DC equipment, the steps are similar but the details change. Choose a switch rated for DC use and for the current your device will draw. Add a fuse close to the power source. Use wire sized for the amperage and distance. Mount the switch in a clean, dry, secure panel.
A common low-voltage setup is: power source positive to fuse, fuse to switch input terminal, switch output terminal to the device positive wire, and device negative wire back to the power source negative. In many DC projects, the switch interrupts the positive conductor. Use insulated terminals or heat-shrink connectors to prevent accidental shorts.
Common Mistakes to Avoid
Using the Wrong Switch Rating
Never guess on ratings. Match voltage, amperage, AC or DC type, and load type. Motors and inductive loads can require switches with special ratings because they create extra stress when starting and stopping.
Ignoring the Ground Wire
If the switch has a ground terminal, connect it properly. If there is no ground in the box, do not improvise. Older wiring may require professional evaluation.
Mixing Up Three-Way Switch Wires
Three-way switches are easy to confuse because they use traveler wires and a common terminal. Mark the common wire before removing the old switch. If you forget, troubleshooting becomes a puzzle, and nobody invited puzzles to switch day.
Leaving Loose Connections
Loose connections create heat, flickering, arcing, and failure. Tug gently on each wire after tightening it. If it moves, reconnect it.
Overcrowding the Box
If the new switch is larger than the old one, especially with smart switches or illuminated toggles, make sure the electrical box has enough space. A crowded box can damage insulation and make future repairs difficult.
When to Call an Electrician
Some toggle switch installations are beginner-friendly. Others are not. Call a licensed electrician if you encounter aluminum wiring, knob-and-tube wiring, burnt wires, no grounding, multiple unknown cables, a tripping breaker, moisture, buzzing, melted insulation, or wiring that does not match the diagram. Also call a professional if local law requires licensed installation.
A professional may cost more than doing it yourself, but it is cheaper than repairing fire damage or explaining to your family why the hallway light now controls the toaster.
Troubleshooting After Installation
The Switch Does Nothing
Turn the power off and check that the breaker is on, the bulb or device works, and the wires are connected to the correct terminals. In a DC project, check the fuse and polarity.
The Breaker Trips
A tripping breaker may indicate a short circuit, incorrect wiring, damaged insulation, or overloaded circuit. Turn the breaker off and do not keep resetting it. Repeated resets can make a problem worse.
The Switch Feels Warm
A standard toggle switch should not feel hot. Warmth may indicate overload, loose wiring, wrong switch rating, or a defective device. Turn off power and investigate.
The Light Flickers
Flickering can come from loose connections, incompatible bulbs, bad fixtures, or circuit problems. Recheck the switch connections first, then evaluate the fixture and circuit.
Practical Experience Tips for Installing a Toggle Switch
After installing a few toggle switches, you learn that the actual wiring is only part of the job. The real secret is preparation, patience, and not trusting your memory when a smartphone photo can do the job better. Before removing an old switch, always take clear photos from two angles. Capture the screw colors, wire positions, and cable entry points. If you are replacing more than one switch in a multi-gang box, label each wire with tape. Future-you will be very grateful, and future-you is notoriously hard to impress.
Another useful habit is to test your voltage tester before every job. Touch it to a known live outlet, confirm it responds, then test the switch box. After testing the box, check the tester again on a live source. This verifies that the tester did not fail silently. It may sound excessive, but safety habits are supposed to be repetitive. That is why they work.
When working in older homes, expect surprises. You may open a switch box and find wires that do not match modern color expectations. A white wire may be used as a hot conductor in a switch loop. A box may have no ground. A previous homeowner may have performed what can only be described as “creative electrical poetry.” Do not assume. Test, label, and research the circuit. If the wiring looks suspicious, call an electrician.
For cleaner installations, fold wires neatly into the box instead of shoving them behind the switch. Make gentle accordion folds so the wires sit naturally when the device is pushed in. This reduces stress on terminals and makes the switch sit flush. If the switch refuses to fit, do not force it with the mounting screws. Pull it back out and reorganize the wires. Screws are for fastening, not for compacting copper spaghetti.
In low-voltage projects, use proper connectors instead of twisting wires together and wrapping them with tape. Crimp terminals, heat-shrink connectors, terminal blocks, and inline fuse holders make the installation safer and more durable. If the project is in a vehicle or boat, vibration matters. A connection that seems fine on the workbench may loosen after a few weeks of bumps, heat, and movement. Use strain relief and secure loose wiring with clips or ties.
Switch placement also matters. Put the toggle where it is easy to reach but protected from accidental bumps. In a workshop, avoid placing switches where cords, lumber, or tools can hit them. In a vehicle, avoid knee-level locations where the switch can be flipped unintentionally. For outdoor or damp locations, use weather-rated switches and covers designed for the environment.
Finally, test slowly. After restoring power, do not immediately button everything up mentally and walk away. Flip the switch several times. Watch the light or device. Listen for odd sounds. Check that the cover plate sits flat. After a few minutes of use, confirm the switch is not unusually warm. A good toggle switch installation should feel boring when finished. No sparks, no smells, no drama. Just a satisfying click and a device that behaves exactly as expected.
Conclusion
Learning how to install a toggle switch is a useful DIY skill, but it should always be approached with care. The basic process is simple: choose the correct switch, turn off power, verify the circuit is dead, document the old wiring, connect the new switch properly, secure everything neatly, and test the result. The difference between a safe installation and a risky one often comes down to small details: tight terminals, correct ratings, proper grounding, and knowing when to stop.
For a basic single-pole replacement, many careful homeowners can handle the job with common tools and a healthy respect for electricity. For complex wiring, older homes, three-way circuits, smart switches, aluminum wiring, or anything that looks burned or confusing, bring in a licensed electrician. The best toggle switch installation is not just one that works today. It is one that keeps working safely tomorrow, next month, and long after everyone has forgotten who installed it.


