Table of Contents >> Show >> Hide
- Why Insulate a Drop Ceiling in the First Place?
- Best Insulation Options for a Drop Ceiling
- How to Insulate a Drop Ceiling: 6 Steps
- Step 1: Inspect the Ceiling and Fix Problems Before You Insulate
- Step 2: Choose the Right Insulation for Your Goal
- Step 3: Measure the Space and Air-Seal What You Can
- Step 4: Support the Insulation Properly
- Step 5: Protect Lights, Ducts, and Heat Sources
- Step 6: Reinstall Tiles, Check Performance, and Fine-Tune
- Common Mistakes to Avoid
- Is DIY Drop Ceiling Insulation Worth It?
- Real-World Experiences and Lessons From Drop Ceiling Insulation Projects
- Final Thoughts
- SEO Tags
If your drop ceiling feels like it is doing a great job of hiding pipes but a terrible job of keeping your room comfortable, you are not imagining things. A suspended ceiling can make a basement, office, rec room, or workshop look tidy, but it also creates a gap where heat, sound, and drafts love to wander around like they own the place.
The good news is that insulating a drop ceiling is usually a manageable project if you plan it well. The even better news is that you do not need to turn your ceiling into a stuffed suitcase. The right insulation, installed the right way, can improve comfort, reduce noise, and help energy efficiency without warping tiles, blocking access, or creating code headaches.
This guide walks you through how to insulate a drop ceiling in 6 steps, with practical advice for homeowners who want real results instead of a ceiling that looks fine but performs like a paper napkin in a windstorm.
Why Insulate a Drop Ceiling in the First Place?
Before diving into tools and materials, it helps to know what drop ceiling insulation actually does. In most homes, insulating above a suspended ceiling can help with three main goals:
- Thermal comfort: It reduces heat transfer between rooms or between a finished basement and the floor above.
- Sound control: It softens voices, footsteps, TV noise, and the general soundtrack of family life.
- Energy efficiency: It can help conditioned air stay where it belongs instead of drifting into unused spaces.
That said, not every ceiling needs the same strategy. If your priority is warmth, you will care more about R-value. If your priority is noise reduction, mineral wool insulation and acoustic components often perform better than standard fiberglass alone. And if your priority is access to plumbing, ductwork, or wiring, the installation method matters just as much as the insulation type.
Best Insulation Options for a Drop Ceiling
There is no single magic product for every suspended ceiling. The best choice depends on your ceiling height, the weight your system can handle, your climate, and whether you care more about soundproofing or energy savings.
Fiberglass Batts
Fiberglass batts are affordable, widely available, and effective for reducing heat transfer. They are a common choice when there is enough depth above the grid or when the insulation can be secured to the framing above rather than resting on the tiles. The catch? Fiberglass loses performance when compressed, so squeezing a thick batt into a tight space is not a clever trick. It is just a fluff-flattening mistake.
Mineral Wool
Mineral wool, sometimes called stone wool, is denser than fiberglass and is often the better pick for ceiling sound insulation. It also handles heat and fire exposure well and resists moisture better than many people expect. If you want a quieter basement office or media room, mineral wool deserves a serious look.
Pre-Cut Backer Panels or Drop-Ceiling Insulation Panels
Some suspended ceiling systems use lightweight insulation backers or pre-cut panels sized to sit above specific ceiling tiles. These can be convenient for improving sound control and modest thermal performance, especially when the manufacturer approves the setup. They are not the same thing as tossing a heavy batt on top of random tiles and hoping for the best.
How to Insulate a Drop Ceiling: 6 Steps
Step 1: Inspect the Ceiling and Fix Problems Before You Insulate
Insulation is not a magic eraser. If there is a leak, condensation issue, damaged grid, sagging tile, or questionable old ceiling material, deal with that first. Insulating over moisture problems only hides them until they turn into a larger, smellier, more expensive surprise.
Start by removing a few tiles and checking the cavity above. Look for:
- Roof or plumbing leaks
- Condensation on ducts or pipes
- Loose wiring or unsupported fixtures
- Mold, water stains, or rust
- Damaged or weak grid components
If the house is older and the ceiling materials are suspicious, do not disturb them casually. Have suspect materials evaluated before tearing into them. Also confirm whether the ceiling is part of a fire-rated assembly or is installed beneath sprinklers. In those cases, you cannot improvise with insulation and hope local code will clap politely.
Step 2: Choose the Right Insulation for Your Goal
Now decide what kind of performance you want. If the room below is too cold, prioritize thermal value. If footsteps from upstairs sound like a herd of determined raccoons, prioritize acoustic performance. If you want both, choose materials that provide a sensible balance.
Here is a practical way to choose:
- Use fiberglass batts if you want an economical solution and have space to install them without crushing them.
- Use mineral wool if sound reduction matters more and you want a denser product that handles irregular spaces well.
- Use manufacturer-made ceiling backers or panels if your suspended ceiling system is designed for them and you want a simple upgrade above the tiles.
Whatever you choose, match the thickness to the available space. More insulation is not always better if it gets compressed. An insulation batt that is too thick for the cavity can lose effectiveness, create pressure on tiles, and make your drop ceiling act like it regrets meeting you.
Also think about vapor retarders carefully. In some assemblies and climates, faced insulation may be appropriate. In others, unfaced insulation is the better choice. The safe rule is to follow local code and manufacturer guidance for your climate zone and assembly.
Step 3: Measure the Space and Air-Seal What You Can
This step is less glamorous than buying insulation, but it is often where the performance gains really happen. Air leaks can steal comfort even when insulation is present, so seal gaps before installing the insulation whenever possible.
Measure the distance between framing members, note the depth available above the ceiling, and map obstacles such as:
- Recessed lights
- Ducts and boots
- Pipes and shutoff valves
- Electrical boxes
- Cable bundles and low-voltage lines
- Access points you may need later
Then seal obvious gaps with materials appropriate to the opening. Small cracks may call for caulk. Larger penetrations may need foam sealant. The goal is not to mummify the ceiling cavity. The goal is to reduce uncontrolled air movement while preserving safe ventilation and service access where required.
This is also the time to clean the area. Dust, old debris, and mystery crumbs on top of tiles are common in drop ceilings. No one knows exactly where they come from. They simply appear, like glitter after a school project.
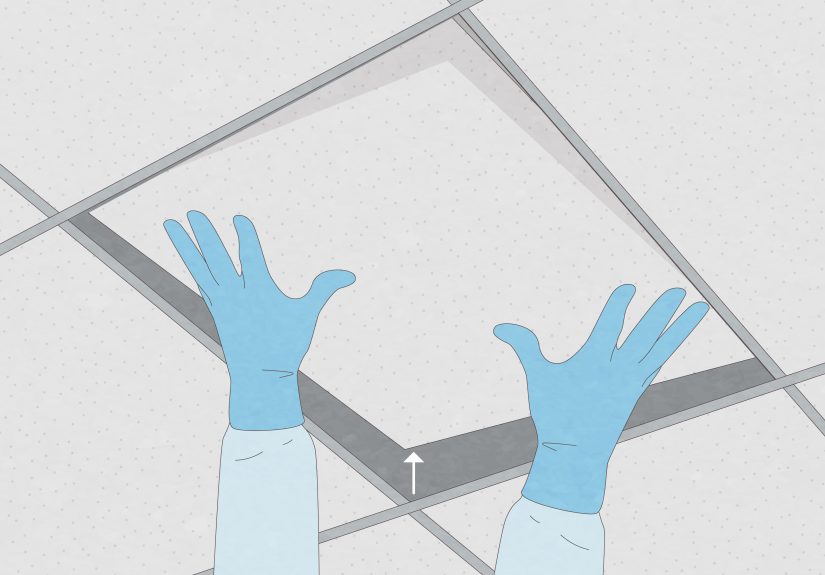
Step 4: Support the Insulation Properly
This is the step that separates a good project from a sagging one. Standard batt or roll insulation should generally be supported by the framing above, insulation supports, wires, mesh, or another approved method. Do not assume the ceiling tiles themselves are meant to carry heavy insulation.
If you are using batts between joists above a suspended ceiling, cut them neatly and fit them snugly without crushing them. If you are using insulation in the plenum area above the grid, secure it to the structure above rather than dropping weight directly onto the tiles unless your specific ceiling system explicitly allows that setup.
In practical terms:
- Use insulation supports, wire stays, or netting for joist cavities.
- Keep batts full thickness for rated performance.
- Avoid gaps at edges and around penetrations.
- Do not block access to junction boxes, valves, or service points.
If you are using pre-cut backer panels or approved drop-ceiling insulation pads, install them as a matched system with the tiles. These products are often designed to be lightweight and sized correctly. That is very different from improvising with oversized batts that make each tile feel like it is carrying a small mattress.
Step 5: Protect Lights, Ducts, and Heat Sources
This is the step where safety gets bossy, and honestly, that is a good thing. Insulation should never be jammed around hot fixtures, flues, or other heat-producing components without proper clearance. Recessed lights are a common trouble spot. Some fixtures are rated for insulation contact, and some absolutely are not.
As you install, make sure you:
- Maintain required clearance around non-IC recessed lights
- Keep insulation away from chimneys, flues, and exhaust components
- Do not cover vents that need airflow
- Protect ductwork prone to condensation
- Leave serviceable mechanicals accessible
If your drop ceiling is beneath lighting fixtures, sprinkler heads, or HVAC equipment, verify that your changes will not interfere with how those systems operate. A ceiling project is a terrible time to accidentally reinvent the concept of trapped heat.
Step 6: Reinstall Tiles, Check Performance, and Fine-Tune
Once the insulation is in place, reinstall the ceiling tiles carefully. Watch for any signs of sagging, bowing, or poor fit. Tiles should sit flat in the grid, not bulge upward like they are trying to send an SOS.
After reassembly, do a final inspection:
- Are the tiles sitting evenly?
- Is any insulation visible or pressing on the panels?
- Can you still access shutoffs, boxes, and equipment?
- Are there any drafts you can still feel?
- Has the room become quieter or more comfortable?
If needed, label removable access tiles for future service locations. That small step can save a lot of frustration later when you are standing on a ladder wondering which tile hides the plumbing valve and which tile hides nothing but regret.
Common Mistakes to Avoid
- Compressing insulation: Compressed batts lose performance, so choose the right thickness instead of forcing the fit.
- Resting heavy insulation on the tiles: Many tiles and grids are not designed for that load.
- Ignoring moisture: Wet insulation is bad at its job and excellent at causing other jobs.
- Blocking access: Plumbing, electrical, and HVAC components still need maintenance.
- Forgetting code issues: Fire-rated ceilings, recessed lights, and sprinklered spaces require extra caution.
- Assuming soundproofing and insulation are identical: They overlap, but they are not the same goal.
Is DIY Drop Ceiling Insulation Worth It?
For many homeowners, yes. If your suspended ceiling is in a basement office, den, workshop, or family room, adding the right insulation can make the space feel noticeably warmer, quieter, and less echo-prone. It can also make the floor above feel less noisy from below. That is a win for everyone, especially the person trying to take a Zoom call while someone upstairs practices competitive heel-walking.
Still, if your ceiling includes complex wiring, recessed can lights, questionable older materials, or a fire-rated assembly, hiring a pro may be the smarter route. A neat ceiling is nice. A safe ceiling is nicer.
Real-World Experiences and Lessons From Drop Ceiling Insulation Projects
One of the most common experiences people report after insulating a drop ceiling is that the room changes in ways they did not fully expect. Yes, it often feels warmer. That part makes sense. What surprises people is how different the room sounds. A basement office that once echoed suddenly feels calmer. A TV room stops sounding like the audio is bouncing off every hard surface. Even casual conversations become easier because the room no longer has that hollow “unfinished basement pretending to be a living space” vibe.
Another common lesson is that planning matters more than speed. Many first-time DIYers think the job will be mostly about cutting insulation and dropping it into place. In reality, the time goes into inspecting, moving tiles, locating wires, tracing ducts, checking lights, and figuring out which obstacles are harmless and which ones mean “stop and rethink this.” Homeowners who rush usually end up redoing sections because a batt was too thick, a tile bowed, or a shutoff valve disappeared behind a fluffy fortress.
There is also a huge difference between a room that is merely insulated and one that is both insulated and air-sealed. People often expect insulation alone to solve every comfort problem, but real projects show that drafts around pipe penetrations, rim areas, and duct openings can keep stealing performance. Once those leaks are addressed, the insulation starts earning its paycheck.
Noise control brings its own set of experiences. If the goal is to reduce footsteps and voices from upstairs, many homeowners discover that standard fiberglass helps somewhat, but denser mineral wool often makes a more noticeable difference. On the other hand, if the biggest complaint is the boominess inside the basement, better acoustic tiles and soft furnishings can matter just as much as what goes above the ceiling. In other words, the best results often come from a combination strategy rather than one miracle product.
People also learn quickly that access matters. A drop ceiling is popular for a reason: it gives you a way back in. The smartest projects preserve that convenience. Experienced installers leave clear routes to electrical junctions, valves, cleanouts, and equipment that may need service later. They also label important tile locations. It sounds minor until the day you need to shut off water fast and do not have time to play ceiling roulette.
Finally, the emotional experience is worth mentioning. Ceiling work is overhead work, and overhead work has a special talent for making your shoulders file formal complaints. But once the project is finished, homeowners often say the room feels more “complete.” It is not just warmer or quieter. It feels intentional. That is the real payoff of insulating a drop ceiling correctly: not just lower heat loss or better sound control, but a room that finally behaves like part of the home instead of a leftover space with ambitions.
Final Thoughts
If you want a more comfortable room without giving up the service access that makes suspended ceilings so practical, insulating a drop ceiling is a smart upgrade. The trick is to choose the right material, avoid compressing it, support it correctly, and respect the safety rules around lights, moisture, and code requirements.
Done well, this project can improve comfort, reduce noise, and make your ceiling system work harder than just hiding pipes and looking innocent. Done poorly, it can create sagging tiles, blocked access, and expensive do-overs. So measure carefully, install thoughtfully, and remember: ceiling tiles are a finish surface, not weightlifters.