Table of Contents >> Show >> Hide
- What “Perfect Coffee” Actually Means
- What You Need Before You Start
- The Golden Starting Formula
- How to Make the Perfect Coffee: Step-by-Step with Pictures
- Step 1: Choose Fresh Beans You Actually Like
- Step 2: Measure Your Coffee and Water
- Step 3: Grind the Beans Right Before Brewing
- Step 4: Heat the Water and Rinse the Filter
- Step 5: Add the Coffee and Bloom
- Step 6: Do the Main Pour Slowly and Evenly
- Step 7: Let It Draw Down
- Step 8: Swirl, Sip, and Adjust
- How to Troubleshoot Your Coffee Like a Home Barista
- Mistakes That Ruin an Otherwise Great Cup
- How to Store Coffee for Better Flavor
- Easy Variations for Different Brewing Methods
- Experience Section: What Making “Perfect Coffee” Really Teaches You
- Final Sip
- SEO Tags
Note: Replace the sample image file paths below with your own original photos before publishing.
Making the perfect coffee at home is a little like making great toast: it sounds insultingly simple until you realize there are about twelve tiny ways to mess it up. Too hot, too cold, too fine, too coarse, too much coffee, too little coffee, stale beans, sad water, mysterious bitterness, weird sourness. Suddenly your “simple cup” is acting like a chemistry final.
The good news is that excellent coffee is not reserved for baristas with sleeve tattoos and a deep emotional attachment to gooseneck kettles. With the right coffee-to-water ratio, fresh beans, proper grind size, and a repeatable method, you can make a cup that tastes balanced, smooth, and honestly a little smug. This guide shows you exactly how to make the perfect coffee step by step, with picture placeholders, easy troubleshooting, and practical tips you can actually use before your brain has fully booted up in the morning.
What “Perfect Coffee” Actually Means
Perfect coffee does not mean “the strongest possible cup that can wake the neighbors.” It means a brew that tastes balanced. You should get sweetness, aroma, and clarity, not a mug full of bitterness or a sip that tastes like someone waved a coffee bean over hot water and called it a day.
In practical terms, a great cup usually has:
- a clean, pleasant aroma
- sweetness and body without harsh bitterness
- brightness without sourness
- a smooth finish that makes you want another sip instead of an apology
For this article, the “perfect coffee” method is a simple pour-over style cup because it gives you the most control and teaches the basics fast. Once you understand this method, your drip machine, French press, and iced coffee all get better too.
What You Need Before You Start
You do not need a café-sized budget, but a few tools matter more than others.
- Fresh whole coffee beans: buy what you can finish in a couple of weeks
- Burr grinder: for a more even grind and more even extraction
- Digital scale: because “a scoop” is chaos wearing a polite hat
- Kettle: a gooseneck helps, but any kettle works
- Pour-over dripper and paper filter: or a standard drip machine with a basket filter
- Filtered water: coffee is mostly water, so ugly water makes ugly coffee
- Timer: your phone is fine
The Golden Starting Formula
If you remember only one thing from this coffee brewing guide, remember this ratio: start with 1 gram of coffee for every 16 to 17 grams of water. That is the sweet spot for a lot of home brewers because it gives you a cup with enough strength, but not so much concentration that the flavor falls off a cliff.
A reliable single-mug recipe looks like this:
- Coffee: 22 grams
- Water: 350 grams
- Grind size: medium, like coarse sand
- Water temperature: 195–205°F
- Total brew time: about 2 minutes 30 seconds to 4 minutes
If you do not own a thermometer, boil the water, then let it sit for about 30 to 45 seconds before pouring. No drama. No lab coat required.
How to Make the Perfect Coffee: Step-by-Step with Pictures
Step 1: Choose Fresh Beans You Actually Like

The best coffee beans for home brewing are the ones that match your taste. If you like chocolate, nuts, and low drama, medium roasts from Latin America are a friendly place to start. If you love fruit, citrus, and a brighter cup, try an African single-origin coffee. If you want something rich and cozy, go a little darker, but not so dark the bean tastes like it lost a fight with a campfire.
Look for a roast date if possible. Whole beans stay flavorful longer than pre-ground coffee, which tends to lose aroma faster once exposed to air. Translation: grinding fresh is one of the easiest ways to make your coffee taste more expensive than it was.
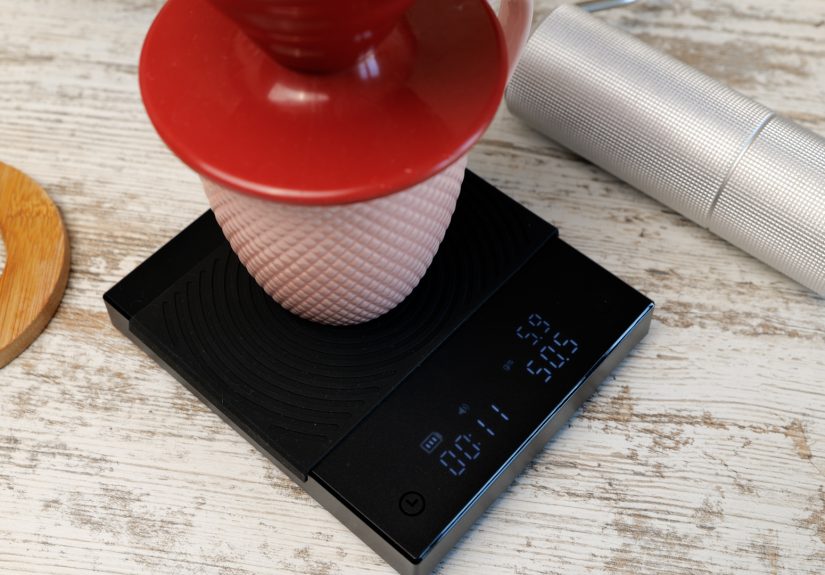
Step 2: Measure Your Coffee and Water

Measure 22 grams of coffee and 350 grams of water. Eyeballing coffee is fun in the same way that guessing on a math test is fun: technically possible, emotionally risky.
Using weight instead of tablespoons makes your brew repeatable. When you find a cup you love, you can make it again tomorrow instead of spending your morning wondering why today’s coffee tastes like an accident.
Step 3: Grind the Beans Right Before Brewing

For pour-over coffee, use a medium grind. Think coarse sand, not powder and not pebbles. Grind too fine and the water moves too slowly, pulling out bitter flavors. Grind too coarse and the water rushes through, leaving your cup sour, weak, or oddly lifeless.
This is why a burr grinder matters. A blade grinder can create a weird mix of dust and boulders, which sounds like a landscaping issue and tastes nearly as messy.
Step 4: Heat the Water and Rinse the Filter

Heat your water to 195–205°F. Place the paper filter in the dripper and rinse it thoroughly with hot water. This does two helpful things: it gets rid of papery taste and warms up your dripper and mug. Then discard the rinse water from the mug.
It is a small step, but small steps are where good coffee lives. Skip it and your coffee may taste faintly like someone brewed it through a homework assignment.
Step 5: Add the Coffee and Bloom

Add the ground coffee to the rinsed filter and gently shake it flat. Start your timer. Pour just enough water to wet all the grounds, about 45 to 60 grams for a 22-gram dose. Let the coffee bloom for 30 to 45 seconds.
This bloom stage lets trapped carbon dioxide escape from the grounds. In normal human language, it helps the coffee stop fizzing and start extracting more evenly. If your beans are fresh, the bloom may puff up dramatically. Congratulations: your coffee is alive, but in a good way.
Step 6: Do the Main Pour Slowly and Evenly

After the bloom, continue pouring in slow, controlled circles, starting in the center and moving outward without splashing the filter walls too much. Add water in stages until you reach 350 grams total.
A simple rhythm works well:
- pour to 150 grams
- pause briefly
- pour to 250 grams
- pause briefly
- finish at 350 grams
The goal is even saturation, not a heroic waterfall. Pouring too aggressively stirs up the coffee bed and can make extraction less consistent. Gentle, steady, boring-looking pours often make the tastiest cup. Coffee rewards calm energy, which is irritatingly mature of it.
Step 7: Let It Draw Down

Once you hit your target water weight, let the coffee finish draining. Total brew time should land somewhere around 2:30 to 4:00, depending on your brewer, filter, beans, and grind size.
If the coffee drains much faster, your grind is likely too coarse. If it drags on forever, your grind is probably too fine. You are not failing. You are dialing in, which is coffee’s fancy way of saying “make a small adjustment and try again.”
Step 8: Swirl, Sip, and Adjust

Give the mug a gentle swirl and take a sip once it cools slightly. Very hot coffee hides detail. Once the temperature drops a bit, you can actually taste whether the cup is sweet, balanced, bitter, sour, weak, or just generally confused.
Make only one change at a time on your next brew. Adjust the grind first before changing everything else. That is the easiest way to improve coffee fast without accidentally creating a science project.
How to Troubleshoot Your Coffee Like a Home Barista
If Your Coffee Tastes Sour
Your coffee is likely under-extracted. Try a slightly finer grind, a slightly hotter water temperature, or a longer brew time.
If Your Coffee Tastes Bitter
Your coffee is likely over-extracted. Try a slightly coarser grind, a slightly cooler water temperature, or a gentler pour.
If Your Coffee Tastes Weak
Use a little more coffee, or reduce the total water slightly. You may also be grinding too coarse.
If Your Coffee Tastes Muddy or Flat
Your beans may be old, your grind may be inconsistent, or your water may be poor. Fresh beans and filtered water fix a shocking number of coffee problems.
Mistakes That Ruin an Otherwise Great Cup
- Using stale pre-ground coffee: convenience is nice, but flavor pays the price
- Skipping the scale: inconsistency sneaks in fast
- Using boiling water straight away: this can push extraction too hard
- Ignoring grind size: it is one of the biggest drivers of taste
- Storing coffee badly: air, light, heat, and moisture are flavor thieves
- Changing five variables at once: now you do not know what helped or hurt
How to Store Coffee for Better Flavor
Store whole beans in an airtight container in a cool, dark place. Keep them away from heat, sunlight, and kitchen moisture. Do not leave the bag open on the counter like a tiny bean sacrifice to the oxygen gods.
If you buy a large amount, divide it into smaller airtight portions. Use one now and keep the rest sealed. Ground coffee loses freshness faster than whole beans, so grind only what you need right before brewing whenever possible.
Easy Variations for Different Brewing Methods
For Drip Coffee Makers
Use the same ratio, about 1:16 to 1:17, with a medium to medium-coarse grind. The machine does the pouring, but the same rules still matter: good beans, good water, correct measurement.
For French Press
Use a coarser grind and steep for about 4 minutes. French press coffee is fuller-bodied because more oils stay in the cup. It is the comfy sweater version of coffee.
For Iced Coffee
Brew slightly stronger, then pour over ice, or use a Japanese-style iced coffee method where part of the brew water is replaced with ice in the server. This keeps the coffee bright instead of tasting watered down and emotionally distant.
Experience Section: What Making “Perfect Coffee” Really Teaches You
The funny thing about learning how to make the perfect coffee is that the process starts off feeling technical and ends up becoming personal. At first, you obsess over grams, seconds, grind settings, kettles, and whether your medium grind is truly medium or just aggressively optimistic. Then, somewhere between your tenth and fifteenth decent cup, the routine begins to feel less like a recipe and more like a ritual.
Most people have had this experience without even realizing it. You make coffee one morning and it is incredible. Sweet, aromatic, smooth, balanced. You stand in your kitchen acting like you personally invented beans. The next day, you do what feels like the exact same thing, and the cup tastes dull or harsh. That is when coffee humbles you. Not cruelly. Artistically.
Over time, those small differences start to teach you something. You notice that stale beans flatten the cup long before they become undrinkable. You realize that a cheap grinder can produce a brew that tastes both bitter and sour at the same time, which feels rude but is actually useful feedback. You discover that water temperature matters, though not in a dramatic movie-trailer kind of way. It matters quietly, like lighting in a restaurant or salt in soup.
You also learn that “perfect” is not fixed. A bright, juicy Ethiopian coffee may taste amazing as a light, tea-like pour-over, while a chocolatey Colombian might shine when brewed a little stronger with more body. Some mornings call for elegance. Other mornings call for survival. Coffee understands this.
There is also the sensory side of the experience, which is half the magic. Grinding fresh beans changes the smell of your kitchen. The bloom rises and releases a warm cloud of aroma that tells you the coffee still has life in it. The first pour sounds different from the last. Even the drawdown becomes familiar. If that sounds dramatic, fine, but coffee people have accepted their fate and moved on.
One of the best lessons that comes from brewing coffee at home is patience. Not big spiritual patience. Tiny practical patience. The kind that says, “Let the water cool a few seconds,” or “Change one variable, not six.” That patience pays off. And once you start noticing how a slightly finer grind adds sweetness or how a better filter rinse cleans up the flavor, you stop chasing random hacks and start building real consistency.
The ideal outcome is not that every cup becomes identical. It is that you begin to understand why a cup tastes the way it does. That is where confidence comes from. You stop hoping for good coffee and start making it on purpose. And honestly, there are few better feelings than taking a first sip at home and realizing it tastes like the expensive café cup you used to stand in line for.
So yes, perfect coffee involves ratios and temperatures and technique. But it also becomes something simpler: a reliable, repeatable pleasure that makes mornings feel more civilized. Even when everything else is chaotic, a well-made cup can still say, “Relax. We have at least one thing under control.”
Final Sip
If you want to make the perfect coffee at home, do not chase gimmicks. Start with fresh beans, use filtered water, measure everything, grind right before brewing, and keep your method consistent. A great cup usually comes down to a few fundamentals done well, not a fancy machine that looks like it belongs on a spaceship.
Once you lock in the basics, coffee becomes a lot more fun. You can play with beans, ratios, brew times, and methods without losing the plot. And that is really the goal: not coffee snobbery, not countertop theater, just a genuinely delicious cup that makes your morning better.


