Table of Contents >> Show >> Hide
- Before You Start: A Quick (Important) Safety Reality Check
- What You’ll Need
- Step 1: Decide What Kind of Massage Oil You Want
- Step 2: Pick Your Carrier Oil (This Matters More Than People Think)
- Step 3: Choose Essential Oils (Optional) and Keep It Simple
- Step 4: Learn Dilution (The “Do Not Skip This” Part)
- Step 5: Sanitize Your Setup (Yes, Even for Oil)
- Step 6: Measure Your Carrier Oil Into the Bottle
- Step 7: Add Essential Oils (Count Drops Like It’s Your Job)
- Step 8: Cap, Mix, and Let It Marry (No Fancy Ceremony Required)
- Step 9: Label It Like a Responsible Wizard
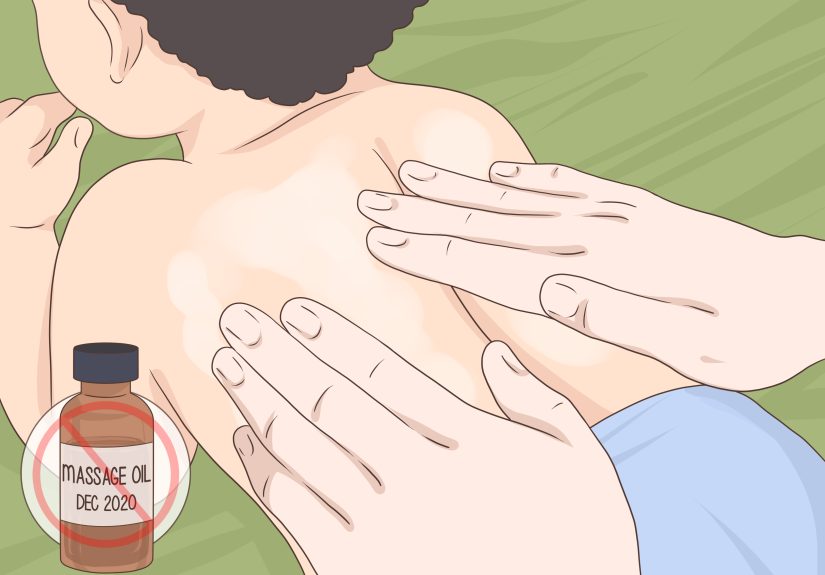
- Step 10: Patch Test, Then Use It Correctly
- Troubleshooting: Fixing Common DIY Massage Oil Problems
- Storage Tips (So Your Blend Stays Fresh, Not Funky)
- Three “Go-To” DIY Massage Oil Recipes (Adult Use, Conservative Dilution)
- Frequently Asked Questions
- Conclusion: DIY Massage Oil Is EasyIf You Respect the Dilution
- Experiences Related to DIY Massage Oils (An Extra of Real-World Wisdom)
Store-bought massage oils can be lovely… right up until you read the ingredient list and realize you’re basically paying premium prices for “mystery perfume + one drop of lavender + vibes.”
The good news: making your own DIY massage oil at home is surprisingly simple, customizable, and often cheaper per bottle. The even better news: you don’t need a lab coatjust a clean bottle, a good carrier oil, and the common sense to treat essential oils like the powerful concentrates they are.
In this guide, you’ll learn how to make your own massage oils in 10 clear steps, with safety-forward dilution math, storage tips, and a few blend ideas that smell like “spa day” instead of “I spilled a candle.”
Before You Start: A Quick (Important) Safety Reality Check
Essential oils are concentrated plant extracts. “Natural” doesn’t automatically mean “gentle.” Some oils can irritate skin, trigger allergic reactions, or increase sun sensitivityespecially when used undiluted or at high concentrations.
Think of essential oils like hot sauce: a tiny amount can be delicious; a full bottle on your taco is a personal choice you will regret.
- Always dilute essential oils in a carrier oil before applying to skin.
- Patch test any new blendespecially if you have sensitive skin or eczema.
- Avoid eyes, mucous membranes, and broken skin.
- Don’t ingest essential oils. (Not a “wellness hack.” Just a bad idea.)
- Use extra caution for kids, pregnancy, or medical conditionsand consider skipping essential oils entirely unless a qualified clinician says otherwise.
What You’ll Need
Basic supplies
- 1–2 clean glass bottles (preferably amber or cobalt, 2–4 oz)
- Small funnel (optional but highly recommended for avoiding “oil lake” on your counter)
- Measuring spoon or small graduated cup
- Label (masking tape works) + pen
Ingredients
- Carrier oil (your “base” oil): sweet almond, jojoba, grapeseed, fractionated coconut, etc.
- Essential oils (optional): lavender, chamomile, cedarwood, etc.
- Optional add-ins: vitamin E (a drop or two), or a second carrier oil to customize glide
Step 1: Decide What Kind of Massage Oil You Want
Start with the goal. This helps you choose the right carrier oil and essential oil style.
- Relaxation / bedtime vibe: light scent, slow glide
- Post-workout comfort: medium glide, “cooling” or “grounding” aroma (still diluted!)
- Sensitive skin: unscented or very low essential oil concentration
- Quick-absorbing: lighter carrier oils like grapeseed or jojoba blends
Step 2: Pick Your Carrier Oil (This Matters More Than People Think)
Carrier oils do the heavy lifting: they provide slip (“glide”), help spread essential oils safely, and affect how the blend feels on skin.
Popular carrier oils for massage
- Sweet almond oil: classic massage glide, mild scent, widely used
- Jojoba oil: technically a wax ester; feels light and absorbs nicely
- Grapeseed oil: lighter, less greasy feel, good for blending
- Fractionated coconut oil: stable, light, long shelf life, very “slippery”
- Olive oil: thicker, more noticeable scentgreat in a pinch, less “spa-like”
Sensitive skin tip: If your skin is reactive, start with a single, simple carrier oil and skip essential oils at first. “Boring” is beautiful when your skin is easily annoyed.
Step 3: Choose Essential Oils (Optional) and Keep It Simple
You don’t need a 14-oil symphony. A good massage oil blend often uses 1–3 essential oils total. Too many can increase irritation risk and smell like a craft store exploded.
Beginner-friendly essential oils for massage blends
- Lavender: classic “calm” scent
- Roman chamomile: soft, soothing aroma (often pricier)
- Cedarwood: warm, woodsy base note
- Sweet orange: cheerful scent (use caution with citrus; some can increase sun sensitivity)
Important: Some essential oils (especially certain citrus oils) can cause photosensitivity. If you use citrus oils, avoid sun exposure on the applied area unless you’re confident the oil is non-phototoxic and you’re using a conservative dilution.
Step 4: Learn Dilution (The “Do Not Skip This” Part)
A safe dilution depends on the oil, your skin, and how you’ll use it. For general full-body massage, many reputable clinical sources recommend staying conservative.
A good everyday range for adults is often 1%–2% essential oil in a carrier oil blend. For sensitive skin, older adults, or large-area use, consider 0.5%–1%.
Dilution cheat sheet (approximate)
Drops vary by bottle and oil viscosity, so these are practical estimatesnot lab measurements. When in doubt, use fewer drops.
| Blend Size | 0.5% (gentle) | 1% (conservative) | 2% (common adult range) |
|---|---|---|---|
| 1 oz (30 mL) | 3 drops | 6 drops | 12 drops |
| 2 oz (60 mL) | 6 drops | 12 drops | 24 drops |
| 4 oz (120 mL) | 12 drops | 24 drops | 48 drops |
Rule of thumb: If this oil will be used on a large area (like a full back, legs, or whole body), lean lower. If you have asthma, allergies, eczema, or highly sensitive skin, go lower stillor skip essential oils.
Step 5: Sanitize Your Setup (Yes, Even for Oil)
Oil blends don’t support microbial growth the same way water-based products do, but cleanliness still matters. Wash bottles, funnels, and measuring tools with hot soapy water, rinse well, and let them dry fully.
Water is the enemy of shelf lifeintroducing moisture can speed up spoilage.
Step 6: Measure Your Carrier Oil Into the Bottle
Decide your batch size. For beginners, 2 oz is perfect: enough to test, not so much that you’re stuck with “Oops, I hate this smell” for months.
Example base blend (nice glide, not too greasy)
- 1 oz sweet almond oil
- 1 oz jojoba oil
Pour the carrier oils into your bottle using a funnel. Take a moment to admire your life choices. So far, you’re doing amazing.
Step 7: Add Essential Oils (Count Drops Like It’s Your Job)
Choose your dilution level, then add the essential oils drop by drop. Start lower than you think you needscent intensifies as it sits, and you can always add 1–2 drops later.
Simple 2 oz blend examples (choose ONE)
- Relax blend (1%): 8 drops lavender + 4 drops cedarwood (12 drops total)
- Fresh-and-clean (1%): 6 drops lavender + 6 drops sweet orange (12 drops total)
- Ultra-gentle (0.5%): 4 drops lavender + 2 drops chamomile (6 drops total)
Note: Avoid “hot” oils (like cinnamon bark, clove, oregano, thyme) for massage blends unless you have advanced safety guidancethey’re much more likely to irritate skin.
Step 8: Cap, Mix, and Let It Marry (No Fancy Ceremony Required)
Cap the bottle tightly and roll it between your palms for 30–60 seconds. Shaking is fine toojust don’t fling it like a maraca near your laptop.
Let the blend rest for a few hours (or overnight). Many blends smell more balanced after they “settle,” especially when they include woodsy base notes.
Step 9: Label It Like a Responsible Wizard
Label your bottle with:
- Name of the blend
- Date made
- Carrier oils used
- Essential oils used + approximate dilution
This is not just for organizationit’s for safety. If someone reacts, you’ll know what was in it. Also, your future self will thank you when you find a mystery bottle that smells like “pinecone regret.”
Step 10: Patch Test, Then Use It Correctly
Before a full massage, do a patch test. Apply a small amount to the inner forearm and monitor for irritation. If you notice redness, itching, stinging, or rash, wash it off and don’t use it.
How to use your massage oil (without turning into a slip-n-slide)
- Start with a small amountabout a teaspoon for a back or shoulders.
- Warm the oil by rubbing hands together before applying.
- Avoid irritated, sunburned, or broken skin.
- Keep away from eyes.
Troubleshooting: Fixing Common DIY Massage Oil Problems
“It feels too greasy.”
Try a lighter carrier oil next time (like grapeseed or jojoba) or reduce heavier oils. Use less product per massage and blot excess with a towel.
“It absorbed too fast. I need more glide.”
Add a bit more fractionated coconut oil or sweet almond oil. You can also reapply a small amount during massage.
“The scent is too strong.”
Dilute the blend by adding more carrier oil. Don’t try to “cancel” scent by adding more essential oilsthis is how DIY becomes “why do I feel itchy?”
“How long does it last?”
Shelf life depends mostly on the carrier oil(s). Some carrier oils can go rancid faster than others. Store tightly capped, away from heat and light, and use clean hands to avoid contamination. If it smells “off” (like crayons, stale nuts, or old fryer oil), toss it.
Storage Tips (So Your Blend Stays Fresh, Not Funky)
- Use dark glass bottles to reduce light exposure.
- Store in a cool, dry place (a drawer beats a sunny windowsill).
- Keep caps tightly closed to reduce oxygen exposure.
- Keep out of reach of children and pets.
Three “Go-To” DIY Massage Oil Recipes (Adult Use, Conservative Dilution)
1) The “Unclench Your Jaw” Relax Blend (2 oz, ~1%)
- 2 oz carrier oil (1 oz sweet almond + 1 oz jojoba)
- 8 drops lavender
- 4 drops cedarwood
2) The “Spa Lobby” Citrus-Soft Blend (2 oz, ~0.5%–1%)
- 2 oz carrier oil (2 oz fractionated coconut, or split with jojoba)
- 4–6 drops sweet orange
- 2–6 drops lavender (adjust based on your total drop target)
If you’ll be in the sun, choose a lower dilution and avoid applying to areas that will get direct sunlight.
3) The “Sensitive Skin Starter” (2 oz, unscented)
- 2 oz jojoba or fractionated coconut oil
- No essential oils
Yes, it counts. The best massage oil is the one your skin actually likes.
Frequently Asked Questions
Can I use cooking oils from my kitchen?
In a pinch, some people use olive oil. It’s generally safe for most skin, but it’s thicker, has a stronger scent, and may stain fabrics more easily. For a more “massage-friendly” feel, choose oils typically used for body care (jojoba, sweet almond, grapeseed, fractionated coconut).
Do I need preservatives?
Not for an oil-only blend with dry, clean tools. Preservatives are mainly needed for products containing water. The bigger concern here is oxidation (rancidity), which you manage with storage and reasonable batch sizes.
Is vitamin E required?
No. Some people add a drop or two as an antioxidant, but it won’t magically save an oil that’s stored in heat and sunlight. Storage habits matter more than bonus ingredients.
Conclusion: DIY Massage Oil Is EasyIf You Respect the Dilution
Making your own massage oils is one of those rare DIY projects that’s actually as relaxing as the finished productespecially when you keep it simple.
Pick a carrier oil that feels good on your skin, use conservative essential oil dilutions, label your blend, patch test, and store it properly.
Do that, and you’ll have a personalized massage oil that smells like you paid for a spa membership… without having to whisper “no thanks” to anyone offering you cucumber water.
Experiences Related to DIY Massage Oils (An Extra of Real-World Wisdom)
If you’ve never made a homemade massage oil before, the first experience is usually a mix of “This is so simple!” and “Why does my kitchen smell like a forest yoga class?”
That’s normal. DIY blending is a sensory project, and the learning curve is mostly about texture, scent strength, and how your skin reacts over time.
One common experience: you’ll discover that carrier oils feel very different. Sweet almond oil tends to give that classic massage glidesmooth, a little richerwhile grapeseed and jojoba can feel lighter and “cleaner” on the skin.
People often start with one carrier oil and then, after a few uses, realize they want a blend: maybe more slip for longer massages, or more absorption for a post-shower shoulder rub that won’t leave your T-shirt feeling like it lost a fight with a salad dressing bottle.
Another real-world lesson is that essential oil scent builds. The blend you sniff right after mixing might smell subtle. Then the next day, it can feel stronger and more “together.”
This is why experienced DIYers often start with a lower drop count, live with it for 24 hours, and adjust slowly. It’s much easier to add 2 drops than to explain why your “relaxation blend” now smells like an overenthusiastic holiday candle aisle.
Many people also notice the “too much vs. just right” moment during application. The first time, it’s tempting to pour oil like you’re buttering popcorn.
Then you realize massage oil spreads further than you thinkespecially when it’s warmed between your hands. A small amount can cover a surprising area, and using less often feels better (and keeps sheets, towels, and clothing from becoming involuntary grease collectors).
Patch testing can feel like overkill until it saves you from a bad reaction. Lots of folks report that a blend smelled amazing, but their skin disagreedespecially if they’re sensitive to fragrance, have eczema, or tried a “spicy” essential oil without realizing it.
The experience here is usually a quick shift from “DIY spa!” to “Why am I itchy?” The fix is simple: wash it off, switch to a lower dilution, or go unscented. In practice, many people end up loving an unscented base oil for everyday use and saving scented blends for occasional use.
Storage becomes a thing, too. The “I’ll leave it on the bathroom counter” approach often leads to faster oxidation, especially with lighter carrier oils.
People who make DIY massage oils regularly tend to store them in darker bottles, in a drawer, and make smaller batches more often. It’s a very normal experience to throw out a bottle that smells off and then become the kind of person who labels everything like a tiny apothecary owner.
Finally, there’s the most satisfying experience: finding your signature blend.
Maybe it’s lavender + cedarwood at a gentle 1% dilution, or a simple jojoba base that feels perfect and never argues with your skin.
Once you land on what works, DIY massage oils stop being a project and become a routineone that’s calming, practical, and quietly impressive when someone asks, “Wait… you made this?”