Table of Contents >> Show >> Hide
- Why correct bike chain length matters
- First, know what kind of chain you are working with
- Tools you need to measure and size a bike chain
- Method 1: Measure the new chain against the old chain
- Method 2: Measure chain length from scratch with the big-big method
- How to calculate chain length in inches and links
- Special cases that change the correct chain length
- How to install and test the chain after measuring
- Common mistakes when measuring a bike chain
- Quick answer: what is the best way to measure a bike chain?
- Real-world experience: what measuring bike chains teaches you after a few messy installs
- Conclusion
- SEO Tags
A bike chain has one job: connect your pedaling legs to forward motion. It is a simple little metal miracle, right up until it is too long, too short, noisy, sloppy, or about as cooperative as a cat in a bathtub. If you are replacing a worn chain, upgrading a cassette, switching chainrings, or building a bike from scratch, knowing how to measure a bike chain correctly is one of those skills that saves money, improves shifting, and keeps your derailleur from filing a formal complaint.
The good news is that measuring chain length is not mysterious. The better news is that you do not need a math degree, a wind tunnel, or a beard full of chain wax to do it right. You just need the correct method for your drivetrain. In this guide, you will learn how to measure a bike chain to calculate the correct length, how to count links without losing your mind, what changes on full-suspension and single-speed bikes, and how to avoid the classic mistakes that turn a quick repair into a garage-floor drama.
Why correct bike chain length matters
When chain length is right, your bike shifts better, runs quieter, and puts less stress on expensive parts. When chain length is wrong, everything gets weird fast.
A chain that is too short can overextend the rear derailleur when you shift into the large chainring and biggest rear cog. That can damage the derailleur, hanger, chain, or even the frame. A chain that is too long can create excess slack, lazy shifting, chain slap, and a higher chance of dropping the chain. In other words, the chain becomes the mechanical version of sweatpants at a wedding: technically present, but not doing the job properly.
Correct chain length also matters when you change drivetrain parts. A larger cassette, a larger chainring, a new rear derailleur, or a full-suspension frame with chain growth can all change the amount of chain your bike needs. That is why measuring chain length is not just about cutting a new chain to “about the same as the old one” and hoping for the best.
First, know what kind of chain you are working with
Most modern bicycle chains share the same 1/2-inch pitch, which means the distance from one pin to the next is half an inch. What changes is the width and compatibility. Geared bikes use narrower derailleur chains that match the number of speeds on the rear cassette. Single-speed, fixie, BMX, and some internally geared hub bikes often use wider chains, commonly 1/8-inch.
Before you measure anything, confirm these basics:
- Your drivetrain speed, such as 8-speed, 10-speed, 11-speed, or 12-speed
- Whether your bike is 1x, 2x, or 3x
- Whether the bike is hardtail, rigid, full-suspension, or single-speed
- Whether the chain uses a quick link or a connecting pin
- Whether your chain brand or drivetrain maker has a specific sizing method
This matters because many bikes follow the classic big chainring + biggest rear cog measuring method, but some Shimano and SRAM systems, especially certain 12-speed setups, have brand-specific instructions for how many extra links to add.
Tools you need to measure and size a bike chain
You do not need a pro shop, but a few tools help:
- A new compatible chain
- A chain tool or chain breaker
- Quick-link pliers if your chain uses a master link
- A ruler or tape measure for checking wear or confirming length
- A bike stand if you have one, though it is not required
For full-suspension bikes, you may also need a way to compress the suspension safely so you can size the chain at the point where the rear axle is farthest from the bottom bracket.
Method 1: Measure the new chain against the old chain
This is the fastest method, but only use it if you are sure the old chain was the correct length before it wore out.
When this method works best
Use it when you are replacing a worn chain on the same bike with the same cassette, same chainrings, same derailleur, and no major drivetrain changes. It is also helpful when the old bike shifted correctly and never showed signs of bad chain length.
How to do it
- Lay the old chain and the new chain side by side on a flat surface.
- Line them up at one end, pin to pin.
- Pull both chains straight so there is no slack.
- Count the links rather than trusting stretched metal to sit perfectly even.
- Cut the new chain to match the old chain’s link count, accounting for the quick link if needed.
The catch is obvious: an old chain can be stretched through wear. That means visually matching length can fool you. If the old chain is badly worn or if you are not sure it was sized correctly in the first place, skip this shortcut and use the next method instead.
Method 2: Measure chain length from scratch with the big-big method
This is the most useful general method for derailleur bikes, and it is the one many mechanics start with. It is simple, reliable, and much smarter than eyeballing things while whispering, “Yeah, that looks about right.”
The basic idea
You wrap the chain around the largest front chainring and the largest rear cog without routing it through the rear derailleur. Then you find the point where the chain just meets. From that starting point, you add the extra chain required by the drivetrain design.
How to measure step by step
- Shift your bike into the smallest chainring and smallest rear cog first so the old chain is easier to remove.
- Remove the old chain.
- Take the new chain and wrap it around the largest front chainring.
- Then wrap it around the largest rear cog.
- Do not route it through the rear derailleur yet.
- Pull both ends of the chain together until the chain is snug.
- Find the point where the chain would naturally connect. This is your zero point.
- Now add the extra chain required for your drivetrain before cutting.
For many standard derailleur setups, the common rule is to add one inch of chain, which equals two 1/2-inch pitches. Many mechanics describe this as adding one inner-and-outer pair. That is why you will hear “big-big plus two” so often.
A simple example
Suppose your chain first meets exactly at the zero point when wrapped around the biggest chainring and biggest cog. On a typical derailleur setup, you would then add one inner-and-outer pair before cutting. Once the chain is routed through the derailleur and connected, that extra length gives the drivetrain enough room to shift into all gears without overloading the derailleur.
This is also where people get confused by “links.” Some riders count every half-inch pitch as a link. Others count an inner-and-outer pair as one complete inch of chain. To avoid mistakes, focus on the physical result: measure at the zero point, then add the manufacturer-appropriate extra chain before cutting.
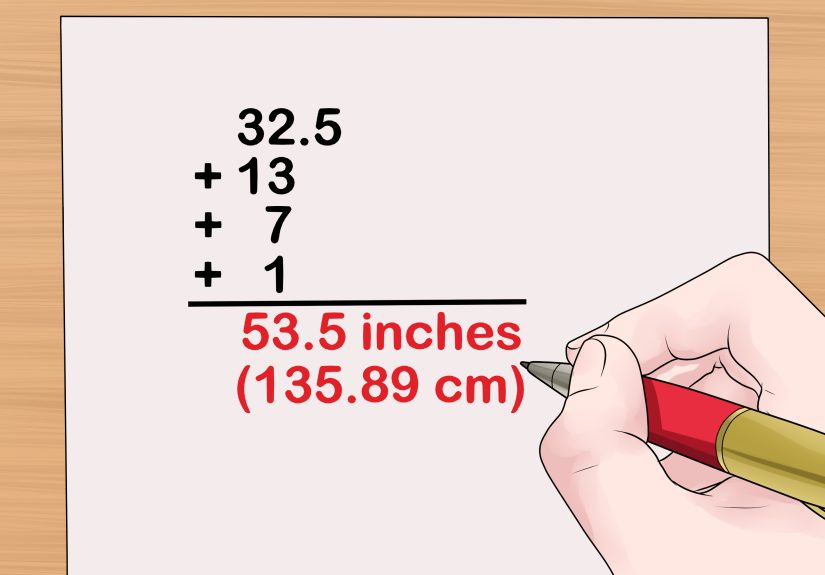
How to calculate chain length in inches and links
If you like numbers, here is the clean version.
Modern bike chain pitch is 1/2 inch. So:
- 1 pitch = 1/2 inch
- 2 pitches = 1 inch
- 12 full inches on a ruler covers 24 pitches
That is why a ruler is useful for two different jobs. First, it can help you confirm chain wear. Second, it can help you understand the extra length you are adding during sizing. If your setup calls for one extra inch, you are adding two pitches. If your drivetrain manual calls for more than the classic amount, follow that exactly rather than forcing the general rule.
Special cases that change the correct chain length
Full-suspension mountain bikes
This is the big one. A full-suspension bike can experience chain growth, meaning the distance between the bottom bracket and rear axle increases as the suspension moves through its travel. If you size the chain while the suspension is not at its longest axle-to-bottom-bracket position, the chain can end up too short.
So, on a full-suspension bike, you should measure the chain at the point where the rear axle is farthest from the bottom bracket. Depending on the frame design, that may require compressing the suspension or temporarily removing or deflating the shock. This is not optional on bikes with noticeable chain growth. It is the difference between a clean install and a derailleur trying to become modern art.
Some 12-speed systems
Not every drivetrain follows the exact same “big-big plus two” rule. Certain SRAM and Shimano 12-speed systems use specific chain-length instructions based on the drivetrain type, the connection method, and whether the bike is a hardtail or full-suspension model. That means a generic rule can get you close, but the manufacturer’s method gets you correct.
If you are installing a modern 12-speed chain, especially on a mountain bike, check the chain or derailleur manual before you cut. A nice chain is a terrible thing to cut short by one confident-but-wrong link.
Single-speed, fixie, BMX, and internally geared bikes
Single-speed chain measurement is different because there is no rear derailleur to manage slack. Instead, you set the chain length so the rear wheel position or chain tensioner produces proper tension. A common target is a small amount of up-and-down movement in the middle of the chain run, often around 1/2 inch total movement. Too tight adds drag and bearing stress. Too loose invites noise, derailment, and sadness.
Also, many true single-speed bikes use a wider 1/8-inch chain, while geared bikes typically use narrower derailleur chains. Match the chain to the drivetrain before you measure length.
E-bikes
E-bikes do not require magical chain math, but they often place more load on the drivetrain. You still size the chain according to the drivetrain design, but you should make sure the replacement chain is compatible with your number of speeds and, when appropriate, suitable for e-bike use. If your system has brand-specific instructions, use them.
How to install and test the chain after measuring
After you cut the chain to length, route it correctly through the rear derailleur. This is where many first-time mechanics make a wrong turn. The chain must pass around the pulley wheels exactly as intended. One bad routing move can make the derailleur look fine from far away while shifting like a shopping cart with one square wheel.
Once connected, test the drivetrain carefully:
- Shift into the largest front chainring and largest rear cog.
- Make sure the derailleur is not stretched to a dangerous angle.
- Shift into the smallest front chainring and smallest rear cog.
- Make sure the chain is not drooping excessively.
- Pedal through all gears and listen for hesitation, skipping, or noise.
If the bike will not safely reach the big-big combination, the chain is too short. If it sags badly in the small-small combination, it may be too long or your derailleur capacity may not match the drivetrain.
Common mistakes when measuring a bike chain
- Using a worn chain as a perfect template: worn chains elongate, so visual matching can mislead you.
- Ignoring manufacturer-specific instructions: especially risky with newer 12-speed systems.
- Forgetting full-suspension chain growth: one of the fastest ways to size a chain too short.
- Routing the chain incorrectly through the derailleur: the length may be right, but the installation can still be wrong.
- Mixing incompatible chain widths or speeds: correct length does not fix the wrong chain.
- Cutting before double-checking the end link configuration: the chain ends must match the connector style you are using.
Quick answer: what is the best way to measure a bike chain?
If you want the short practical answer, here it is: for most derailleur bikes, the best way to measure a bike chain is to wrap the new chain around the largest front chainring and largest rear cog without routing through the rear derailleur, pull it snug, and then add the extra chain required by your drivetrain before cutting. If the bike is full-suspension, do that measurement at maximum chain growth. If the drivetrain is modern 12-speed, confirm the brand’s specific instructions before you cut.
Real-world experience: what measuring bike chains teaches you after a few messy installs
The first time many riders measure a chain, they expect it to be a five-minute task. Remove old chain. Open new chain. Snip, clip, victory lap. Then the quick link ends do not match, the derailleur gets routed wrong, the chain seems magically too short, and suddenly a repair that looked like a coffee-break project becomes a character-building event.
One of the most useful lessons from real-world chain work is that old chains lie. They do not lie maliciously, of course. They are just worn, stretched, dirty, and fully committed to giving you confidence they have not earned. Plenty of riders have cut a brand-new chain to match an old one, only to discover the new chain now feels a little long, shifts a little soft, or exposes that the old chain was never sized properly in the first place. The fix is simple: count links, verify wear, and do not trust appearance alone.
Another common experience is learning that full-suspension bikes do not care about your optimism. A hardtail lets you get away with a lot. A full-suspension bike does not. Riders who size a chain with the bike sitting calmly in the stand sometimes discover the problem only when the suspension compresses on the trail and the drivetrain reaches the mechanical equivalent of “absolutely not.” That moment usually arrives under load, on a climb, far from home, and accompanied by the sound of money leaving your wallet. Once you have seen chain growth cause trouble, you stop skipping that measurement forever.
There is also the quick-link lesson. In theory, a quick link is quick. In practice, it is quick after you have done it a few times, remembered which connector your chain uses, made sure the ends are correct, and resisted the urge to force things with whatever pliers happen to be nearby. A lot of chain frustration is not really about chain length at all; it is about rushing the final two percent of the job.
Experienced home mechanics also learn that chain length affects how a bike feels more than beginners expect. A properly sized chain makes shifting feel crisp and settled. The bike sounds cleaner. The derailleur cage looks calmer. Pedaling feels normal in the good way, not the “Why is my drivetrain making popcorn noises?” way. It is one of those repairs where nobody walking by will applaud your work, but you will notice it on every ride.
And finally, there is the lesson every rider eventually learns: cutting a chain twice is impossible. Once you remove too much length, there is no clever speech that talks the chain back into existence. That is why careful mechanics measure twice, confirm the connector style, check the route through the derailleur, and only then make the cut. It is not because they are slow. It is because they have already paid tuition at the School of “Well, That Was the Wrong Link.”
So yes, measuring a bike chain is a technical task. But it is also one of those jobs that rewards patience, careful observation, and a little humility. The more chains you size, the more you realize the goal is not just getting the bike back together. The goal is getting it back together in a way that makes the next ride quiet, smooth, and delightfully uneventful. In bike maintenance, uneventful is often the highest compliment.
Conclusion
If you want to measure a bike chain to calculate the correct length, start with the drivetrain you actually have, not the one you wish you had, the one your friend has, or the one a random forum hero says “should be fine.” For most derailleur bikes, the proven approach is to measure using the largest chainring and largest rear cog, bypass the derailleur, then add the correct extra chain for your setup. For full-suspension bikes, measure at maximum chain growth. For modern 12-speed systems, follow brand-specific instructions before cutting. And if the old chain looks like a trustworthy template, verify it anyway.
Do that, and your reward is simple: smoother shifting, less noise, fewer mechanical surprises, and one more reason to enjoy your ride instead of negotiating with it.


