Table of Contents >> Show >> Hide
- Understanding Chocolate Types and Their Melting Points
- The Best Microwave Setup for Melting Chocolate
- Step-by-Step Guide for Melting Chocolate in the Microwave
- Common Mistakes to Avoid When Melting Chocolate in the Microwave
- What to Do if Your Chocolate Seizes
- Using Melted Chocolate for Various Recipes
- Conclusion
- Personal Experiences with Melting Chocolate
Introduction
Melting chocolate in the microwave is a quick and convenient method, but many of us have experienced the frustration of ending up with a burnt mess rather than smooth, creamy melted chocolate. Whether you’re using it for baking, dipping, or drizzling over desserts, properly melting chocolate in the microwave requires a bit of know-how. With the right techniques, you can melt chocolate effortlessly without the risk of burning it. In this guide, we’ll walk you through the essential steps for microwaving chocolate and share tips to ensure you achieve that silky, smooth result every time.
Understanding Chocolate Types and Their Melting Points
Before you start melting chocolate, it’s important to understand the different types and their melting points. The melting temperature of chocolate can vary depending on its composition, so knowing what type of chocolate you’re working with will help you avoid overheating it.
- Dark Chocolate: Contains a higher percentage of cocoa solids, giving it a lower melting point compared to milk chocolate. Dark chocolate generally melts at 115°F to 120°F (46°C to 49°C).
- Milk Chocolate: Contains more sugar and milk solids, which raise the melting point to around 130°F to 140°F (54°C to 60°C).
- White Chocolate: Since it doesn’t contain cocoa solids, white chocolate has a lower melting point, usually between 105°F and 110°F (41°C to 43°C).
- Chocolate Chips: Though they’re convenient, chocolate chips often contain stabilizers, which help them hold their shape in baking. As a result, they may not melt as easily as other chocolate types and require extra care.
The Best Microwave Setup for Melting Chocolate
Now that you know your chocolate types, let’s talk about the best setup for melting chocolate in the microwave. Microwaving chocolate requires a lower heat setting to prevent it from burning. Here’s what you’ll need:
- Microwave-safe Bowl: Use a heat-resistant glass or ceramic bowl to ensure even heat distribution. Avoid using plastic, as it may melt or warp under heat.
- Microwave-safe Plate or Paper Towel: Cover your bowl with a microwave-safe plate or a paper towel to prevent splattering.
- Stirring Spoon: A silicone or wooden spoon is ideal for stirring chocolate since metal utensils can cause the chocolate to seize.
- Microwave: A microwave with a medium or low heat setting will help ensure the chocolate melts without burning.
Step-by-Step Guide for Melting Chocolate in the Microwave
Step 1: Break the Chocolate into Small Pieces
Start by chopping or breaking your chocolate into uniform pieces. This allows the chocolate to melt more evenly and prevents overheating. If you’re using chocolate chips, you can skip this step since they are already in small, uniform pieces.
Step 2: Set the Microwave to Medium or Low Heat
Set your microwave to 50% or medium heat. This is a crucial step in ensuring your chocolate melts without burning. If you use high heat, the chocolate can overheat quickly, causing it to seize up and become unusable.
Step 3: Microwave in Short Intervals
Place your bowl in the microwave and heat for 20-30 second intervals. After each interval, take the bowl out and stir the chocolate. Stirring helps distribute the heat evenly and prevents the chocolate from overheating. Don’t be tempted to skip the stirringit’s essential for getting a smooth texture.
Step 4: Keep an Eye on It
Continue microwaving and stirring every 20-30 seconds until most of the chocolate has melted. The residual heat will melt the remaining small pieces. Be patient and resist the urge to rush itoverheating chocolate even slightly can ruin its texture.
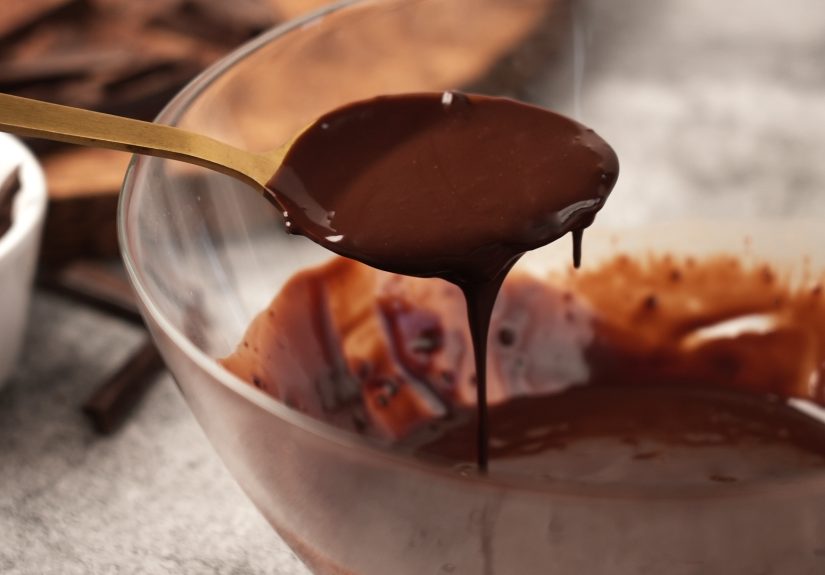
Step 5: Stir Until Smooth
Once the chocolate is nearly melted, stir it thoroughly. The residual heat will continue to melt the last few bits. You want the texture to be smooth, shiny, and free of lumps. If the chocolate feels a bit thick or not quite as smooth as you’d like, you can add a small amount of vegetable oil, butter, or cream to thin it out.
Common Mistakes to Avoid When Melting Chocolate in the Microwave
To avoid ending up with scorched chocolate or a lumpy mess, here are a few common mistakes to watch out for:
- Overheating: One of the most common mistakes is overheating the chocolate. This causes the cocoa fats to separate, resulting in a grainy texture. Always microwave in short bursts and stir between intervals.
- Using High Heat: As mentioned, microwaving chocolate on high heat can cause it to burn and seize. Always use a lower setting for better control.
- Not Stirring Enough: Stirring between intervals is critical. Without stirring, the chocolate can form hot spots, which may lead to burning.
- Using the Wrong Type of Bowl: Always use microwave-safe glass or ceramic bowls. Some materials, like plastic, can heat unevenly and cause the chocolate to burn.
What to Do if Your Chocolate Seizes
If you find that your chocolate has seized (becomes thick and clumpy), don’t panic. It’s often due to the chocolate coming into contact with moisture or being overheated. Here’s how you can fix it:
- Add a Fat: A small amount of vegetable oil, butter, or cream can help smooth out seized chocolate. Start with just a teaspoon at a time, stirring until the texture becomes smooth again.
- Reheat in Short Intervals: Sometimes, simply reheating the chocolate in short intervals and stirring will help to bring it back to a creamy texture.
Using Melted Chocolate for Various Recipes
Once your chocolate is perfectly melted, the possibilities are endless. You can use it for:
- Drizzling over desserts: Melted chocolate is perfect for drizzling over cakes, cupcakes, cookies, and fruit.
- Making ganache: Combine melted chocolate with heavy cream for a rich ganache to use as a filling or topping.
- Chocolate-dipped treats: Use melted chocolate to dip strawberries, pretzels, marshmallows, and other treats for an indulgent snack.
- Baking: Incorporate melted chocolate into cake batters, cookies, brownies, and other baked goods for added flavor.
Conclusion
Melting chocolate in the microwave may seem like a simple task, but it requires the right technique to avoid burning or ruining the texture. By following the steps we’ve outlined and being mindful of the temperature and stirring intervals, you can melt chocolate smoothly and easily. Whether you’re using it for baking, dipping, or drizzling, knowing how to melt chocolate without burning it opens up a world of culinary possibilities. Remember, patience is key, so take your time and enjoy the process of turning your chocolate into a smooth, luxurious treat!
Personal Experiences with Melting Chocolate
Over the years, I’ve had my fair share of chocolate-melting mishaps. There was a time when I tried melting chocolate for a baking project and ended up with a hard, burnt mess. It was a lesson in patience and temperature control. The key takeaway from that experience was the importance of using medium heat and microwaving in small intervals. Another time, I made a chocolate ganache by melting chocolate in the microwave, and the smooth, glossy result was beyond satisfying. I’ve learned that adding a tiny bit of oil helps make the chocolate extra smooth for dipping treats like strawberries or pretzels. Now, whenever I melt chocolate in the microwave, I have more confidence that it will turn out perfectly every time.