Table of Contents >> Show >> Hide
- First, Identify the “Stain” (Because Coffee Isn’t the Only Culprit)
- What You’ll Need (Most of This Is Probably Already in Your Kitchen)
- The 12 Steps to Remove Coffee Stains from a Stainless Steel Pot
- Step 1: Confirm It’s Bare Stainless Steel (Not Nonstick-Coated)
- Step 2: Let the Pot Cool Completely
- Step 3: Do a Quick Rinse + Soap Wash
- Step 4: Soak in Hot, Soapy Water (15–30 Minutes)
- Step 5: Scrape Gently with a Wooden Spoon
- Step 6: Make a Baking Soda Paste (Your MVP for Coffee Rings)
- Step 7: Simmer Baking Soda Water for Stubborn Film (Low Effort, High Reward)
- Step 8: Use Diluted Vinegar Briefly (For Rainbow/Water Spots and Some Coffee Discoloration)
- Step 9: Bring in a Stainless-Steel Cookware Cleanser (For “This Stain Pays Rent” Situations)
- Step 10: Rinse Like You Mean It (Then Wash Again)
- Step 11: Dry Immediately to Prevent New Spots
- Step 12: Prevent the Next Coffee Stain (Because Future You Deserves Nice Things)
- Quick “Choose Your Fighter” Cheat Sheet
- FAQ: Common Questions About Coffee Stains and Stainless Steel
- Real-World Experiences: What Usually Works (and What People Wish They’d Done First)
- Conclusion
If your stainless steel pot looks like it’s been moonlighting as a coffee mug (hello, brown ring of doom),
you’re not alone. Coffee stains happen when tannins and oils cling to hot metal, then “bake on” over time.
The good news: stainless steel is tough, and most coffee stains are removable without turning your kitchen
into a chemistry labor your pot into modern art.
This guide walks you through a practical, 12-step, start-gentle-then-level-up method that works for
everyday coffee discoloration, stubborn brown film, and that not-so-cute caramelized “latte line” near the bottom.
We’ll keep it safe, food-surface appropriate, and mildly entertainingbecause scrubbing is already doing the most.
First, Identify the “Stain” (Because Coffee Isn’t the Only Culprit)
Before you attack the pot like it insulted your favorite barista, take 10 seconds to identify what you’re seeing:
- Brown or tan film/ring: coffee tannins + oils (the classic).
- Rainbow or blue-ish sheen: heat discoloration (still removable, just different tactics).
- White, chalky haze: hard water mineral residue (often fixed with diluted acid + rinse).
- Black, crusty spots: burnt-on residue (needs soak/simmer + mild abrasion).
You can have more than one at the same time. Stainless steel loves multitasking… in the worst way.
What You’ll Need (Most of This Is Probably Already in Your Kitchen)
- Warm water + mild dish soap
- Non-scratch sponge or nylon scrub pad (no steel wool if you value your pot’s glow-up)
- Baking soda
- White vinegar (optional, but use diluted and briefly)
- Soft cloth or microfiber towel
- Wooden spoon/spatula (for scraping without scratches)
- Optional, for stubborn stains: a stainless-steel cookware cleanser (e.g., Bar Keepers Friend or similar)
- Optional: cream of tartar or lemon (nice pantry backups)
The 12 Steps to Remove Coffee Stains from a Stainless Steel Pot
These steps are designed to work in orderstart gentle and move up only as needed. Most pots don’t require
the “big guns,” and your arms will thank you for not jumping straight to maximum effort.
-
Step 1: Confirm It’s Bare Stainless Steel (Not Nonstick-Coated)
Look inside the pot. If it has a dark nonstick coating, don’t use abrasive powders or aggressive scrubbing.
This guide assumes uncoated stainless steel. When in doubt, check the manufacturer’s care info. -
Step 2: Let the Pot Cool Completely
Cleaning a hot pot is a shortcut to warping (and regret). Let it cool down first, then begin cleaning.
-
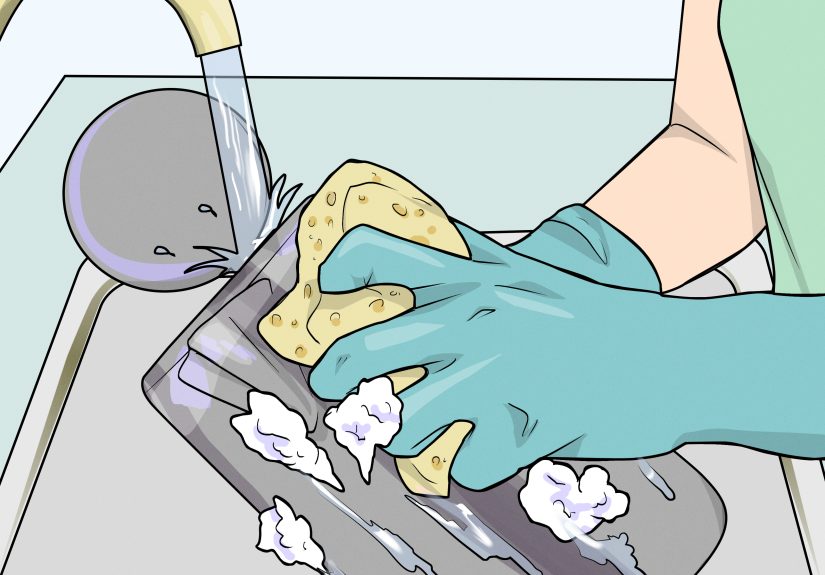
Step 3: Do a Quick Rinse + Soap Wash
Rinse with warm water, add dish soap, and wash with a non-scratch sponge. You’d be amazed how many “stains”
are just greasy coffee oils auditioning as permanent. -
Step 4: Soak in Hot, Soapy Water (15–30 Minutes)
Fill the pot with hot water and a squirt of dish soap. Let it soak. This softens residue and reduces scrubbing.
If the stain is mild, you may be done after a quick scrub and rinse. -
Step 5: Scrape Gently with a Wooden Spoon
If you feel rough spots, use a wooden spoon or spatula to coax them offespecially near the bottom
where coffee concentrate likes to cling. Wood is firm enough to help, gentle enough to avoid damage. -
Step 6: Make a Baking Soda Paste (Your MVP for Coffee Rings)
Mix baking soda with a little water until you get a thick paste (think “toothpaste,” not “soup”).
Spread it over the stained area and let it sit for 10–15 minutes. Then scrub with a damp non-scratch sponge.Why it works: baking soda is mildly abrasive and helps lift the tannin/oil film without shredding the steel.
-
Step 7: Simmer Baking Soda Water for Stubborn Film (Low Effort, High Reward)
For stains that laugh at paste: add 2–3 tablespoons of baking soda and enough water to cover the stain.
Bring to a gentle simmer for 5–10 minutes, then turn off the heat and let it cool.
Scrub again with a non-scratch sponge. -
Step 8: Use Diluted Vinegar Briefly (For Rainbow/Water Spots and Some Coffee Discoloration)
Vinegar can help with heat discoloration and mineral haze, but it’s acidicso keep it diluted and brief.
Try a 1:1 mix of water and white vinegar, heat it until warm (or briefly simmer), then turn off the heat.
Let it sit only a few minutes, scrub lightly, and rinse well.If you’re targeting hard-water haze, a 1 part vinegar to 3 parts water mix brought to a quick boil can work well.
Either way: do not let vinegar sit in the pot for a long soak. Rinse thoroughly afterward. -
Step 9: Bring in a Stainless-Steel Cookware Cleanser (For “This Stain Pays Rent” Situations)
If the coffee stain is still there, use a dedicated stainless-steel cookware cleanser that’s safe for cookware
(not just appliance polish). Follow the label exactly.A common method: dampen the surface, make a paste with the cleanser, rub gently with a soft cloth or sponge,
and don’t let it sit too long. Then wash with hot soapy water and rinse thoroughly. -
Step 10: Rinse Like You Mean It (Then Wash Again)
After any paste, powder, or acidic cleaner, rinse thoroughly. Then do a quick wash with dish soap again.
This removes residue and keeps the surface food-safe and neutral-smelling (nobody wants “vinaigrette coffee”). -
Step 11: Dry Immediately to Prevent New Spots
Air-drying stainless steel can leave water spots that look suspiciously like “the stain came back.”
Towel-dry right away, then buff with a clean cloth for extra shine. -
Step 12: Prevent the Next Coffee Stain (Because Future You Deserves Nice Things)
- Don’t overheat an empty pot: overheating increases discoloration and makes residue stick harder.
- Rinse soon after coffee: dried coffee oils are clingier than a cat during a thunderstorm.
- Avoid harsh cleaners: bleach, oven cleaner, and heavy-duty degreasers can damage stainless steel.
- Use non-scratch tools: scratches trap residue and make stains return faster.
Quick “Choose Your Fighter” Cheat Sheet
- Light coffee ring: soap wash → baking soda paste
- Stubborn brown film: baking soda simmer → cookware cleanser
- Rainbow heat tint: diluted vinegar/water warm-up → gentle scrub → rinse
- White mineral haze: diluted vinegar/water (brief) → rinse + dry
- Burnt crust + coffee: soapy soak → simmer (baking soda) → cleanser if needed
FAQ: Common Questions About Coffee Stains and Stainless Steel
Are coffee stains in a stainless steel pot harmful?
Usually, no. Coffee stains are mostly tannins and oils. They’re more of a flavor/appearance issue than a safety issue.
Still, it’s smart to clean them so old oils don’t add off flavors to whatever you cook next.
Can I use steel wool to remove coffee stains?
You can, but it’s risky. Steel wool can scratch the surface, making future stains more likely and sometimes
encouraging rust spots where moisture gets trapped. A non-scratch pad and the right cleaner are safer choices.
Can I combine baking soda and vinegar?
You’ll get fizz (fun), but the reaction neutralizes some cleaning power (less fun). It can help loosen grime mechanically,
but for best results, use baking soda first (abrasion), then rinse, then use diluted vinegar briefly if needed.
My pot has tiny pits or rough dotswhat now?
That may be pitting from salt or harsh chemicals, or damage from overheating. Cleaning can improve appearance,
but deep pitting is permanent. You can still cook safely in many cases, but avoid aggressive cleaners that worsen damage.
Real-World Experiences: What Usually Works (and What People Wish They’d Done First)
Reading cleaning advice is one thing. Actually standing over a stainless steel pot that looks like it hosted a coffee
tasting event for six months? That’s a different vibe. Here are a few common, very real scenarios home cooks run into
and the practical lessons that come with them.
1) The “I only boiled coffee once” stain. This is the classic: you brewed coffee in a pot in a pinch,
rinsed it “later,” and now there’s a tan ring that won’t budge with soap. In most kitchens, baking soda paste fixes this
fast. The trick people miss is time: letting the paste sit for 10–15 minutes makes scrubbing easier, because the
paste has time to soften the oils holding those coffee tannins in place. The second trick is using a truly non-scratch
spongesome scrubbers claim to be gentle but still feel like sandpaper when the paste gets gritty.
2) The “coffee syrup at the bottom” situation. If coffee simmered too long (or boiled down while you got
distracted by a notification that absolutely could’ve waited), it can leave a sticky, darker film near the base.
People often try to brute-force scrub this drybad idea. The easiest wins come from a short simmer: water + a couple
tablespoons of baking soda, then cool and scrub. Heat does the hard work of loosening the baked-on layer so your sponge
can do the finishing, not the entire marathon.
3) The “Is this coffee stain… or is my pot just haunted?” discoloration. Sometimes the pot looks stained,
but it’s actually heat tint (rainbow/blue) or mineral haze. This is where diluted vinegar used briefly can help.
The experience-based lesson: don’t walk away and let vinegar soak “because more time must mean more cleaning,” right?
Not with stainless steel cookware. A short warm-up or quick boil, then rinse, is usually enough to brighten the surface
without risking a dull finish.
4) The “I tried everything and now it’s worse” spiral. Many people reach for the harsh stuff too early:
bleach, oven cleaner, or aggressive degreasers that don’t belong on cookware. The regret is realbecause even if the
stain fades, the finish can look cloudy or scratched. The better pattern is leveling up in a controlled way:
soap → soak → baking soda → simmer → cookware cleanser. When a dedicated stainless cookware cleanser finally enters the
chat, it often works quicklyespecially when used correctly (short contact time, gentle rubbing, thorough rinse).
5) The “I just want it to look new again” reset. After the stain is gone, people are often surprised
how much better stainless steel looks when it’s dried immediately and buffed. That last dry-and-buff step sounds minor,
but it prevents fresh water spots that can mimic stains and undo your morale. A pot that’s clean but spotty still looks
“dirty,” and nobody wants to re-clean something they already cleaned.
Bottom line: most success stories come from two thingspatience (soak/simmer time) and the right
level of abrasion (gentle but effective). If you treat the stain like a slow negotiation instead of a wrestling
match, your pot wins, your sponge survives, and your arms don’t file a complaint.
Conclusion
Coffee stains on stainless steel can look dramatic, but they’re usually fixable with simple tools and a smart order of
operations. Start with soap and soaking, move to baking soda (paste or simmer), use diluted vinegar briefly for certain
discoloration, and save cookware cleanser for the most stubborn stains. Finish by rinsing well and drying immediately
because stainless steel loves to look spotless, but it also loves leaving water spots like tiny trophies.


