Table of Contents >> Show >> Hide
- Why Tea Cups Get Stained in the First Place
- What You’ll Need
- How to Remove Stains from Tea Cups Using Baking Soda: 7 Steps
- Common Mistakes to Avoid
- What If Baking Soda Alone Doesn’t Fully Remove the Stain?
- Why This Method Works So Well
- Real-Life Experiences: What Actually Happens When You Try This at Home
- Final Thoughts
- SEO Tags
Tea cups are sneaky little drama queens. One day they’re bright, glossy, and ready for a civilized Earl Grey moment. The next day, they’re wearing a brown ring like they’ve been through three centuries of British weather. The good news? You do not need harsh chemicals, a chemistry degree, or the upper-body strength of a medieval blacksmith to fix it. In most cases, baking soda is enough.
If your favorite cup is stained from daily tea drinking, this guide will walk you through exactly how to remove those marks using baking soda in seven simple steps. You’ll also learn why tea stains happen, how to avoid scratching your cups, when to let the paste sit longer, and what to do if the stain is especially stubborn. It’s practical, affordable, and very satisfyingbecause few things in life feel better than turning a grimy mug back into a clean, gleaming cup.
Why Tea Cups Get Stained in the First Place
Tea looks innocent in the cup, but it leaves behind residue over time. Dark teas in particular can create brown or tan rings that cling to ceramic and porcelain surfaces. If you drink tea daily and let the cup sit for a while before rinsing, the stain can build up layer by layer until your once-lovely mug starts looking like it has a permanent sepia filter.
That’s where baking soda comes in. It works because it is mildly abrasive, which means it can help lift stain buildup without being as aggressive as harsher scrubbers. Used correctly, it’s one of the easiest ways to clean a stained tea cup without turning your kitchen into a lab experiment.
What You’ll Need
- Baking soda
- Warm water
- A soft sponge, dishcloth, or non-abrasive scrubber
- Mild dish soap
- A soft towel or microfiber cloth
- An old soft toothbrush for corners or cup rims, if needed
Before you begin, skip the steel wool and anything aggressively scratchy. Your tea stains are annoying, but your cup does not deserve a sandblasting.
How to Remove Stains from Tea Cups Using Baking Soda: 7 Steps
Step 1: Wash the Cup First
Start with a basic wash using warm water and a small amount of dish soap. This removes surface grime, leftover tea film, and any oils from milk, cream, or lip balm that may be hanging around. It also lets you see the actual stain more clearly, which is helpful because sometimes a cup looks deeply stained when it’s really just wearing yesterday’s tea like a bad jacket.
Rinse the cup well after washing. If the stain is light, you may already notice some improvement. If not, excellent. That means it’s time for baking soda to make its entrance.
Step 2: Wet the Stained Area
Lightly dampen the inside of the tea cup with warm water. You don’t want it dripping like it just swam laps; you only need enough moisture to help the baking soda stick. A damp surface helps the paste spread evenly and keeps you from using too much product.
This step matters because dry baking soda sprinkled into a dry cup tends to slide around and make a mess. Dampen first, and the cleaning process becomes smoother, easier, and far less chaotic.
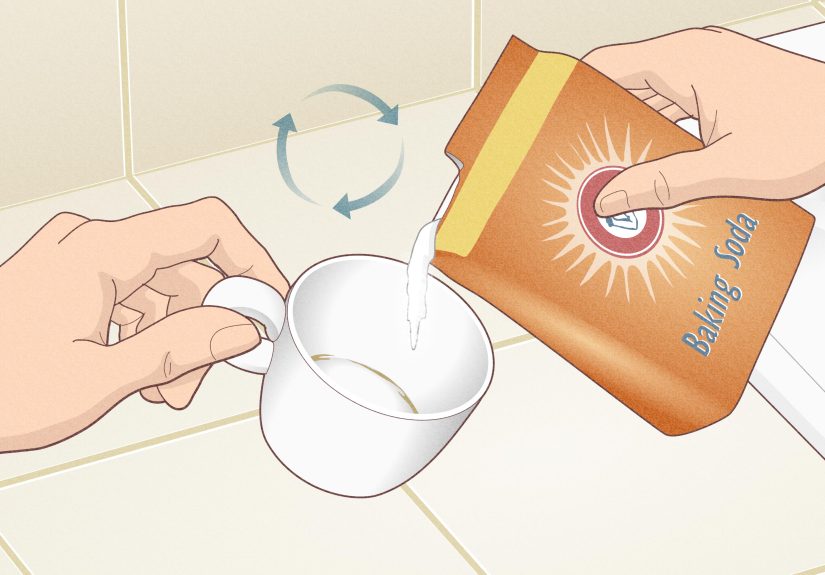
Step 3: Make a Baking Soda Paste
Add about 1 teaspoon of baking soda directly into the cup, then add a few drops of warm water. Stir it with your fingers, a spoon, or the corner of a sponge until it forms a thick paste. You want a texture that is spreadable, not soupy. Think frosting for a very weird cake.
If the stain is spread across the whole inside of the cup, make a little more paste. If it’s just a stubborn ring near the bottom, keep the amount small and targeted. The goal is not to bury the cup in baking soda like you’re preserving it for archaeology. You only need enough to coat the stained area.
Step 4: Gently Scrub in Circular Motions
Use a soft sponge, dishcloth, or non-abrasive scrubber to gently rub the paste over the stain. Work in small circles and apply light to moderate pressure. You should feel the paste doing a little of the work for you. This is not the moment to attack your teacup like it insulted your family.
Pay special attention to the bottom ring and any stained areas near the rim where tea often sits and dries. For decorative cups, fine china, or cups with metallic trim, be especially gentle and avoid rough tools. A soft cloth or sponge is the safest option.
If you’re dealing with corners, textured interiors, or a cup with a narrow shape, use a soft toothbrush to reach those awkward little spots. A toothbrush can be particularly helpful around the base where brown rings love to settle in and sign a long-term lease.
Step 5: Let the Paste Sit for Tough Stains
If the stain is fresh, scrubbing may be enough. But if your tea cup has been collecting “vintage character” for weeks or months, let the baking soda paste sit for 10 to 15 minutes before scrubbing again. For extra stubborn stains, you can even leave it longer.
This resting time gives the paste a chance to loosen the buildup so you don’t have to scrub as hard. That’s especially useful if you’re cleaning delicate ceramic, porcelain, or a favorite cup you’d rather not rough up. Less force, more patiencethat’s the winning formula here.
Once the paste has sat, go back in with your sponge and scrub the area again. Often, the stain will lift much more easily the second time.
Step 6: Rinse Thoroughly
Rinse the cup with warm water until all traces of baking soda are gone. Don’t leave any grainy residue behind, unless you’re hoping your next cup of tea tastes faintly like a science fair. Run your fingers along the inside of the cup to make sure it feels smooth and clean.
Check the stain before moving on. If it’s completely gone, congratulationsyou have restored order to the universe. If it’s faded but still visible, repeat the process once more. Most tea stains respond well to a second round, especially if they’ve been building up over time.
Step 7: Dry the Cup and Prevent Future Stains
Dry the cup with a soft towel or microfiber cloth. Drying right away helps prevent water spots and gives you a clear final look at the inside surface. It also makes the cup feel instantly cleaner, which is emotionally important for reasons science has not yet fully explained.
To keep tea stains from coming back quickly, rinse your cup soon after using it. You do not need to deep-clean it every day, but a quick rinse before the tea dries can make a big difference. If you drink tea regularly from the same mug, a weekly baking soda touch-up can keep it looking fresh without much effort.
Common Mistakes to Avoid
Using Harsh Scrubbers
Steel wool, rough scouring pads, and overly aggressive scrub brushes can scratch ceramic and porcelain surfaces. Once that happens, stains may cling even more easily in the future. So yes, the “faster” method can actually make the problem worse.
Making the Paste Too Watery
A watery mixture won’t scrub effectively. If your paste runs down the sides of the cup like sad pancake batter, add a little more baking soda until it thickens.
Skipping the First Wash
If you go straight to baking soda without washing away surface residue, you may end up smearing grime around instead of actually cleaning the stain. The quick soap-and-water wash is worth the extra minute.
Scrubbing Delicate Cups Too Hard
If the cup is antique, hand-painted, or fine china, gentleness is the rule. Let the paste sit longer instead of increasing pressure. Patience beats panic.
What If Baking Soda Alone Doesn’t Fully Remove the Stain?
Most tea stains come off with baking soda and a little elbow grease, but every now and then you’ll meet a cup that seems committed to the aesthetic of permanent gloom. When that happens, repeat the process first. A second or third round often does the trick.
You can also try extending the dwell time so the baking soda paste sits longer before scrubbing. In some cases, adding just a drop of dish soap to the paste can help it spread more evenly and improve cleaning power. The key is to stay gentle. If you jump straight to harsh products, you may remove the stain but damage the finish.
Why This Method Works So Well
The beauty of using baking soda to remove tea stains from cups is that it is simple, affordable, and accessible. Most people already have it in the pantry, which means there’s no need for a special cleaner with a dramatic label and a warning that sounds like it belongs on rocket fuel.
It also works on more than just tea cups. This same method can help clean coffee mugs, some teapots, and other ceramic drinkware that tends to collect beverage stains over time. Once you get in the habit, it becomes one of those oddly satisfying little kitchen ritualslike organizing your spice drawer, except this one actually gets done.
Real-Life Experiences: What Actually Happens When You Try This at Home
Anyone who drinks tea regularly knows the cycle. You buy a beautiful white mug because it looks classic, clean, and vaguely like the kind of cup a calm person would own. Then real life happens. You make black tea every morning, answer emails while the cup sits on your desk, forget to rinse it right away, and suddenly the inside looks like it has been living through a sepia-toned documentary.
The first time many people try baking soda, they’re usually skeptical. The thought process is something like: “This powder that hangs out next to the flour is supposed to fix this?” Then you make the paste, scrub a little, rinse, and stare into the cup like you’ve just witnessed a minor miracle. It’s one of those cleaning wins that feels outsized compared to the effort involved.
In everyday use, the method works best when you catch the stain early. A cup that has a light tan ring from a day or two of tea usually cleans up fast. A quick wash, a teaspoon of baking soda, and about a minute of gentle scrubbing can make it look nearly new. That kind of result is dangerously satisfying because it may inspire you to start inspecting every mug in the cabinet under bright light.
For older stains, the experience is a little different. You may need to let the paste sit for a while, come back, and scrub again. This is where patience pays off. People often assume the stain needs a stronger product, but in many cases it just needs more contact time. The baking soda loosens the residue gradually, and a second pass often removes what the first pass softened.
There’s also a noticeable difference between cup materials. Smooth ceramic mugs usually respond beautifully. Porcelain teacups also clean up well, but they deserve a gentler touch, especially if they have delicate decoration. Travel mugs, tall mugs, and cups with curved bottoms can be a little awkward, which is why an old toothbrush is such a useful helper. It gets into those spots where a sponge seems to give up and file for retirement.
One of the best things about this method is the low drama. There’s no overpowering smell, no mystery residue, and no need to wear gloves that make you feel like you’re preparing for a hazardous operation. You use a kitchen staple, a little water, and a soft sponge, and that’s basically it. It feels refreshingly normal in a world where many cleaning products seem to promise a complete lifestyle transformation.
Over time, people who use this trick regularly tend to develop a simple routine: rinse the cup after tea, deep-clean with baking soda once a week, and avoid letting stains “age into history.” That tiny habit can keep favorite cups looking bright for months and years. And honestly, there is something weirdly comforting about opening the cabinet and seeing your mugs look clean instead of vaguely haunted.
So yes, removing tea stains from tea cups with baking soda really is one of those household tips that earns its reputation. It’s easy, cheap, gentle, and effective. In the grand rankings of useful kitchen tricks, this one deserves a spot near the topright alongside knowing where the good snacks are hidden.
Final Thoughts
If you’ve been wondering how to remove stains from tea cups using baking soda, the answer is pleasantly simple: wash, dampen, make a paste, scrub gently, let it sit if needed, rinse well, and dry. That’s it. No expensive cleaner, no complicated process, and no need to accept brown rings as your mug’s permanent personality.
Used the right way, baking soda can remove tea stains effectively while staying gentle on ceramic and porcelain surfaces. The method is easy enough for weekly upkeep and strong enough to rescue cups that have seen one too many tea breaks. In other words, your favorite cup does not need to retire. It just needs a tiny spa treatment from your pantry.


