Table of Contents >> Show >> Hide
- What Seasoning Actually Means
- Do Brand New Cast Iron Pans Need Seasoning?
- Best Oil for Seasoning a New Cast Iron Pan
- How to Season A Brand New Cast Iron Pan: Step by Step
- What a Properly Seasoned Pan Should Look Like
- Common Mistakes When Seasoning Cast Iron
- How to Maintain the Seasoning After First Use
- How Often Should You Re-Season Cast Iron?
- Troubleshooting a New Cast Iron Pan
- Final Thoughts
- Real-World Experiences: What People Learn After Seasoning a Brand New Cast Iron Pan
If you just bought a brand new cast iron pan, congratulations: you now own a piece of cookware that could outlive your phone, your favorite hoodie, and possibly civilization. Cast iron is tough, reliable, and wonderfully simplebut only if you treat it right from the start. That begins with seasoning.
Now, before your brain files that word next to “complicated kitchen rituals” and “things your grandfather argues about at Thanksgiving,” relax. Seasoning a brand new cast iron pan is not hard. It is mostly a matter of cleaning it, drying it like you mean it, rubbing on a whisper-thin layer of oil, and baking it properly. The magic is in the detailsand in not drowning the pan in oil like it’s headed to a deep-fried spa.
In this guide, you’ll learn exactly how to season a new cast iron skillet, which oil works best, what temperature to use, how many rounds you really need, and what mistakes can leave your pan sticky, blotchy, or looking like it lost a fight with a glue stick. By the end, your pan will be ready for cornbread, eggs, burgers, seared steaks, and all the slightly overconfident weekend cooking projects you’ve been meaning to try.
What Seasoning Actually Means
Seasoning is not about sprinkling salt and pepper on your skillet and wishing it good luck. In cast iron terms, seasoning is a thin, baked-on layer of oil that bonds to the metal when heated. Over time, that layer helps protect the pan from rust and improves its natural release, making the cooking surface smoother and more nonstick.
Think of it like building a protective jacket for the panexcept the jacket is invisible, food-safe, and much less fashionable. The key is that the oil layer must be thin. Thick oil does not create better seasoning. It creates a sticky mess that makes you question your life choices.
Do Brand New Cast Iron Pans Need Seasoning?
Usually, yeseven if the box says the pan is pre-seasoned.
Many modern cast iron pans come with factory seasoning, which means you can technically cook in them right away. But giving a brand new pan one or two additional rounds of seasoning at home is often a smart move. It helps reinforce the base layer, smooth out early performance, and gives you a stronger start before you begin regular cooking.
That extra effort is especially helpful if you want better results with foods that tend to stick, like eggs, potatoes, or fish. It is also useful if the factory finish looks a little dull, uneven, or dry.
Important: Make Sure Your Pan Is Not Enameled
This guide is for raw cast iron, not enameled cast iron. If your pan has a porcelain enamel coatingoften glossy or satin-looking inside and outit does not need seasoning the same way raw cast iron does. Trying to season enamel like bare iron is like waxing a raincoat: energetic, unnecessary, and a little weird.
Best Oil for Seasoning a New Cast Iron Pan
The best oil for seasoning cast iron is usually a neutral oil with a relatively high smoke point and a clean finish. Good options include:
- Canola oil
- Vegetable oil
- Grapeseed oil
- Sunflower oil
- Corn oil
- Shortening
These oils are popular because they are easy to spread, affordable, and reliable for building thin seasoning layers. Some cast iron fans swear by flaxseed oil, while others find it more likely to chip or become finicky over time. For a brand new pan, a neutral, high-heat oil is usually the safest, easiest choice.
In other words, this is not the moment to reach for your expensive finishing olive oil. Save the fancy bottle for salad. Your skillet does not need artisanal drama.
How to Season A Brand New Cast Iron Pan: Step by Step
Step 1: Wash the Pan First
Yes, with soap. No, the cast iron police will not arrive.
A new pan may have dust, residue, packaging grime, or leftover manufacturing particles on it. Wash it with warm water and a small amount of mild dish soap. Use a soft sponge or brush, then rinse well.
This first wash is important because you do not want to bake mystery debris into your seasoning. “Farm-to-table” is cute. “Factory-to-omelet” is less charming.
Step 2: Dry It Completely
Water is cast iron’s least favorite personality trait. Dry the pan thoroughly with a clean towel, then place it on the stovetop over low or medium-low heat for a few minutes to evaporate any hidden moisture.
Do not skip this. Cast iron can hold tiny droplets in pores and corners, and those droplets can interfere with seasoning or encourage rust. If the pan looks dry, make it drier. Pretend you’re preparing it for a desert vacation.
Step 3: Apply a Very Thin Layer of Oil
Pour a small amount of oil onto the panless than you think you need. Rub it all over the entire skillet: inside, outside, handle, and even the bottom. Then grab a clean paper towel or cloth and wipe off as much oil as you can.
This part surprises people. You are not trying to leave the pan looking shiny and wet. You want it to look almost as though you made a mistake and wiped all the oil away. That is the sweet spot. The surface should look lightly buffed, not greasy.
If there are visible streaks, puddles, or tacky patches, there is too much oil on the pan.
Step 4: Preheat the Oven
Preheat your oven to 450°F to 500°F. A hot oven helps the oil bake into a hard, durable layer. Place a sheet of foil on the lower rack to catch drips, especially if you are still learning the difference between “thin coat” and “I may have overdone it.”
Step 5: Bake the Pan Upside Down
Place the pan upside down on the center rack and bake it for 1 hour. Putting it upside down helps prevent excess oil from pooling on the cooking surface, which can lead to gummy spots.
During this step, your kitchen may smell faintly like hot oil and ambition. That is normal.
Step 6: Let It Cool in the Oven
After one hour, turn off the oven and let the pan cool inside. This slower cool-down helps the new seasoning settle more evenly. Once it is cool enough to handle, remove it and admire your work like the skillet wizard you are becoming.
Step 7: Repeat If You Want a Stronger Start
One round is enough to start cooking, but two or three rounds often give a brand new cast iron skillet a better foundation. If your pan is brand new and you want the best early performance, repeat the oil-and-bake cycle one or two more times.
You do not need to season it seven times under a full moon while listening to bluegrass. Consistency beats theatrics.
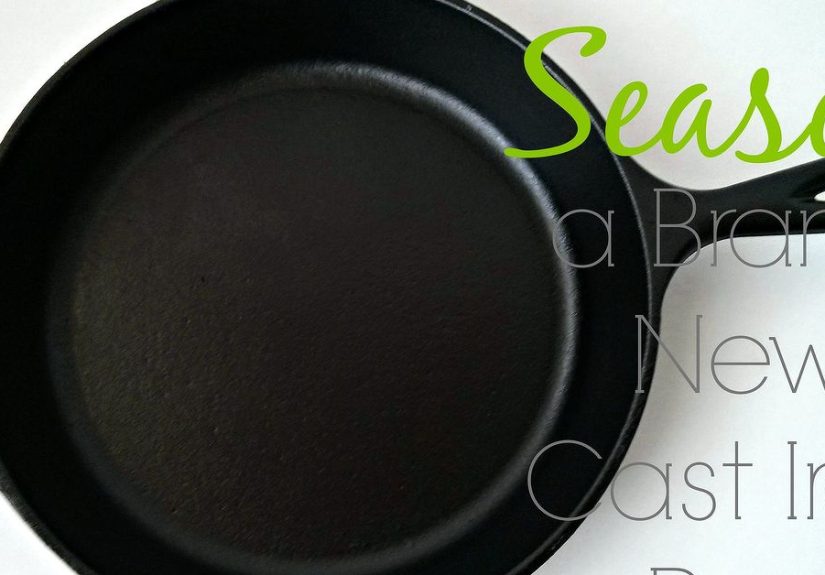
What a Properly Seasoned Pan Should Look Like
After seasoning, the pan should look darker, a bit richer in color, and mostly even. It may not look perfectly black and glossy right away, especially if it is truly brand new. That deep, sleek finish usually develops with use over time.
A newly seasoned skillet may look brownish, bronze, or slightly patchy in places. That is not always a problem. Cast iron is a long game. Cooking with it helps the finish mature.
Common Mistakes When Seasoning Cast Iron
Using Too Much Oil
This is the number one mistake. Too much oil creates sticky, blotchy, uneven seasoning. If your pan feels tacky after baking, excess oil is probably the culprit.
Not Drying the Pan Fully
Any leftover moisture can interfere with seasoning and encourage rust. Always dry thoroughly before oiling.
Skipping the First Wash
New pans are not automatically clean. Wash first so you are not sealing in dust or residue.
Using Low Heat for the Oven Cycle
If the oven is too cool, the oil may not set properly into a durable layer. High heat matters.
Expecting Instant Perfection
Even well-seasoned cast iron gets better with time. One session gives you a start, not a magical nonstick force field.
How to Maintain the Seasoning After First Use
Once your cast iron pan is seasoned, the goal is simple: keep it clean, dry, lightly protected, and in regular use.
After Cooking
- Wash with warm water and, if needed, a little mild dish soap
- Use a non-abrasive scrubber, plastic scraper, or coarse salt for stuck bits
- Dry immediately and completely
- Warm the pan briefly on the stove to remove hidden moisture
- Rub on a very thin film of oil before storing if the surface looks dry
Best Foods to Cook Early On
When breaking in a newly seasoned cast iron pan, start with foods that are forgiving and oil-friendly. Great early choices include:
- Cornbread
- Roasted vegetables
- Burgers
- Bacon
- Grilled cheese
- Fried potatoes
These foods help reinforce seasoning through regular cooking. On the other hand, highly acidic disheslike long-simmered tomato sauce or lemon-heavy pan saucescan be rough on a weak, brand new seasoning layer. You do not need to fear tomatoes forever, but maybe do not make your first meal a two-hour shakshuka situation.
How Often Should You Re-Season Cast Iron?
Not every Tuesday. Not every full moon. Not every time someone on the internet says “Mine is ruined!”
You only need to re-season your cast iron pan when it starts showing signs of trouble, such as:
- Food sticking more than usual
- Dull, dry, or gray spots
- Rust spots
- Patchy or flaky seasoning
For normal maintenance, everyday cooking and a light oil rub after cleaning often do most of the work.
Troubleshooting a New Cast Iron Pan
If the Pan Feels Sticky
You used too much oil. Wipe it thoroughly and run another oven cycle with a much thinner coat.
If the Pan Looks Uneven
That is common in the beginning. Keep cooking with it. A few more seasoning sessions or several weeks of use usually improve the finish.
If Rust Appears
Do not panic. Scrub the rust off, dry the pan fully, and re-season it. Cast iron is durable and usually very forgiving.
If Eggs Still Stick
That does not automatically mean your seasoning failed. Preheat the pan properly, use enough cooking fat, and avoid rushing delicate foods onto a cold or unevenly heated surface.
Final Thoughts
Seasoning a brand new cast iron pan is one of those kitchen jobs that sounds more mysterious than it really is. The formula is simple: wash, dry, oil lightly, bake, cool, repeat if needed, and then cook often. That is it. No secret handshake. No ancient skillet oath.
If you remember only one thing, remember this: thin oil wins. Cast iron seasoning is not about slathering. It is about restraint. The pan should be lightly coated, not glossy like it just finished a moisturizing facial.
Once you get the first seasoning right, your cast iron pan becomes one of the most dependable tools in your kitchen. It can move from stovetop to oven, improve with age, and turn simple food into deeply satisfying meals. Treat it well, and it will be there for yearsquietly doing its job, unlike certain kitchen gadgets that take up a whole drawer and still can’t toast bread properly.
Real-World Experiences: What People Learn After Seasoning a Brand New Cast Iron Pan
One of the funniest things about seasoning a new cast iron pan is how often the first try teaches more than the instructions do. On paper, the process looks almost suspiciously easy. Wash it, dry it, oil it, bake it. But in real kitchens, people learn fast that “a little oil” and “completely dry” are doing a lot of heavy lifting in that sentence.
A very common first experience is the sticky skillet surprise. A home cook seasons a pan, pulls it out of the oven, and instead of a sleek, dry finish, the surface feels tackylike the pan is trying to high-five their fingertips and not let go. Usually, the reason is simple: too much oil was left on the surface. The good news is that this is not a disaster. It is more like cast iron’s way of saying, “Excellent effort, but let’s calm down with the oil.” Once people wipe the pan more aggressively and repeat the process with a much thinner coat, the results are usually much better.
Another real-world lesson comes from the first few meals. Many people assume that one oven seasoning cycle means the pan is now a superhero-level nonstick surface. Then they crack in an egg, do not preheat the skillet properly, use barely any butter or oil, and act shocked when breakfast clings to the pan like it signed a lease. In practice, cast iron performs best when you combine seasoning with technique: proper preheating, enough cooking fat, and a little patience. The pan improves, but the cook usually improves too.
People also learn that the color of a newly seasoned pan can be misleading. Not every brand new skillet turns jet black after one round in the oven. Sometimes it looks bronze, smoky brown, or uneven in spots. That can make new owners nervous, but experienced cast iron users know that appearance changes gradually. Regular cooking darkens the surface over time. A pan becomes “beautifully seasoned” through use, not through one dramatic oven session where angels sing in the background.
There is also the rust panic, which happens to a surprising number of people after their first cleaning. They wash the pan, leave it damp for a little too long, and spot a faint orange mark. Cue instant regret. But this is another area where experience helps. Cast iron is sturdy. A tiny rust spot is usually a cleanup job, not a funeral. Scrub, dry thoroughly, re-oil, and move on. Seasoned cast iron rewards calm people.
Perhaps the most valuable experience, though, is learning that cast iron likes consistency more than perfection. People who use their pans often, dry them well, and give them a light oil touch-up now and then usually end up with better cookware than people who obsess over every mark. The pan does not need worship. It needs use. After a while, most owners stop babying it and start cooking confidentlyand that is usually when the pan starts performing its best.
![18 Best Types of Charts and Graphs for Data Visualization [+ How to Choose]](https://corkopencoffee.org/wp-content/uploads/2026/05/18-best-types-of-charts-and-graphs-for-data-visualization-how-to-choose-qKM1PBYG-thumb.jpg)


