Table of Contents >> Show >> Hide
- Why Upcycle a Baking Tray with Decoupage and Mod Podge?
- Supplies You’ll Need
- Step-by-Step: How to Upcycle a Baking Tray Using Decoupage
- Step 1: Choose and Prep Your Baking Tray
- Step 2: Sand and (Optionally) Prime the Metal
- Step 3: Paint the Tray Base
- Step 4: Measure and Cut Your Paper or Fabric
- Step 5: Apply the First Layer of Mod Podge
- Step 6: Position and Smooth the Paper
- Step 7: Let It Dry, Then Add Top Coats
- Step 8: Consider Dishwasher Safe Mod Podge (Optional)
- Step 9: Add Finishing Touches
- Design Ideas for Your Upcycled Baking Tray
- Common Mistakes (and How to Avoid Them)
- Care and Cleaning Tips for Your Decoupage Baking Tray
- Real-Life Experiences and Extra Tips for Upcycling Baking Trays
- Wrapping It Up
Have an old baking tray that has seen one too many frozen pizzas? Burnt corners, scratched surface,
a suspicious caramelized blob that’s definitely older than your phone? Perfect. Instead of tossing it,
let’s turn that sad pan into a gorgeous decoupage tray sealed with Mod Podge that looks like it came
from a boutique home storeminus the boutique price.
In this step-by-step guide, you’ll learn exactly how to prep a metal baking tray, choose the right
papers or fabric, apply Mod Podge for a smooth decoupage finish, and seal everything so it stands up
to real life. We’ll also cover common mistakes, curing times, and fun design ideas, plus some
hands-on “I actually tried this” experiences at the end.
Why Upcycle a Baking Tray with Decoupage and Mod Podge?
Upcycling an old baking tray checks all the boxes: it’s budget-friendly, eco-conscious, and oddly
therapeutic. Instead of sending another piece of metal to the landfill, you’re giving it a second
career as a coffee table centerpiece, vanity organizer, bar tray, or wall decor.
Mod PodgeAmerica’s classic decoupage mediumacts as a glue, sealer, and finish in one. With the
right technique, it lets you add paper or fabric to metal, wood, glass, and more, creating a durable,
custom surface. Some formulas (like Dishwasher Safe Mod Podge) are even designed to hold up to
washing once they’re fully cured, which makes them a great fit for trays and tableware that might
come into contact with spills or condensation.
Supplies You’ll Need
Before you start, gather everything so you’re not hunting for sandpaper with sticky fingers.
- Old metal baking tray (cookie sheet or roasting pan with a flat bottom works best)
- Mild dish soap and a scrubber or sponge
- Fine- to medium-grit sandpaper (around 120–220 grit)
- Degreaser or rubbing alcohol (for extra-greasy pans)
- Metal primer spray (optional but recommended)
- Spray paint suitable for metal (your base color)
- Decorative paper or napkins (or thin cotton fabric)
- Scissors or craft knife and ruler
- Mod Podge (Matte, Gloss, or Dishwasher Safe, depending on your project)
- Foam or soft-bristle brush for applying Mod Podge
- Plastic scraper, old gift card, or brayer to smooth out bubbles
- Clear acrylic spray sealer (optional extra protection)
- Felt pads or cork sheet for the bottom of the tray (optional)
Step-by-Step: How to Upcycle a Baking Tray Using Decoupage
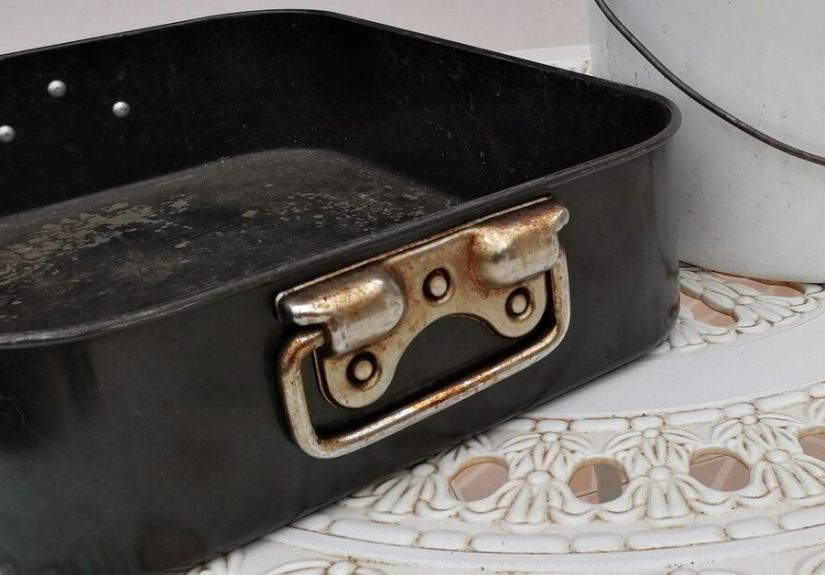
Step 1: Choose and Prep Your Baking Tray
First, pick a tray that’s structurally sound. Scratches and stains are finewe’re covering those
upbut avoid trays that are badly warped or rusted through. Give the tray a thorough scrub with
warm soapy water to remove baked-on grease, then dry it completely. If it’s extra greasy, wipe it
down with a degreaser or rubbing alcohol to help paint and Mod Podge grip better.
Step 2: Sand and (Optionally) Prime the Metal
Lightly sand the surface of the tray with 120–220 grit sandpaper. You’re not trying to remove the
finish completelyjust giving the metal some “tooth” so primer and paint can hold on. Wipe away dust
with a clean, dry cloth.
For the longest-lasting makeover, especially if the tray will see regular handling, apply a thin coat
of metal primer spray according to the can’s directions. A light, even coat is enough; heavy drips
will show through your beautiful floral paper later. Let it dry thoroughly before painting.
Step 3: Paint the Tray Base
Spray paint the back, sides, and, if you’d like, the inner rim of your baking tray. A neutral color
like black, white, cream, or soft gray usually works best with busy patterned papers, but you can also
go bold with teal or mustard if that suits your decor. Use several light coats rather than one heavy
blast to avoid drips and uneven spots. Allow the paint to dry completely according to the manufacturer’s
instructions.
If the inside bottom of the tray will be completely covered by paper or fabric, you can skip painting
that areajust make sure it’s smooth and clean. However, painting the entire tray first often gives a
more polished, finished look.
Step 4: Measure and Cut Your Paper or Fabric
Measure the inside bottom of the tray and cut your decorative paper or fabric to fit. You can:
- Use one large piece for a clean, modern look.
- Patchwork several smaller pieces for a collage-style design.
- Layer torn edges of tissue or napkins for a soft, vintage effect.
If you’re using fabric, choose a light- to medium-weight cotton; thick fabric can be bulky and harder
to smooth out. For napkins, remember to peel away the plain backing layers and only decoupage the
printed top layerthat’s the one with the color and pattern.
Step 5: Apply the First Layer of Mod Podge
Using a foam or soft-bristle brush, apply a medium coat of Mod Podge to the inside bottom of the tray.
Too thin, and the paper will not bond well; too thick, and you’ll fight wrinkles and bubbles.
Work relatively quickly, but don’t panicMod Podge gives you a bit of open time. Make sure you’ve
brushed it evenly to the corners and edges where your paper will sit.
Step 6: Position and Smooth the Paper
Carefully lay your paper or fabric onto the wet Mod Podge, starting from one edge and gently rolling
it down to avoid trapping air. Once it’s in place, use your hands to lightly press it into the corners.
Then, take a plastic scraper, brayer, or old credit card and gently smooth from the center outward.
This pushes out air bubbles and excess glue. Wipe away any glue that squishes out from the edges.
If a few small wrinkles remainespecially with napkinsdon’t stress. Once everything is sealed and
cured, tiny imperfections actually make the tray look more handmade and charming.
Step 7: Let It Dry, Then Add Top Coats
Let the tray dry flat for at least 20–30 minutes, or until the paper feels firmly attached and the
surface is no longer tacky. Then brush on a thin, even coat of Mod Podge over the top of the paper,
sealing the entire inside area of the tray.
Allow that coat to dry, then repeat. Two to four thin coats usually give good protection and a nice,
even finish. Drying time between coats can vary, but 20–40 minutes is typical in normal temperature
and humidity. For heavier use trays, go for at least three coats, brushing in alternating directions
(horizontal, then vertical) for smoother coverage.
Step 8: Consider Dishwasher Safe Mod Podge (Optional)
If you plan to use your decoupaged baking tray as a serving piece that might occasionally get splashed
or lightly washed, you can use Dishwasher Safe Mod Podge instead of (or in addition to) a regular
formula. Apply it in the same waythin, even coats over your paper or fabricletting each coat dry
before adding the next.
Here’s the catch: Dishwasher Safe Mod Podge takes a long time to fully cure. While it’s dry to the
touch within a day, it typically needs a full 28 days of air curing before it becomes top-rack
dishwasher safe. During this time, keep your tray in a clean, dry spot and resist the urge to test it
early. You can gently wipe it with a damp cloth, but avoid soaking or serious scrubbing until the cure
time is up.
Step 9: Add Finishing Touches
Once your Mod Podge is completely dry (and cured, if you’re using the dishwasher-safe version), you can
add a few finishing details:
-
Spray a light coat of clear acrylic sealer for extra scratch resistance, especially on high-use
trays. -
Attach felt pads or a sheet of cork to the bottom of the tray to protect your coffee table or
countertops. -
Add handles or decorative hardware if your tray doesn’t already have themjust drill carefully and
avoid cracking the finish.
At this point you’ve officially retired your baking tray from oven duty and promoted it to the role of
“stylish decor object.” Not bad for something that used to live under a pile of cookie sheets.
Design Ideas for Your Upcycled Baking Tray
Vintage Floral Coffee Table Tray
Go classic with a black-painted tray and a dark floral paper on the bottom. The contrast between the
deep background and bright flowers makes anything you place on topcandles, books, a small vase of
fresh flowerslook intentional and styled. Add a small brass bowl for keys or coins and, suddenly,
your coffee table looks like it belongs in a magazine.
Farmhouse-Style Breakfast-in-Bed Tray
Prefer a lighter, rustic vibe? Paint the tray a soft white or cream, scuff the edges lightly with
sandpaper for a distressed look, and decoupage the base with gingham or text-based paper (think old
recipe pages or vintage advertisements). Top it with a mug, a pastry, and a small bud vase and you’ve
created instant cozy farmhouse energy.
Modern Graphic Wall Art
Your baking tray doesn’t have to stay horizontal. Spray paint it a bold solid color, decoupage the
center with geometric patterns or abstract art, and add a hook to the back. Hang it as wall decor in
the kitchen, craft room, or entryway. If your tray is magnetic, you can even turn it into a memo board
by adding small magnet-backed clips for notes and photos.
Vanity Organizer or Coffee Station Tray
Trays are brilliant for corralling small items. Use a delicate floral or marble-look paper and glaze
it with gloss Mod Podge to create a vanity tray for perfume, lotion, and jewelry. Or choose a coffee
or typography theme and use the tray to group your mugs, sugar bowl, and spoons in a tidy coffee
station on the countertop.
Common Mistakes (and How to Avoid Them)
Using Too Much Mod Podge Under the Paper
It’s tempting to slather on a thick coat “just to be safe,” but that often leads to wrinkles, bubbles,
and a squishy mess. Stick to a medium coat and work evenly. If you’re nervous, practice on a scrap
piece of cardboard first to get a feel for how Mod Podge behaves.
Rushing the Drying and Curing Time
Mod Podge feels dry on the surface long before it’s fully cured. If you stack items on the tray or
wash it too early, you might end up with tacky spots, cloudy patches, or even lifted paper. Give each
coat time to dry before adding the next, and be patient with that final curing periodespecially with
Dishwasher Safe formulas that require several weeks to reach full strength.
Not Prepping the Metal Properly
Skipping cleaning, sanding, or priming might seem like a time saver, but it often leads to chipping
paint and peeling paper later. Metal is a slick surface; the more you help the paint and glue grab
onto it, the better your tray will hold up. A quick scuff with sandpaper and a light primer coat can
dramatically improve durability.
Using Thick or Textured Paper
Heavy scrapbook paper or textured cardstock can be tricky on curved or deeply edged trays. They don’t
like to bend into corners and can lift over time. Thinner decorative paper, tissue, napkins, or
lightweight fabric will mold more easily to the shape of the tray and give you a smoother finish.
Care and Cleaning Tips for Your Decoupage Baking Tray
Once your tray is fully dried (and cured, if you’re using Dishwasher Safe Mod Podge), treat it kindly:
- Wipe spills quickly with a damp cloth.
- Avoid soaking the tray in water, even with sealed decoupage.
-
For non-dishwasher-safe formulas, stick to gentle hand wipingno abrasive scrubbers or scouring
pads. -
If you’re using a dishwasher-safe version and the tray is top-rack safe, still avoid high-heat
“sanitize” cycles and harsh detergents for longer life. -
Don’t place hot pans or dishes straight from the oven onto the decoupaged surface; use coasters or
trivets instead.
With basic care, your upcycled baking tray can stay gorgeous for yearsfar longer than its original
career of catching cookie crumbs.
Real-Life Experiences and Extra Tips for Upcycling Baking Trays
Once you make one decoupage baking tray, you quickly realize it’s dangerously addictive. Suddenly
every scratched pan at the thrift store looks like “potential.” Here are some practical lessons and
small disasters-turned-tips from real-world upcycling sessions.
Lesson 1: Dark Paint Hides a Multitude of Sins
That first tray with the super-shiny aluminum interior? It looked rough. Tiny dings, scratches, weird
discoloration from years of roasting vegetablesit had it all. A couple of light coats of matte black
spray paint transformed it instantly. Even before decoupage, it already looked like a minimalist decor
piece instead of “relic from a college apartment.”
If your tray has battle scars, don’t panic. Dark or mid-tone painteven charcoal, navy, forest green,
or chocolate browndoes a great job of making everything look intentional. Once you add patterned
paper in the base, all those imperfections recede completely into the background.
Lesson 2: Humidity Is Not Your Friend
Mod Podge and humidity have a complicated relationship. On a humid day, the surface may feel dry while
the layers underneath are still soft. One tray that looked “ready” was stacked with books for staging
photos, and the bottom book later peeled up with a faint imprint of flowers. Lesson learned: be extra
patient if you live in a humid climate. Give each coat more time, and let the finished tray cure in a
warm, dry room with good air circulation.
Lesson 3: Fabric Changes the Look (and Feel)
Paper is great, but fabric brings a different softness and richness to your tray. A floral cotton print
can make the surface feel almost upholstered once it’s sealed. The trick is to pre-cut the fabric
slightly smaller than the tray base and apply slightly more Mod Podge underneath to saturate the
fibers without soaking them. Once the top coats dry, the fabric feels smooth and durable but retains a
deeper color that doesn’t fade as quickly as some papers.
If you want a tray that feels cozy and textile-inspiredthink cottagecore or cozy farmhousefabric is
a fantastic option. Just avoid thick upholstery fabric or anything super textured, which can trap
bubbles and be hard to seal.
Lesson 4: Don’t Skip a Test Piece
If you’re using a new type of paper (especially printed at home), always test a small scrap with
Mod Podge first. Some printer inks can smudge or bleed when they come in contact with water-based
glue. One test scrap is much easier to throw away than an entire tray bottom that suddenly turns into
a watercolor version of your design.
The same rule applies to metallic or specialty papers: try a small piece on a cardboard scrap, let it
dry, and see how it looks under a couple of coats of Mod Podge before committing.
Lesson 5: Think Beyond the Living Room
Once you start using decoupaged baking trays around the house, you realize they’re incredibly
versatile:
- In the entryway, they catch keys, wallets, mail, and sunglasses.
- On a dresser, they corral jewelry, perfume bottles, and watches.
- By the sink, they hold dish soap, a scrub brush, and a small plant.
- In a craft room, they keep paints, brushes, or sewing supplies organized yet portable.
Because you’re working with metal trays, many of them are naturally magnetic. Add a few small magnets,
and suddenly your tray can hold notes, photos, or shopping lists if you choose to hang it on the wall.
Lesson 6: Imperfect Is Still Beautiful
Maybe your first tray has a wrinkle in one corner, or the pattern isn’t perfectly centered. That’s
okay. Handmade pieces aren’t supposed to look like they were spat out by a factory. The tiny quirks
are exactly what makes your upcycled baking tray feel special and personal.
The more you practice, the better your decoupage skills will get, and your trays will start to look
like high-end decor. But even the “practice” ones make lovely gifts. Fill one with a candle, a small
plant, and a pretty mug, and you’ve got a thoughtful present that cost you more time than money.
Wrapping It Up
Upcycling a baking tray using decoupage and Mod Podge is a straightforward DIY that gives you a huge
style payoff. With a bit of prep, some pretty paper or fabric, and patience during drying and curing,
you can turn an old pan into a custom decor piece that fits your home perfectly.
So raid your cabinets, hit the thrift store, and rescue a few tired baking trays from retirement.
They’re ready for their glow-up, and now you know exactly how to give it to them.
![18 Best Types of Charts and Graphs for Data Visualization [+ How to Choose]](https://corkopencoffee.org/wp-content/uploads/2026/05/18-best-types-of-charts-and-graphs-for-data-visualization-how-to-choose-qKM1PBYG-thumb.jpg)


