Table of Contents >> Show >> Hide
- What This Product Is (and What It Isn’t)
- Why Primed MDF Shiplap Is So Popular for Accent Walls
- Best Places to Use Pac Trim Primed MDF Shiplap
- Planning Your Layout Like a Pro (So Your Wall Doesn’t “Drift”)
- Tools and Materials Checklist
- Installation Steps (Pac Trim Style, With Real-World Upgrades)
- Step 1: Acclimate the boards
- Step 2: Prep the wall (this is where “easy” projects are won)
- Step 3: Set the first board perfectly straight
- Step 4: Fasten correctlyespecially if you’re using the flange
- Step 5: Handle vertical installs the right way
- Step 6: Deal with outlets and obstacles cleanly
- Step 7: Fill, sand, and calm the evidence of your nail gun
- Finishing and Painting: The Difference Between “DIY” and “Designer”
- Humidity, Movement, and What to Expect Over Time
- Common Mistakes (and How to Avoid Them)
- Is Pac Trim Primed MDF Shiplap Worth It?
- Real-World Experiences With Primed MDF Shiplap (About )
- Conclusion
Shiplap has a funny way of making a room look “finished” even when the rest of the space is still
very much in its “I swear I’m getting to it” era. If you want that crisp, lined, designer-friendly
look without battling knots, grain, and splinters, Pac Trim 0.375 in. x 6.000 in. x 8 ft. Primed MDF Shiplap Interior Siding
is built for the job: slim, smooth, and ready to paint.
This guide breaks down what the product is, where it shines, where it absolutely does not belong,
and how to install and finish it so your wall looks intentional (not like a stack of boards got into
an argument with a nail gun).
What This Product Is (and What It Isn’t)
At its core, this is primed MDF shiplap made for interior use. MDF (medium-density fiberboard)
is an engineered wood product made from fine wood fibers bonded with resin under heat and pressure.
The result is a dense, uniform panel material that’s famously smooth and consistentideal when your
end goal is a flawless painted finish.
The boards are labeled at 0.375 inch thick (3/8 inch), 6 inches wide, and 8 feet long.
The “shiplap” part refers to the overlapping profile: each board is shaped so it laps over the next,
creating that signature shadow line while helping alignment.
What it isn’t: exterior siding, a “splash zone” material, or a product that’s happiest when it’s
repeatedly misted, steamed, or splashed. MDF and water have the kind of relationship that reality TV
producers dream aboutdramatic, fast-moving, and not headed toward a calm ending.
Why Primed MDF Shiplap Is So Popular for Accent Walls
1) The paint finish is ridiculously smooth
Painted wood can look great, but it often takes work: knot sealing, grain filling, sanding, and still
occasionally discovering a surprise knot that bleeds through like it’s auditioning for a horror movie.
MDF doesn’t have knots or grain variation, so it tends to deliver a cleaner, more modern painted look
with fewer prep headaches.
2) Consistency makes installation easier
MDF is dimensionally consistent compared with many natural wood boards, which can cup, twist, or vary
slightly in thickness. That consistency helps your shadow lines look intentionalmore “designer detail,”
less “I installed this at 11 p.m. and may have whispered apologies to my level.”
3) It’s made for paintespecially in bright whites
If your plan is a bright white, soft cream, or any modern neutral, primed MDF shiplap is often a smart
move. The surface is already primed, so you’re starting closer to your finish line.
4) The tradeoffs: moisture sensitivity and edge durability
MDF can swell or soften when exposed to moisture. It’s also more prone to edge dings than many solid
woodsespecially along the lapped profile if boards are handled roughly. The good news: thoughtful
prep, careful handling, and proper finishing dramatically improve results.
Best Places to Use Pac Trim Primed MDF Shiplap
Think “dry, lived-in interiors” where you want architectural texture without major construction.
Great candidates include:
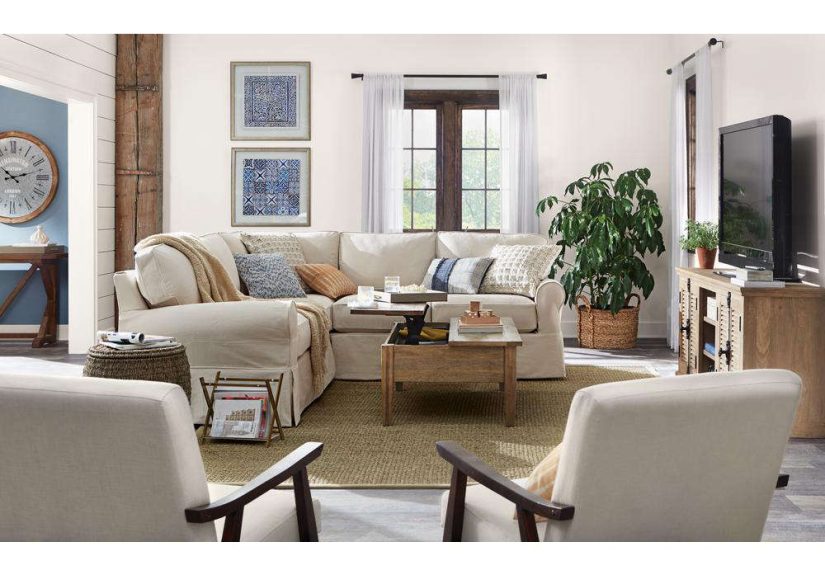
- Living room feature walls behind a sofa or media console
- Bedroom headboard walls (adds depth without crowding the room)
- Entryways and hallways that feel flat and forgotten
- Home offices for a camera-ready backdrop
- Dining rooms where you want subtle texture that plays well with lighting
Use extra caution (or choose a different material) in bathrooms with showers, damp basements, laundry
rooms with frequent humidity spikes, or behind sinks. In those areas, moisture resistance matters more
than a perfect paint finish.
Planning Your Layout Like a Pro (So Your Wall Doesn’t “Drift”)
Measure, then plan the story your seams will tell
Shiplap looks best when seams look deliberate. Before you cut anything, decide where end joints will land.
A common approach is to stagger joints across rows so they don’t stack vertically. That “brick-like” offset
keeps the wall from shouting “I was installed row-by-row with no plan.”
Find the studs (and mark them clearly)
Whether you’re nailing only, using adhesive plus nails, or mounting to furring strips, you’ll get a stronger,
flatter install if you know exactly where structure is behind the drywall. Mark stud locations lightly but
clearly so your fastening pattern stays neat.
Pick a starting lineand trust it
Shiplap is a “tiny errors become big errors” project. One slightly crooked first board can snowball into a
wall that looks like it’s slowly sliding into another dimension. Use a level (or a laser) and establish a
straight reference line before the first board goes up.
Tools and Materials Checklist
- Stud finder, level or laser level, tape measure, pencil
- Miter saw or circular saw (fine-tooth blade helps reduce chipping)
- Brad nailer (commonly 18-gauge) and appropriate brad nails
- Construction adhesive (if you’re using it over drywall)
- Spackle or painter’s putty for nail holes
- Caulk (paintable) for edges/corners (optional, but often worth it)
- Sandpaper (fine grit), vacuum or tack cloth
- Primer/edge sealer (especially for cut ends) and interior paint
- Safety gear: eye protection and a good dust mask/respirator
Installation Steps (Pac Trim Style, With Real-World Upgrades)
Step 1: Acclimate the boards
Let the shiplap acclimate indoors before installation. Stack it off the floor (on scrap 2x4s is common)
and keep it protected. This helps reduce surprises once it’s on the wallbecause materials like MDF can
respond to changes in humidity.
Step 2: Prep the wall (this is where “easy” projects are won)
Remove outlet covers and baseboards if needed, patch major wall issues, and clean the surface. If your wall
has bumps, peeling paint, or loose drywall paper, fix that now. Shiplap can hide a lot, but it can’t
magically make a lumpy wall flat.
Pro move: paint the wall behind the shiplap a similar color to your final finish. If tiny gaps appear at
seams or corners, you’ll see “shadow,” not “drywall.”
Step 3: Set the first board perfectly straight
Take your time here. Measure from the ceiling (or from your starting edge) in several places to confirm the
board is aligned before fastening. This first course is the foundation for everything above it.
Step 4: Fasten correctlyespecially if you’re using the flange
MDF shiplap often installs by fastening through the overlapping flange and adding an additional fastener lower
on the face for stability. If installing over drywall, you can fasten into studs and/or use construction
adhesive applied in beads.
If installing directly to studs, a brad nailer is typically used. For longer runs, stagger seams so end joints
don’t line up row after row.
Step 5: Handle vertical installs the right way
Want vertical shiplap? It’s a great look, but you’ll usually need horizontal support. Many installers add
furring strips across studs, then attach the shiplap to those strips, keeping support spacing consistent.
Step 6: Deal with outlets and obstacles cleanly
Measure twice, cut once, and then measure again because outlets love chaos. Cutouts should be neat but not
overly tight. You may also need box extenders so outlets sit flush with the new finished surface.
Step 7: Fill, sand, and calm the evidence of your nail gun
Fill nail holes with painter’s putty or light spackle. Let it dry fully, then sand lightly. The goal is
invisible repairs, not a wall that looks like it had a minor run-in with hail.
Finishing and Painting: The Difference Between “DIY” and “Designer”
Even primed boards need edge love
Primed MDF shiplap is a great head start, but any cut ends or exposed edges are still vulnerable. MDF edges
are porous and can absorb paint unevenly if they aren’t sealed well. A dedicated edge-sealing approach
(sealer/filler + primer) helps keep your finish uniform and durable.
Choose paint that matches the room’s reality
For low-traffic feature walls, a quality interior wall paint in eggshell or satin is often enough. For
kid zones, hallways, or anywhere that gets touched a lot, consider a tougher interior enamel or a more
washable finish.
Caulk strategically (not everywhere)
If you want a built-in look, apply paintable caulk where shiplap meets adjacent walls, ceilings, or trim.
Keep it tidy. Caulk is like eyeliner: a little makes everything look sharper, but too much becomes the main
event.
Humidity, Movement, and What to Expect Over Time
MDF can expand and contract slightly with changes in indoor humidity. That’s normal. The practical takeaway:
let boards acclimate, avoid installing in damp conditions, and don’t force joints so tight that the wall has
nowhere to “breathe.” If your home swings between very dry winters and humid summers, build in a bit of
tolerance and finish carefully so minor seasonal changes don’t ruin the look.
Common Mistakes (and How to Avoid Them)
- Skipping acclimation: leads to more movement after installdon’t rush this step.
- Starting crooked: one crooked board becomes a crooked wall. Use a level/laser.
- Not sealing cut ends: edges can swell or look fuzzy under paint if left raw.
- Over-nailing without a plan: messy nail patterns show through paint; keep fasteners consistent.
- Using in wet areas: MDF is happiest in dry interiorschoose moisture-resistant materials where needed.
Is Pac Trim Primed MDF Shiplap Worth It?
If your goal is a clean, painted shiplap look indoorsand you want consistent boards that finish smoothlythis
product style checks a lot of boxes. The thinner profile can also be helpful when you don’t want to lose much
room depth or you’re trying to keep trim transitions simple.
The “worth it” verdict depends on using it in the right environment, prepping thoughtfully, and sealing/painting
like you mean it. Do that, and you’ll end up with a wall that looks customwithout custom drama.
Real-World Experiences With Primed MDF Shiplap (About )
People tend to describe their first MDF shiplap project in three stages: confidence, dust,
and victory photos. Stage one starts when you unbox boards that look straight, smooth, and perfectly primed.
You hold one up to the wall, squint, and suddenly you’re mentally hosting a home tour. Stage two begins the
moment you make your first cut and discover that MDF dust is basically a substance with its own zip code.
A shop vac, a mask, and a “no sanding inside the bedroom” policy become your best friends.
One of the most common “glad I listened” moments is acclimation. DIYers who let boards rest indoors for a couple
days often report fewer odd gaps later, especially in homes where heating and cooling swing humidity up and down.
Folks who skip acclimation sometimes notice hairline seams that appear after the system kicks on for the season.
It’s not the end of the world, but it’s the kind of thing that can make you stare at your wall like it personally
betrayed you.
Another recurring experience: the first-board panic. Even confident DIYers slow way down at the start
because the first course sets the tone. Many end up using a laser level and measuring from the ceiling in
multiple spots before committing. The people who don’t? They often discover around row five that their “slight
angle” has become an “architectural opinion.” The fix is usually pulling a few boards and resettingannoying,
but still cheaper than living with a wall that looks like it’s leaning into a strong wind.
Painting experiences are also pretty consistent. The face of primed MDF usually takes paint beautifully, but cut
ends and edges are where beginners get surprised. If you paint raw edges without sealing, you can wind up with
a slightly rough, thirsty texture that needs extra coats. DIYers who seal edges (with filler/sealer and a good
primer) talk about getting that “factory smooth” look with fewer coats and less frustration. The lesson:
primed doesn’t mean invincible.
Installation-wise, many people like the combination approach: adhesive for tight contact plus brad nails into
studs to hold everything flat. The most satisfied installers usually mention two small habits: wiping squeeze-out
adhesive immediately (before it becomes a permanent art installation), and staggering seams so joints don’t form
obvious vertical lines. When seams land randomly or stack in a column, your eyes go straight to themlike they’re
trying to win an award for “Most Noticeable Line on the Wall.”
Finally, there’s the “it looks expensive now” moment. It usually happens after nail holes are filled, edges are
caulked neatly, and the second coat of paint dries. MDF shiplap tends to deliver a clean, modern finish that
photographs wellespecially in whites and soft neutrals. And the best part? Once the wall is done, you can stop
thinking about it and start enjoying it… which is the whole point of a home project that isn’t secretly a
personality test.
Conclusion
Pac Trim primed MDF shiplap is a smart interior cladding option when you want crisp lines and a paint-ready
surface. Keep it in dry spaces, acclimate before installing, fasten thoughtfully, and treat cut edges like the
VIPs they are. Do that, and your shiplap wall won’t just look good on install dayit’ll keep looking good after
the “new project smell” wears off.